Learn how to cut granite safely and accurately with these step-by-step instructions and essential tips for DIY projects. Cutting granite is a task that requires both patience and preparation, but it's well within reach if you're equipped with the right tools, technique, and safety practices. In this guide, we'll take you through each step of the process, from setting up your workspace to making the final cut. This guide provides a deep dive into the materials and techniques needed to ensure clean, precise cuts for any granite project.
Understanding the Basics of Granite Cutting
Granite is a durable and versatile stone, but its density requires a careful approach when cutting. Whether you're customizing a kitchen countertop, vanity, or another surface, granite demands specific tools, including diamond blades, to achieve a clean cut. If handled incorrectly, granite can crack, so the right setup and a careful process are key.
Why Diamond Blades?
Granite's density can quickly dull standard blades, so diamond blades, which are specifically designed for hard materials, are essential. These blades have a continuous rim, which provides a smooth, even cut suitable for granite, slate, and concrete.
Essential Tools and Materials
Having the right tools and materials can make or break your granite cutting project. Here's what you'll need:
- Diamond Blade: A continuous rim diamond blade, usually 4.5 inches for angle grinders or larger for circular saws, is ideal.
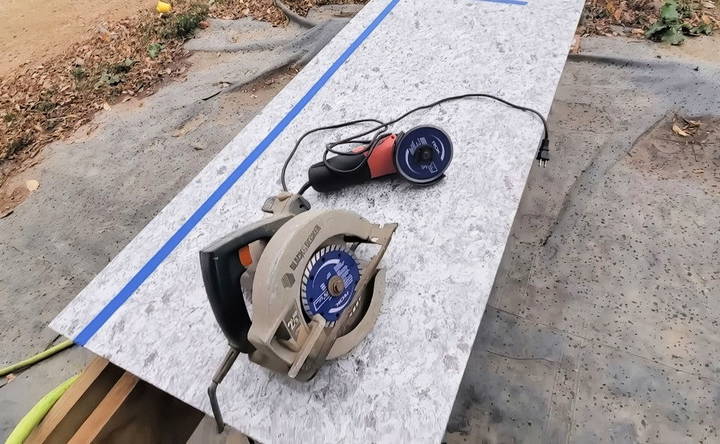
- Angle Grinder and Circular Saw: These tools will provide the necessary power for cutting through granite.
- Tape Measure and Marker: Precise measurements are crucial, so a reliable tape measure and marker are essential.
- Support Table: A stable, purpose-built table to support the granite slab is necessary to prevent cracking.
- Painter's or Electrical Tape: Helps to mark and guide your cut while reducing chipping.
- Water Source: A trickle of water reduces dust, cools the blade, and helps prevent cracking.
- GFCI-Protected Outlet: When working with water and power tools, it's vital to use a Ground Fault Circuit Interrupter (GFCI) for safety.
Step by Step Instructions
Learn how to cut granite like a pro with step-by-step instructions, from workspace prep to cutting techniques, ensuring a perfect finish.
1. Preparing Your Workspace
Preparation is essential when working with granite. An effective setup includes a stable support system, a GFCI outlet for electric tools, and a water source for cooling.
Set Up a Stable Support Table
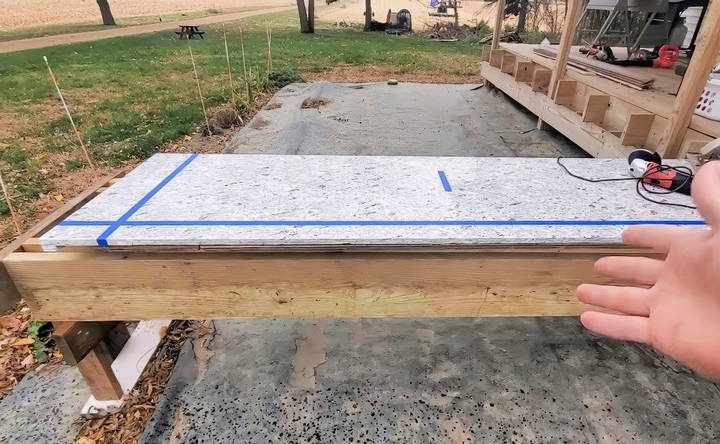
Granite is heavy and brittle, so it needs proper support during cutting. If possible, build a custom table that attaches securely to your workspace (e.g., deck or workbench). This prevents the granite from flexing or breaking.
Protect Your Area and Plan for Dust Control
Cutting granite produces a lot of dust, even with water. Choose a location with good ventilation, ideally outdoors. Consider using plastic sheeting to contain dust if you're working indoors.
2. Measuring and Marking the Granite Slab
Accurate measurements are crucial, as cutting mistakes can be costly. Here's how to get it right:
- Double-Check Your Measurements: Measure the area where the granite will be installed. Standard kitchen countertops are typically 24 inches deep, but adjustments may be needed for custom projects.
- Mark Your Cutting Line: Use painter's tape or electrical tape to mark your line. The edge of the tape will guide your cut, and the tape helps minimize chipping on the granite surface.
- Confirm and Align: Always double-check your lines before cutting, especially if adjustments are needed.
3. Cutting Techniques for Granite
When you're ready to cut, follow these steps to achieve the best results:
Set the Depth of Your Saw Blade
Adjust the blade depth so it's just enough to cut through the granite without touching the support table. For thicker granite, set a deeper cut, and make multiple shallow passes instead of one deep cut to reduce the risk of cracking.
Position the Water Source
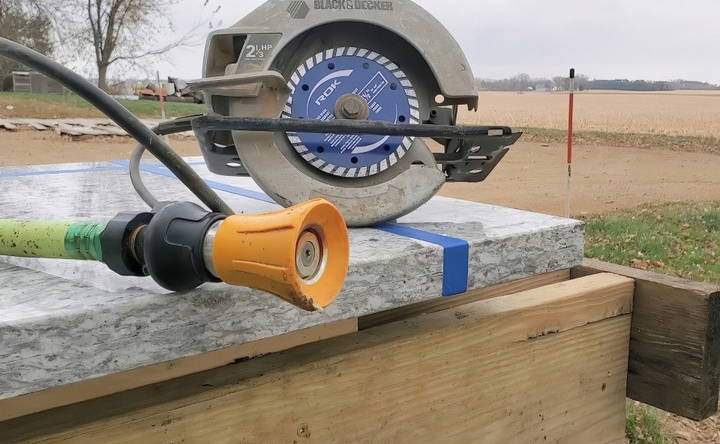
Running a small stream of water over the blade will help keep it cool, reduce dust, and minimize stress on the granite. If a hose isn't available, a spray bottle can suffice for smaller cuts, though this requires more frequent application.
Start Cutting Slowly and Steadily
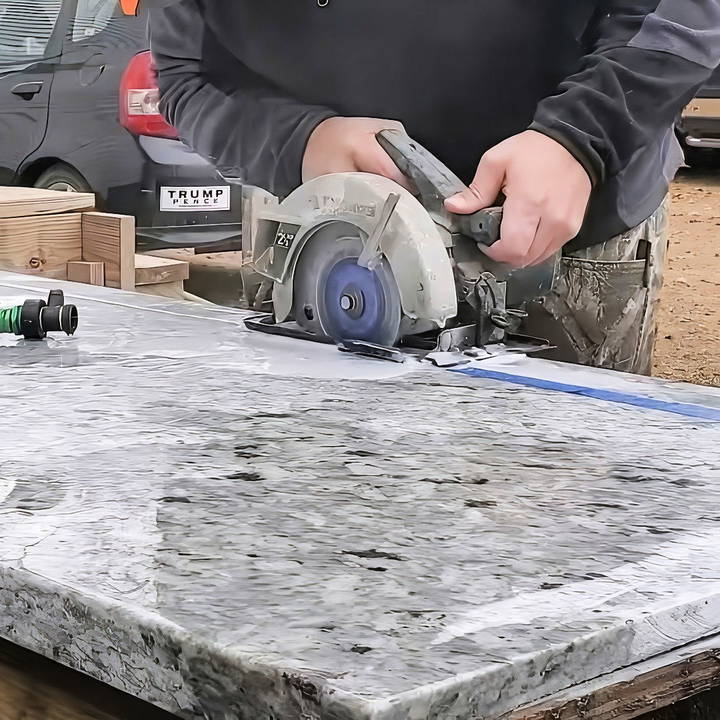
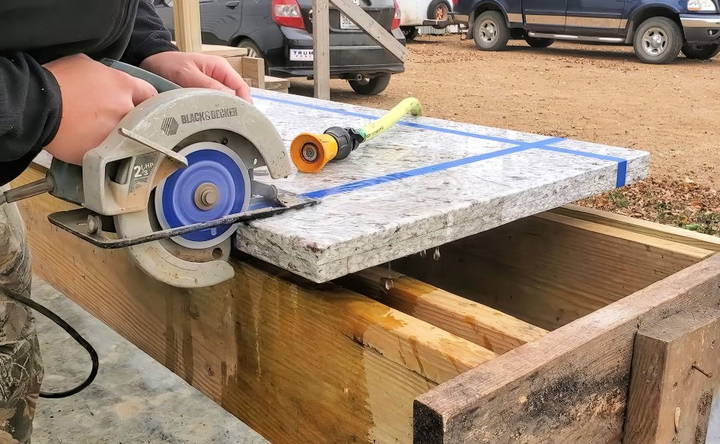
Place the saw on the granite at the starting point of your cut. Turn on the water flow and saw, and begin cutting slowly to maintain control and precision.
- Angle Grinder for Short Cuts: For small adjustments or detailed edges, use an angle grinder. This tool allows for more control and can be easier to manage than a larger saw.
- Circular Saw for Long, Straight Cuts: For extensive cuts, a circular saw provides more power and efficiency. Keep the blade cool by ensuring consistent water flow.
Make Multiple Passes
For thick granite, a single pass might not be sufficient. Make several shallow passes instead. This helps prevent blade binding and reduces the chance of overheating, both of which could damage the granite or your tools.
Finishing Touches and Tips
After making your primary cuts, you'll want to polish and refine the edges. Here's how:
- Polishing the Edges: Use finer-grit sandpaper or a polishing wheel to smooth the edges of the granite. Start with a rougher grit, then progress to finer grits until you achieve the desired smoothness.
- Check for Rough or Unfinished Spots: Inspect the edges to make sure they're smooth and even. Uneven spots can cause installation issues, so be thorough with this final step.
- Clean and Dry the Surface: After cutting and polishing, wipe down the granite with a clean cloth to remove any residue. Granite can stain if left with water spots, so ensure it's completely dry before installing.
Safety Tips for Working with Granite
Safety should be your top priority when working with power tools and heavy materials. Here are some key tips to keep in mind:
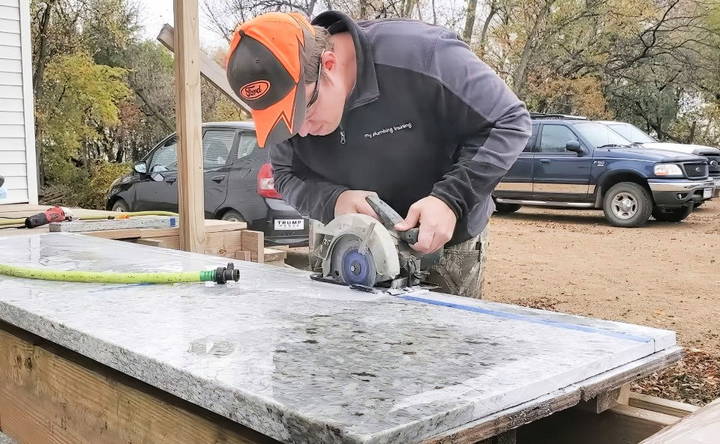
- Use Eye and Ear Protection: Cutting granite is loud and can send particles flying. Protective goggles and ear protection are necessary.
- Wear a Dust Mask: Even with water to reduce dust, cutting granite generates fine particles. A mask or respirator will protect your lungs.
- Secure Your Workspace: Make sure your cutting table and granite slab are stable. Any movement could result in inaccurate cuts or potential injury.
- Stay Hydrated and Take Breaks: Working with granite can be tiring, especially when working with power tools. Take breaks to avoid fatigue and mistakes.
- Handle the Granite Carefully: Avoid carrying granite pieces horizontally without support in the middle; this can cause cracking.
Final Thoughts
Cutting granite can seem daunting, but with the right preparation, tools, and patience, it's a manageable DIY task. Always take the time to measure carefully, support your workspace, and prioritize safety. The reward is a beautifully customized granite surface tailored perfectly for your space. By following this guide, you'll be able to confidently cut granite for countertops, vanities, and other home projects.
FAQs About Cutting Granite Safely and Efficiently
Get expert answers to FAQs about cutting granite safely and efficiently. Discover essential tips and techniques for best results.
Granite saw blades often require a "climb cut," where the blade moves downward into the stone. This direction prevents chipping on the polished edge and enables the water to better cool the blade and clear dust. On a standard circular saw, you may need to cut backward to achieve this, but using a tool specifically designed for granite is ideal.
A regular blade isn’t recommended for granite; the density of the stone can quickly damage a standard blade. Diamond blades are necessary for durability and precision. You could technically use a circular saw with a diamond blade, but be sure it’s kept cool with water for best results.
If painter’s tape or other guides don’t hold well, clamping a straight edge, like a piece of wood, along your line is a good solution. This guide keeps the saw straight and eliminates reliance on tape alone for accuracy.
Cutting granite without water is possible but not advisable for DIYers. Water not only cools the blade, extending its life, but also minimizes dust. If you must cut dry, use a high-quality dust collection system and respirator, as granite dust contains silica, which is hazardous when inhaled.
Granite should be transported vertically, not flat, to avoid stress that can cause cracking. Use sturdy clamps or supports, especially in transit, to keep the slab stable and upright until it reaches your workspace.
Plugging your tool into a GFCI outlet is essential to prevent electric shock. Direct water flow carefully at the blade, not the saw’s motor. Consider a drip system or a hose with a fine stream directed at the blade, keeping water exposure controlled while cooling the blade effectively.
Making shallow passes (about 1/4 inch each) reduces blade stress and the chance of cracking the stone. It also gives you greater control over the cut line, allowing you to refine the depth gradually, which is essential when working with thick or particularly brittle granite.
An angle grinder can work for short or detail cuts, but it’s harder to control for straight cuts compared to a circular saw. If using an angle grinder, clamp a guide rail along your line for better control. Angle grinders have higher RPMs, so practice and caution are necessary.
The blade’s lifespan depends on use and material hardness. When cutting granite, you might get 12-15 countertop cuts per blade. Using water and minimizing pressure during cutting helps prolong the blade’s life, especially on dense materials like granite.
Using a climb cut technique, a small water stream, and a shallow first pass can help prevent chipping. Flipping the granite so the polished side faces down can also reduce chipping, but requires careful blade and water direction management for efficiency and blade preservation.
Yes, granite cutting produces fine dust that contains silica, a health hazard. Use a respirator or dust mask, eye protection, and ear protection. Dust collection is also recommended if you’re working indoors, and using a water feed will further help to reduce airborne particles.
Bridge and rail saws are built specifically for granite and operate with a climb cut to optimize blade cooling and dust clearing. They also offer more precision and are easier to control for straight, long cuts compared to handheld saws. For regular granite work, these machines are ideal.


