Learn how to cut Hardie Board with our comprehensive guide. Cutting Hardie board (or HardieBacker cement board) may seem daunting at first, but with the right tools, techniques, and safety measures, you'll find it straightforward. Hardie board is popular for use in tiling and exterior applications due to its durability, moisture resistance, and ease of use. In this guide, you'll learn all the essentials for performing straight and circular cuts on Hardie board, guaranteeing outcomes that are professional and secure.
What You'll Need
Before starting any project with the Hardie board, gather the essential tools and materials for cutting. Here's a quick checklist:
- Carbide-tipped scoring knife (or utility knife)
- Straight edge (ruler or T-square)
- Marker (to mark cut lines)
- Manual, electric, or pneumatic shears (optional but useful)
- Hammer (for circular cuts)
- Personal Protective Equipment (PPE) (mask, goggles, gloves)
Note: It's crucial to avoid using high-speed grinders or power saws for cutting Hardie board indoors, as these tools can release hazardous silica dust.
Step by Step Instructions
Learn how to cut hardie boards with straight lines and circles safely. Explore tools, avoid common mistakes, and manage dust efficiently.
1. Cutting Straight Lines on Hardie Board
For straightforward, linear cuts, you can use a scoring and snapping technique. This method is quick, effective, and minimizes dust.
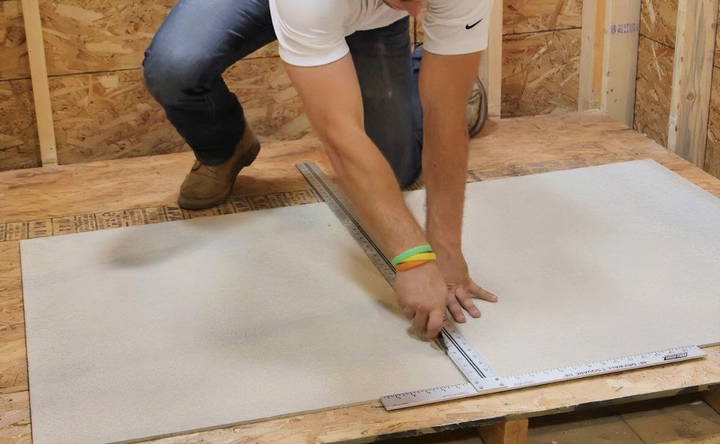
- Prepare the Board: Lay your Hardie board on a stable, flat surface. Ensure the area is clean, dry, and free from obstructions that could interfere with the scoring process.
- Mark the Cut Line: Use a straight edge to mark your cutting line on the board with a pencil or marker. If you're using HardieBacker 500 cement board, you'll need to score more deeply for a clean snap due to its thickness. For thinner boards (1/4 inch), the grid lines can serve as a guide for marking.
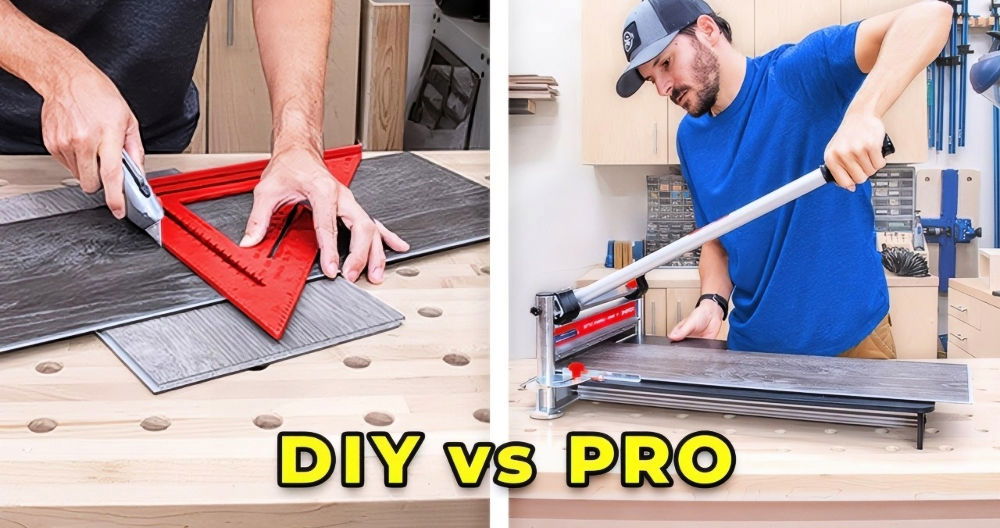
- Score the Hardie Board: Using a carbide-tipped scoring knife or a sturdy utility knife, score along the marked line. Apply firm, even pressure as you pull the blade along the straight edge. If the board is thicker (HardieBacker 500), you may need to score it several times to ensure a clean cut.
- Snap the Board: With the scoring line complete, place the Hardie board on the floor. Position your knee on the board for stability and apply pressure on both sides of the scored line to snap the board along the cut. This step should produce a clean break along the line, leaving you with two pieces ready for installation.
2. Making Circular Cuts or Small Holes
If your project requires circular cuts, such as around pipes or fixtures, follow these steps for an efficient process.
- Mark the Circle: Using a compass or circular template, mark the location of the circular cut on the board. This mark should clearly indicate where the cut will go, ensuring an accurate fit around pipes or fixtures.
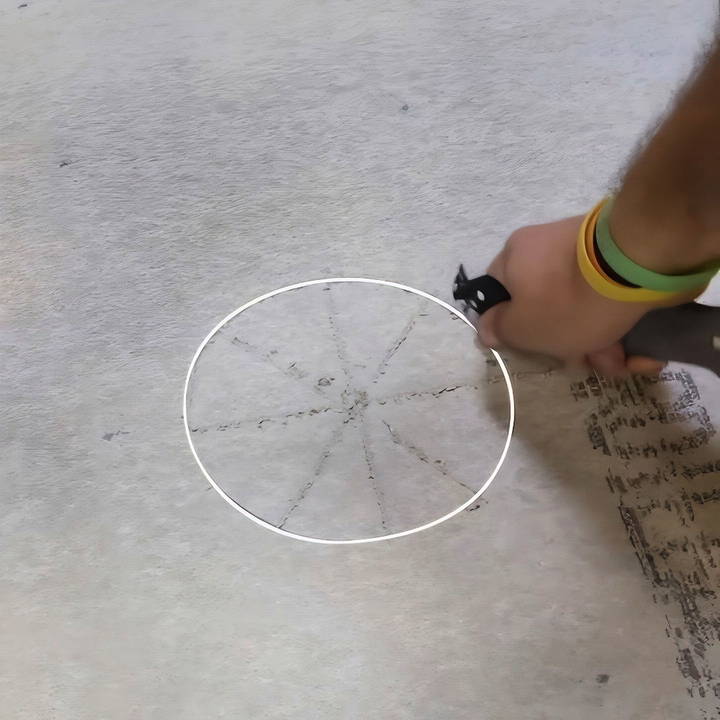
- Score Around the Circle: Using the same scoring tool as before, score the perimeter of the circle. For best results, create scoring lines from the edge of the circle to the center, creating a “pizza slice” pattern. This pattern helps break the circle out cleanly.
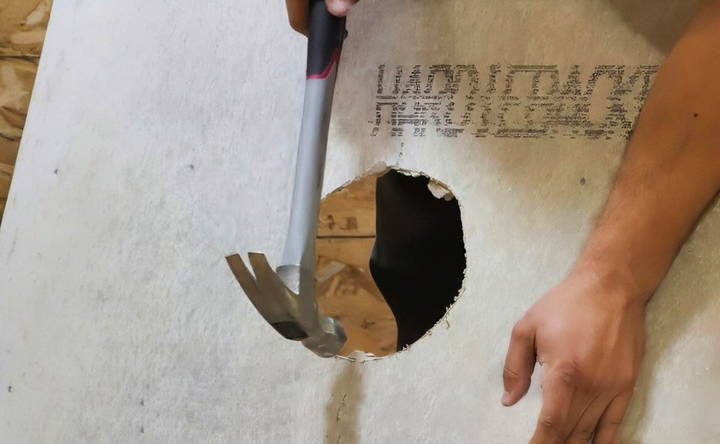
- Tap and Break the Circle: After scoring, tap around the circle's perimeter with a hammer to loosen the scored area. Once it's loosened, strike the center of the circle with the hammer to break it out. Any remaining material can be removed by hand to complete the circular cut.
Safety Precautions
Cutting Hardie board produces silica dust, a hazardous material if inhaled over time. To minimize risks, always follow these safety measures:
- Work in a well-ventilated area, preferably outdoors.
- Wear a dust mask with a high-efficiency particulate air (HEPA) filter.
- Use protective goggles to shield your eyes from dust and debris.
- Gloves are recommended to protect your hands from sharp edges.
Alternative Tools and Techniques
If you're working on a larger project or want to expedite the process, consider using alternative cutting tools:
- Manual, Electric, or Pneumatic Shears: Shears are excellent for minimizing dust and can cut through Hardie board efficiently. Electric shears work well for long, straight cuts, while pneumatic shears are ideal for smaller, more intricate cuts.
- Jigsaw with Carbide Blade: For detailed or complex cuts, a jigsaw with a carbide-grit blade can be effective. It provides more control over the cut and can navigate curved lines more easily. Always use this tool outdoors or with dust control measures, as it can create silica dust.
Common Mistakes to Avoid
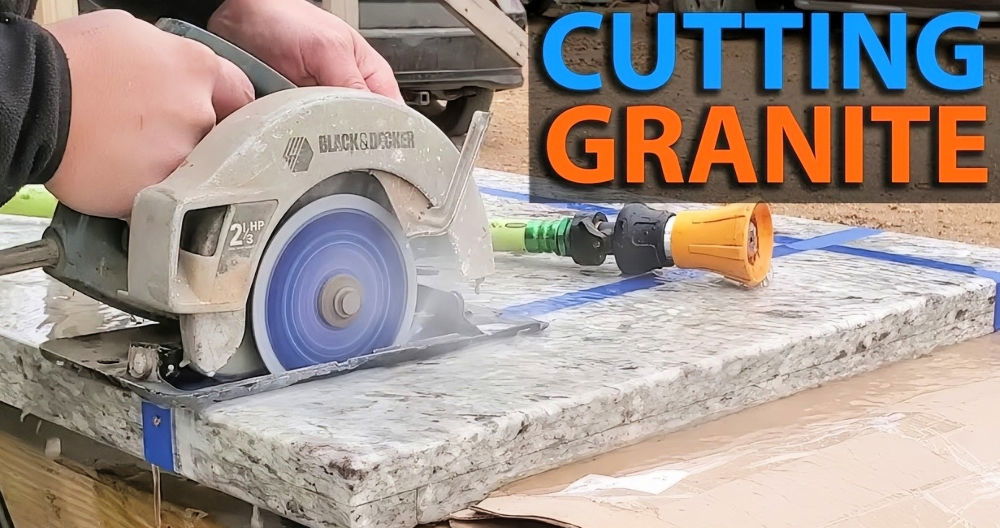
- Using a High-Speed Grinder Indoors: Never use high-speed grinders or circular saws indoors on Hardie board. They create a lot of silica dust, posing a significant health hazard.
- Inadequate Scoring: Ensure you score deeply enough on thicker boards (like HardieBacker 500), or you may end up with jagged edges.
- Lack of Support Under the Board: Always place your board on a flat surface and ensure it's supported to prevent cracking during the snap.
Dust Management and Clean-Up
After cutting, it's essential to control and clean up any dust effectively:
- Wet dust suppression methods: Lightly dampen the board with a spray bottle to minimize airborne dust.
- Use a HEPA filter vacuum: After cutting, vacuum the area with a HEPA-filtered vacuum to trap fine particles.
- Avoid sweeping dry dust: Sweeping can stir up dust; instead, use a damp cloth or vacuum for clean-up.
Tips for Best Results
- Choose the Right Thickness for Your Project: Hardie board is available in different thicknesses, with 1/4 inch and HardieBacker 500 being the most common. For floor tiling, use 1/4 inch; for walls and areas that need more strength, consider HardieBacker 500.
- Practice Scoring on a Scrap Piece: If you're new to working with Hardie board, practice scoring and snapping on a scrap piece. This will help you get a feel for the pressure needed to create clean cuts.
- Double-Check Measurements: Before scoring, always double-check your measurements to avoid mistakes. Precise measurements prevent the need for re-cuts and wasted material.
- Support Small Cuts or Narrow Sections: When making narrow or intricate cuts, ensure the board is fully supported underneath to prevent breaking.
Final Thoughts
Cutting Hardie board may seem challenging, but by following these steps and safety precautions, you'll be able to make precise cuts for your project. Whether you're a seasoned professional or a DIY enthusiast, these techniques will ensure that your Hardie board is cut cleanly and safely. Always prioritize safety by working in well-ventilated areas, using PPE, and following recommended dust management methods. With practice, you'll achieve clean cuts, enabling a durable and moisture-resistant surface ready for tiling or any other application.
FAQs About Cutting Hardie Board
Get expert answers to FAQs about cutting hardie boards. Learn tips, tools, and safety measures for efficient and precise cuts.
While a circular saw with a carbide-tipped blade can cut Hardie board, it creates a large amount of silica dust. It’s best to avoid this method indoors. If you must use a saw, do so outdoors with a dust collection system in place.
No, Hardie board does not require sealing on the cut edges, as it is designed to be moisture-resistant. However, ensure the board is securely fastened and supported to avoid movement.
Use a carbide-tipped scoring knife to create a deeper score line before snapping, which helps produce clean cuts. Avoid using excessive force when snapping, as it can cause chipping.
Hardie board can be cumbersome, especially in larger sizes. For full-size sheets, consider having a second person to help maneuver the board safely, especially during cutting and installation.
For 1/2-inch Hardie board, score deeply and consider scoring both sides for a cleaner snap. A carbide-tipped utility knife or jigsaw with a metal-cutting blade is also helpful, but avoid putting excessive pressure to prevent breaking the board.
While a regular utility knife may work, it often requires multiple passes to achieve a deep enough score, which can wear down blades quickly. A carbide-tipped scoring tool is recommended for better results on thicker boards like 1/2-inch Hardie board.
Narrow cuts on Hardie board can be challenging. For best results, use a jigsaw with a metal-cutting blade or a small circular saw with a cement board blade. Support the board fully to avoid cracking.
Power tools can be used outdoors, but only with dust-suppressing methods, as the silica dust from Hardie board is hazardous. Always use a HEPA-filtered vacuum for clean-up and wear a dust mask. Avoid high-speed tools indoors.
Pre-cutting around windows or niches is essential to avoid needing plunge cuts. For clean cuts, use a jigsaw or a circular saw with a cement board blade, ensuring all cuts are made before mounting the board.
Yes, 1/4-inch Hardie board typically includes grid lines to guide straight cuts. The 1/2-inch board usually does not, so you'll need to measure and mark lines manually for accurate cuts.
Cutting outdoors is ideal. To control dust, dampen the board with a spray bottle and use a dust-collecting vacuum with a HEPA filter. Avoid dry sweeping to prevent airborne silica particles.


