Cutting metal roofing may seem intimidating, especially if you're new to working with metal panels. However, with the right tools and techniques, you can achieve clean, precise cuts that protect the material from rust and ensure a long-lasting roof. In this guide, we'll cover everything you need to know about cutting metal roofing, including the recommended tools, safety practices, and step-by-step instructions for different cutting scenarios.
Why Metal Roofing Requires Special Cutting Techniques
Metal roofing panels are used in a variety of applications, from actual roofing to fences, chicken coops, and even decorative projects. Their durability makes them a popular choice, but cutting them requires specific tools to maintain the integrity of the metal and prevent corrosion. When cut improperly, the metal can become vulnerable to rust, which significantly shortens its lifespan.
Using tools like nibblers, electric shears, and tin snips helps avoid these issues by creating clean edges and minimizing the risk of corrosion. Additionally, each tool serves a specific purpose, allowing for flexibility depending on the shape and precision of the cut required.
Tools for Cutting Metal Roofing
Each tool has unique strengths that make it ideal for certain cutting scenarios. Here's a breakdown of the tools you'll need:
1. Nibblers
Nibblers are a specialized tool designed to make long, straight cuts in metal sheets. They are ideal for cutting across large sheets of metal quickly and efficiently, without generating much heat or leaving rough edges that can lead to rust.
- How They Work: Nibblers use a punch-and-die mechanism to chew through the metal, leaving behind a series of small crescent-shaped cuts.
- Best For: Long, straight cuts across metal sheets, especially when cutting panels that will be installed flat.
- Advantages: Fast and effective for larger cuts, leaves a clean edge with minimal chance of corrosion.
- Drawbacks: May not be suitable for intricate or detailed cuts, as they lack the precision of tin snips or electric shears.
2. Electric Shears
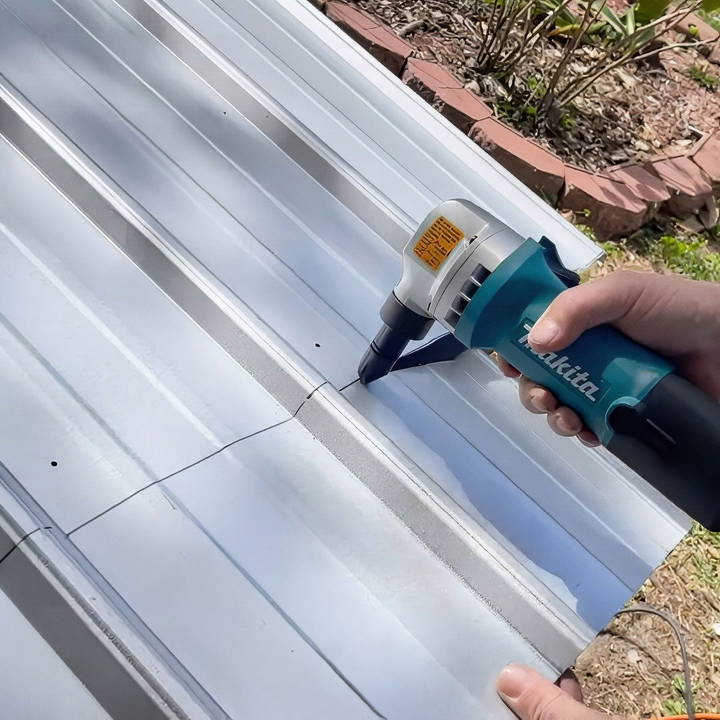
Electric shears are a versatile tool for cutting metal roofing. They consist of sharp blades that slice through metal, making them useful for straight and curved cuts. Electric shears are particularly effective for cutting flashing and other pieces that require precision.
- How They Work: The blades work like scissors, cutting the metal in a controlled manner without bending or warping it.
- Best For: Precise cuts in both straight and curved shapes, such as around obstacles or for creating detailed designs.
- Advantages: Flexible in cutting direction, suitable for both large and small panels.
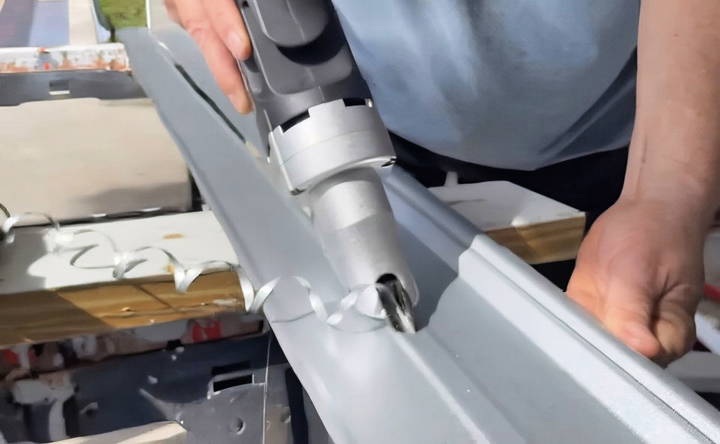
- Drawbacks: Electric shears can be more challenging to control over long cuts, and they generate metal shavings that need to be cleaned up to prevent rust.
3. Tin Snips
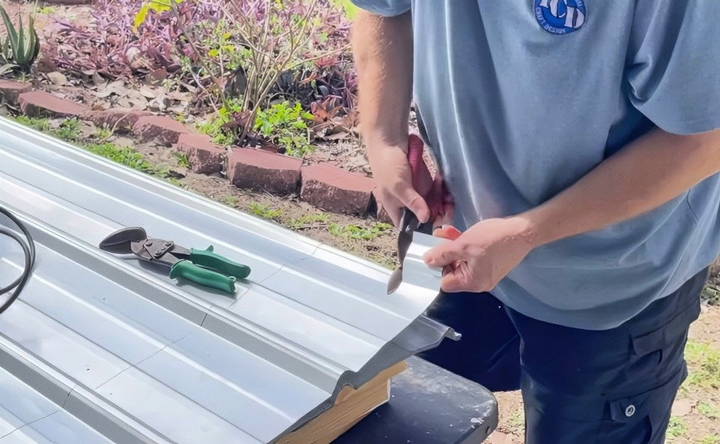
Tin snips, or manual shears, are ideal for small cuts and fine detailing. They come in left-hand and right-hand versions, allowing for directional cutting based on the hand dominance of the user and the angle of the cut.
- How They Work: Tin snips work like heavy-duty scissors for metal, allowing for highly controlled, detailed cuts.
- Best For: Small jobs, cutting around corners, and making precision cuts where accuracy is crucial.
- Advantages: Highly precise and ideal for detail work, lightweight, and affordable.
- Drawbacks: Not suitable for large or straight cuts, as they require more manual effort and may be time-consuming for extensive cuts.
Step by Step Instructions
Learn how to cut metal roofing safely and precisely with our step-by-step instructions, from workspace setup to choosing the right tools.
Step 1: Set Up a Safe Workspace
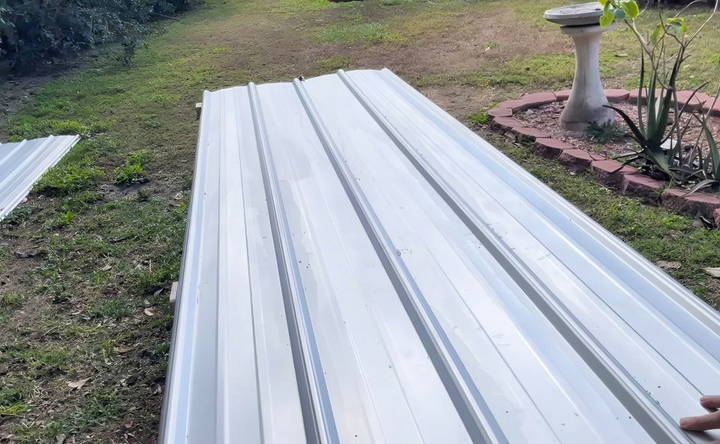
Before you begin cutting, set up a workspace that provides enough room to maneuver the metal sheets safely. Metal roofing panels can be cumbersome to handle, so having a stable workbench or sawhorses will help you manage them more easily. Make sure your area is clear of debris and other obstacles.
Step 2: Wear Appropriate Safety Gear
Cutting metal can create sharp edges and flying metal shavings. Always wear protective gear, including:
- Safety glasses to protect your eyes from metal shavings.
- Gloves to prevent cuts when handling the metal.
- Long sleeves to shield your arms from sharp edges and hot metal shards.
- Hearing protection if you're using power tools in a confined area.
Step 3: Measure and Mark the Cuts
Use a measuring tape and a marker or chalk to mark where you need to cut. Ensuring accurate measurements and marking precise lines will prevent wasted material and help you achieve a cleaner cut. If you're working with intricate shapes, consider using a template to trace the desired cut on the metal.
Step 4: Choose the Right Tool for Your Cut
Depending on the type of cut you need, select the appropriate tool:
- For long, straight cuts: Use nibblers, as they are fast and efficient for covering larger areas.
- For curved or detailed cuts: Electric shears allow for more precise maneuvering around bends and curves.
- For small, intricate cuts: Use tin snips, especially if you need to cut around tight corners or create highly detailed shapes.
Step 5: Begin Cutting
Efficient metal roof cutting techniques for precision and safety. Discover tools and tips to enhance your roofing project.
Using Nibblers
- Position the nibbler at the start of your marked line.
- Gently squeeze the trigger to activate the tool.
- Guide the nibbler along the line, keeping it steady to maintain a straight path.
- After completing the cut, clean up any small metal pieces that may be left behind.
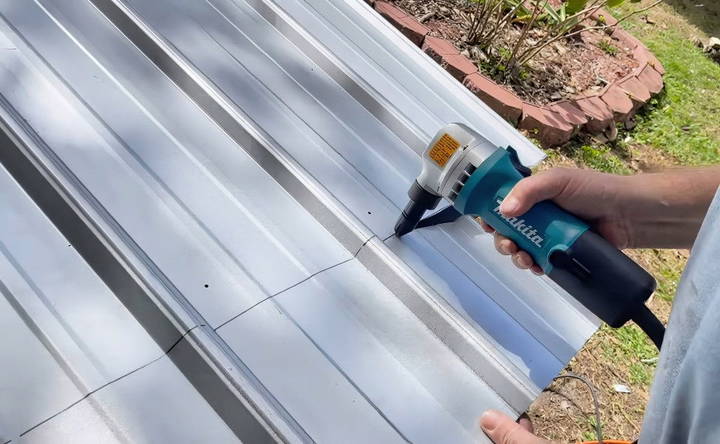
Using Electric Shears
- Align the electric shears with the beginning of your marked line.
- Start the shears and let them cut along the marked line, maintaining steady pressure for a clean cut.
- For curved cuts, maneuver the shears slowly, adjusting your angle as needed to keep the cut smooth and controlled.
Using Tin Snips
- Choose the correct tin snip (left-hand or right-hand) based on the direction of your cut.
- Position the snip at the start of the line, cutting slowly and steadily to follow the marked path.
- If you're cutting around a tight corner or making detailed shapes, take your time to avoid miscuts.
Tips for Avoiding Rust and Corrosion
One of the key concerns when cutting metal roofing is the risk of rust. Follow these tips to prevent corrosion and ensure the longevity of your roof:
- Avoid Saw Blades and Grinder Wheels: Although these tools may seem convenient, they create heat that can damage the metal's protective coating, leading to rust. Additionally, sparks from grinders can embed in the metal, accelerating corrosion.
- Clean Metal Shavings: After each cut, use a brush to remove metal shavings from the panel's surface. Leaving shavings on the metal can create rust spots over time.
- Cut on the Ground: To avoid leaving metal debris on the roof, perform your cuts on the ground whenever possible. This reduces the amount of cleanup required and protects the roof from potential rust spots caused by leftover shavings.
Best Practices for Precise Cuts
- Keep a Steady Hand: Regardless of the tool, maintain a steady hand to ensure clean, straight cuts.
- Allow for Tolerance: When cutting with nibblers or electric shears, give yourself a slight margin for error by marking slightly outside the desired line. This ensures you can refine the cut later if needed.
- Practice on Scrap Material: If you're new to cutting metal roofing, practice on a scrap piece first. This helps you get comfortable with the tool's handling and speed.
- Angle Control with Shears: When using electric shears, maintain a consistent angle. Slight variations in angle can lead to jagged cuts, especially on flashing or thinner metal.
Final Safety Tips
Using power tools to cut metal can be risky if not done properly. Here are a few final safety tips to keep in mind:
- Practice Tool Confidence: Take time to familiarize yourself with each tool's weight, speed, and handling. Confidence with the tools will lead to cleaner cuts and reduce accidents.
- Watch Your Hands: Always be mindful of hand placement, especially when working close to the cutting edge. Keeping your hands at a safe distance will help you avoid injuries.
- Inspect the Metal After Cutting: After making cuts, examine the edges to ensure they're smooth and free of burrs. If necessary, file down any sharp points to avoid accidental cuts during installation.
Conclusion
Cutting metal roofing panels doesn't have to be complicated or overwhelming. With the right tools, preparation, and technique, you can achieve professional-quality results on your own. Whether you're making straight cuts with nibblers, intricate curves with electric shears, or fine details with tin snips, each tool has its purpose and advantages. Remember to prioritize safety, maintain a clean workspace, and practice on scrap metal to build your confidence.
FAQs About Cutting Metal Roofing
Get quick answers to your top questions about cutting metal roofing efficiently and safely with our comprehensive FAQs guide.
Some people use circular saws with metal blades or even a standard blade placed backward. However, these methods can cause sparks and rough edges, increasing corrosion risk if not immediately treated with rust-resistant paint or sealant. Although quick, these methods may void warranties due to potential damage to protective coatings.
Yes, it’s possible to stack and cut multiple panels at once using a skilsaw with a metal blade. Pre-drilling holes for screws also helps by reducing measurement time for each panel. However, cutting multiple panels simultaneously may require more control and could lead to rough edges if not done carefully.
Metal roofing is often coated to resist corrosion, but cutting exposes raw edges vulnerable to rust, especially in humid environments like Florida. To prevent rust, avoid using tools that produce excessive heat or sparks. Also, clean metal shavings from the panels immediately to avoid rust spots.
Nibblers can struggle with straight cuts, often leaving a serrated edge. For a cleaner finish, move steadily and consider using a file or sandpaper on rough spots. If you prioritize straightness, electric shears or tin snips might be more suitable.
Yes, nibblers create a sharp metal ribbon as they cut, which can be hazardous if mishandled. Keep the area clear of these scraps, wear gloves, and dispose of them properly to prevent injuries.
Cutting 45-degree angles or valleys on corrugated roofing can be tricky due to the metal's profile. Electric shears or tin snips are better suited for these angled cuts since they allow more control around contours. Taking your time on these sections is key for precision.
Yes, gloves are essential for handling metal sheets to prevent cuts. Metal roofing panels can have sharp edges, and handling tools like nibblers or tin snips can increase the risk of accidental cuts. Choose gloves with good dexterity to maintain control over the tools.
Grinders and cutoff discs are generally not recommended for metal roofing. These tools create heat and sparks, damaging the protective coating and causing immediate rusting. If you must use them, apply rust-resistant paint along cut edges to prevent corrosion.


