Learn how to cut plexiglass easily with this step-by-step guide. Cutting plexiglass may seem daunting, but with the right tools and techniques, it's a straightforward process that anyone can manage at home. Whether you need plexiglass for a project like building a chicken coop window or want to add protective covers for displays, cutting it without chips or cracks is possible with some patience and planning. In this guide, we'll go through everything you need to know to cut plexiglass easily and effectively.
What You Need to Cut Plexiglass
Before diving into the cutting process, gather the following tools and materials. You don't need specialized tools – a circular saw or jigsaw with the appropriate blade will work perfectly. Here's a quick list of what you'll need:
Tools and Materials
- Plexiglass Sheet – Ensure you have the correct thickness and size for your project.
- Circular Saw or Jigsaw – Both saws work well, though each has its benefits depending on the type of cut.
- Saw Blade – A fine-tooth blade is essential for a clean cut:
- For circular saws, a 60-tooth ultra-fine finishing blade works best.
- For jigsaws, bi-metal T-shank jigsaw blades for plexiglass will give optimal results.
- Marker (e.g., Sharpie) – To mark your cut line accurately.
- Measuring Tape or Ruler – For precise measurements.
- MDF or Scrap Plywood – Place this underneath your plexiglass to stabilize it during the cut.
- Clamps – Secure the plexiglass and MDF/plywood together to minimize vibrations and movement.
- Safety Gear – Always wear safety goggles and a dust mask to protect yourself from debris.
Step by Step Instructions
Learn how to cut plexiglass precisely with our step-by-step guide, from workspace prep to using tools like circular saws or jigsaws for a smooth finish.
1. Prepare Your Workspace
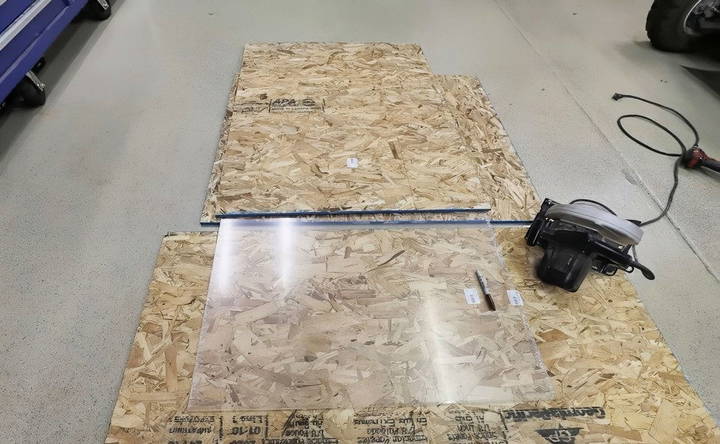
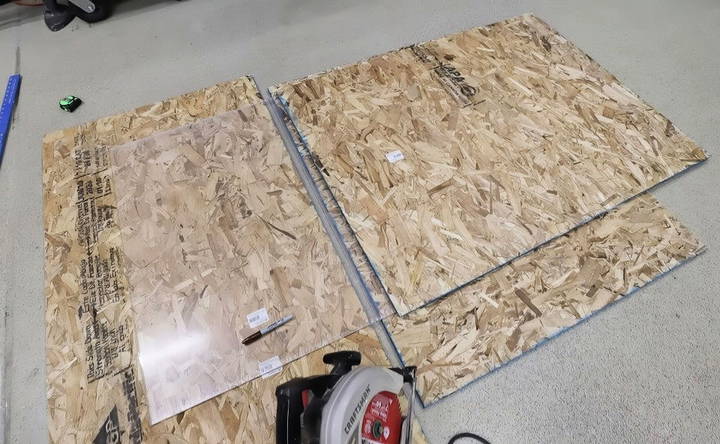
Start by setting up a clean, flat surface where you can work comfortably. Plexiglass is prone to vibrations during cutting, which can lead to chipping. By placing the sheet on a stable surface, you reduce the risk of unwanted movements.
- Lay down two pieces of scrap plywood or MDF on the surface where you'll be working.
- Place the plexiglass sheet on top of the scrap material.
- If you have another piece of plywood, set it on top of the plexiglass. This top layer will help dampen vibrations and give you a smoother cut.
2. Measure and Mark the Cut Line
Accurate measurements are crucial to achieving a precise cut.
- Use a measuring tape or ruler to find the exact dimensions needed.
- With a Sharpie or similar marker, draw a straight line along the cut area. This will serve as your cutting guide.
For curved or rounded cuts, consider using a jigsaw as it's easier to maneuver than a circular saw.
3. Choose Your Cutting Tool: Circular Saw or Jigsaw?
Each tool has specific advantages, depending on the cut type:
- Circular Saw: Best for long, straight cuts. The 60-tooth ultra-fine finishing blade will prevent chipping and give you a clean edge.
- Jigsaw: Ideal for smaller, intricate, or curved cuts. A bi-metal T-shank blade designed for plexiglass will reduce cracking.
4. Secure the Plexiglass Sheet
Vibration is one of the primary causes of chipping in plexiglass. To minimize movement:
- Use clamps to secure the plexiglass to the scrap wood. This setup prevents the sheet from shifting and keeps your hands away from the cutting line.
- Ensure the clamps are tight enough to prevent the plexiglass from slipping but not so tight that it damages the sheet.
Cutting Plexiglass with a Circular Saw
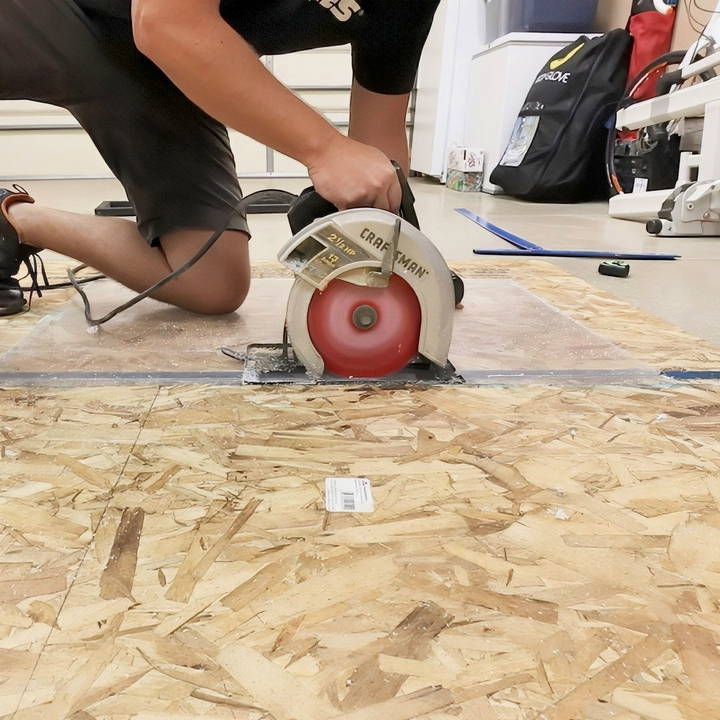
Using a circular saw is often the quickest way to achieve a smooth, chip-free cut on plexiglass. Here's how to do it effectively:
1. Set Up the Saw and Adjust Blade Depth
- Install the 60-tooth ultra-fine finishing blade on your circular saw. This blade will help achieve a smooth cut with minimal chipping.
- Adjust the blade depth so it's slightly deeper than the thickness of the plexiglass. This ensures you won't accidentally cut into your work surface.
2. Make the Cut
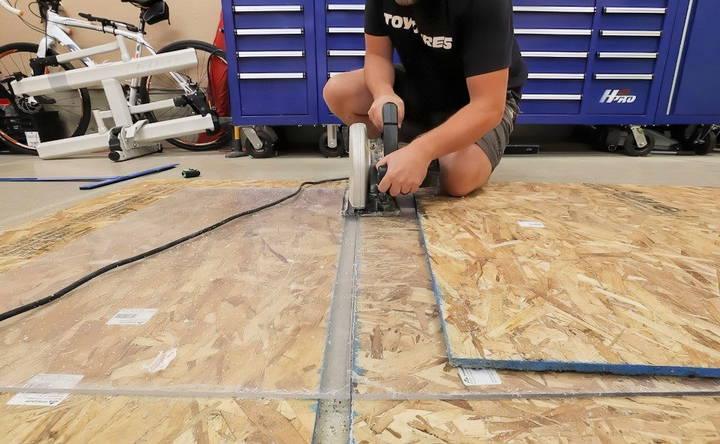
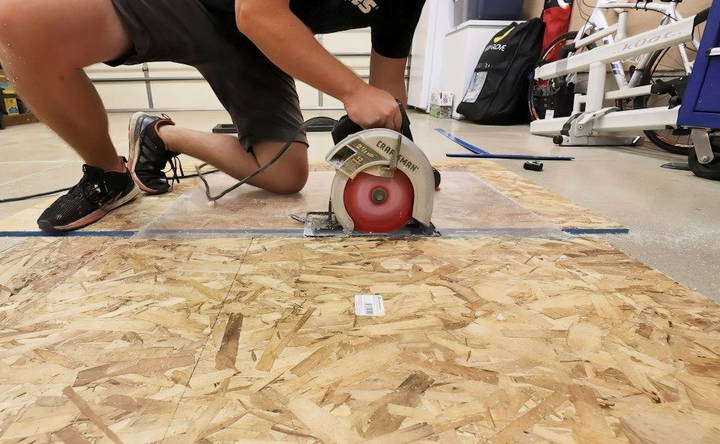
- Start Slowly: Begin cutting on one side of the line, pressing gently but firmly into the plexiglass. Starting slowly reduces the risk of chipping.
- Follow the Cut Line: Guide the saw steadily along the marked line.
- Finish the Cut: Once you've cut through one side, start from the other side and complete the cut by meeting in the middle. This technique helps prevent chipping at the end of the cut.
For some brands and types of plexiglass, you may find that you can cut straight through without stopping. If you do so, move at a consistent speed without pausing to avoid creating rough edges.
Cutting Plexiglass with a Jigsaw
For rounded or more intricate cuts, a jigsaw with the right blade is your best choice. Here's how to achieve a clean cut with this tool.
1. Set Up the Jigsaw
- Install the bi-metal T-shank blade designed for plexiglass onto your jigsaw. This blade is specially crafted to handle plastic materials without cracking or chipping.
- Adjust the speed settings to low or medium, as high speeds can cause plexiglass to melt.
2. Make the Cut
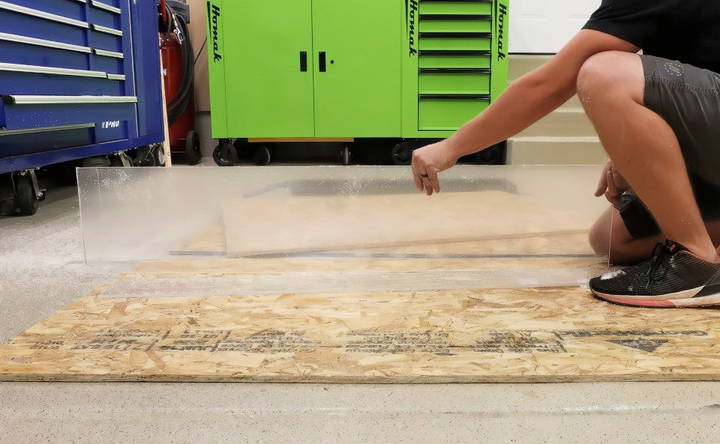
- Start on the Edge: Begin your cut at the edge of the plexiglass and guide the blade along your marked line.
- Take It Slow: Apply steady, even pressure. Moving too quickly can cause the plexiglass to melt or chip.
- Follow the Curve: If making curved cuts, take extra care to follow the line accurately. Jigsaws are naturally suited for curves, so move at a comfortable pace.
Once complete, you should have a smooth cut without chips or cracks. For best results, avoid pressing too hard on the jigsaw to prevent breakage or uneven edges.
Final Steps: Smoothing and Finishing the Edge
After cutting, you may notice small rough edges or slight imperfections along the cut line. Here's how to clean up these minor issues:
- Sand the Edges: Use fine-grit sandpaper to smooth out the edges. Move in small, circular motions until the edge feels smooth to the touch.
- Polish with a Heat Gun (Optional): For a truly polished look, run a heat gun along the edges to remove any remaining roughness. Be cautious, as too much heat can warp the plexiglass.
Tips for a Perfect Finish
- Avoid Overheating: Both sanding and using a heat gun can cause the plexiglass to warp if too much heat is applied. Keep your movements steady and consistent.
- Test on a Scrap Piece: If you're new to cutting plexiglass, practice on a small scrap piece before making the final cuts on your main project. This practice will help you get a feel for the tools and techniques.
Conclusion
Cutting plexiglass doesn't have to be a complex task. With a little preparation, the right tools, and careful techniques, you can make clean, professional cuts in plexiglass that suit any project. By securing the plexiglass correctly, choosing the right blade, and controlling your cutting speed, you can avoid common pitfalls like chipping and melting. Whether you're using a circular saw for straight lines or a jigsaw for curves, the techniques outlined in this guide will help you achieve great results.
FAQs About How to Cut Plexiglass
Discover answers to common questions about how to cut plexiglass safely and effectively with expert tips and tools.
Yes, but it’s not recommended unless you have a fine-tooth or high-density carbide blade. Standard saw blades are too coarse for plexiglass and will likely cause chipping and cracking.
Yes. For thin plexiglass sheets, scoring and snapping is an option. This involves using a utility knife to score a deep line on both sides and then applying gentle pressure to snap along the scored line. However, for thicker sheets, power tools will give a cleaner result.
Plexiglass can soften and melt under high heat, so avoid using high-speed settings on power tools. A slow, consistent speed is ideal for a smooth cut without overheating.
A 60-tooth ultra-fine finishing blade on a circular saw or a bi-metal T-shank jigsaw blade is ideal for cutting plexiglass. Both minimize chipping and deliver a clean, smooth edge.
Yes, for thin plexiglass (usually up to 1/8-inch), you can use a utility knife. Score along the cut line multiple times with the knife, then snap the plexiglass along the scored line. However, this method isn’t suitable for thicker sheets.
To prevent melting, maintain a steady cutting speed and avoid pushing the blade too hard. Using a high-tooth-count blade (e.g., 60-80 teeth) on a circular saw or jigsaw also helps. If cutting thicker sheets, consider using soapy water or painter’s tape on the cut line to minimize heat buildup.
You can sand rough edges with fine-grit sandpaper. For a smoother finish, use a router with a top-bearing trim bit along the edges, especially for projects requiring precise, polished edges.
Yes, keeping the protective film on helps prevent scratches during cutting. If your sheet doesn’t have a film, applying painter’s tape on both sides of the cut line provides similar protection.
Yes, a miter saw can work well for small pieces if you use a fine-tooth blade, but handle it carefully to avoid cracking. Wet saws can also be used, but they’re less common for plexiglass cutting as water can sometimes mar the finish.
For round cuts, a jigsaw with a bi-metal T-shank blade is a practical option. Alternatively, a hole saw attachment on a drill works well for smaller circles. Always secure the plexiglass tightly to prevent shifting.
Some users find that reversing the blade direction helps reduce chipping, especially with vinyl or softer materials. However, this approach may not be necessary if using a high-tooth-count blade and the correct cutting technique.
A standard wood-cutting blade isn't ideal because it's too coarse and may cause chipping. A fine-tooth blade, specifically designed for plastic or with 60-80 teeth, provides much cleaner results.


