Learn how to cut stair stringers accurately with this step-by-step guide, covering measurements, cutting techniques, and essential tips for perfect stairs. Stair stringers are essential components that support each step of a staircase, playing a crucial role in its structural integrity. Crafting them might seem complicated, but with the right approach, you can tackle it with confidence. In this guide, we'll cover everything you need to know to measure, mark, and cut stair stringers accurately, saving both time and money. This process, inspired by practical DIY techniques, will simplify stair construction and set you up for success.
Understanding Stair Stringers
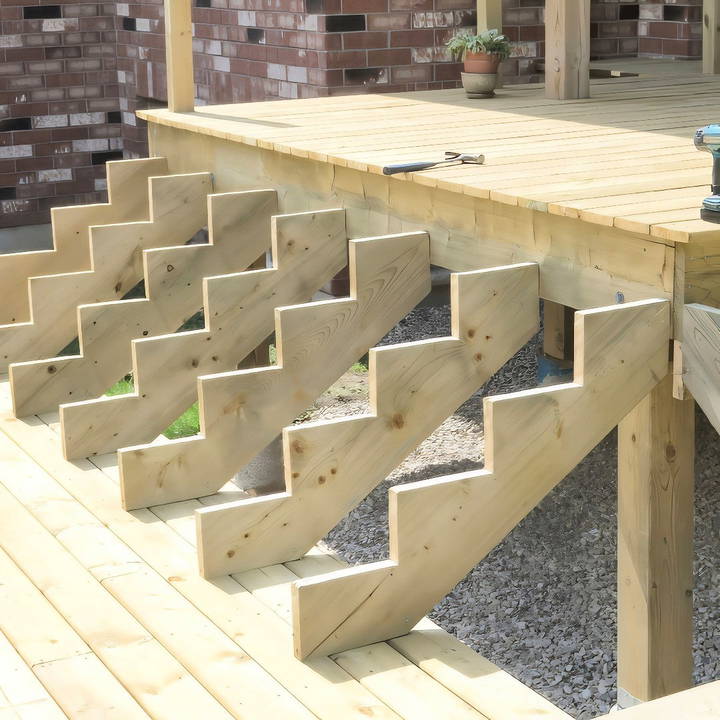
A stair stringer is the backbone of a staircase, typically cut from wood, that supports each step. It runs at an angle from the bottom to the top of the staircase and provides a secure base for the treads (where you step) and risers (the vertical part between each tread).
Stringers are usually cut at specific angles to accommodate the "rise" (vertical height of each step) and "run" (horizontal depth of each step). Cutting stringers accurately is key to a staircase that feels comfortable and safe to walk on. Ideally, the rise and run should fall within standard guidelines, making a staircase that isn't too steep or shallow.
Gathering Tools and Materials
Before you begin, gather these essential tools and materials to ensure you have everything needed for accurate stringer cutting:
- Tape Measure: To measure the total height (rise) and depth (run).
- Calculator: Essential for quick calculations.
- Square or Framing Square: For accurate right angles.
- Pencil or Marker: To mark measurements on wood.
- Saw (Skill Saw or Circular Saw): For precise cuts.
- Jig: A custom guide that makes marking easier.
- Scrap Wood: To make a jig if you don't have one.
- Screws and Drill: For assembling the jig.
- Sawzall: Useful for final trimming of cuts.
Step by Step Instructions
Learn how to cut stair stringers with our step-by-step guide. From calculating dimensions to cutting techniques, ensure precision and safety in your project.
1. Calculating Stair Dimensions
Accurate measurements are the foundation of properly cut stair stringers. Here's how to determine the rise and run for your staircase:
Measure the Total Height (Rise)
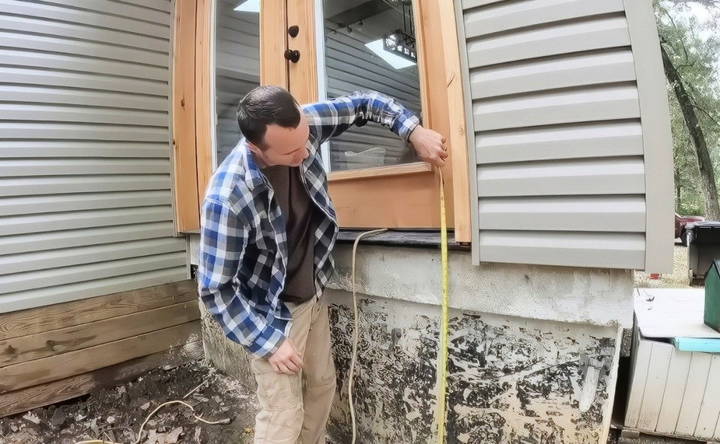
- Measure the vertical distance from the base of the staircase to the top landing where the stairs will end. This is your total rise.
- If you're working on a deck or similar surface, ensure you account for the thickness of the final step material (such as a deck board). For instance, if the top surface will add an inch, include this in your total measurement to avoid uneven steps.
Determine the Number of Steps and Step Height
Divide the total rise by the number of steps you wish to make. Standard guidelines suggest a step rise between 7 and 8 inches. For example, if your total rise is 42 inches:
- Start by dividing 42 inches by 6 (an estimated step count), giving each step a rise of 7 inches. This is ideal since it meets the comfortable standard range.
- Adjust the number of steps if needed to keep each rise within the 7 to 8-inch range.
Establish the Run
The step run typically falls between 10 and 11 inches for comfortable footing. For this example, we'll set each step's run to 10 inches, which is both manageable and standard.
2. Making a Jig for Stringer Accuracy
A jig is a guide that simplifies the marking process by ensuring each step has the correct rise and run without requiring repeated calculations.
Building Your Jig
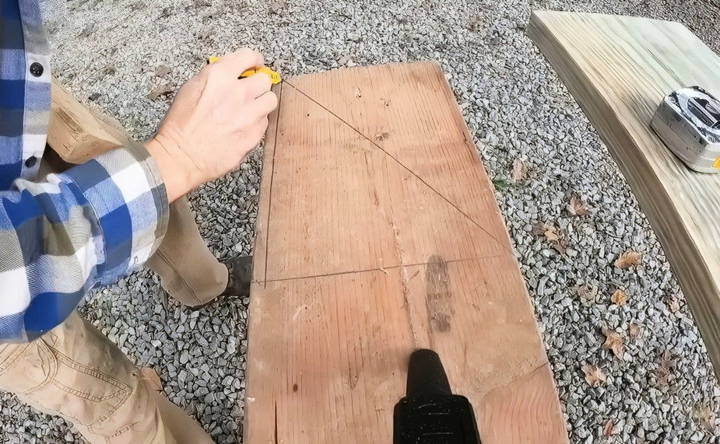
- Cut a Piece of Scrap Wood: Cut two pieces of scrap wood—one for the rise and one for the run. Measure and mark 7 inches on one side for the rise and 10 inches on the other for the run.
- Attach the Pieces Together: Align them at a right angle, forming an "L" shape to make a quick template for marking the stringer.
- Screw Together: Secure the pieces with screws. This jig allows you to quickly mark each rise and run consistently.
Benefits of the Jig
This jig reduces errors by maintaining consistent measurements as you mark each step. It eliminates the need for continual recalculations, making the process much faster and accurate.
3. Marking the Stair Stringer
With your jig ready, it's time to start marking your stringer.
Step-by-Step Marking Process
- Place the Jig on the Stringer: Begin at the top of the board where the first step will be.
- Mark the Rise and Run: Using your jig, mark the rise (7 inches) and the run (10 inches) on the board.
- Repeat the Process: Move the jig down, aligning it with the last mark. Repeat until you have marked all steps down the length of the board.
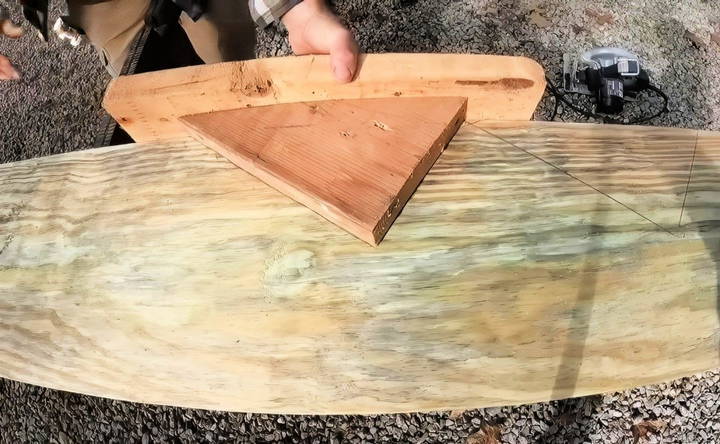
For the final step, mark only the rise, not the run, to make a clean end.
4. Cutting the Stringer
With the measurements marked, it's time to cut along the lines. Follow these steps to make clean cuts:
Cutting Techniques
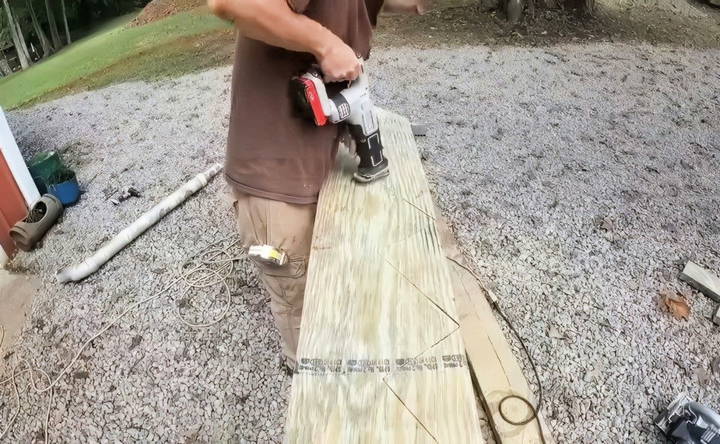
- Use a Skill Saw: Start with a circular or skill saw to cut along each marked line for the risers and treads. Avoid cutting past each corner to prevent weakening the structure.
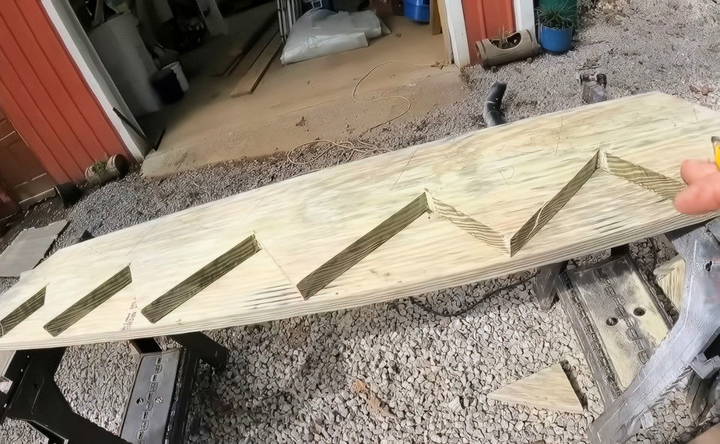
- Clean Up with a Sawzall: Use a sawzall to finish corners where the skill saw couldn't reach. This keeps the cuts precise and ensures each corner is neatly trimmed.
- Double Check Your Work: Place the cut stringer on a flat surface to check for consistency in rise and run. Each step should be even to prevent wobbling when installed.
Pattern for Repetition
After cutting one stringer, use it as a pattern for additional stringers. Label it as a “Pattern” piece and lay it on top of each new board to trace out identical cuts, ensuring uniformity across all stringers. Avoid using newly cut stringers to trace each time, as slight discrepancies can accumulate and lead to inaccuracies.
Tips for Final Installation
Once your stringers are cut, you're nearly ready for installation. Here are some tips to ensure a smooth finish:
Allowing for Step Thickness
If your steps will be covered with a board (such as a 1-inch thick deck board), subtract this thickness from the final stringer measurement. For example, if you want each step to have a 7-inch rise but plan to cover the steps with a 1-inch board, mark your stringers with a 6-inch rise. This way, the finished staircase will have each step level with the intended rise.
Double Check with Local Building Codes
Every area may have specific building codes governing stair dimensions for safety. Before finalizing your cuts, verify your measurements meet local requirements, which may vary based on residential or commercial applications.
Mounting the Stringers
- Pre-drill Holes: For clean attachment, pre-drill holes in the stringers where they will be secured. This prevents the wood from splitting during installation.
- Secure Each Stringer in Place: Use screws or bolts appropriate for the weight and intended use of the stairs.
- Add Support Where Needed: If your staircase is wide, add extra support beams between stringers to prevent flexing and ensure durability.
Common Pitfalls and Troubleshooting
- Inaccurate Measurements: Not accounting for the thickness of your final tread covering can throw off your step rise measurements. Always plan to add or subtract material thicknesses as needed.
- Uneven Cuts: Rushing through cuts without double-checking marks can lead to misaligned steps. Take time to verify each cut aligns perfectly.
- Using Incorrect Stringer Patterns: If you don't use the original cut stringer as the pattern, minor inaccuracies can compound with each additional stringer. Label your pattern stringer clearly to avoid confusion.
Conclusion
Cutting stair stringers may seem complex initially, but with a calculated approach and the right tools, it becomes a manageable DIY project. A jig simplifies the process by reducing the need for repeated measurements, and accurate marking and cutting yield professional-quality results. By carefully following these steps and double-checking measurements, you'll make a stable, even staircase ready for years of use. With your stair stringers prepared, you're well on your way to a perfectly crafted staircase, a foundational skill in any DIYer's toolkit.
Embrace the process, take your time, and remember: each cut brings you closer to mastering stair construction.
FAQs About How to Cut Stair Stringers
Explore FAQs about how to cut stair stringers effectively with tips, tools, and techniques to ensure accuracy and safety in your project.
The standard recommendation is a rise of 7 inches and a run of 10 to 11 inches. For comfortable and safe stairs, the combined total of rise and run should be between 17 and 19 inches.
To account for a slope, measure from the intended landing point where the stairs will end, not directly from the top surface. This helps accommodate variations in ground height and ensures a level installation.
A jig simplifies repetitive marking by setting fixed rise and run measurements, reducing the chance of cumulative errors. This method is especially helpful for DIYers, as it prevents minor misalignments that can add up across multiple steps.
Many professionals prefer framing squares with stair gauges (buttons) for precise, repeatable measurements. However, the jig method is a simpler alternative, especially useful for DIYers or occasional projects. Both methods yield accurate results with practice.
Start by aligning your jig or square at the intended top point of the stringer. Ensure the first mark allows for any tread thickness that will be added later, as this affects the final step height.
Pre-cut stringers can be convenient, but they may not match your exact height needs and often lack precision. Many find cutting custom stringers more reliable, especially since mass-produced ones sometimes don’t align perfectly.
Double-check each mark and consider measuring diagonally across the hypotenuses (from each riser and tread corner). This helps catch minor errors early on and keeps all measurements aligned throughout the stringer.
For easier use, especially for seniors, reduce the rise to 6 inches if possible. This increases comfort but may require more steps and space, so it's essential to plan accordingly.


