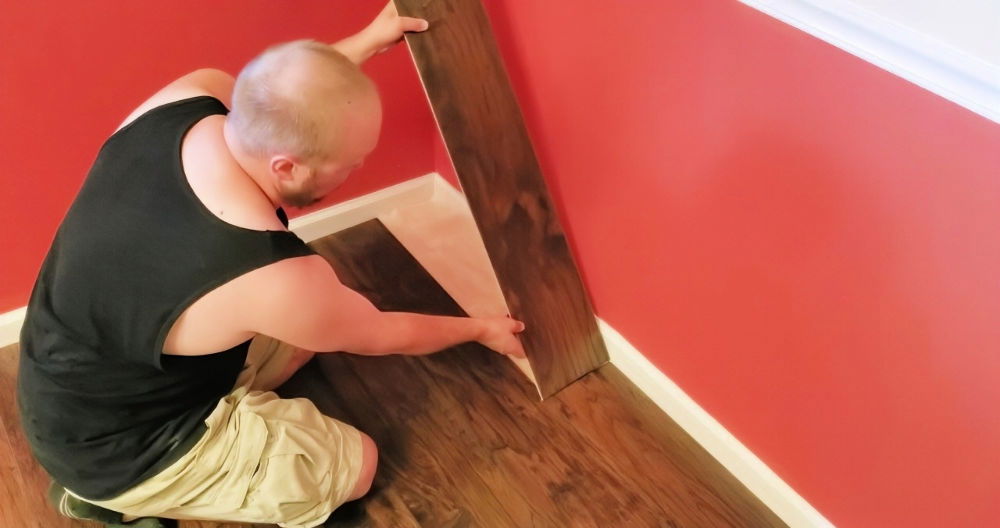
Learning how to cut vinyl plank flooring is an essential skill for a successful DIY installation, whether you're upgrading your bedroom, living room, kitchen, or bathroom. In this guide, you'll explore every kind of cut you'll come across, along with recommendations for selecting the best tools and strategies to achieve precise and polished results.
Vinyl plank flooring is popular for its durability, water resistance, and aesthetic appeal. However, the precision required to install it neatly around edges, corners, and obstacles can be challenging. Here, we'll go over six key types of cuts you'll need and explore different tools and methods to ensure a smooth and efficient installation.
Why Cutting Vinyl Plank Flooring is Crucial
Cutting vinyl planks accurately ensures a snug fit, reducing gaps that could allow moisture or dust to get underneath the flooring. Furthermore, a precise cut allows the floor to expand and contract with temperature changes, preventing potential warping or buckling over time. To accomplish this, it's essential to use the right tools and follow reliable techniques.
Tools for Cutting Vinyl Plank Flooring
Before starting, gather the tools that will make the job efficient and precise:
- Utility knife or box cutter: Essential for scoring and snapping.
- Carpenter square: Helps achieve straight, accurate lines.
- Miter saw or circular saw: Ideal for making clean, straight cuts, especially on longer or narrower pieces.
- Jigsaw: Handy for curved cuts and intricate notches.
- Multi-tool: Useful for plunge cuts, especially around irregular obstacles.
- Contour gauge: Helpful for cutting curves around complex shapes like pipes or columns.
Types of Cuts You'll Need
- Cutting to Length – Most Common Cut
- Cutting to Width – For Boards at the Room's Edges
- Corner Notches – Around Cabinets or Wall Protrusions
- Side Notches – For Closets or Similar Structures
- Curves – Around Pipes or Rounded Obstacles
- Holes – For Air Vents or Plumbing Pipes
Step by Step Instructions
Learn how to cut vinyl plank flooring perfectly with step-by-step guidance and expert tips for every type of cut. Achieve a flawless finish every time.
1. Cutting Vinyl Planks to Length
Cutting planks to length is the most frequent cut you'll make, as each row usually requires adjustments at the ends to fit your space.
Step-by-Step Guide to Cutting Length:
- Measure the Space: Measure the distance from the last plank to the wall, allowing a small gap (usually about a quarter inch) for expansion.
- Mark the Cutting Line: Using a carpenter square, mark the line where you'll cut. If the plank has to fit snugly against a wall, ensure you account for expansion by marking slightly shorter than the exact measurement.
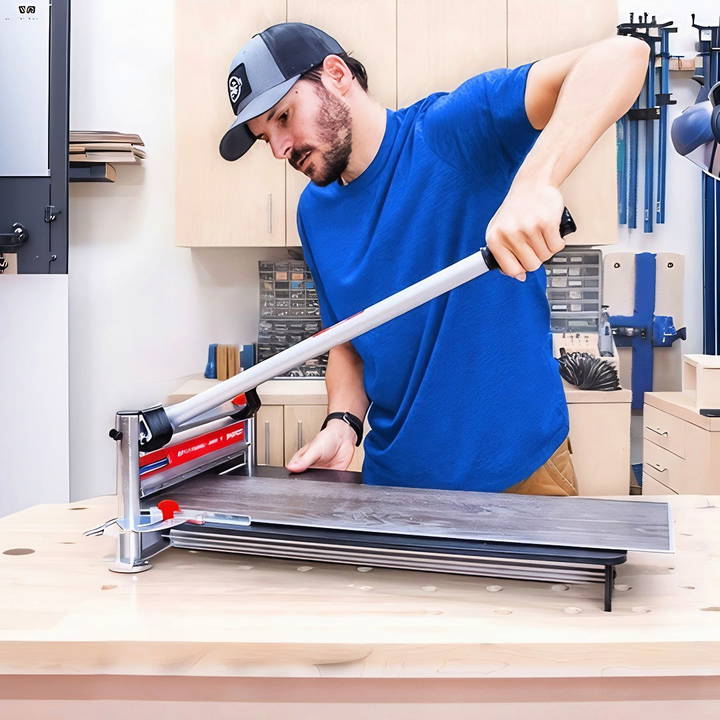
- Score and Snap: Use a utility knife to score along the marked line. Hold the carpenter square firmly in place while scoring. Once you have a deep enough groove, place the plank over a scrap piece of wood for leverage and snap the plank along the scored line.
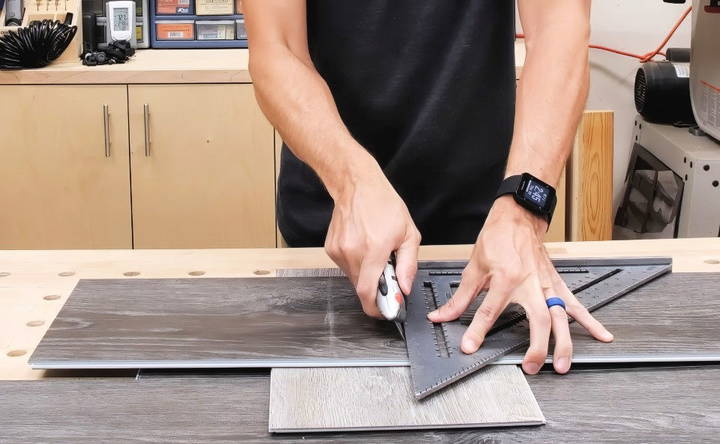
For tighter cuts (under four inches), using a utility knife and snapping might be tricky. In such cases, consider using a miter or circular saw for a clean cut.
2. Cutting to Width – Preparing the Starting or Ending Row
Cutting planks to width is less frequent but necessary at the beginning or end of the installation, or for rooms that require custom widths.
Tools & Technique:
- Preferred Tool: Circular saw or jigsaw
- Alternate Tool: Handsaw (though slower, especially on large cuts)
Steps:
- Measure the Width: Determine how wide the plank needs to be to fill the row.
- Clamp the Plank: If using a circular saw, secure the plank on a stable surface with clamps to prevent movement during cutting.
- Cut the Width: Use the saw to cut along the line. Be mindful of blade depth, setting it slightly deeper than the plank thickness for a smooth cut.
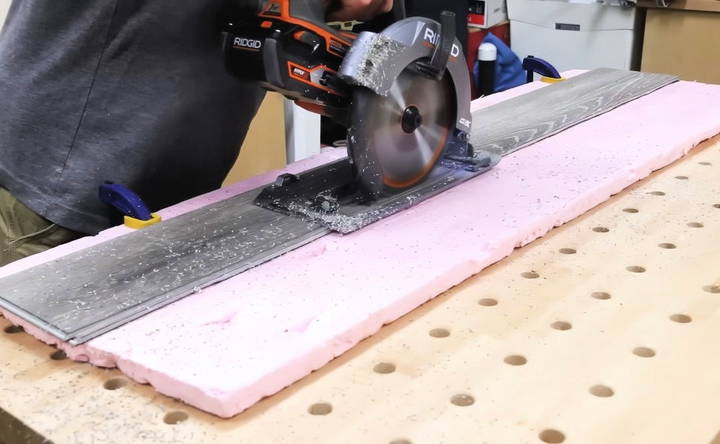
For beginners, a circular saw provides a stable, precise cut and minimizes the likelihood of jagged edges.
3. Cutting Corner Notches – For Cabinets or Wall Protrusions
If the room has cabinets or walls that protrude into the flooring area, you'll need to cut corner notches to fit around these elements. Corner notches are common in kitchens and bathrooms, where cabinetry and other fixtures limit full planks.
Steps:
- Measure and Mark: Place the plank where it will be installed and mark the outline of the corner.
- Outline the Notch: Mark the length and width of the notch using a carpenter square to ensure accuracy.
Cut the Notch:
- Jigsaw: The jigsaw is highly effective for cutting notches. Make two cuts along the marked lines to remove the excess.
- Hand Saw: This can be used as an alternative for one side, though it may be challenging for beginners.
- Test Fit: Place the plank to check if the notch aligns with the protruding area. Trim any additional material if necessary.
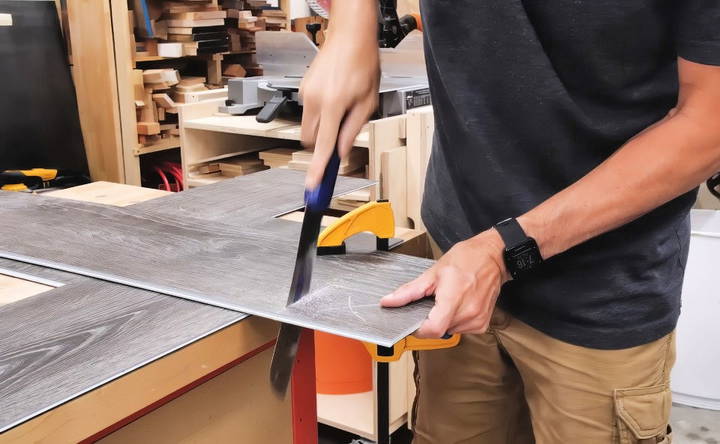
4. Cutting Side Notches – Fitting Around Closet or Doorway Openings
Side notches are required when you encounter closet or doorway structures that require cuts in the middle of a plank rather than at the ends.
Tools & Technique:
- Preferred Tool: Jigsaw or multi-tool
Steps:
- Position and Measure: Lay the plank in its intended position and mark where the notch is required.
- Measure the Depth: Measure the depth from the plank's edge to where the notch should end.
- Draw the Outline: Using a carpenter square, mark the width and depth of the notch.
- Cut with a Jigsaw: A jigsaw allows precision and can easily create the inner cuts needed. Make the side cuts first, then add small “relief cuts” to help remove the inner material.
- Check Fit: Test the plank to ensure the notch fits around the closet or doorway structure without gaps.
5. Cutting Curves – Around Pipes or Rounded Obstacles
Curved cuts are required less frequently but are crucial for areas around pipes, columns, or other round objects.
Tools & Technique:
- Preferred Tool: Jigsaw with a fine-tooth blade
- Additional Tool: Contour gauge for marking curves accurately
Steps:
- Position the Plank: Place the plank close to the obstacle (like a pipe or toilet flange).
- Mark the Curve: Use a contour gauge to trace the outline of the curve onto the plank.
- Draw the Cut Line: Using the gauge tracing as a guide, mark the curve on the plank.
- Cut the Curve with a Jigsaw: Slowly follow the curve with the jigsaw, adjusting as needed for precision. A narrow blade makes it easier to handle tighter curves.
- Fit and Adjust: Place the plank to ensure the curve fits snugly around the obstacle. If adjustments are needed, trim carefully with the jigsaw until you achieve a precise fit.
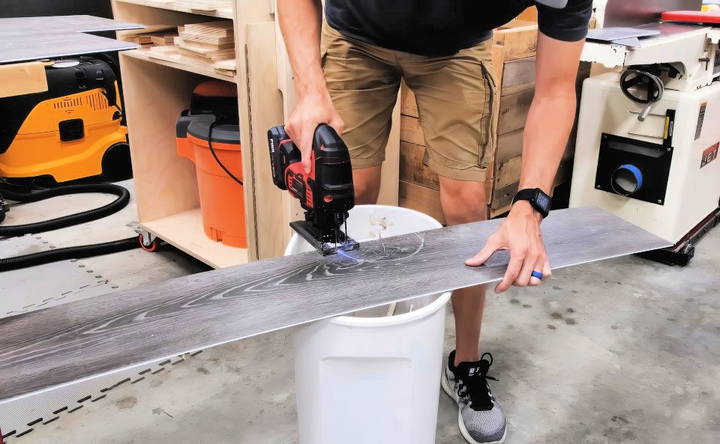
Essential Tips for Cutting Curves
- Contour Gauge: Invest in a contour gauge if you'll be doing multiple installations. It helps trace intricate shapes with ease.
- Precision: Always undercut slightly and test-fit the plank, making incremental adjustments for the best result.
6. Cutting Holes – For Air Vents or Plumbing Pipes
Cutting holes in vinyl plank flooring is essential when you need to accommodate air vents, pipes, or similar structures. This cut is generally less common but requires precision to ensure a neat fit, especially around visible features like air vents.
Tools & Technique:
- Preferred Tool: Forstner bit or spade bit with a drill; alternatively, a jigsaw or multi-tool works well for larger, non-circular cuts.
Steps:
- Measure and Mark: Identify the exact position of the hole on the plank. If it's for a vent, measure the distance from the wall to the center of the vent and then transfer this measurement onto your plank.
- Mark the Diameter: For circular cuts, use a compass or draw around a similar-sized object to ensure an accurate circular marking.
- Drill with a Forstner Bit: Start by placing the drill bit on the center mark. Forstner bits or spade bits create a clean hole, making them ideal for vinyl planks.
- Slowly drill through the plank until you create the hole. This method is especially effective for small to medium-sized holes.
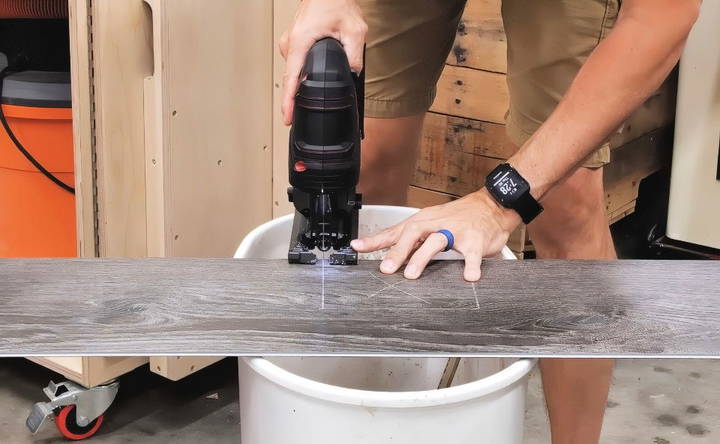
- Alternative with a Jigsaw: If you're making a larger hole or working with a rectangular vent, use a jigsaw. Start by drilling a small pilot hole that fits the jigsaw blade, then carefully cut around the outline to finish the hole.
- Test the Fit: Place the plank in position to ensure the hole aligns correctly with the vent or pipe.
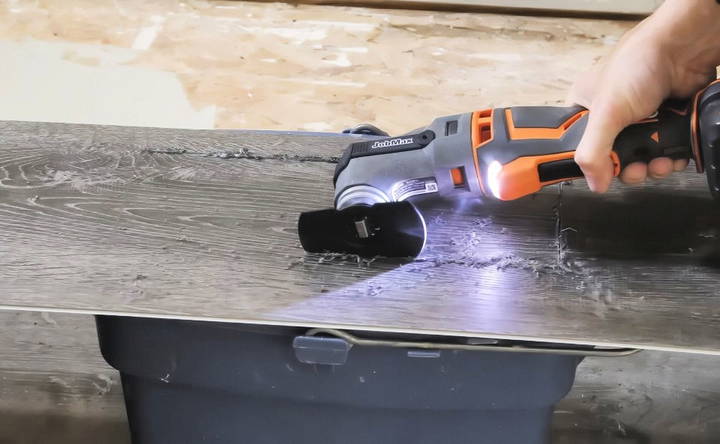
Pro Tip: Using a Multi-Tool for Versatile Cuts
A multi-tool is a versatile option for vinyl plank flooring. Its oscillating blade can plunge directly into the plank, making it ideal for smaller, precise cuts or adjustments on the spot. This tool is particularly helpful if you're working around baseboards, door jambs, or other narrow spaces where using a larger tool would be difficult.
Finishing Touches: Ensuring a Smooth and Professional Installation
Now that you've mastered the cuts, here are some final tips to ensure your vinyl plank flooring looks clean and professionally installed:
- Check Manufacturer Recommendations: Many vinyl plank products have specific guidelines regarding the expansion gap (often around 1/4 inch). Ensuring this gap helps prevent issues with shifting or buckling over time.
- Avoid Overcutting: When making notches or curves, it's better to cut slightly less and test-fit the plank. You can always trim a bit more, but overcutting can leave unsightly gaps.
- Keep Spare Planks: Have extra planks on hand for mistakes or unexpected adjustments. Buying an additional 10% of the required flooring is usually enough to account for any mishaps.
- Mind Your Safety: When using tools like saws and jigsaws, always wear protective gear, including safety glasses and ear protection. Take breaks if needed, especially if you're new to DIY flooring.
Budget and Tool Recommendations for DIYers
For a beginner, investing in essential tools like a utility knife and a jigsaw will provide you with everything necessary for most cuts. If you're looking to expand your toolkit for added precision and ease, here are some recommendations:
Essential Tools:
- Utility Knife: Inexpensive and versatile for quick scoring and snapping.
- Carpenter Square: Ensures straight cuts and accurate markings.
- Jigsaw: Useful for intricate cuts, such as curves and notches.
- Optional Tools for Ease and Efficiency:
- Circular Saw: Ideal for cutting planks to width quickly.
- Contour Gauge: Great for marking curves accurately, especially around pipes and columns.
- Multi-Tool: Excellent for plunge cuts around tight spaces like door jambs.
Troubleshooting Common Cutting Challenges
Cutting vinyl plank flooring can pose several challenges, especially for first-time installers. Here are some common issues and solutions:
- Jagged or Rough Edges After Cutting: Ensure your tools have sharp blades. Dull blades can tear the vinyl rather than cut it. If you notice a rough edge, consider using a vinyl plank cutter for a smoother finish, especially on smaller pieces.
- Planks Are Difficult to Snap After Scoring: For shorter pieces, you may find snapping challenging because there's less leverage. Consider using a miter saw for precision or adding a tapping block to provide additional support while snapping.
- Measuring Errors for Notches and Curves: Double-check all measurements before cutting, and keep a piece of scrap vinyl nearby to practice your measurements. Using a contour gauge also helps avoid mistakes by allowing you to trace curves accurately.
- Dust Accumulation During Cuts: If you're cutting indoors, place a trash bin beneath the plank or work over a tarp to catch debris. Alternatively, cut outside whenever possible to minimize cleanup.
Final Thoughts
Installing vinyl plank flooring and mastering the cutting techniques will elevate your DIY skills and make your project look polished and professional. By familiarizing yourself with each type of cut and the right tools, you can overcome common obstacles and ensure a precise, visually appealing floor. Whether you're installing in a kitchen, bathroom, or living room, taking your time with measurements and cuts will make a significant difference.
Remember, vinyl plank flooring can withstand various environments, making it a popular choice for many homeowners. As you refine your cutting technique, you'll see how versatile this material can be for custom installations. Happy flooring!
FAQs About Cutting Vinyl Plank Flooring
Discover answers to FAQs about cutting vinyl plank flooring, including tools, techniques, and tips for perfect cuts. Improve your DIY skills today!
For thicker planks, scoring and snapping with a utility knife may not be effective. Use a power tool like a jigsaw, circular saw, or a vinyl cutter for cleaner cuts. A fine-tooth blade is recommended for a smoother finish without chipping.
For smaller cuts or tight areas, a multi-tool or jigsaw works well. Use a thin blade for precision, and if you're working near corners, consider scoring first with a utility knife before using a jigsaw to minimize chipping.
Yes, a table saw is highly effective for long, straight cuts, though it can create more dust. Using a fine-tooth blade and a guide fence will improve precision. However, this tool may not be necessary for short or narrow cuts.
Use a contour gauge to trace the curve’s shape onto the plank, then cut with a jigsaw. Start with small, steady cuts to avoid overshooting the curve. This method is ideal for cuts around toilet flanges or pipes.
Yes, scoring and snapping is a common method. Use a utility knife to score deeply along your marked line, then snap it over a straight edge. This method works best on thinner planks but may not be suitable for thicker or SPC vinyl planks.
A fine-tooth blade for wood or a laminate-specific blade works well. These blades provide a cleaner edge and reduce chipping on the vinyl surface. A metal-cutting blade can also be effective for finer detail on thick planks.
While it's not strictly necessary, removing baseboards can make the installation look more professional. Alternatively, you can use quarter-round molding to cover any gaps between the planks and the baseboards if they remain in place.
Yes, as long as the linoleum is level and in good condition. Vinyl planks require a smooth, even surface for the best results. If there are raised areas or imperfections, sand them down or use a leveling compound.
Place painter's tape along the cutting line to reduce scuffing, or use a tool with a clean, smooth base. When using a jigsaw, ensure the baseplate is not scratched, as this can transfer marks onto the vinyl surface.
A circular saw or table saw with a guide rail will help maintain a straight line on long planks. Ensure the plank is securely clamped to avoid movement during the cut. A rail or a guide fence can improve precision.


