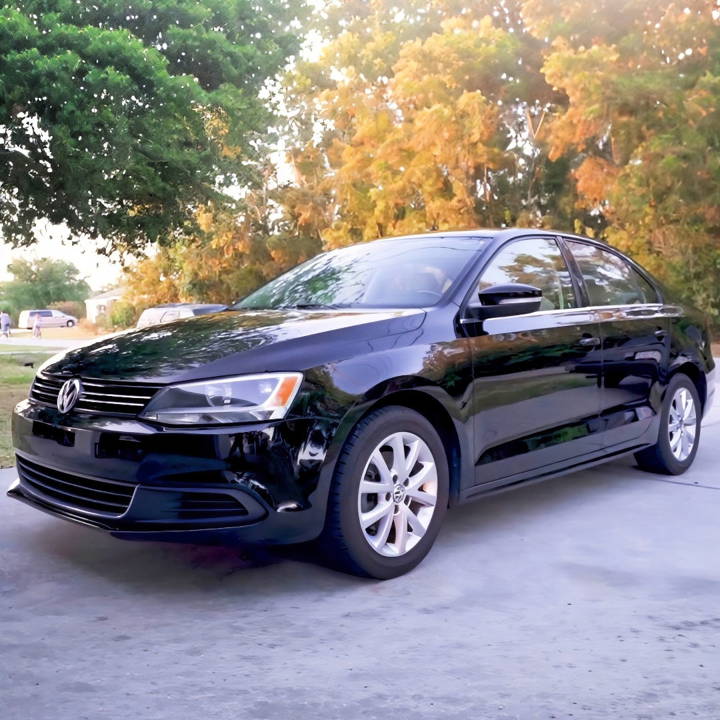
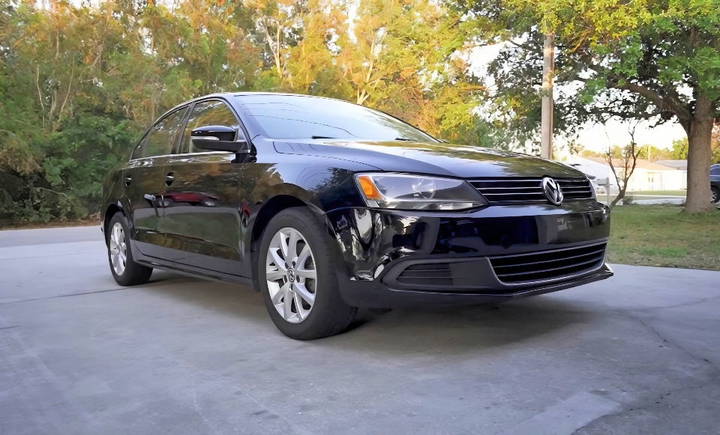
Starting my weekend with detailing my car at home was a great decision. I gathered all the necessary supplies like soap, sponges, a vacuum, and microfiber towels. I first rinsed off the dirt and grime, then applied car soap. Using a sponge, I scrubbed thoroughly to make sure the entire car was clean. This process made my car look shiny again.
Next, I cleaned the interior with a vacuum and wipes, paying special attention to the dashboard and seats. After using an air freshener, my car smelled fresh. I polished all surfaces with a microfiber towel to make them sparkle.
Doing this myself saved me money and gave me a sense of accomplishment. I'm helping with this guide so you can feel proud too.
What is Car Detailing?
Car detailing is the art of meticulously cleaning, restoring, and finishing a car to achieve a show-quality level of detail. It's a step-by-step process that covers every inch of the car, including areas that are often overlooked during a regular wash.
Benefits of Car Detailing
- Preserves Your Car's Value: Regular detailing can help maintain or even increase your car's resale value.
- Protects the Paintwork: Detailing includes waxing and polishing the exterior, which protects the paint from the elements.
- Enhances Appearance: It removes dirt and grime that a standard wash can't, leaving your car with a stunning shine.
- Improves Comfort: A clean interior is more pleasant to be in, especially for those with allergies as detailing can remove dust and other irritants.
- Safety: Clean windows and mirrors improve visibility, making driving safer.
DIY Detailing Tips
- Start with the Right Tools: Gather all necessary tools and products before you start.
- Work in the Shade: Direct sunlight can cause cleaning products to dry too quickly, leaving streaks.
- Be Gentle: Use soft cloths and gentle motions to avoid scratching the surfaces.
- Follow Instructions: Always read and follow the instructions on cleaning products.
Knowing basic car detailing helps your vehicle look its best and stay in great condition long-term. Regular detailing is an investment in your car's longevity and appeal.
Materials Needed and Why
Before diving into the nitty-gritty, let's talk about the materials needed for this detailing process:
- Electric Power Washer (1600 PSI): Essential for removing loose dirt without damaging the paint.
- Foam Cannon & Car Shampoo: Helps loosen grime, making the washing process more effective.
- Wheel Cleaner, Brushes, Mitts: Specified tools for different parts keep the cleaning process efficient and prevent cross-contamination.
- Two Bucket System with Grit Guards: Reduces the risk of scratching the paint by keeping the wash mitt clean.
- Clay Bar and Lubricant: Necessary for pulling out embedded contaminants from the paint.
- DA Polisher, Microfiber Cutting Disc, Compound, and Polish: These materials correct paint imperfections and bring back the shine.
- IPA (Isopropyl Alcohol) Solution: Prepare the paint for ceramic coating by removing polishing oils.
- Ceramic Coating Kit: The final protective layer that will shield the paint from environmental elements and make maintenance easier.
Step by Step Instructions
Discover easy DIY car detailing steps for a professional clean and shine at home. Achieve top results with our step-by-step instructions.
Step 1: Preparing the Car
The first step in the process was giving the car a good rinse using the electric power washer. It's crucial to use it carefully, especially around any existing paint chips to avoid further damage. After rinsing, I attached my foam cannon to apply a pre-wash foam, helping to break down the dirt before the actual hand wash.
Step 2: Washing
I began with the wheels, using a dedicated wheel cleaner and brushes to tackle brake dust and road grime. Transitioning to the body, the two-bucket method was my best friend, ensuring that I wasn't just moving dirt around.
Step 3: Decontaminating
Post-wash, the car looked clean, but superficial contaminants were still clinging onto the paint. I performed both chemical and clay bar decontamination. Starting with a chemical decontaminant, I sprayed it all over the car, watching it react and bind to metal particles embedded in the paint. After rinsing that off, I used a clay bar with lubricant to gently pull out the remaining contaminants. It's a tedious process, but seeing the amount of dirt still coming off was surprisingly satisfying.
Step 4: Correcting
The correction phase was the most time-consuming. Using a DA polisher, microfiber cutting disc, and compound, I worked panel by panel, removing the swirl marks and scratches that marred the paint. After compounding, polishing was up next to restore the gloss that compounding dulls. This step required patience and attention to detail.
Step 5: Prepping for Coating
Even after polishing, oils and residues can remain on the paint, potentially hindering the ceramic coating's ability to bond correctly. Thus, an IPA wipe-down was crucial. I mixed 50% water and 50% isopropyl alcohol and gently wiped down every panel.
Step 6: Applying the Ceramic Coating
With the surface prepped, it was time for the ceramic coating. This step transforms the effort into lasting protection. Following the instructions in the kit, I applied the coating panel by panel. It's crucial to work in a well-ventilated area and use the provided gloves and applicator pads. Watching the coating cure and realizing the depth of shine it added was incredibly rewarding.
Step 7: The Cure
Patience is a virtue, especially when waiting for the ceramic coating to cure fully. It took about 5 hours for it to dry to the touch, but I avoided getting the car wet or washing it for several days to ensure the best results.
Advanced Techniques for Car Detailing
When you're ready to take your car detailing to the next level, advanced techniques can make a significant difference. These methods are designed to give your car that extra shine and protection it deserves. Let's explore some sophisticated strategies that can help you achieve a professional-quality finish.
- Strategic Washing with the Two-Bucket Method Begins with the two-bucket method: one bucket for clean, soapy water and another for rinsing your wash mitt. This prevents dirt from contaminating your cleaning solution and reduces the risk of scratching your paint. Use grit guards in both buckets to trap dirt and change the rinse water if it gets too dirty.
- Top-to-Bottom Approach: Wash your car from the top down. This ensures that you don't dirty areas and helps you use the cleanest water on the most visible parts of the car first. Start with the roof and move down to the hood, trunk, and sides, finishing with the wheels.
- Microfiber Towels for Drying: Dry your car with microfiber towels. They're super absorbent and gentle, which means they won't scratch your paint. Change towels when one gets too wet to avoid streaks, and pat the car dry rather than dragging the towel across the surface.
- Clay Barring for Paint Decontamination: After washing, use a clay bar to remove embedded contaminants from the paint. This leaves a smooth surface that's perfect for waxing and ensures a longer-lasting shine.
Advanced techniques need patience and detail, but the results are worth it. Your car will look better and have added protection, staying great longer.
Common Detailing Mistakes to Avoid
Detailing your car can be a rewarding experience, but it's easy to make mistakes that can lead to less-than-perfect results. Here are some common errors to watch out for, ensuring your car looks its best without causing any damage.
- Washing in Direct Sunlight: Avoid detailing your car in direct sunlight. The heat can cause soaps and waxes to dry too quickly, leading to streaks and spots. Instead, choose a shaded area or work during cooler parts of the day.
- Using the Wrong Products Using household cleaners or the wrong type of soap can strip away waxes and damage your car's finish. Always use automotive-specific products designed for car detailing.
- One-Bucket Method Using a single bucket for both washing and rinsing can transfer dirt back onto your car, risking scratches. Use the two-bucket method with grit guards to keep your wash water clean.
- Improper Drying Tools Drying your car with regular towels or sponges can scratch the paint. Use microfiber towels that are gentle on surfaces and absorbent enough to prevent streaks.
- Neglecting the Wheels Don't save the wheels for last; they're often the dirtiest part of the car. Clean them first to avoid splashing grime onto already cleaned areas.
- Rushing the Process: Take your time with each step of the detailing process. Rushing can lead to missed spots and uneven application of products.
- Cross-Contaminating Towels Using the same towel for different parts of the car can spread dirt and contaminants. Have separate towels for the body, windows, and wheels.
Avoiding these mistakes ensures a safer, more effective detailing process, keeping your car pristine.
Troubleshooting Common Issues
Car detailing issues are part of learning. Knowing how to fix them can save time and avoid vehicle damage. Here's a simple guide to solving common detailing problems.
- Water Spots After washing your car, you might notice water spots. These are caused by minerals in the water that remain after the liquid evaporates. To avoid this, dry your car immediately after washing, especially in sunny weather. If spots do appear, a quick detailer spray can help remove them.
- Streaks on Glass Streaks on your car's windows can obstruct your view. They often occur when glass cleaner dries too quickly. To fix this, clean your windows with a microfiber towel and glass cleaner in the shade. Wipe in one direction on the inside, and another on the outside to easily identify which side the streaks are on.
- Scratches from Washing Sometimes, washing can cause fine scratches. This usually happens when dirt is rubbed into the paint. Always rinse your car thoroughly before washing, and use a clean, soft wash mitt. If scratches occur, they may be buffed out with a fine polish.
- Dull Paint If your car's paint looks dull, it might need more than just a wash. Over time, the paint can become oxidized. A polishing compound can restore the shine. Remember to seal it with wax afterward to protect the paint.
- Cloudy Headlights Headlights can become cloudy due to oxidation. This not only looks bad but also reduces visibility. You can use a headlight restoration kit to clear up the haze. Follow the instructions carefully to avoid damaging the headlights.
- Stains on Upholstery Spills and stains on your car's upholstery are inevitable. For fabric, use a dedicated upholstery cleaner and a soft brush. For leather, a leather cleaner followed by a conditioner works best. Test any product in an inconspicuous area first to ensure it doesn't cause discoloration.
Addressing these issues correctly keeps your car looking great. Patience and using the right products and techniques are key to effective troubleshooting.
Safety Precautions
When diving into the world of car detailing, safety should always be your top priority. It's not just about making your car look its best; it's also about ensuring you're not putting yourself at risk. Here are some essential safety precautions to keep in mind:
Personal Protective Equipment (PPE)
- Gloves: Protect your hands from harsh chemicals and contaminants with quality gloves.
- Face Masks: Use a mask when dealing with strong odors or chemicals to avoid inhaling harmful substances.
- Protective Glasses: Shield your eyes from splashes and airborne particles with safety goggles.
- Long Pants and Closed-Toe Shoes: These will protect your skin from spills and prevent injuries from dropped items.
Proper Ventilation
Work in a well-ventilated area to avoid the buildup of fumes from cleaning products, which can be harmful if inhaled in large quantities.
Reading Labels
Always read the labels on detailing products. They contain important information on how to use them safely and effectively.
Dilution Ratios
Follow the recommended dilution ratios for cleaning products. Using too much can be unsafe and may damage your car's surfaces.
Testing Products
Before applying a product to a large area, test it on a small, inconspicuous spot to ensure it doesn't cause damage.
Direction of Application
When using sprays or other products, apply them in a direction away from you to avoid contact with your skin or eyes.
Handling Equipment
If you're using an electric pressure washer or other equipment, handle it with care. Maintain a safe distance to prevent damage to your car or injury to yourself.
Following these safety tips keeps you safe while detailing your car. Enhance your car's look without risking your health.
FAQs About DIY Car Detailing
Discover answers to common questions about DIY car detailing. Learn tips, techniques, and best practices for maintaining your vehicle's shine.
Start with the wheels, as they’re usually the dirtiest part. Then, pre-clean the vehicle to remove bugs and dirt from the lower parts. Apply snow foam to break down stubborn dirt before a thorough wash. Use the two-bucket method for washing: one with soapy water and one with clean water for rinsing your mitt. After washing, decontaminate the paintwork with an iron dissolver and clay bar. Dry the car thoroughly, then polish for a shiny finish. Finally, seal and wax to protect your hard work.
For a fresh interior, start by removing all trash and personal items. Vacuum the carpets, seats, and all nooks and crannies. Clean the upholstery with appropriate cleaners: use leather cleaner for leather and upholstery shampoo for fabric. Wipe down all hard surfaces with a microfiber cloth and a mild all-purpose cleaner. Don’t forget to clean the windows inside and out for a streak-free view.
After washing and drying your car, apply a polish to remove small imperfections. Follow this with a wax or sealant to add gloss and protect the paint. For an extra shine, consider using a glaze before the final waxing. Remember, regular maintenance like this not only makes your car look great but also preserves the paintwork.
While some household products can be safe, it’s best to use products designed for cars to avoid damage. For example, dish soap can strip the wax from your car’s paint and isn’t recommended. Invest in a good quality car wash soap, wheel cleaner, and interior cleaners specific to your car’s materials.
The frequency of detailing depends on several factors, including how much you use your car, the environment it's exposed to, and personal preference. A good rule of thumb is to do a full detail every four to six months with regular washes in between. This will keep your car looking its best and help maintain its value.
Conclusion
Wrapping up, learning how to detail your own car can be a rewarding experience. With the right tools and techniques, you can make your car shine like new. Keep practicing, and soon, you'll master auto detailing. Happy cleaning!


