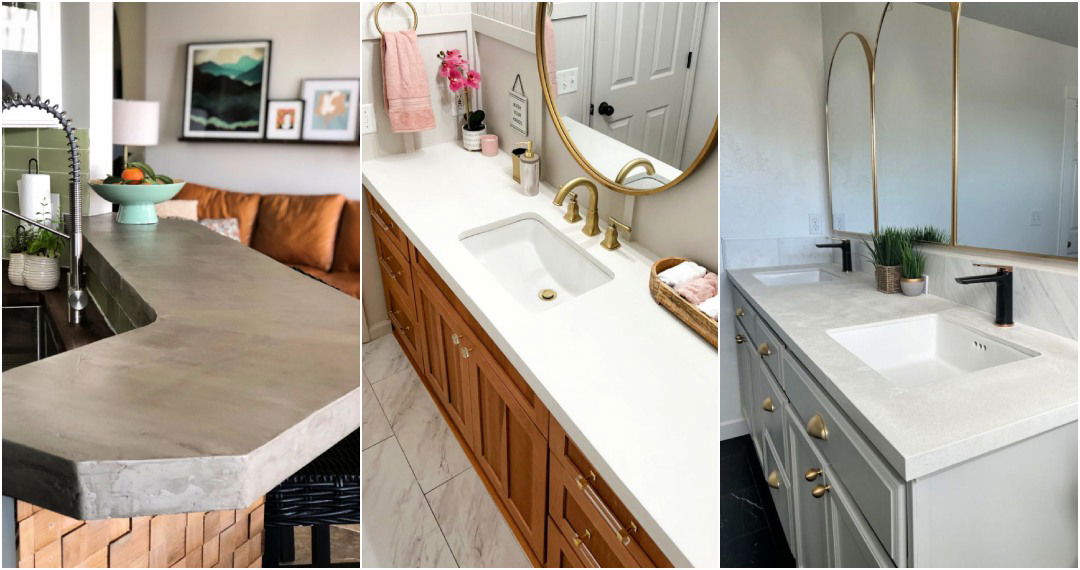
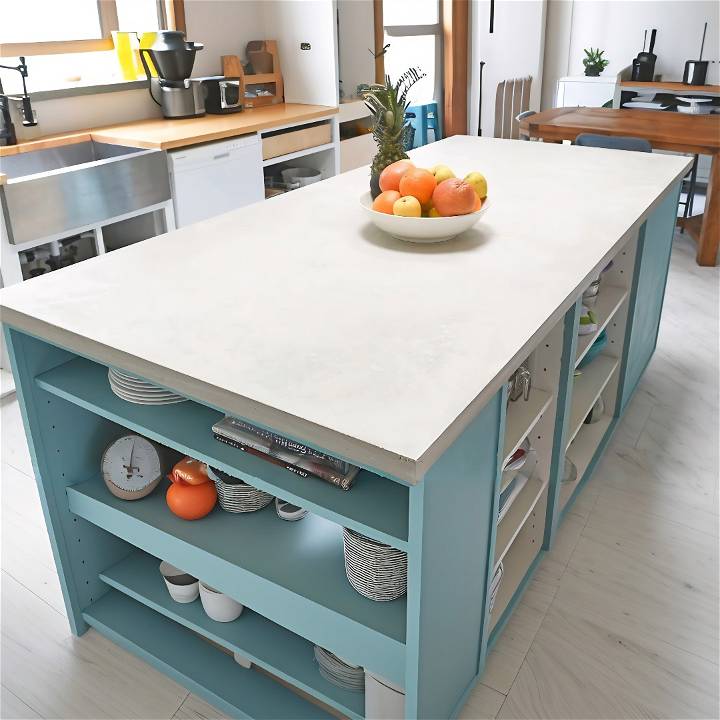
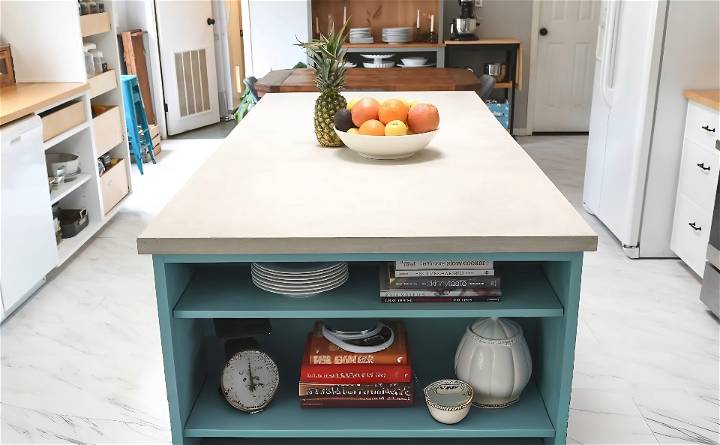
DIY concrete countertops on a budget are a stylish and cost-effective way to upgrade your kitchen. Our kitchen island was an expansive canvas awaiting transformation, a massive workspace where culinary dreams would unfold. My ambition was to endow it with a contrasting countertop that exuded rustic charm. My material of choice? Concrete. While it was my maiden voyage into the world of concrete countertops, my excitement knew no bounds, bolstered by the unique aesthetic it promised to lend my kitchen.
Choosing the Right Materials: The Foundation
Our partner for this venture was CTS, with their Rapid Set Cemental. The allure of using Cemental was its promise of speed without compromising quality. Traditional concrete applications whispered tales of 48-hour waits before form removal. Cemental, however, pledged a countertop ready for action in just a day. This was the cornerstone of our project's efficiency and success.
Prepping with Precision
Learn how to achieve flawless DIY concrete countertops with precision prepping techniques.
The Vital Role of Hardie Backer Cement Board
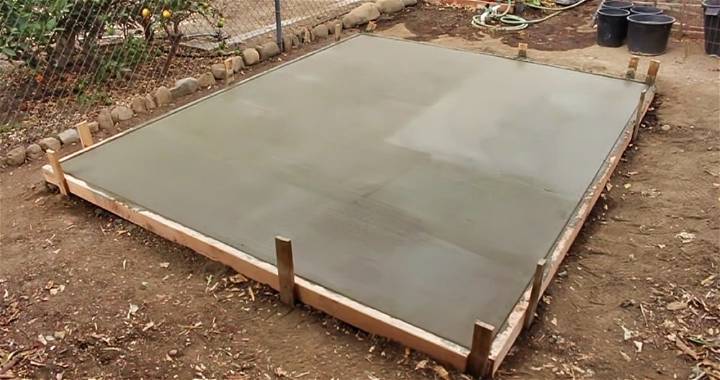
The day before the pour was dedicated to form preparation. Our choice to make a pour-in-place countertop was dictated by the sheer size of our kitchen island. Transporting a pre-made slab was out of the question. We laid down a layer of half-inch Hardie Backer cement board directly atop our existing countertops. Easy to cut and crucial for providing a solid, supportive base, this cement board was our starting line.
Silicone, applied beneath the cement board, played the dual role of adhesive and sealer, ensuring the cement board was immovable and leak-proof. This step was critical in preventing any concrete from seeping into our cabinetry below.
The Ingenious Use of Melamine for Forms
Our forms' sides were crafted from melamine shelving boards, chosen for their smooth finish which aids in easy form removal post-pour. Their rigidity and ease of customization made them the perfect boundary for our concrete mix. After meticulous measuring, cutting, and sealing with silicone, our forms stood ready: guardians of the shape our countertop would assume.
The Pour: A Symphony of Speed and Precision
Discover the art of making DIY concrete countertops with the pour: a symphony of speed and precision.
Pre-Pour Preparations
CTES Rapid Set's experts graced our project, transforming our pour into a seamless symphony. Their guidance underscored the importance of preparation. Every tool, every material, had its place, poised for action. The demeanor of our kitchen shifted, from a space of communal meals to a stage for precise construction.
Mastering the Mix
The dance began with the measuring of water, ensuring consistency across mixes by marking a vital line on our bucket. With the incorporation of set control to manage the concrete's curing time and flow control for the perfect consistency, we found our rhythm. The harmony of water, Rapid Set Cemental, and additives flowed into the forms, guided by vigilant hands and watchful eyes.
Vibrating Life into Concrete
The removal of air bubbles was a battle fought with vibrators and sanders, ensuring a smooth finish free of imperfections. This was a delicate balance - too much vibration could compromise the structure, and too little and bubbles would mar the surface.
Finishing with Finesse
Once poured, our focus shifted to finishing. A 2x4, repurposed as a screed, guided us in leveling the surface. When the form was brimming, trowels took over, caressing the concrete into submission. Rounded corners on our finishing trowel prevented gouging, allowing us to achieve a surface that whispered tales of artisans' hands at work.
Unveiling and Reflection
The moment of truth arrived with the form removal. The WD-40, our secret weapon, ensured a clean break from the melamine, revealing a countertop that was the embodiment of our vision. The next steps - sanding, sealing, curing - were completed with a blend of eagerness and patience.
In Retrospect
Reflecting on this journey, the intersection of anticipation and apprehension was where I found my resolve. The guidance of CTS Rapid Set’s experts transformed what could have been a daunting undertaking into a smooth ascent marked by learning and fulfillment. This project wasn't just about making a DIY concrete countertop; it was about crafting a space infused with intention, a space that reflects the ethos of our home.
Curing and Sealing Your DIY Concrete Countertops
After pouring and shaping your concrete countertop, the curing and sealing process is essential to ensure its longevity, strength, and resistance to stains. Let’s dive into the details:
1. Curing: The Art of Patience
Curing is the period during which the concrete gains strength and durability. Follow these steps to achieve optimal results:
- Covering: Immediately after pouring, cover the countertop with plastic sheeting or damp burlap. This prevents rapid moisture evaporation and ensures even curing.
- Moisture Retention: Keep the countertop damp for at least seven days. Spray it with water regularly or use a wet cloth. Avoid sudden temperature changes during this period.
- Temperature Control: Maintain moderate temperatures (around 50–90°F). Extreme heat or cold can affect curing. If it’s too hot, consider using shade or misting the surface.
- Patience: Yes, curing requires patience. Rushing this step can lead to cracks and weakened concrete. Trust the process and allow time for the magic to happen.
2. Sealing: Shielding Your Investment
Sealing your concrete countertop serves two crucial purposes: protection and enhancement. Here’s how to do it right:
- Wait for Full Cure: Before sealing, ensure the countertop has completed the curing process. Typically, wait at least 28 days after pouring.
- Choose the Right Sealer:
- Penetrating Sealers: These seep into the concrete, providing protection without altering the appearance. Ideal for a natural, matte finish.
- Topical Sealers: Form a protective layer on the surface. Choose from acrylic, epoxy, or polyurethane sealers based on your desired sheen (glossy, satin, or matte).
- Application:
- Clean the Surface: Remove any dust, debris, or residue.
- Apply Evenly: Use a brush, roller, or sprayer. Follow the manufacturer’s instructions.
- Multiple Coats: Apply two to three thin coats for thorough coverage.
- Edges and Undersides: Don’t forget to seal the edges and undersides to prevent moisture infiltration.
- Drying Time:
- Allow each coat to dry completely before applying the next.
- Follow the recommended drying time (usually 24 hours between coats).
- Maintenance:
- Regularly reseal your countertop (every 1–3 years) to maintain its protective barrier.
- Avoid harsh chemicals and abrasive cleaners that can damage the sealer.
Bonus Tip: Enhancing Aesthetics
- For a wet look, choose a glossy sealer.
- For a natural appearance, opt for a matte or satin finish.
Remember, proper curing and sealing transform your concrete countertop from raw material to a functional and beautiful surface. Your patience and care will pay off!
Maintenance and Care for Your Concrete Countertop
Congratulations on your beautiful DIY concrete countertop! To keep it looking pristine and functional, follow these essential maintenance and care tips:
1. Regular Cleaning: A Simple Habit
- Daily Wipe-Down: After meal prep or use, wipe the countertop with a damp cloth to remove crumbs, spills, and debris. This prevents stains and keeps the surface hygienic.
- Mild Soap Solution: For deeper cleaning, use a mild dish soap diluted in warm water. Avoid harsh chemicals that can damage the sealer.
- Avoid Abrasives: Steer clear of abrasive scrubbers or steel wool—they can scratch the surface. Opt for soft sponges or microfiber cloths.
2. Heat and Impact Protection: Handle with Care
- Hot Pots and Pans: Use trivets or heat-resistant pads to protect the countertop from direct heat. Extreme temperature changes can cause cracks.
- Avoid Heavy Impact: Concrete is sturdy, but it’s not indestructible. Don’t drop heavy objects directly onto the surface.
3. Sealing Maintenance: Keep It Fresh
- Regular Resealing: Depending on usage, reseal your countertop every 1–3 years. This maintains the protective barrier and enhances its appearance.
- Signs of Wear: If water stops beading on the surface or you notice dull spots, it’s time to reseal.
4. Stain Prevention: Act Swiftly
- Wipe Spills Promptly: Concrete is porous, so spills can leave stains. Blot up spills immediately to prevent absorption.
- Avoid Acidic Substances: Citrus juices, vinegar, and wine can etch the surface. Use cutting boards for food prep.
5. Repair Minor Issues: Nip Them in the Bud
- Hairline Cracks: Over time, tiny hairline cracks may appear. Fill them with a color-matched epoxy filler to prevent dirt accumulation.
- Chips or Nicks: If you notice small chips or nicks, use a concrete patching compound to repair them.
6. Long-Term Durability: Be Mindful
- Avoid Standing Water: Prolonged exposure to water can weaken the sealer. Wipe up spills promptly.
- Chemical Caution: Harsh chemicals (like bleach or ammonia) can harm the sealer. Stick to mild cleaning solutions.
Bonus Tip: Enjoy the Patina
- Concrete develops a unique patina over time. Embrace it as part of your countertop’s character.
Remember, your concrete countertop is an investment. With a little care, it will serve you well for years to come!
FAQs About DIY Concrete Countertops
Discover all you need to know about DIY concrete countertops in this comprehensive FAQ guide. Tips, tricks, and step-by-step instructions included!
1. How Difficult Is It to Make Concrete Countertops?
Building concrete countertops is a moderate-level DIY project. While it requires some preparation and attention to detail, even beginners can achieve quality results. The key is to follow the steps carefully and have the necessary tools and materials ready.
Certainly! Let’s expand the FAQ section for your DIY Concrete Countertops. Here are a few more common questions readers might have:
2. Can I Customize the Color of My Concrete Countertop?
Absolutely! You can add pigments to your concrete mix to achieve various colors. Earthy tones like gray, taupe, or charcoal are popular. Experiment with different pigments during the mixing stage to make a custom hue that complements your kitchen or bathroom.
3. How Do I Achieve a Smooth Finish?
- Sanding: After curing, use sandpaper (gradually finer grits) to achieve a smooth surface. Sand in circular motions to remove imperfections.
- Polishing Pads: For a professional finish, use diamond polishing pads with a variable-speed grinder. Start with coarse grits and work your way up to finer ones.
4. Can I Embed Objects in the Concrete?
Certainly! Consider adding decorative elements like glass chips, seashells, or even coins. Place them strategically before pouring the concrete. Just ensure they are well-sealed within the mix to prevent water infiltration.
5. What About Edge Profiles?
- Square Edges: Simple and modern, these are easy to achieve.
- Bullnose Edges: Rounded edges for a softer look.
- Beveled Edges: Angled edges that add dimension.
- Ogee Edges: Elegant and intricate, resembling an S-shape.
6. Is Concrete Countertop Maintenance High-Maintenance?
Not at all! With proper care, concrete countertops are quite low-maintenance. Regular cleaning, occasional resealing, and handling stains promptly are the keys to keeping them looking great.
Conclusion:
In conclusion, DIY concrete countertops are a versatile and cost-effective option for your kitchen or bathroom. With endless customization possibilities and durability, they are a trendy choice for modern homeowners looking to revamp their space.


