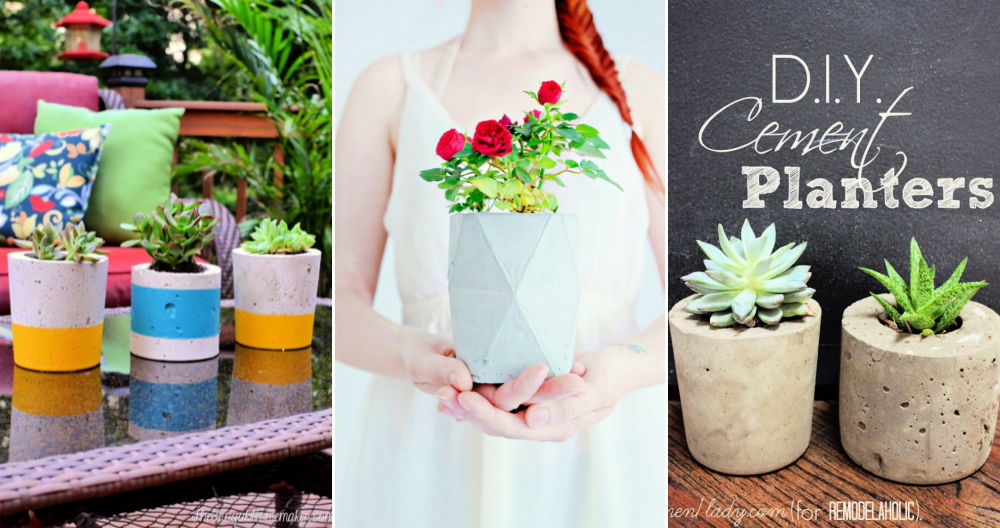
Making my own DIY concrete planters was surprisingly simple and fun. I was excited when I found out how easy it is to mix and mold the concrete on my own. With just a few materials and some patience, I build beautiful and sturdy planters for my home. This guide will walk you through each step, ensuring you have the best experience.
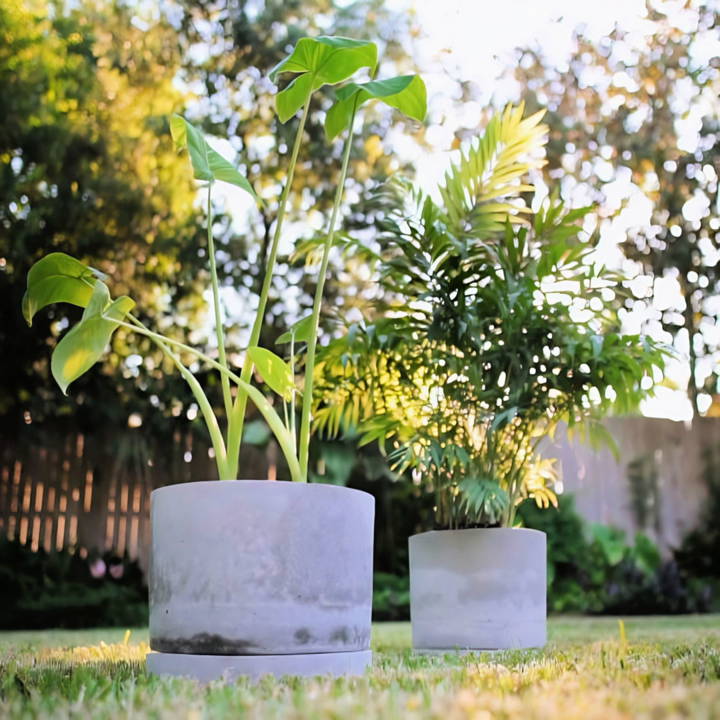
By following these instructions, you'll not only learn how to make a concrete planter, but you'll also get the chance to add a personal touch to your garden or indoor space. It's a satisfying and rewarding project that anyone can handle with a bit of effort. Trust me, making these planters will bring a sense of achievement and joy to your home decor.
Get started with these steps, as they will help you build beautiful DIY concrete planters that you can be proud of.
Materials Needed and Their Importance
Before diving into the process, gathering the right materials is crucial. Here's what I used:
- Concrete Mix: I opted for Quikrete 5000 due to its durability. The mix you choose is pivotal as it determines the sturdiness of your planter.
- 5 Gallon and 2 Gallon Plastic Buckets: These served as the outer and inner molds for my planters. Their availability and size make them perfect for this project.
- Additional 5 Gallon Bucket for Mixing: Keeping your mixing bucket separate ensures cleanliness and orderliness throughout the process.
- Concrete Trowel: This helped me smooth out the concrete mix, a must for achieving a polished look.
- Utility Knife and Mini Hacksaw: These were essential for cutting the buckets to build the molds.
- Waterproof Tape: To rebuild the buckets' original shape after cutting, ensuring a snug mold for the concrete.
- Masonry Drill Bit: Needed for making drainage holes in the bottom of the planters.
Each material plays a specific role, from making the mold to ensuring the finished product's functionality with drainage holes.
Step by Step Instructions
Learn how to make easy DIY concrete planters with our step-by-step instructions. Perfect for beginners! Build stylish, durable planters today!
Prepping the Molds
The first major step was preparing my molds. This involved marking and cutting the 5-gallon and 2-gallon buckets to ensure they could be easily disassembled later. I marked a line around each bucket – one inch from the bottom for the 2-gallon and two inches for the 5-gallon – and sawed through them. Additionally, I made a vertical cut from top to bottom to allow easy removal post-concrete setting. Sizing and smoothing these cuts ensured I could reassemble the buckets with tape, making a reliable mold for my concrete.
Mastering the Concrete Mix
Achieving the right concrete consistency was next. I aimed for a thick, oatmeal-like mix, adding water gradually to avoid it being too runny. This part was crucial; the consistency dictated how well the mix would hold in the mold and eventually, the quality of the planter's surface.
Pouring and Setting the Concrete
With my molds prepped and concrete mixed, pouring was up next. I filled the outer bucket with concrete before inserting the inner bucket, which was held in place with crafted alignment blocks. These blocks ensured the inner bucket stayed centered and didn't float up, maintaining an even thickness for the planter walls. After pouring, vibrating the molds helped remove air bubbles, contributing to a smoother finish.
The Unveiling
Patience was key; the concrete needed to cure. I waited 24 hours before demolding, starting with the tape removal. The excitement of seeing the first successful demolding is hard to capture in words. It was a moment of pure joy mixed with relief.
Finishing Touches
After demolding, I sanded down any rough edges and drilled drainage holes at the bottom. Applying a concrete sealer was an optional step I chose to skip, preferring a more natural look and feel.
Reflections and Tips
This project was more than making planters; it was about transformation. I transformed not only materials into functional garden decor but also my understanding and appreciation for the craft. Here are some additional insights I learned along the way:
- Be Prepared for Mess: Working with concrete is messy. Wear appropriate gear and work in a well-ventilated area.
- Patience Pays Off: Don't rush the curing process. Giving your planters enough time to cure means a stronger final product.
- Experiment with Sizes and Shapes: Once comfortable with the process, experimenting with different mold shapes and sizes can add variety to your garden decor.
Advanced Techniques for DIY Concrete Planters
When you're ready to take your DIY concrete planter projects to the next level, exploring advanced techniques can open up a world of creativity and customization. Here's a guide to some sophisticated methods that will help you craft unique and durable planters.
Crafting with Concrete-Countertop Mix
Consider using a concrete countertop mix for planters that resist cracking and withstand the test of time. This type of concrete is designed to cure quickly and smoothly, allowing for a professional finish. You can even add translucent stains to give your planters a custom color.
Molding Techniques
Building intricate shapes and designs requires precise molding techniques. Use sturdy materials for your molds, like melamine or laminated plywood, to ensure clean edges and detailed surfaces. Experiment with different textures by pressing objects into the wet concrete or using textured liners.
Staining and Sealing
To add a pop of color or protect your planter from the elements, staining and sealing are essential steps. Choose water-based stains for easy application and cleanup. Sealers not only protect your planter from moisture and stains but can also enhance the color and give a glossy or matte finish.
Incorporating Decorative Elements
Embedding decorative items such as tiles, glass pieces, or stones into your concrete planters can build a mosaic effect. Plan your design beforehand and carefully place the items on the wet concrete surface, pressing them in slightly to secure them.
Advanced Curing Methods
Proper curing is crucial for the durability of your planters. Cover your freshly poured concrete with plastic sheeting to retain moisture and prevent cracks during the curing process. For faster curing, you can use a heat lamp or place your project in a warm, dry area.
Mastering these advanced techniques will let you build functional and artistic planters. Always wear gloves and safety glasses when working with concrete.
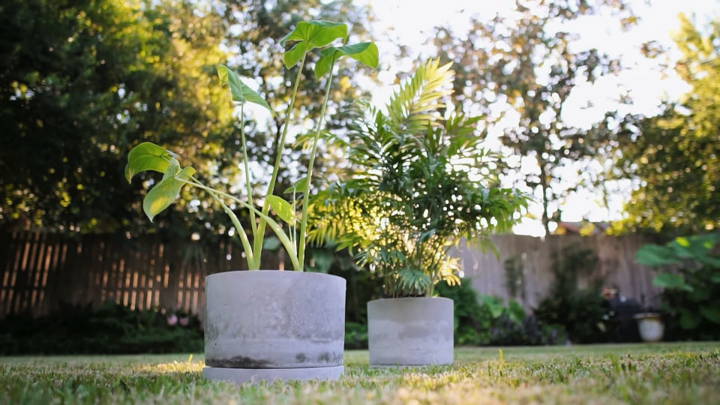
Plant Pairing Suggestions for Concrete Planters
Choosing the right plants for your concrete planters is essential for the health and beauty of your garden. Concrete planters are versatile, but they have unique characteristics that make them suitable for certain types of plants. Here's a guide to help you select the best companions for your concrete planters.
Understanding Concrete's Qualities
Concrete is a durable material that provides excellent protection against the elements. However, it's also porous, which means it can draw moisture away from the soil. This trait makes concrete planters a good match for plants that prefer dry conditions.
Best Plant Choices
- Succulents and Cacti: These are the go-to plants for concrete planters because they thrive in well-draining soil and require little water. Their varied shapes and sizes also add an architectural element to your space.
- Ferns: If your planter is in a shaded area, ferns can be a great choice. They enjoy the cooler temperatures and consistent moisture that concrete can provide, as long as there's proper drainage.
- Herbs: Many herbs, like rosemary and thyme, prefer drier soil and will do well in concrete planters. They're also practical, providing fresh flavors for your kitchen.
- Flowering Plants: For a splash of color, consider plants like petunias, marigolds, or geraniums. They can handle the sun's heat reflected by concrete and brighten up your outdoor space.
Considerations for Plant Health
- Drainage: Ensure your concrete planter has a drainage hole to prevent water from pooling at the bottom. This will protect the roots from rot and keep your plants healthy.
- Soil: Use a well-draining potting mix to complement the concrete's properties. Adding pebbles or gravel at the bottom can improve drainage further.
- Sunlight: Pay attention to the amount of sunlight your planter will get. Choose plants that match the light conditions, whether it's full sun, partial shade, or full shade.
- Insulation: In colder climates, consider insulating your planters during the winter months to protect the roots from freezing.
Following these tips, you'll have a beautiful, sustainable garden in your concrete planters.
Maintenance and Durability of Concrete Planters
Concrete planters are a popular choice for both indoor and outdoor gardening due to their robustness and stylish appearance. To ensure they last for many years, it's important to understand how to maintain and preserve them effectively. Here's a straightforward guide to keeping your concrete planters in great shape.
Regular Sealing
One of the key steps in maintaining concrete planters is to apply a sealer. Sealers protect the concrete from moisture, which can lead to cracking over time. It's recommended to seal your planters annually to maintain their durability and appearance.
Handling Cracks and Chips
Despite their sturdiness, concrete planters can develop cracks or chips, especially if they experience frequent temperature changes or accidental impacts. Inspect your planters regularly for any signs of damage. Small cracks can be repaired with a concrete patching compound to prevent further deterioration.
Cleaning Routine
Keeping your planters clean is essential for both aesthetic and health reasons. Dirt and debris can accumulate on the surface, which can be removed with a gentle scrub using a brush and mild detergent. Rinse thoroughly with water after cleaning.
Pest and Rot Resistance
Concrete planters have the advantage of being resistant to pests and rot, making them a hassle-free option for garden enthusiasts. This natural resistance contributes to their longevity and makes them a practical choice for any gardening project.
Weather Considerations
Concrete planters provide insulation for plant roots, which is beneficial during extreme temperatures. However, in very cold climates, consider insulating your planters or moving them to a sheltered area to prevent freezing and cracking.
Follow these simple tips to keep your concrete planters durable and attractive. Regular care prolongs their life and keeps your garden looking great.
FAQs About DIY Concrete Planters
Get expert answers to faqs about DIY concrete planters. Learn tips, materials, and techniques for crafting perfect planters at home.
For silicone molds, spray the inside with non-stick cooking spray. If you’re using recycled plastic containers, tape over any holes with duct tape and then spray the insides of the larger container and the outside of the smaller container with the cooking spray. Ensure there’s about a half-inch of space between the two containers.
A good concrete mix for planters is one that is strong yet lightweight. A mix of one part Portland cement, one part vermiculite (or perlite), and two parts sand or fine pebbles is recommended. This builds a durable planter that's not too heavy to move.
Mix the Portland cement, aggregate, and water in a bucket until you achieve a smooth consistency, similar to peanut butter. Pour the mixture into the outer mold until it’s about halfway full, then press the smaller mold inside, making sure it’s centered and there’s an even gap all around. Add more concrete if necessary to fill the gap, then tap the sides to remove air bubbles.
The curing time can vary depending on the size of the planter and the humidity levels. Generally, you should wait at least 24 hours before removing the planter from the mold. For a complete cure, it’s best to wait up to a week. Keep the planter moist by covering it with plastic or damp cloth during this time.
Yes, you can add color to your concrete planters to make them more personalized and vibrant. Here's how you can do it:
Choose a pigment: Concrete pigments come in powder form and are available in a variety of colors. Select a pigment that is specifically designed for use with concrete.
Mix the pigment: Before adding water to your concrete mix, blend the dry pigment with the dry concrete to ensure an even color distribution.
Test the color: To ensure you're happy with the hue, it's a good idea to test the colored concrete mix on a small sample before making your entire planter.
Adjust as needed: If the color is too light, add more pigment; if it's too dark, add more concrete mix.
Mix thoroughly: Once you've achieved the desired color, slowly add water and mix thoroughly to ensure the pigment is evenly distributed throughout the concrete.
Conclusion
By making your own DIY concrete planters, you craft something unique and durable for your home. Enjoy the process, and happy crafting!


