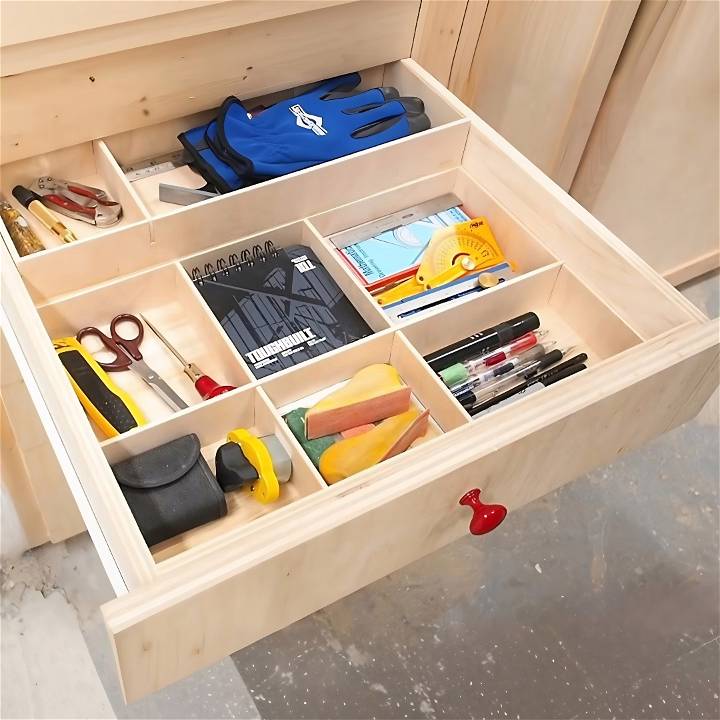
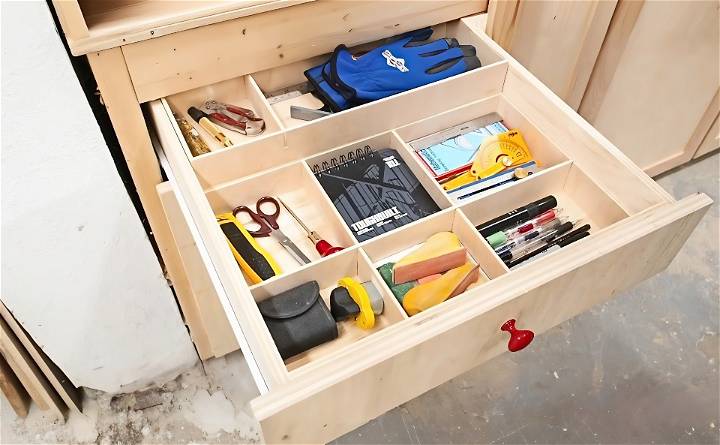
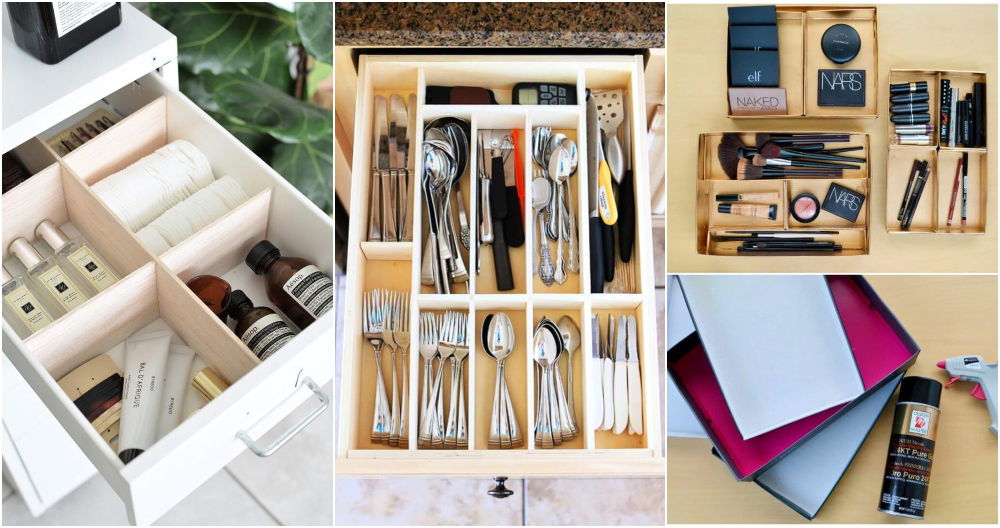
As a DIY enthusiast, I've always been passionate about making efficient and effective storage solutions. My recent project involved transforming a chaotic drawer in my workshop into an organized masterpiece. I utilized simple materials to DIY drawer dividers along with an innovative sliding tray, maximizing space and accessibility. Here's how I accomplished it, following a step-by-step guide that was inspired by a mixture of personal experience and insights from various DIY resources, including an informative YouTube video by DIY Montreal.

Evaluate and Empty the Drawer
First things first, I removed the drawer from its cabinet. It was crucial to start with a clean slate, so I emptied out the contents, categorizing items based on their sizes and types. This step wasn't just about decluttering; it was about envisioning the drawer's potential to be more than just a catch-all space.
Materials Needed and Their Importance
For this project, I used:
- Quarter-inch plywood, chosen for its sturdiness yet lightweight nature, perfect for making dividers without adding excessive weight.
- A magnetic tool holder to keep metal tools organized and easily accessible.
- A table saw and miter gauge for precise cuts, vital for ensuring the dividers perfectly fit into the drawer.
- Masking tape, to group the strips of plywood for uniform cutting of notches.
- Wood glue and brad nails for assembling the sliding tray, providing a balance between sturdiness and ease of repositioning.
Step by Step Instructions
Learn how to build your own DIY drawer dividers with our step-by-step instructions. Keep your drawers organized and clutter-free with this easy DIY project.
Step 1: Cutting the Plywood
With the drawer's dimensions in mind, I cut the plywood into 2-inch strips. These would serve as the bones of my dividers, making a grid-like structure. Each piece was carefully measured and cut to fit the drawer's width and length, ensuring a snug fit that utilized the drawer's full depth without any wasted space.
Step 2: Building the Dividers
Notches needed to be meticulously measured and cut into the strips. I grouped and taped strips that would run parallel and perpendicular to each other, marking where the notches should be. Ensuring precision here was key for a seamless interlocking fit. I opted for a hands-on approach with a table saw, prioritizing safety and accuracy to avoid any mishaps.
Step 3: Assembling the Grid
The assembly was somewhat like solving a puzzle. Interlocking the notched strips created a grid that formed the foundation of my new drawer organization system. This structure wasn't just for aesthetics; it allowed for customizable compartments that could evolve with my needs.
Step 4: Building the Sliding Tray
Here's where the magic happened. To capitalize on unused vertical space, I crafted a sliding tray. This feature was a game-changer, doubling the usable area of the drawer. Using the previously cut plywood, I assembled a shallow tray with dividers, mirroring the bottom layout. The tray slides smoothly over the lower grid, providing easy access to both levels without hindering the visibility or accessibility of the items below.
Step 5: Finishing Touches and Organization
After ensuring all elements were accurately assembled and the sliding tray operated smoothly, it was time to repopulate the drawer. Organizing tools and materials into their designated sections was satisfying. The magnetic tool holder affixed to the side of the workshop proved to be incredibly handy for keeping frequently used tools within reach, further optimizing my workspace.
The Results
In retrospect, this project didn't just organize a drawer; it revolutionized the way I stored my tools and materials. No longer am I wasting time rummaging through a messy drawer. Each item has its place, and the added sliding tray makes use of every inch of space efficiently.
Why DIY Drawer Dividers?
Building your own drawer dividers offers practical benefits that go beyond mere organization. Let's explore why opting for DIY dividers is a smart choice:
1. Cost Savings:
- Affordability: DIY dividers are budget-friendly unlike store-bought options, which can be pricey, making your own dividers using materials like foam core or sturdy cardboard costs significantly less.
- Resourcefulness: By repurposing materials you already have (such as old boxes or packaging), you contribute to sustainability and reduce waste.
2. Customization:
- Tailored Fit: DIY dividers allow precise customization. You can measure your drawer dimensions and create dividers that fit snugly, maximizing available space.
- Adaptability: As your needs change (e.g., switching from office supplies to kitchen utensils), you can easily adjust or create new dividers without breaking the bank.
3. Creativity and Personalization:
- Unleash Your Creativity: Designing your own dividers lets you express your style. Add decorative contact paper or fabric to match your room decor.
- Personal Touch: DIY dividers carry a sense of accomplishment. Each time you open the drawer, you'll appreciate the effort you put into customizing it.
4. Environmental Impact:
- Reduce Waste: DIY dividers promote sustainability by repurposing existing materials. You contribute to minimizing landfill waste.
- Eco-Friendly Choices: Opt for eco-conscious materials like recycled cardboard or biodegradable foam core.
5. Empowerment and Skill Building:
- Learn New Skills: Crafting dividers enhances your DIY skills. You'll gain confidence in measuring, cutting, and assembling.
- Problem-Solving: Overcoming challenges during the divider-making process empowers you to find creative solutions.
Remember, DIY drawer dividers aren't just about tidying up; they're an opportunity to infuse your personality into everyday organization. So grab your materials, unleash your creativity, and transform those messy drawers into functional, customized spaces!

Tips for Effective Drawer Organization
Keeping your drawers organized is essential for a clutter-free and efficient lifestyle. Whether it's your kitchen, office, or bedroom drawers, these practical tips will help you make the most of your space:
1. Categorize and Prioritize:
- Group Similar Items: Start by sorting items within the drawer. Group similar items together (e.g., utensils, stationery, socks).
- Prioritize Frequently Used Items: Place frequently used items near the front for easy access.
2. Measure and Plan:
- Measure Your Drawer: Before making dividers, measure the drawer's width, depth, and height. This ensures a perfect fit.
- Sketch a Layout: Build a simple sketch of how you want to arrange dividers. Consider different sections for various items.
3. Choose the Right Dividers:
- Customize Dividers: DIY dividers can be made from foam core, cardboard, or even repurposed materials. Ensure they fit snugly.
- Adjustable Dividers: Look for adjustable dividers that allow flexibility as your storage needs change.
4. Maximize Vertical Space:
- Stack Vertically: Stack items vertically to utilize drawer height efficiently. Use dividers to separate stacks.
- Fold Clothing Vertically: KonMari-style folding saves space and keeps clothes visible.
5. Label Everything:
- Label Dividers: Label each section to avoid confusion. Use adhesive labels or a label maker.
- Clear Labels: Clear labels work well for transparent drawers.
6. Declutter Regularly:
- Monthly Check-In: Set a reminder to declutter your drawers monthly. Remove items you no longer need.
- One In, One Out Rule: When adding new items, remove something else to maintain balance.
7. Maintain Order:
- Return Items to Their Spots: After use, put items back in their designated sections.
- Weekly Tidy-Up: Dedicate a few minutes each week to tidy your drawers.
Remember, effective drawer organization isn't just about aesthetics; it streamlines your daily routines and reduces stress. So roll up your sleeves, create those dividers, and transform your drawers into functional, harmonious spaces!
FAQs About DIY Drawer Dividers
Learn everything you need to know about DIY drawer dividers in this comprehensive FAQ guide. Find answers to all your questions here!
1. What Are DIY Drawer Dividers?
DIY drawer dividers are simple tools that help organize the chaos lurking inside your drawers. They're like friendly little fences that keep socks from mingling with office supplies or utensils from staging a rebellion. Crafted from materials like cardboard or foam core, these dividers create tidy compartments within your drawers.
2. Why Should I Make My Own Dividers?
- Cost-Effective: DIY dividers won't break the bank. Unlike store-bought versions, they're budget-friendly.
- Custom Fit: Tailor dividers to your drawer's exact dimensions. No more awkward gaps or wasted space.
- Personal Touch: Design dividers that match your style. Add decorative paper or labels for that extra flair.
3. Can I Use Repurposed Materials?
Absolutely! Old cereal boxes, sturdy packaging, or even that forgotten board game box can become your dividers. Sustainability bonus points!
4. How Often Should I Declutter My Drawers?
- Monthly Check-In: Set a reminder to declutter. Remove items you no longer need.
- One In, One Out: When adding new stuff, remove something else. Balance is key.
Remember, DIY dividers transform chaos into order. So grab that cardboard, channel your inner organizer, and let those drawers breathe a sigh of relief!
Personal Insights and Advice
Throughout this project, patience and meticulous planning were my greatest allies. Rushing through measurements and cuts would have jeopardized the integrity of the dividers and the sliding tray. My advice? Take your time and double-check your calculations. Embrace the process, and don't be afraid to customize the steps to fit your specific drawer dimensions and storage needs.
In the end, the satisfaction of transforming chaos into order using my own hands and a few simple materials was unparalleled. This DIY project not only enhanced my workshop's functionality but also sparked further creativity for future organizational endeavors.


