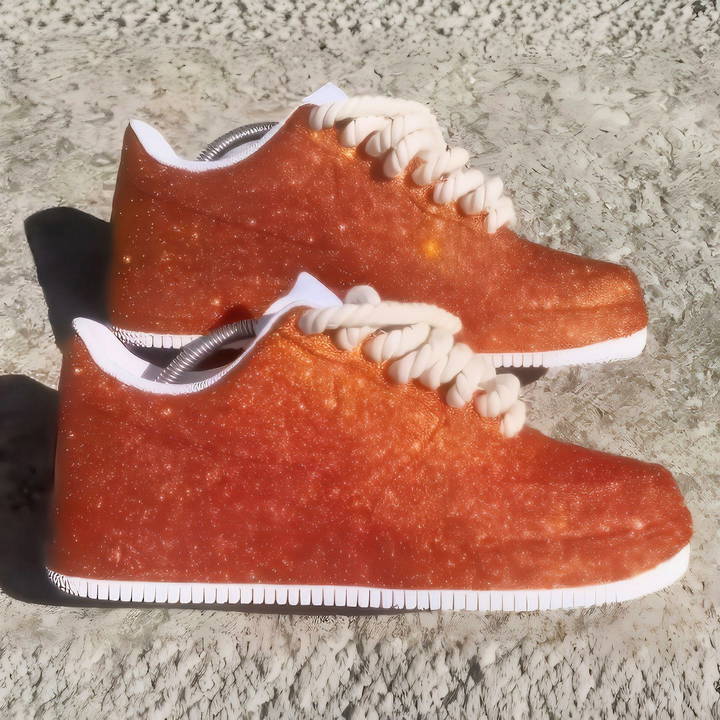
Do you want to add a touch of glam to your shoes, turning them into dazzling pieces that make a statement? Follow this guide to make your own DIY glitter shoes from start to finish, with tips on keeping the glitter smooth and durable. This tutorial covers everything you need to make high-quality, durable glitter shoes that sparkle wherever you go.
Materials You'll Need
Before starting, gather all the necessary materials to make the process smooth and enjoyable:
- Shoes: Any pair you want to glam up (white canvas or leather work best).
- Mod Podge (Glossy): Acts as both glue and sealer, essential for holding the glitter in place and providing a shiny finish.
- Fine Glitter: Choose a color and glitter grade that suits your style. Fine glitter works best for a smooth, even coat.
- Flat Bristle Brush: Helps apply Mod Podge evenly.
- Acetone: Used to prep the surface for better adhesion.
- Painter's Tape: Protects areas you don't want to glitter.
- Clear Sealer Spray (like Krylon): Adds an extra layer of protection to keep the glitter from flaking.
- Cotton Craft Cord (Optional for Glittered Laces): Customizable laces can add a cohesive look.
- Scissors: To trim laces and tape as needed.
- Small Bowl: Useful for mixing Mod Podge with water if necessary.
- Old Newspaper or Plastic Sheeting: To protect your workspace from glitter and glue.
Step by Step Instructions
Learn how to make dazzling DIY glitter shoes with our step-by-step guide. Perfect your crafting skills and shine in custom style!
Step 1: Prepare Your Workspace and Shoes
Preparation is key for achieving a professional look with DIY glitter shoes. Follow these steps to ensure your shoes are ready for glittering.
Set Up Your Workspace
Lay down newspaper or plastic sheeting to catch any mess. Glitter can be challenging to clean up, so this step will save you a lot of hassle later.
Prepare the Shoes
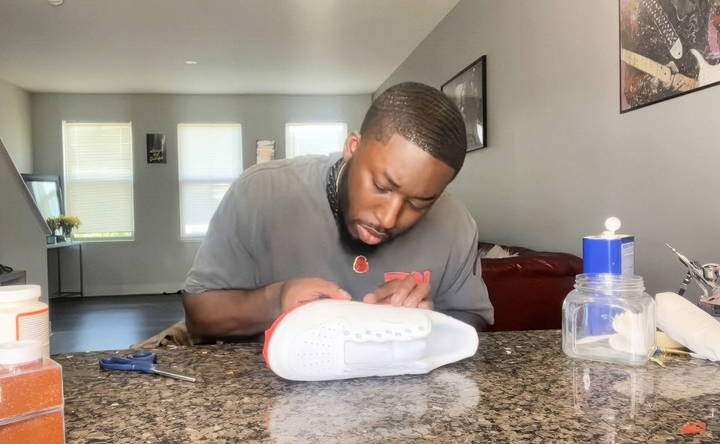
To ensure the glitter adheres well, prepare the shoes by wiping them down with acetone. This step is especially important for leather or synthetic shoes as it removes oils and residues that might prevent the Mod Podge from sticking properly.
- Apply acetone to a cotton pad.
- Wipe the shoes thoroughly, focusing on any glossy areas.
- Allow the shoes to dry completely.
Tape Off Areas You Don't Want to Glitter
Use painter's tape to cover parts of the shoes that should remain glitter-free, like the soles or any logos. This will help you achieve clean, professional lines.
Step 2: Apply the Base Glitter Layer
Now comes the fun part – applying the first layer of glitter!
Prepare the Mod Podge and Glitter
Pour a small amount of Mod Podge into a bowl. Fine glitter works best because it gives a smoother finish and better coverage.
Apply the Mod Podge and Glitter
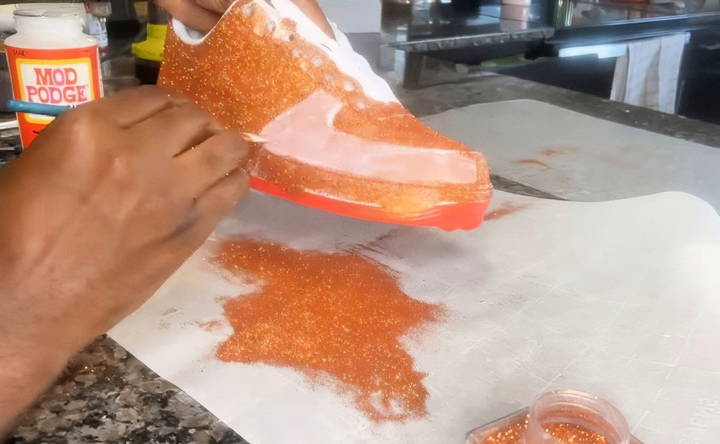
- Using the flat bristle brush, apply a layer of Mod Podge to a small section of the shoe. Working in sections is crucial as Mod Podge dries quickly.
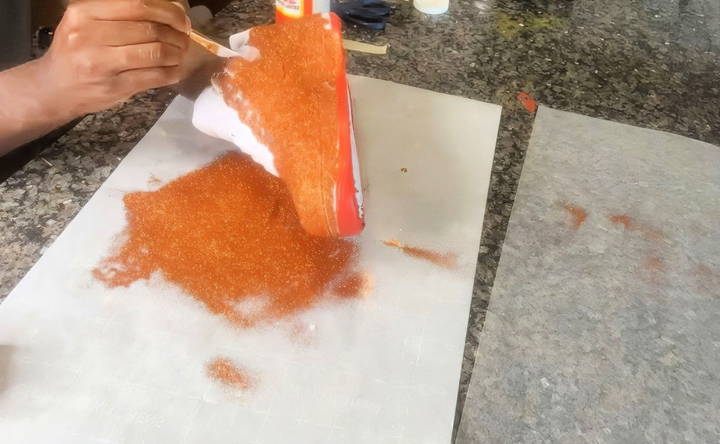
- Generously sprinkle glitter over the Mod Podge. You may want to hold the shoe over a tray or paper to catch excess glitter for easy reuse.
- Shake off any excess glitter and let the first coat dry for about 15-20 minutes.
Step 3: Add Additional Coats for Full Coverage
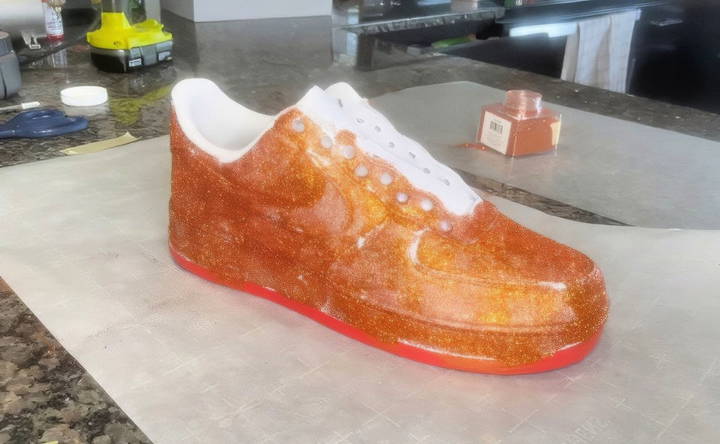
To make your glitter shoes truly shine, you'll need at least one or two more coats of glitter. This builds up the shine and ensures no bare patches are visible.
- Apply another layer of Mod Podge over the first coat of glitter, working one section at a time.
- Sprinkle glitter again, focusing on areas that may appear sparse or patchy.
- Allow each layer to dry for 15-20 minutes before applying the next.
For extra sparkle, consider mixing a little glitter directly into the Mod Podge for the top layer. This technique adds depth to the shine and ensures a thorough, even coating of glitter across the shoe surface.
Step 4: Sealing for Durability and Shine
Sealing is crucial for preventing the glitter from flaking off. A good seal also protects your shoes from wear, weather, and movement.
Thin Down Mod Podge for the Final Seal
For the top coat, mix a small amount of water into the Mod Podge to make a thinner consistency. This helps the final coat go on smoothly without disrupting the glitter underneath.
- Dip your brush into the thinned Mod Podge.
- Apply a thin layer over the entire shoe, being careful not to brush too hard, as this can displace the glitter.
- Allow the shoes to dry completely, ideally for 24 hours.
Use a Clear Sealer Spray
After the final coat of Mod Podge has dried, apply a clear sealer spray like Krylon. This spray makes a waterproof, durable finish that further prevents the glitter from cracking or flaking.
- Hold the spray can about 8-10 inches away from the shoes.
- Apply an even coat over the glittered areas, making sure not to oversaturate.
- Let the shoes dry according to the sealer's instructions.
Step 5: Glittered Shoelaces (Optional)
If you want to go the extra mile, consider making matching glittered shoelaces for a cohesive look.
Choose the Right Shoelace Material
Use a cotton craft cord, which is dyeable and can hold Mod Podge and glitter well. Cut the cord to the desired length, typically 2-3 inches longer than the original shoelaces to account for any shrinkage from gluing.
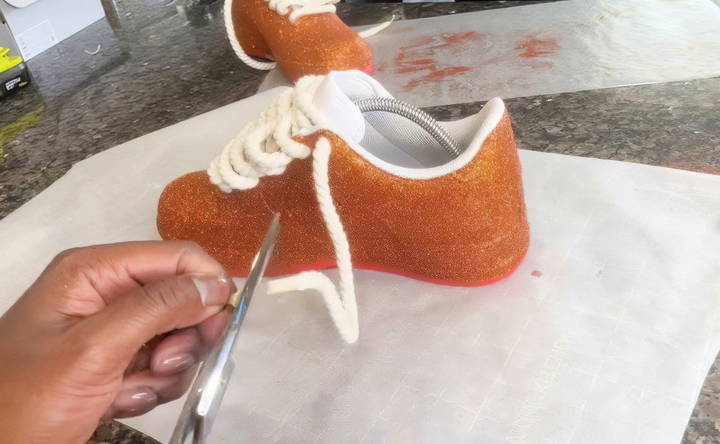
Apply Mod Podge and Glitter to Laces
- Dip or brush Mod Podge along the length of the laces.
- Sprinkle glitter evenly over the Mod Podge.
- Let the laces dry for at least 20 minutes.
Seal the Glitter on the Laces
After the glitter has dried, add a final layer of Mod Podge or clear sealer spray to keep the glitter intact during use. This step is essential for ensuring the laces remain durable and flexible.
Step 6: Finishing Touches and Final Tips
Once your glitter has dried and your shoes are sealed, it's time for some finishing touches.
Removing Tape
Carefully peel off the painter's tape from the areas you didn't glitter. This step can make a huge difference in achieving a polished, professional look.
Cleaning Up Loose Glitter
Use a soft brush to gently brush away any loose glitter. You may also want to apply a quick wipe with a damp cloth to remove stray glitter specks from the non-glittered areas.
Tips for Maintenance and Care
To keep your glitter shoes looking their best, follow these care tips:
- Avoid Rough Surfaces: Walking on rough surfaces can cause the glitter to wear down faster.
- Spot Clean Only: If they get dirty, use a damp cloth to gently spot-clean the glittered areas. Avoid soaking the shoes, as this may damage the glitter finish.
- Store Properly: Store your shoes in a cool, dry place away from direct sunlight to prevent discoloration.
Conclusion
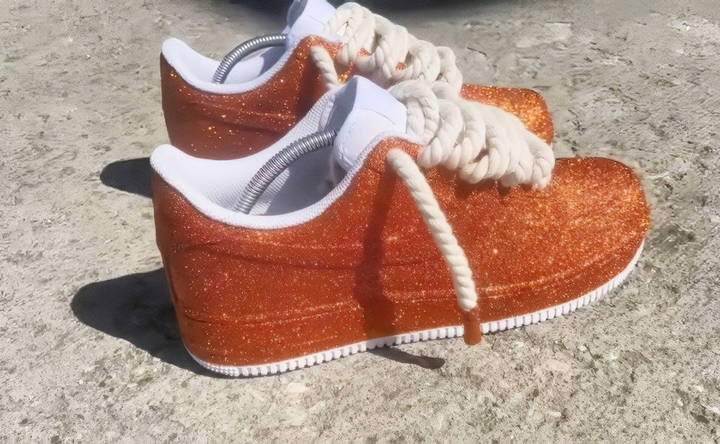
With these steps, you can make your own dazzling glitter shoes that will stand out and last. This DIY project is not only fun but also allows you to customize your shoes for special events or add some sparkle to your everyday style. Whether you're gearing up for prom, or a wedding, or simply want a unique fashion statement, these glitter shoes will be sure to impress. Now, grab your materials, and let your creativity shine!
FAQs About DIY Glitter Shoes
Discover the essentials and get answers to common questions about DIY glitter shoes in our comprehensive FAQ guide. Transform your footwear now!
To avoid cracking, apply Mod Podge in thin, even layers, allowing each layer to fully dry (around 15 minutes) before applying the next. For extra protection, lightly sand high-crease areas, like the toe box, before applying the Mod Podge and glitter.
Regular glue often cracks after just one wear. Mod Podge Glossy Lustre is recommended for better flexibility and shine. Alternatively, Art Glitter Glue can be used, especially for beginners, as it provides a smoother application without cracking.
A small drill with a bit from an art tools kit is ideal, especially for customizing lace holes. This will make precise openings without damaging the shoe. Many users recommend a size that matches the original lace hole diameter.
For the final top coat, thin down Mod Podge with a little water for a smoother application. Start with a small amount (around a 4:1 Mod Podge to water ratio), adding water gradually until the consistency is slightly runnier than standard Mod Podge.
Yes, this method works well on fabric shoes and even adheres slightly better to them than to leather or synthetic materials. Fabric surfaces hold the glitter well and resist cracking better than some synthetic surfaces.
Fine glitter is recommended for a smoother, more uniform finish. It also adheres more evenly to the Mod Podge, making a shinier effect without clumping.
The clear sealer should be applied after the final Mod Podge layer has dried completely. This finishing coat helps lock in the glitter and adds an extra layer of durability.
Yes, but note that glittered shoes, especially in high-movement areas, are more prone to cracking with frequent use. For light running or special events, they should hold up well if properly sealed.
Glitter can be messy and difficult to clean up. Lay down plastic sheeting or newspaper before starting, and consider using a tray to catch excess glitter for reuse.


