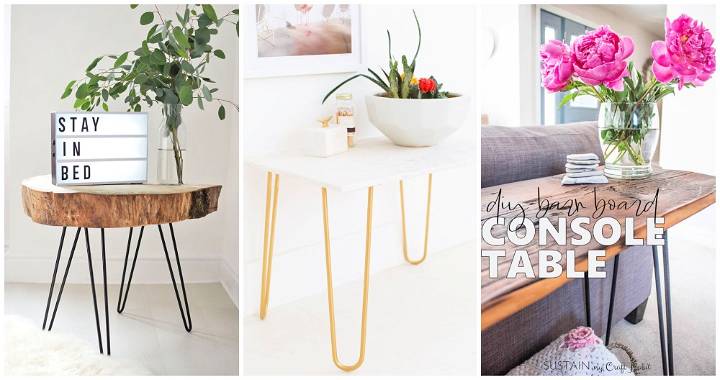
Making your own DIY hairpin legs is not only simple but also adds a personal touch to any furniture. When I first tried this, I was amazed at how quickly it came together. This guide will walk you through every step, and you'll have a finished product you can proudly use.
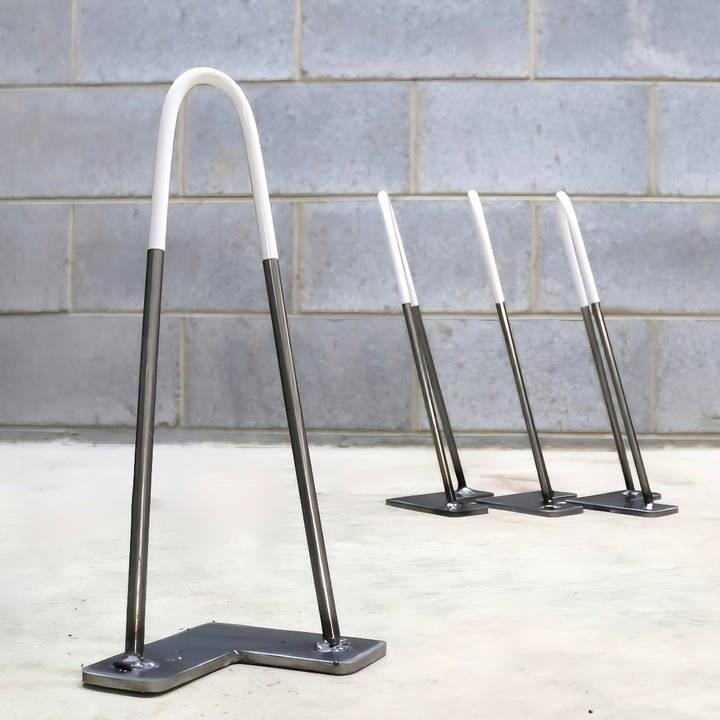
With the right materials and clear instructions, you'll see how rewarding it is to make DIY hairpin legs yourself. Let's get started, and soon, you'll have stylish, custom-made legs for your furniture.
Materials Needed and Their Purpose
- 3/8 Inch Steel Rod: The core material for the legs, providing strength and durability.
- Mineral Spirits: Used for cleaning the mill scale and gunk off the steel rods.
- Portable Bandsaw or Cut-off Wheel: For cutting the steel rod to the desired length.
- Welding Tools: Essential for attaching the legs to the base plates.
- Drill Press (optional, but recommended): For making precise holes in the base plates for screws.
- Cut-off Wheel and Angle Grinder: For shaping the base plates.
- Sandpaper: To smooth out any rough edges on the metal before painting.
- Paint and Paste Wax: For finishing the legs and protecting them against rust.
Step by Step Instructions
Learn to make stylish furniture with our step-by-step instructions on DIY hairpin legs—detailed steps from cutting to attaching the legs to your table.
Step 1: Cutting the Steel Rod
Initially, I measured and cut the 3/8 inch steel rod for the legs. Using a portable bandsaw greatly expedited this process, though a cut-off wheel in an angle grinder can also do the job.
Step 2: Cleaning the Rods
Next, I used mineral spirits to diligently clean off all the dirt and mill scale from the rods, ensuring a clean surface for welding and bending.
Step 3: Building the Bending Jig
To bend the rods, I constructed a simple yet effective jig on a workbench, using bolts, steel plates, and a socket. This setup allowed me to bend the steel rods without applying heat.
Step 4: Bending the Steel Rods
With my jig in place, I began bending the rods, aiming for a 15-degree angle for a more dramatic look than standard hairpin legs. I learned quickly that overbending was necessary to account for the steel's spring back to the desired shape.
Step 5: Making the Base Plates
After cutting the base plates from 1/8 inch hot rolled steel plate, I used the drill press to make holes for screws. This ensured that the legs could be securely attached to the tabletop.
Step 6: Welding
Welding was, by far, the most challenging yet rewarding part. I carefully welded the legs to the base plates, ensuring each leg was positioned at the correct angle and the welds were solid.
Step 7: Finishing Touches
After smoothing the welds, I applied a coat of paint and paste wax to the legs. The paint added a beautiful aesthetic, while the wax protected the metal from rusting.
Step 8: Attaching the Legs to the Table
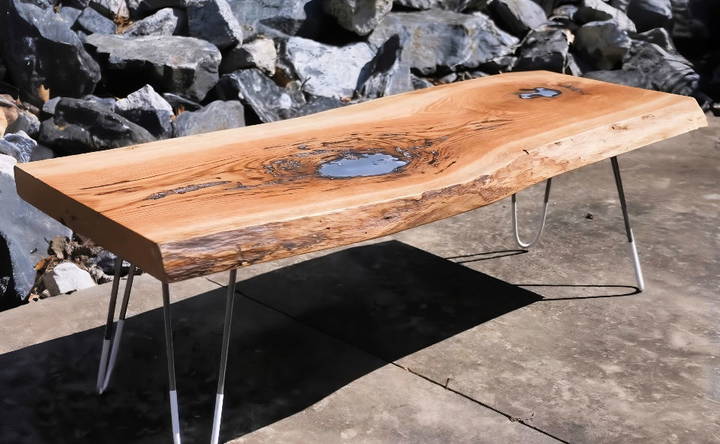
Finally, I drilled holes in the underside of my tabletop, securing the legs in place with screws. This step brought the project full circle, from individual steel rods to an integral part of a functional piece of furniture.
Additional Tips
- Take Your Time: Bending and welding require patience. Don't rush the process to ensure the best results.
- Practice Welding: If you're new to welding, practice on some scrap metal first to get the hang of it before moving on to your actual project.
- Protect Your Workspace: Metalwork can be messy. Cover your work area to protect it from sparks and debris.
Customization Tips and Tricks
Customizing DIY hairpin legs can turn simple furniture into a stylish statement. Here are easy tips to help you personalize your hairpin legs practically.
Choose Your Finish
- Paint: A quick and effective way to add color. Use spray paint for a smooth finish, and choose from matte, glossy, or metallic effects.
- Powder Coating: For a more durable finish, consider powder coating. It's resistant to chipping and comes in a variety of colors.
Add Feet
- Rubber Tips: Slip rubber tips onto the ends of the legs to prevent scratching floors and to add a pop of color.
- Felt Pads: Stick felt pads to the bottom for a quieter and softer touch.
Adjust the Height
- Cut to Size: If you need your table or chair to be a specific height, cut the legs to size using a metal saw. Remember to file down any sharp edges after cutting.
- Threaded Feet: Install adjustable feet to fine-tune the height and ensure stability on uneven surfaces.
Make Patterns
- Tape Designs: Use painter's tape to make geometric patterns or stripes on the legs before painting.
- Stencils: Apply stencils to add intricate designs or even numbers and letters for a personalized touch.
Mix Materials
- Wood Accents: Attach wooden feet or tops to the legs for a mixed-material look.
- Metal Details: Add brass or copper sleeves to the bottom or top of the legs for a touch of elegance.
Protective Coatings
- Clear Sealant: Apply a clear sealant over painted legs to protect the finish from wear and tear.
- Wax: Rubbing wax on bare metal can prevent rust and add a subtle sheen.
By following these tips, you can easily customize your hairpin legs to match your decor and personal taste.
Troubleshooting Common Issues
When working with DIY hairpin legs, you might encounter a few hiccups along the way. Here's a helpful guide to troubleshooting common issues, ensuring your project stays on track.
Wobbly Legs
- Solution: Check if the surface where the legs are attached is even. If not, adjust the legs or add shims to level out the furniture. Ensure all screws are tightened properly.
Rust Formation
- Solution: Apply a coat of clear lacquer or use stainless steel legs to prevent rust. If rust appears, gently sand the area and apply a rust-inhibitor before repainting.
Scratches on Floors
- Solution: Attach felt pads or rubber tips to the bottom of the legs. This will protect your floors and reduce noise when moving furniture.
Difficulty Attaching Legs
- Solution: Pre-drill holes for the screws to make the process easier. If the wood splits, use a smaller drill bit or add wood glue to reinforce the area.
Paint Chipping
- Solution: Use a primer before painting and finish with a sealant to protect the paint. For high-traffic items, consider powder coating for a more durable finish.
Legs Not Aligning
- Solution: Measure and mark the attachment points carefully before drilling. Use a template to ensure consistency for multiple legs.
Screws Not Holding
- Solution: Use screws that are the appropriate length for your project. If they're too short, they won't grip properly; if too long, they can damage the leg or surface.
Bending Under Weight
- Solution: Ensure the thickness and material of the legs are suitable for the weight of the furniture. Reinforce with additional legs if necessary.
Anticipate common issues and know how to fix them to handle challenges in your DIY hairpin leg project.
FAQs About DIY Hairpin Legs
Discover answers to common questions about DIY Hairpin Legs, including materials, installation tips, and design ideas.
Hairpin legs are a type of furniture leg made from solid metal rods bent into a hairpin shape. They are popular because they offer a sleek, minimalist look that can complement a variety of design styles. Additionally, they are sturdy and easy to install, making them a great choice for DIY enthusiasts looking to make custom furniture pieces.
The size of the hairpin legs you need depends on the height you want your finished piece to be. For example, if you’re making a standard coffee table, you might choose 16-inch legs, while a dining table would typically require 28 to 30-inch legs. Measure the thickness of your tabletop and subtract that from the desired final height to determine the length of the legs you should purchase.
Yes, you can make hairpin legs yourself if you have the right tools and materials. You'll need metal rods, a way to bend them (like a jig or a vise), and something to cut them with. There are tutorials available online that can guide you through the process step by step.
Yes, there are a few common mistakes to watch out for:
Using screws that are the wrong size: Make sure the screws are not too long for your tabletop.
Drilling pilot holes too deep: This can cause the screws to go through the tabletop.
Placing the legs too close to the edge: This can make the table unstable. Aim to position the legs about 1 to 2 inches from the edge of the tabletop.
Proper maintenance is key to ensuring your hairpin legs last a long time. Here are some tips:
Clean regularly: Wipe your hairpin legs with a soft, damp cloth to remove dust and dirt. Avoid using harsh chemicals that can damage the metal.
Check for rust: If your hairpin legs are made of raw steel, they may be prone to rusting. Inspect them periodically and treat any rust spots early with a rust-inhibitor product.
Tighten screws: Over time, the screws that attach the legs to your furniture may loosen. Check them every few months and tighten them as needed to ensure stability.
Use floor protectors: To prevent scratches on your floors, attach felt pads or rubber caps to the bottom of the legs. This also helps in reducing noise when moving the furniture.
Avoid moisture: Keep your furniture with hairpin legs away from excessive moisture to prevent rusting. If they do get wet, dry them promptly.
Conclusion
In the end, making your own DIY hairpin legs isn't just about saving money; it's about making something unique. With this guide, you'll feel confident in your skills and ready to start your project.


