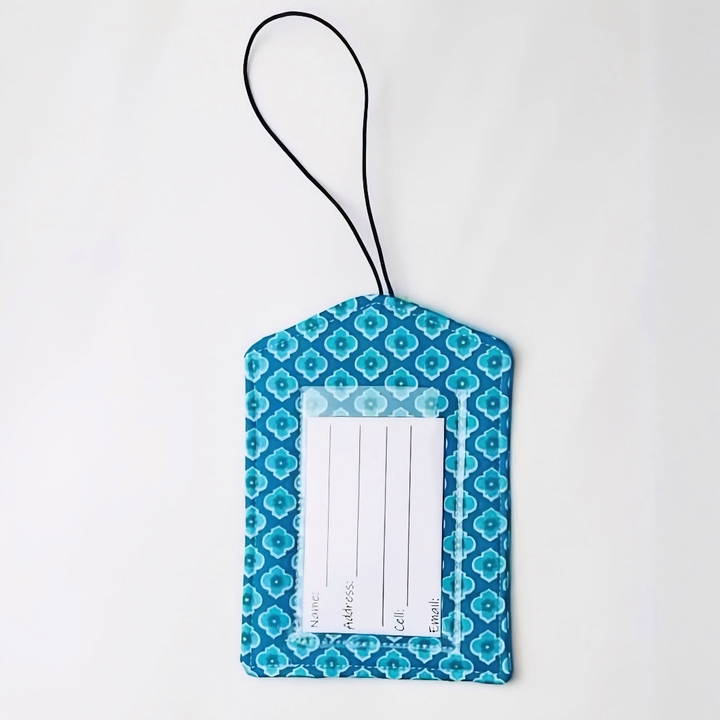
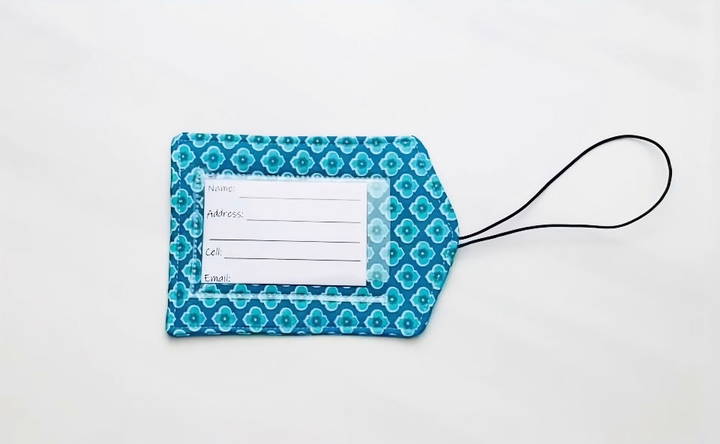
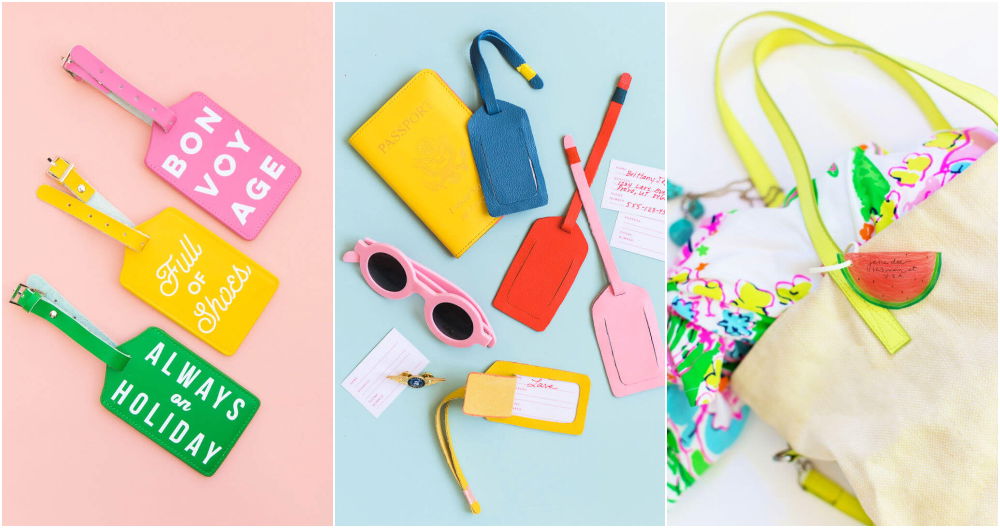
Making my own DIY luggage tags was an enjoyable project that made my travel gear unique. I found simple materials at home, like cardboard and fabric scraps. The process was quick and fun. I personalized the tags with my name and contact information, making my bags easy to identify at the airport.

If you've ever struggled to spot your luggage quickly, these DIY luggage identifiers will help. They save time and reduce stress at crowded baggage claims. Making them yourself lets you add personal touches that stand out. With these steps, you'll make tags that are both practical and stylish.
I'm helping with this guide to get you started on your DIY tags—it's easier and more rewarding than you think!
What You'll Need
- Pattern: You can find this in the video linked or make your own.
- Fabric Scraps: I chose fabric that not only had a durable texture but also vibrant designs. This way, it's easier to spot and it looks fantastic.
- Fusible Fleece: For the back of one of the fabric pieces, add a bit of sturdiness.
- Clear PVC or Vinyl: For the ID window, your information is visible but protected.
- Elastic Cord: This acts as the loop attaching the tag to your luggage handle. I found a durable elastic cord that works best.
- Sewing supplies: A sewing machine, thread, scissors, and pins or clips.
Step by Step Instructions
Make custom luggage tags with our step-by-step DIY guide. Easy instructions from pattern prep to final touches. Perfect for personalized travel.
Preparing the Pattern and Materials
After gathering all my materials, I started by cutting out the pattern pieces. It's essential to have everything neatly organized and prepped. Applying fusible fleece to one of the fabric pieces helps ensure the tag holds its shape over the course of its travels.
Sewing the Main Pieces
I placed my fabric pieces on the right sides together, ensuring the fleece was on the outside. I traced the luggage tag pattern onto the fabric, marking where my elastic loop would go. This elastic needed to be sturdy enough to withstand the pulling and tugging of travel. I cut an 11-inch piece, folded it in half, and positioned it between the layers, securing it with a few back-and-forth stitches for added durability.
Sewing around the edge while leaving a gap for turning was probably the trickiest part, considering the excitement and slight impatience on my end. Clipping the corners before turning the tag right side out was a small but crucial step that genuinely made a difference in how the corners poked out, sharply defining the tag's shape.
The Finishing Touches
Once turned right side out and pressed to define the edges, I prepared to close up the open gap by folding the edges inwards and top-stitching around the entire tag for a neat finish.
Adding the PVC window was straightforward, although I remembered the tip about keeping tissue paper over the vinyl while sewing. This prevented the sewing machine foot from sticking and ensured smooth, uninterrupted stitches. It was fascinating to see how such a simple trick could make such a significant difference in sewing with tricky materials.
Finally, removing the tissue paper to reveal a neat, clear window felt immensely satisfying, just like pulling off that protective film from a new phone's screen. I slipped in a freshly printed address card, secure in the knowledge that even if my bag decided to go on an unexpected journey, my contact details would be clear and accessible.
Personalization Tips for DIY Luggage Tags
Personalizing luggage tags adds style and makes them unique identifiers on the carousel. Here are tips to make them truly yours:
- Choose Your Material Wisely: Whether it's leather, fabric, or recycled materials, pick something that resonates with your personal style and values. For instance, if you're an advocate for the environment, consider using upcycled materials like canvas from old bags or clothes.
- Incorporate Your Identity: Your name and contact information are essential, but think beyond the basics. Add a favorite quote, a symbol that represents your hobby, or a design that reflects your heritage. This not only makes your luggage tag unique but also a conversation starter.
- Color It Bold: Use colors that are bright and easily noticeable. Neon hues or contrasting color schemes can help your luggage stand out, making it easier to spot and less likely to be picked up mistakenly by someone else.
- Keep It Secure: While it's important to display your name, you might want to keep other details more private. Consider a design that hides your address or phone number, revealing them only if the tag is opened or flipped over.
- Make It Durable: Travel can be tough on luggage tags. Use materials that are weather-resistant and secure the tag firmly to your luggage. Clear plastic covers or laminating your tag can protect it from the elements.
- Update Regularly: If you travel frequently, keep your tags updated with your current contact information and refresh the design periodically to reflect your evolving style.
- Involve the Family: If you're making tags for family travel, involve everyone in the design process. Kids can draw on their tags, and each family member can choose a different color or theme for their tag.
The goal is to make a luggage tag that is not only functional but also a reflection of who you are.

Durability and Security for DIY Luggage Tags
When you're making your own luggage tags, it's crucial to ensure they're both durable and secure. After all, they need to survive the journey and keep your information safe. Here's how you can achieve that:
- Choose Robust Materials: Start with materials that can take a beating. Leather, thick plastic, and heavy-duty fabric are all excellent choices. They're tough enough to endure rough handling and will last for many trips to come.
- Reinforce the Edges: The edges of your luggage tag are the most vulnerable parts. Reinforce them with stitching, eyelets, or clear tape. This extra step can prevent tearing and keep your tag intact.
- Waterproof Your Tags: Whether it's a sudden downpour or a spill, water can ruin your tag. Use waterproof materials or coat your paper-based tags with a clear, protective laminate to shield them from moisture.
- Secure Attachment: Your tag is only as good as its attachment to your luggage. Use a strong loop, like a steel cable or a thick elastic band, to attach the tag firmly to your bag. Avoid flimsy strings or clips that can easily break or come undone.
- Protect Your Privacy: You want your tag to be informative, but not at the cost of your privacy. Only include essential information and consider using a privacy flap or cover to keep sensitive details hidden from prying eyes.
- Lock It Down: If you're using a tag holder, make sure it has a secure closure, like a snap button or a locking mechanism. This will prevent the tag from accidentally slipping out during transit.
- Test It Out: Before you head to the airport, give your tag a stress test. Tug on it, get it wet, and make sure it stays legible and attached. It's better to find any weaknesses now than on the luggage carousel.
By concentrating on these elements, you'll craft luggage tags that are not only customized but also durable enough to endure the demands of travel while safeguarding your information.
Troubleshooting Common Issues with DIY Luggage Tags
When crafting your own luggage tags, you might encounter a few hiccups along the way. Here's how to tackle some of the most common issues, ensuring your tags are both attractive and resilient:
My Luggage Tag Keeps Falling Off
- Solution: Secure your tag with a sturdy attachment. Consider using a metal eyelet and a strong loop, such as a cable tie or a leather strap with a buckle.
The Information on My Tag Fades Over Time
- Solution: Use waterproof ink if you're writing by hand, or opt for printed labels covered with a clear, protective laminate.
My Tag Got Damaged During Transit
- Solution: Choose durable materials like thick cardstock, leather, or plastic. Reinforce the edges and corners with clear tape or use a plastic sleeve.
The Tag Design Doesn't Stand Out
- Solution: Be bold with your design choices. Use contrasting colors, large fonts, and distinctive patterns that are easily visible from a distance.
My Personal Information is Too Exposed
- Solution: Design a foldable tag that conceals your details, or use a sliding mechanism that covers your information until it's intentionally revealed.
I'm Not Sure How to Best Attach My Tag to Different Types of Luggage
- Solution: Have a variety of attachments ready. A flexible loop for soft handles, a clip for backpacks, and a buckle strap for hardshell cases can cover most needs.
The Tag's Surface is Too Glossy to Write On
- Solution: Lightly sand the area you wish to write on, or use a permanent marker designed for glossy surfaces.
Prepare solutions for potential issues to make personalized, practical, and durable luggage tags.
FAQs About DIY Luggage Tags
In our comprehensive FAQ guide, discover answers to common questions about DIY luggage tags, including materials, design tips, and durability.
Durability is key for luggage tags. Use quality materials like heavy-duty fabric and secure stitching. Consider using fusible interfacing to provide extra strength and structure to your tags. Additionally, clear vinyl can protect the paper insert where your contact information goes.
Yes, you can design luggage tags that keep your information private. One way is to place a flap over your personal details or use clear vinyl only on one side of the tag. This way, your information isn't visible unless the tag is moved or lifted.
Absolutely! For an eco-friendly approach, consider using recycled materials or leftover fabric scraps from other projects. You can also look for biodegradable options for any plastic components like vinyl.
Get creative by adding personal touches like embroidery, appliqué, or decorative stitching. You can also play with different fabric patterns and colors to match your style. For a more personal touch, add charms or beads that reflect your hobbies or interests.
To make your luggage tag stand out, consider using bold colors and distinctive patterns. You can also add dimensional elements like puff paint or buttons. For a truly unique tag, try incorporating LED lights or reflective tape that will catch the eye under the bright lights of the baggage claim area.
The Joy of Gifting
In conclusion, making DIY luggage tags is a fun and practical way to personalize your travel gear. By following this tutorial, you'll know exactly how to make luggage tags that are both stylish and durable. Enjoy your next trip with the confidence that your bags truly stand out. Happy crafting!


