I recently decided to try making my own DIY oil lamp at home. It seemed like a fun and creative project, and I wanted to see if I could make something useful and beautiful. I grabbed a mason jar, some oil, and a few other simple supplies. It was exciting to put everything together and see how it would turn out.
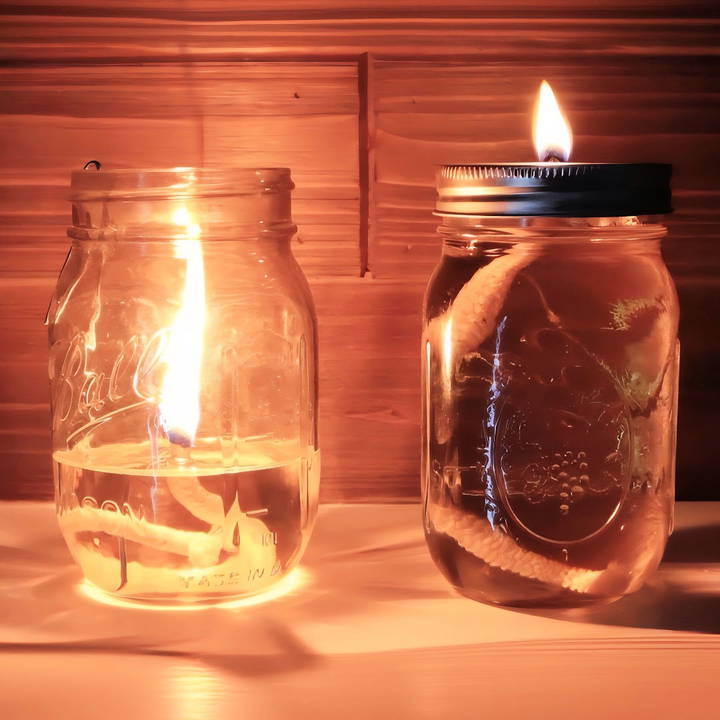
In this guide, I'll show you how to make your own DIY oil lamp using a mason jar. It's a simple project that anyone can do, and it can add a lovely touch to your home or garden. Follow these steps, and in no time, you'll have a beautiful oil lamp that you made yourself.
Materials You'll Need
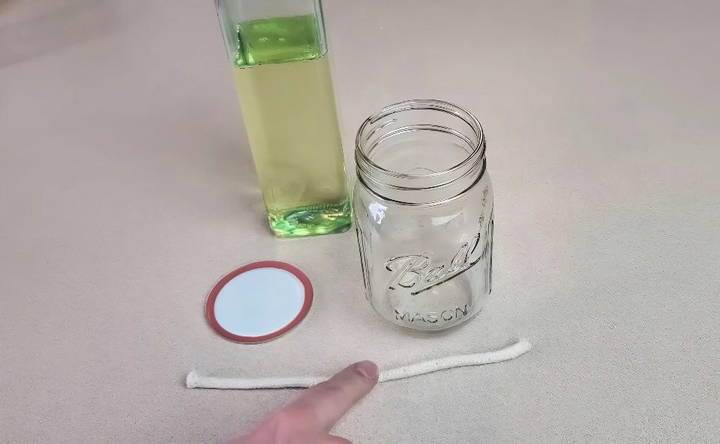
Before we start, here are the materials you'll need for both the mason jar candle-style oil lamp and the lantern-style:
- Mason Jar: The glass container is essential for holding the oil and making the lamp. Its transparency allows the light to shine through brightly.
- Regular Lid and Ring: These will help secure the wick in place and ensure the oil is contained.
- Cotton Wick (8 inches, 1/4 inch thick): The wick is the channel through which the oil will travel and sustain the flame. Cotton is ideal because it burns steadily without emitting harmful chemicals.
- Cooking Oil: This is your fuel. You can use any type of cooking oil, including vegetable, canola, or even used oil as long as it's filtered.
Tools:
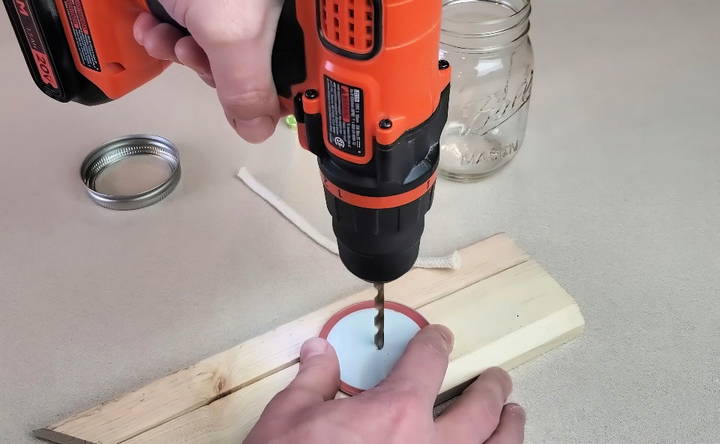
- Drill with 15/64 Drill Bit or Punch: Necessary for making a hole in the lid for the wick.
- Needle Nose Pliers: Useful for making the wire bracket in the lantern-style lamp.
- Galvanized Wire: This will hold the wick in place in the lantern-style lamp.
Safety Note:
Always be cautious when working with fire. Keep fire extinguishers or water nearby, especially if you plan on using these lamps indoors.
Step by Step Instructions
Learn to make DIY oil lamps with our step-by-step guide. Perfect for mason jar candle-style and lantern-style lamps. Easy, quick, and safe crafting!
Mason Jar Candle-Style Oil Lamp
Make a cozy ambiance with a mason jar candle-style oil lamp. Easy steps: prepare lid, insert the wick, fill the jar, soak wick, light, and enjoy the glow.
Step 1: Prepare the Lid
Start by taking the lid of your mason jar and drilling a hole in its center. It's best to use a drill with a 15/64 drill bit. Drill from the underside of the lid to make a slight lip that will help keep the wick from sliding back down through the hole.
Step 2: Insert the Wick
Feed the cotton wick through the hole from the underside of the lid. It should be tight enough to stay in place but should also pull through with some effort. Only leave about half an inch of the wick exposed above the lid.
Step 3: Fill the Jar with Oil
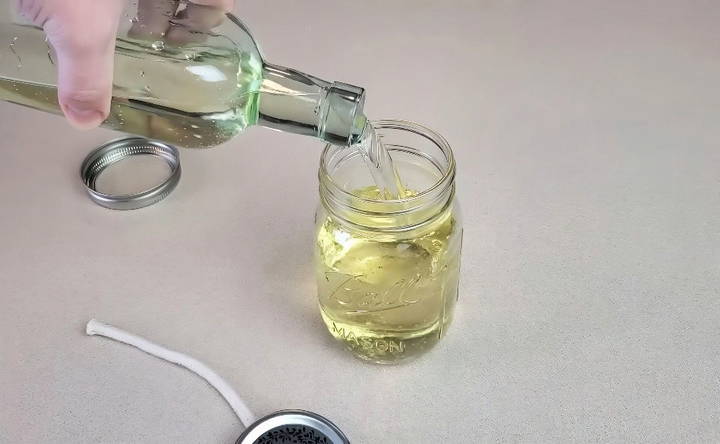
Pour the cooking oil into the mason jar until it's almost to the top, leaving a bit of space to ensure the oil doesn't spill. Insert the wick and screw the lid onto the jar firmly.
Step 4: Allow Wick to Soak
Wait a few minutes to let the oil climb up the wick. This helps in getting a steady flame when you light it. If you're in a hurry, you can trim down the wick and pull out a section that's already saturated with oil.
Step 5: Light and Enjoy
Light the wick and voila! Your mason jar candle-style oil lamp is ready to use. It may smoke a bit initially but will soon settle into a steady burn.
Mason Jar Lantern-Style Oil Lamp
Make a stunning mason jar lantern-style oil lamp. Follow our step-by-step guide to craft, maintain, and safely extinguish your DIY lantern.
Step 1: Make a Wire Bracket
Get a piece of galvanized wire and, using your needle nose pliers, bend it into a loop that will fit the width of your wick. Make sure the loop is tight enough to hold the wick but loose enough to adjust.
Step 2: Bend the Wire to Hold Position
Measure the length required to keep the wick submerged in the oil but not touching the jar's bottom. Bend the wire at strategic points so that it forms a stable platform for the wick. The top should hook over the edge to hold it in place.
Step 3: Insert and Position the Wick
Place the wick inside the wire loop and position it in the jar. The wire should hold the wick in a mostly vertical position, with the bottom part of the wick submerged in the oil.
Step 4: Fill with Oil
Pour 1 to 1.5 inches of cooking oil into the mason jar. This keeps the end of the wick submerged while most of it remains above the oil to burn effectively.
Step 5: Light the Wick
Wait for a few minutes to allow the oil to be soaked into the wick, then pull the wick slightly up using the wire handle, light it, and gently set it back down.
Tips for Maintenance
- Refilling Oil: Top off the oil before it runs out to avoid burning the wick itself.
- Adjusting Wick Size: Ensure a properly sized wick for consistent and smoke-free burning. Trim if necessary.
- Using Clean vs. Used Oil: Clean oil is preferable for a cleaner burn, but you can filter and use used cooking oil to be more economical.
Extinguishing the Flame
Both types of lamps can be easily extinguished by blowing it out gently or snuffing it. For the lantern style, using a lid to cut off oxygen works very well.
Pros and Cons
Discover the pros and cons of candle-style and lantern-style lighting. Find the perfect style for your home decor with our detailed comparison.
Candle-Style
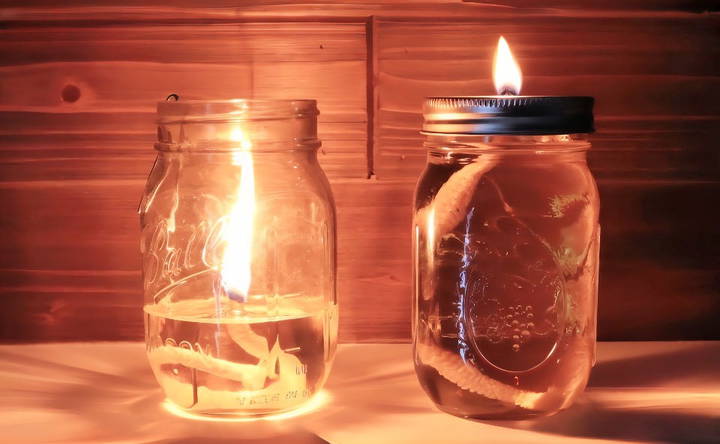
- Pros: Longer burn time due to the jar's oil capacity. Less messy if tipped over.
- Cons: Less light diffusion compared to the lantern style.
Lantern-Style
- Pros: Better light distribution thanks to the jar acting as a glass globe. More aesthetic and better ambient lighting.
- Cons: Requires more frequent oil refilling.
Customization Ideas for Your DIY Oil Lamp
Making a DIY oil lamp is not just about functionality; it's also an opportunity to express your personal style and add a unique touch to your home decor. Here are some customization ideas to make your oil lamp truly one-of-a-kind:
- Choose Your Container Wisely: Select a container that reflects your personal taste. You can use anything from a vintage teacup to a mason jar or a simple glass bottle. Consider the size, shape, and color of the container, as it will be the main visual element of your lamp.
- Decorate with Natural Elements: Wrap the container with twine or burlap for a rustic look. Glue on shells, pebbles, or dried flowers to make a nature-inspired design. These materials not only look beautiful but are also eco-friendly.
- Paint and Patterns: Unleash your creativity with paint. Use glass paints to add vibrant colors or patterns to your lamp. You can go for a minimalist design with geometric shapes or intricate motifs for a more elaborate appearance.
- Personalize with Charms and Trinkets: Attach charms or trinkets that have special meaning to you. This could be anything from a piece of jewelry to small figurines. They add a personal narrative to your lamp and make it a conversation starter.
- Experiment with Different Wicks: The wick is not just a functional part of the lamp; it can also be decorative. Try braiding cotton strings for a thicker, more prominent flame, or use colored wicks for a playful touch.
- Scented Oils: Infuse your lamp oil with essential oils for a lamp that not only provides light but also a pleasant aroma. Lavender for relaxation, citrus for invigoration, or eucalyptus for a refreshing scent are all great choices.
- Seasonal Themes: Decorate your lamp according to the season. Use bright colors and floral patterns for spring, warm tones and leaves for autumn, or glitter and snowflake designs for winter.
- Lighting Up the Outdoors: If you're making an oil lamp for outdoor use, consider adding a sturdy handle for easy carrying. You can also make a protective shield around the flame to prevent it from being extinguished by the wind.
Customize your DIY oil lamp to boost its appeal and match your lifestyle. Have fun and let your creativity shine, making it a true reflection of you.
Troubleshooting Common Issues with DIY Oil Lamps
When crafting your own oil lamp, you might encounter a few hiccups along the way. Here's a helpful guide to troubleshooting common issues, ensuring your lamp burns bright and safe.
The Flame is Too Small or Keeps Going Out
- Solution: Check if the wick is fully soaked with oil. If it's dry, allow more time for the oil to wick up. Trim the wick to ensure it's not too long; a shorter wick can provide a steadier flame.
The Flame is Too Large or Produces Smoke
- Solution: A flame that's too large can be caused by a long wick. Trim the wick a bit at a time until you achieve a moderate flame size that doesn't produce smoke.
Difficulty Lighting the Wick
- Solution: If the wick is new, it may take a little longer to light because it needs to be fully saturated with oil. Hold the lighter or match to the wick for a few seconds to allow it to catch.
Oil Lamp Produces an Unpleasant Odor
- Solution: Ensure you're using high-quality, clean-burning lamp oil. Low-quality oils can produce an unpleasant smell. You can also add a few drops of essential oil to improve the scent.
Lamp Oil Level Depletes Quickly
- Solution: If your oil lamp is consuming oil too fast, consider using a thinner wick. Thicker wicks absorb and burn oil more rapidly. Also, check for any leaks in your lamp container.
Soot Accumulation on the Container
- Solution: Soot build-up is often a sign of an incomplete burn, usually due to a lack of oxygen or an overly long wick. Adjust the wick and ensure there's enough airflow around the flame.
The Oil Lamp is Overheating
- Solution: Overheating can occur if the lamp is left burning for too long or if it's in a confined space. Make sure to place your lamp in a well-ventilated area, and don't leave it unattended for extended periods.
Difficulty Controlling the Flame Size
- Solution: The wick control mechanism may be faulty. If you're using a lamp with an adjustable wick, ensure the mechanism is clean and operates smoothly. If it's a fixed wick, trim it to manage the flame size.
By addressing these common issues, you'll be able to enjoy your DIY oil lamp safely and efficiently.
FAQs About DIY Oil Lamp
Discover essential answers in our FAQs about DIY oil lamps, from safety tips to materials needed, ensuring an easy and safe project for your home!
Yes, it's safe to use an oil lamp indoors if you follow safety precautions. Use a stable, non-flammable surface away from flammable materials. Never leave the lamp unattended while lit, and ensure proper ventilation to avoid the buildup of fumes. Olive oil is a safe fuel option as it burns cleanly without producing harmful fumes.
Absolutely! You can customize the scent by adding a few drops of essential oils to the vegetable or olive oil. Popular choices include lavender, citrus, or peppermint. This will make a pleasant aroma when the lamp is lit.
To extinguish your oil lamp, you can use a metal snuffer or a small cup to deprive the flame of oxygen. Do not blow out the flame as it can cause the oil to splatter. Wait until the lamp is completely cool before moving or refilling it.
The burning time of a DIY oil lamp depends on the amount of oil used and the size of the wick. Generally, a lamp with about two inches of oil can burn for several hours. If you use a larger container with more oil, it can last even longer. Remember, the wick should be trimmed to about a quarter inch above the oil to ensure a clean burn and extend the life of your lamp.
While most vegetable oils can be used for oil lamps, the best options are olive oil, canola oil, or peanut oil because they burn cleanly and have a higher flash point, making them safer. Avoid using petroleum-based oils or oils with low flash points, as they can produce harmful fumes and are more prone to catching fire.
Conclusion:
I hope this guide helps you make a beautiful DIY oil lamp. It's a simple way to brighten your space and add a personal touch. Give it a try, and enjoy the warm glow of your handmade lamp.


