Wind chimes bring a serene ambiance to any outdoor or indoor space, casting melodic tunes that are soothing to the soul. Not long ago, I embarked on a journey to craft my own DIY wind chimes—a project that turned out to be not only fulfilling but also a great addition to my patio. Here's a detailed, step-by-step guide to making DIY wind chimes that I learned and now want to share with you, inspired by resources and insights from experts in the field.
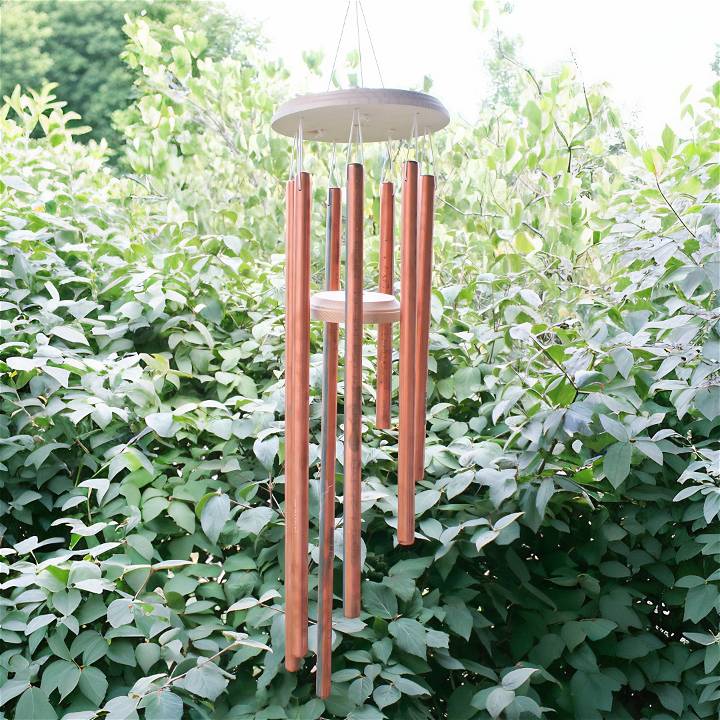
Materials Needed and Why
- Purple Heart Wood: A dense and rot-resistant wood, making it ideal for the durable construction of wind chime tops and strikers.
- EMT Conduit: I chose 3/4 inch conduit for the chimes due to its availability and metal properties that produce pleasant sounds.
- Eyelets and Chains: Essential for hanging the chimes securely. I broke one during the process, which taught me the importance of quality materials.
- Braided Fishing Line (50-pound): Used for suspending the chimes, it's strong and almost invisible, providing a floating effect.
- Lacquer: Seals the wood and conduit, protecting them from the elements and highlighting the wood's natural beauty.
- Heat Shrink Tubing: Protects the fishing line from wear where it contacts the metal, extending the life of your chimes.
- Tools: A drill press, sanding materials, router table, and a tubing cutter contributed to precise crafting and smooth finishes.
Step by Step Instructions
Learn how to make beautiful DIY wind chimes with step-by-step instructions for preparing, drilling, assembling, cutting, and adding finishing touches to your project.
Step 1: Preparing the Wood
The journey began with preparing the Purple Heart wood for the top and striker of the chimes. Cutting the wood into discs on a bandsaw, followed by sanding and rounding the edges with a router table, was the initial step. This process was crucial for achieving smooth, aesthetically pleasing components that would serve as the framework for hanging the chimes.
Step 2: Drilling and Assembling
After preparing the wood, drilling precise locations for the eyelets, as detailed in the template from Lee Hite's resources, was next. Utilizing templates significantly simplified this task, ensuring accuracy for the eyelets that would eventually support the chime tubes. Assembling with care, especially when screwing in the eyelets (a step where I learned the hard way to use wax for lubrication), set the foundation for the wind chimes.
Step 3: Cutting and Preparing the Chimes
Selecting the right lengths for the EMT conduit based on the musical notes I desired (thanks again to Lee Hite's charts) was fascinating. Using a tubing cutter ensured clean, burr-free cuts, essential for quality sound production. Cleaning and prepping the tubes for painting not only personalized my chimes but also protected them from weathering.
Step 4: Assembly
This step involved tying everything together—literally. Using braided fishing line and heat shrink tubing, I secured the chimes to the wood platform, adjusting for even lengths to ensure harmony in both appearance and sound. Patience was key here, especially in achieving the correct tension and securing the knots.
Step 5: Finishing Touches
Applying several coats of lacquer to the wood parts not only enhanced the Purple Heart's natural color but also weatherproofed the components. Attaching the striker and a sail (a teardrop piece cut from clear acrylic) completed the assembly. Finally, hanging the chimes in a spot that catches the wind but is sheltered from extreme weather would ensure their longevity.
Lessons Learned and Tips
- Lacquer Thinner works wonders for removing stickers and grease from the conduit, preparing it for a flawless paint job.
- Using Wax on screw threads can prevent breakage—a lesson I learned after breaking an eyelet.
- Patience and Precision in tying and adjusting the chimes are crucial for a harmonious sound.
Materials Selection Tips for DIY Wind Chimes
When crafting your own wind chimes, thoughtful material selection plays a pivotal role in achieving delightful sounds and visual appeal. Whether you're a seasoned DIY enthusiast or a beginner, consider the following tips to make harmonious wind chimes that resonate with both your surroundings and your heart.
1. Understand the Impact of Materials
Metal Tubes:
- Aluminum: Lightweight and corrosion-resistant, aluminum tubes produce bright, clear tones. Opt for thicker-walled tubes for a deeper sound.
- Copper: Known for its warm, mellow tones, copper tubes age gracefully and develop a lovely patina over time.
- Steel: Robust and durable, steel tubes offer a rich, resonant sound. Experiment with different diameters for varying pitches.
Wooden Rods:
- Bamboo: Bamboo rods make soothing, earthy tones. Choose different diameters to achieve distinct notes.
- Hardwoods (e.g., oak, cherry, or cedar): These woods produce warm, melodious sounds. Sand the edges for a smoother finish.
Upcycled Items:
- Silverware: Old forks, spoons, or butter knives can be transformed into whimsical chimes. Their unique shapes make playful sounds.
- Glass Bottles: Cut glass bottles into sections and sand the edges. Hang them to catch the breeze and produce gentle tinkling sounds.
2. Consider Aesthetics and Durability
Visual Appeal:
- Color: Choose materials that complement your outdoor space. Vibrant colors add cheer, while natural tones blend seamlessly with greenery.
- Texture: Experiment with polished, rustic, or weathered finishes. Textured surfaces catch light beautifully.
Weather Resistance:
- Outdoor Durability: Ensure your chosen materials can withstand sun, rain, and wind. Rust-resistant metals and treated wood are excellent options.
- Maintenance: Consider ease of cleaning and upkeep. Some materials require periodic polishing or sealing.
3. Harmonize with Your Environment
Tone and Placement:
- High-Pitched Chimes: Hang near windows or doorways where gentle breezes pass. They'll greet you with delicate melodies.
- Deep-Toned Chimes: Place these in open spaces or near trees. Their resonant sounds blend harmoniously with nature.
4. Experiment and Personalize
Mix and Match:
- Combine different materials for a unique symphony. Pair metal tubes with wooden clappers or glass bottle chimes.
- Let your intuition guide you—sometimes, the most unexpected combinations make magic.
Remember, making DIY wind chimes is an art form. Trust your instincts, listen to the wind, and let your creation sing its own song in the breeze.

Aesthetics and Durability: Crafting Wind Chimes That Last
When making DIY wind chimes, it's not just about the sound—they should also be visually pleasing and able to withstand the elements. Let's explore how to choose materials that strike the right balance between aesthetics and durability.
1. Visual Appeal: Harmonizing with Your Space
Color and Texture:
- Choose Colors Thoughtfully: Consider the overall color scheme of your outdoor area. Bright, bold colors add cheer, while earthy tones blend seamlessly with nature.
- Textured Finishes: Experiment with different textures. Polished metals catch sunlight beautifully, while rustic or weathered finishes lend a charming, timeless look.
Material Options:
- Metal Tubes:
- Aluminum: Lightweight and corrosion-resistant, aluminum tubes are ideal for modern or minimalist designs. Their silver hue complements various settings.
- Copper: Known for its warm, reddish-brown patina, copper tubes age gracefully. They add elegance and a touch of vintage charm.
- Steel: Robust and durable, steel tubes produce rich, resonant tones. Opt for thicker steel for a deeper sound.
- Wooden Rods:
- Bamboo: Bamboo rods evoke a sense of tranquility. Their natural texture and earthy tones make a soothing ambiance.
- Hardwoods (e.g., oak, cherry, or cedar): These woods offer warmth and melodious sounds. Sand the edges for a smoother finish.
- Upcycled Items:
- Silverware: Old forks, spoons, or butter knives can be repurposed into whimsical chimes. Their unique shapes add character.
- Glass Bottles: Cut glass bottles into sections, sand the edges, and hang them. They catch light and produce gentle tinkling sounds.
2. Weather Resistance: Ensuring Longevity
Outdoor Durability:
- Choose Materials Wisely: Opt for rust-resistant metals (like aluminum or stainless steel) and treated wood. These withstand sun, rain, and wind.
- Seal and Protect: Apply weather-resistant coatings or sealants to wooden components. Regular maintenance ensures longevity.
Maintenance Considerations:
- Ease of Cleaning: Some materials require minimal upkeep, while others need more attention. Consider how easy it is to clean and maintain your wind chimes.
- Inspect Regularly: Check for signs of wear, rust, or damage. Prompt repairs prevent further deterioration.
3. Placement Matters: Harmonizing with Nature
Tone and Environment:
- High-Pitched Chimes: Hang near windows or doorways where gentle breezes pass. They'll greet you with delicate melodies.
- Deep-Toned Chimes: Place these in open spaces or near trees. Their resonant sounds blend harmoniously with nature.
Making wind chimes is a creative opportunity to enhance your outdoor space. Choose materials that reflect your style and enjoy their soothing songs in the breeze.
FAQs About DIY Wind Chimes
Discover everything you need to know about DIY wind chimes in our comprehensive FAQs guide. Learn how to make your own beautiful chimes at home today!
1. How Do I Choose the Right Material?
Consider aesthetics and durability:
- Visual Appeal: Match colors to your outdoor space, and experiment with textures.
- Weather Resistance: Opt for rust-resistant metals and treated wood. Seal wooden components for longevity.
2. How Do I Tune Wind Chimes?
- Length Matters: Cut chimes to different lengths to make various notes.
- Clapper Placement: Adjust the wooden striker (clapper) to fine-tune vibrations and sound quality.
3. Where Should I Hang Wind Chimes?
- High-Pitched Chimes: Hang near windows or doorways to catch gentle breezes.
- Deep-Toned Chimes: Place in open spaces or near trees for harmonious sounds.
4. Can I Mix Different Materials?
Absolutely! Combine metal tubes, wooden clappers, and glass bottle chimes for a unique symphony.
5. How Do I Maintain Wind Chimes?
- Regular Inspections: Check for wear, rust, or damage.
- Cleaning: Keep them dust-free and polished.
- Enjoy the Breeze: Let your wind chimes sing their soothing songs!
Final Thoughts
Making wind chimes from scratch was a rewarding venture that taught me not only about craftsmanship but also the science of sound. The chimes now hanging on my patio are a constant reminder of the project's challenges and triumphs. For anyone looking to undertake this project, my advice is to embrace the process, learn from my experiences, and add your own personal touch to make something truly unique.


