Learn how to enclose a patio with our step-by-step guide. An enclosed patio can transform your outdoor space into a cozy, weather-protected area that can serve various purposes, such as a sunroom, office, or extra living space. This guide covers a detailed process of enclosing a patio, offering insights into materials, tools, and techniques. By the end, you'll have all the information you need to make a beautiful enclosed patio on your own.
Why Enclose a Patio?
Enclosing a patio offers several benefits:
- Protection from Elements: Keeps out wind, rain, and insects.
- Year-Round Usability: Turn your outdoor space into an all-season room.
- Increased Home Value: An enclosed patio adds value to your home.
- Versatility: Can serve as a sunroom, office, or an extra recreational space.
Materials Needed for Enclosing a Patio
Before starting the project, gather the following materials:
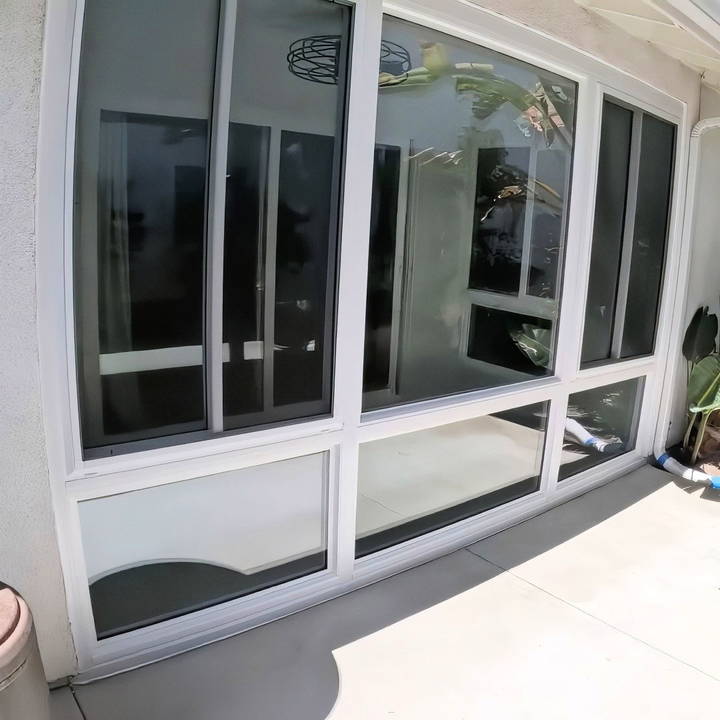
- Glass Panels: For natural light and a sleek look, opt for a fixed glass window in the center with operable windows on the sides.
- Four Seasons Wall System: Pre-fabricated wall panels that can be assembled and installed.
- Red Head Concrete Anchors: Used for securing the wall system to the concrete.
- Bottom and Top Tracks: Essential for fitting the glass panels into place.
- Weatherproof Sealant: To prevent water infiltration around the edges.
- Multi-Tool and Masonry Bit: For precise cuts when installing outlets.
- Quick-Connect Electrical Outlets: Make adding electrical outlets simple.
- Ceiling Fan with Light: Provides airflow and additional lighting.
Tools Needed
- Drill and Bits: For making holes in concrete and securing frames.
- Level: Ensures that the wall panels and frames are straight.
- Spatula and Soft Hammer: To adjust panels into tight spaces.
- Measuring Tape: Essential for precise measurements.
- Safety Equipment: Gloves, goggles, and dust masks for protection.
Step by Step Instructions
Learn how to build a DIY-enclosed patio with this step-by-step guide. From planning to installation, make a stunning space efficiently and affordably.
1. Planning and Measuring the Space
- Assess the Area: Measure the dimensions of the space you plan to enclose. This will help you order the right size of glass panels and wall systems.
- Center the Design: Determine the center point of the space. This will help you evenly position the wall system and glass windows for a balanced look.
2. Prepare the Patio Base
- Clean the Surface: Remove debris and clean the concrete base where the wall system will be installed.
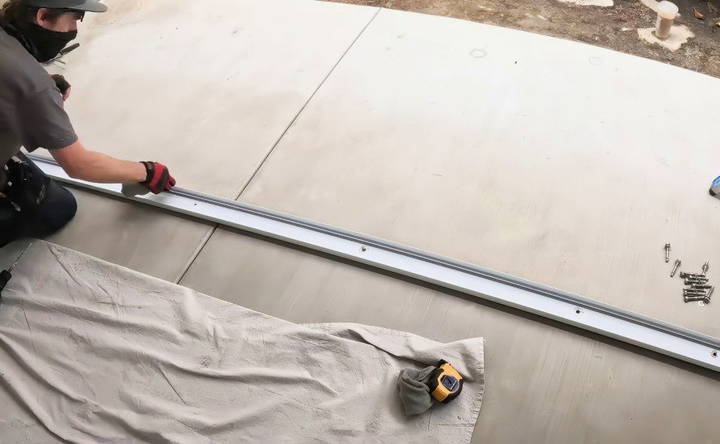
- Install Bottom Track: Lay down the bottom track, which serves as the base for the wall system. Drill holes into the concrete using a masonry bit.
- Secure with Red Head Anchors: Install Red Head concrete anchors every 2 feet along the track for stability. These anchors ensure that the bottom track remains firmly in place.
3. Install the Top Track
- Measure and Cut to Fit: The top track should align with the bottom track. Cut it to the required length if necessary.
- Attach to the Existing Wall Frame: Use screws to secure the top track to the structure of your home. Ensure it is level to avoid issues when fitting the glass panels.
4. Assemble and Install Wall Panels
- Pre-Fabricated Wall Panels: If you're using a Four Seasons Wall System, the panels typically come pre-assembled. This simplifies installation.
- Adjust for Height: Order panels slightly taller than needed, then trim them to fit on-site.
- Fit the Panels: Lift the panels into the top track, then lower them into the bottom track. It's crucial to have assistance for this step, as glass panels can be heavy and delicate.
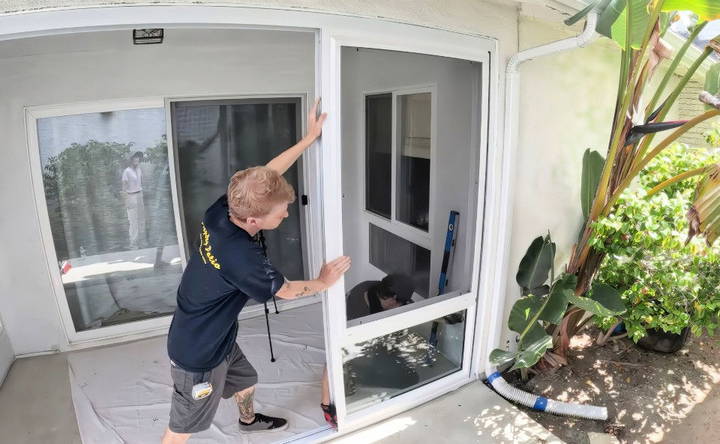
5. Install Operable and Fixed Glass Windows
- Position the Fixed Glass Panel: Place the fixed glass window in the center for a balanced look.
- Install Operable Windows on Each Side: These windows can be opened to allow for ventilation. Secure them using the same method as the fixed glass panel.
6. Seal the Wall System
- Apply Weatherproof Sealant: After securing all panels, apply sealant along the edges of the tracks and around the window frames. This prevents water and air infiltration, ensuring your new space is well-insulated.
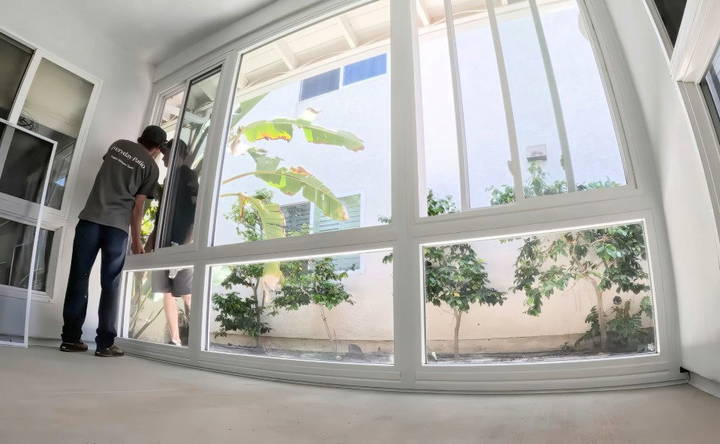
7. Install Electrical Outlets
- Determine Outlet Locations: Choose where to add outlets based on your intended use for the space. For instance, if it's going to be an office, place outlets where you'll set up a desk.
- Cut Openings with a Multi-Tool: Use a masonry bit to cut through the paneling.
- Use Quick-Connect Outlets: These make adding outlets a simpler task. Connect the wiring to an existing outlet inside your home, and use a quick-connect outlet for a clean installation.
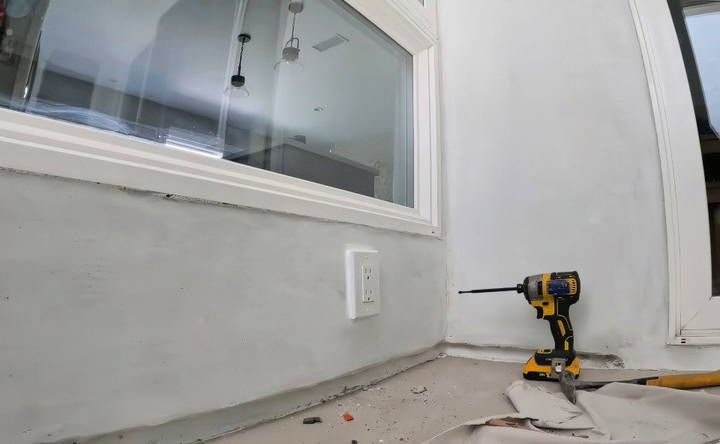
8. Add a Ceiling Fan for Airflow
- Choose a Suitable Fan: A fan with a light can be a great addition to provide both airflow and lighting in the space.
- Secure to Ceiling: Ensure the fan is properly anchored to a support beam or bracket. Use longer screws if attaching to an older support box for added security.
- Install Wireless Receiver: This allows the fan to be controlled remotely, offering convenience in your new enclosed space.
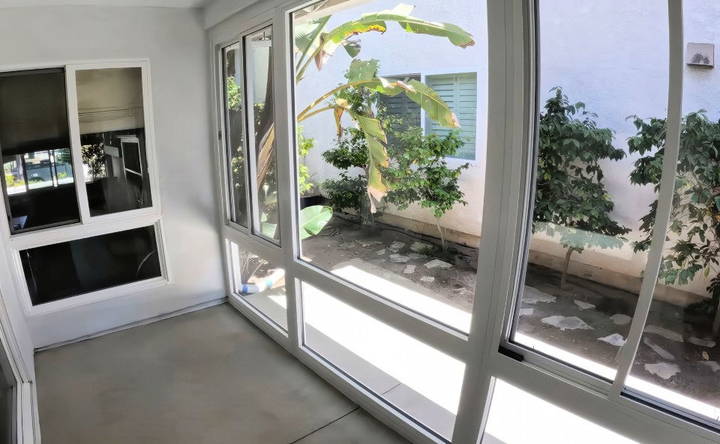
Tips for a Professional Finish
- Mud the Walls: To give a polished look, consider adding a layer of mud over existing stucco texture before painting. This provides a smoother, modern finish.
- Check for Tight Fits: Use a spatula or soft hammer to adjust panels that might be tight. This will ensure the glass fits snugly into the frames.
- Add Window Treatments: For added privacy and comfort, install blinds or shades that can be adjusted based on the time of day.
Common Challenges and How to Overcome Them
- Tight Panel Fits: It's common to encounter panels that don't slide into place easily. In these cases, use a spatula and a soft hammer to adjust the position carefully.
- Waterproofing Issues: To avoid leaks, ensure all seams are thoroughly sealed. Apply additional sealant around any penetrations like electrical outlets.
- Electrical Hookups: If you're not comfortable with electrical work, consider hiring a professional. Quick-connect outlets are user-friendly, but it's important to ensure safety.
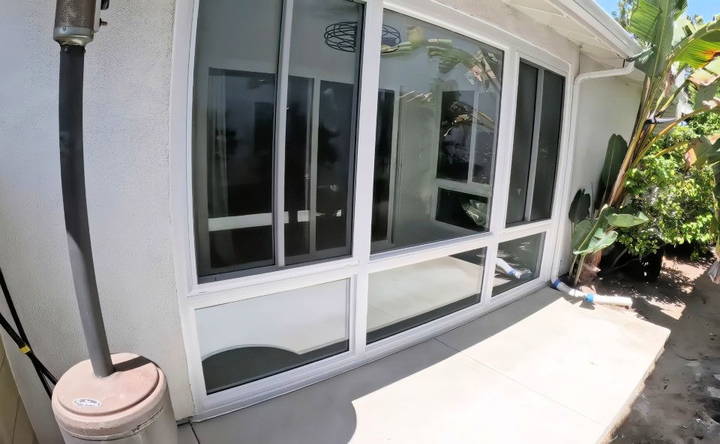
How Long Does It Take to Enclose a Patio?
The time required depends on the size of your space, your experience level, and the help you have. For a smaller space and with a few helping hands, you might complete the project in 2-3 days. Larger spaces or more complex designs may take up to a week.
Cost Considerations for DIY Enclosed Patio
While costs vary based on materials and the scope of the project, here's a general breakdown:
- Wall System: $2,000 - $5,000, depending on the size and brand.
- Glass Panels: $500 - $2,000, varying based on size and quality.
- Tools and Miscellaneous Supplies: $300 - $500, including drill bits, anchors, and sealant.
- Electrical Work: $100 - $300, depending on the number of outlets.
Overall, a DIY enclosed patio can range from $3,000 to $8,000, much less than hiring a contractor.
Final Thoughts
Enclosing a patio is a rewarding DIY project that can add both comfort and value to your home. With the right materials, tools, and a bit of time, you can transform an underutilized space into a functional and beautiful room. This guide provides a thorough roadmap to make your DIY enclosed patio project a success. Happy building!
FAQs About DIY Enclosed Patio
Explore common FAQs about DIY enclosed patios, including materials, design ideas, and tips to make a cozy outdoor space on a budget.
Using fixed and operable glass windows made from durable options like C-thru and Cardinal Glass provides good insulation and clear visibility. Fixed windows in the center and operable ones on the sides balance aesthetics and airflow.
Yes, in many regions, you might need a building permit to enclose a patio, especially if it involves electrical work or altering the structure. Check with your local building authority to ensure compliance.
To maintain comfort year-round, use a ceiling fan for air circulation and consider a portable heater or mini-split system for heating and cooling. This ensures a balanced temperature throughout the year.
Yes, the Four Seasons Wall System is designed for DIY installation. It comes with pre-fabricated panels that can be trimmed and adjusted on-site, making it user-friendly for experienced DIYers.
The total cost can range from $3,000 to $8,000, depending on the size, materials, and any additional features like fans or electrical work. This range includes glass panels, wall systems, and installation supplies.
The Four Seasons wall system and glass panels can be ordered through suppliers like C-thru and Cardinal Glass. You can find them on websites like fourseasonsbp.com or consult local distributors.
Apply a high-quality weatherproof sealant around the edges of the panels, windows, and any penetrations like outlets. This helps prevent water leaks and maintains a dry, comfortable space.
Yes, an enclosed patio can be a great space for a home office. Install windows for natural light, an outlet for electronics, and a ceiling fan for comfort to create a functional and pleasant work environment.
Use a multi-tool with a masonry bit to make openings for outlets. Quick-connect outlets make the installation process simpler and safer, especially if you connect them to an existing outlet inside the house.
You can use window treatments like blinds or shades that are easy to adjust. This provides privacy while still allowing you to enjoy natural light when desired.
If panels are tight, use a spatula and a soft hammer to adjust them gently into place. This helps prevent damage to the glass and ensures a proper fit without forcing the panels.


