Transform your basement into a functional space without breaking the bank by learning how to finish a basement on a budget. Start with smart planning and prioritize tasks that give the best return on investment. Understand the essentials of finishing a basement, from insulation to flooring, and use affordable materials that don't compromise on quality. Adopting cost-effective techniques can make a big difference.
Explore various steps to finishing a basement, including assessing the space, tackling moisture issues, and building a layout. Simple DIY methods can save considerable money, while still achieving a polished look.
This guide will help you navigate this rewarding project efficiently. Ready to transform your basement on a budget? Let's dive deeper into the specifics.
Understanding the Basics
When you're looking to transform your basement into a functional and inviting space, it's essential to start with a solid foundation of knowledge. Here's what you need to know to get started on the right foot.
- Why Finish Your Basement? Finishing your basement can significantly increase your home's value and provide additional living space. Whether you're dreaming of a cozy family room, a home office, or a workout area, a finished basement can make those dreams a reality.
- Envisioning the Space Think about how you want to use the space. Will it be for entertainment, relaxation, or work? Your intended use will guide all your decisions, from layout to lighting.
- Initial Checks Before diving into the project, it's crucial to assess your basement for moisture issues, insulation needs, and any legal requirements such as permits or building codes. This step ensures that your finished basement will be safe, comfortable, and compliant with local regulations.
- Moisture and Insulation Basements are prone to dampness, which can lead to mold and structural damage. Check for any signs of moisture and address them promptly. Proper insulation is also key to maintaining a comfortable temperature and reducing energy costs.
- Legal Requirements: Depending on where you live, you may need to obtain permits before starting your basement renovation. It's also important to understand local building codes, which can affect everything from electrical work to ceiling height.
Understanding the basics ensures a successful basement project, adding value and enjoyment. Careful planning is key to building a space your family will love for years.
Planning and Prepping
Get organized with our planning and prepping guide. Learn essential materials needed and their importance for efficient preparation.
Materials Needed:
- Tape Measure
- Graph Paper or Online Room Design Tool
- Drill with Mixer Attachment
- Tin Snips
- Drywall Panels and Screws
- Concrete Base Coat and Finish Coat
- Wet Look Sealer
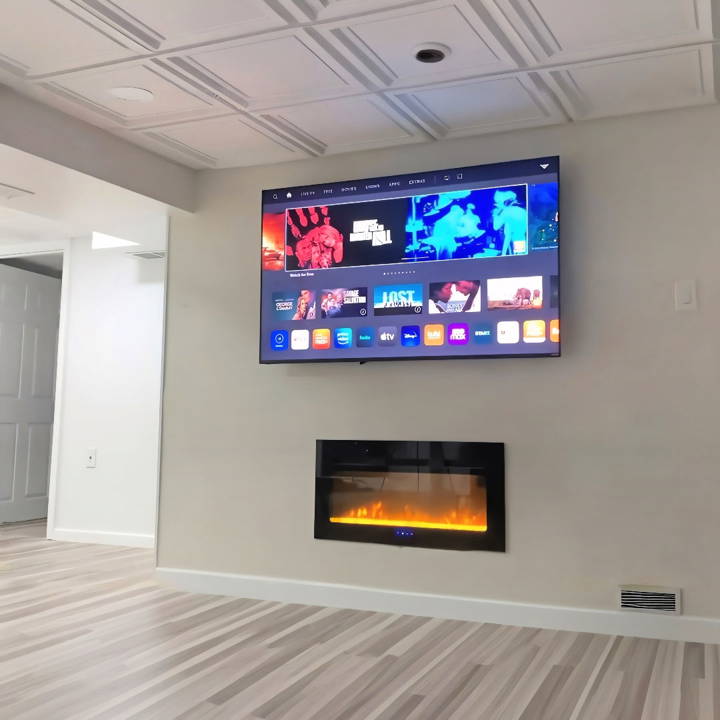
- Electric Fireplace and TV Wall Mount
- Luxury Vinyl Plank Flooring
Why Each Material is Needed:
- Tape Measure and Graph Paper/Online Tool: Essential for accurate measurements and planning the layout of your ceiling grid, positioning of the electric fireplace, and the placement of LVP flooring.
- Drill with Mixer Attachment: Needed to mix the concrete coatings for the faux concrete wall efficiently.
- Tin Snips: Crucial for cutting the metal tracks for the drop ceiling and wall molding.
- Drywall Panels and Screws: The backbone of any basement renovation, providing the walls for your space.
- Concrete Base and Finish Coat: These build the faux concrete wall effect, adding an industrial chic look to the basement.
- Wet Look Sealer: Protects the concrete wall, making it more durable and giving it a polished finish.
- Electric Fireplace and TV Wall Mount: Central pieces in building a cozy and entertaining living space within the basement.
Step by Step Instructions
Learn how to finish a basement with step-by-step instructions: planning, prepping, building faux walls, and installing flooring.
Step 1: Planning Your Space
First and foremost, I measured and planned my space. Utilizing a combination of graph paper and an online room design tool, I meticulously planned the layout of the ceiling grid, the placement of the LVP flooring, the electric fireplace, and where my TV would go.
Step 2: Prepping the Room
Preparation involved everything from sweeping and cleaning the existing concrete floor to applying a crack prevention membrane where I would later apply the concrete finish for the faux wall. It was crucial to ensure no moisture would seep through the new LVP flooring.
Step 3: Framing for the Electric Fireplace
Framing was up next. I built a frame for the electric fireplace, ensuring it was perfectly centered and level on the wall where it would be installed. This step required precise measurements and careful use of the drill and screws to secure the frame in place.
Step 4: Drywall Installation
Installing drywall was the next big task. After framing, I measured, cut, and screwed in the drywall panels, cutting out space for the electric fireplace. This stage started bringing the room together and setting the stage for the aesthetic elements to come.
Step 5: Building the Faux Concrete Wall
For the faux concrete wall, I mixed and applied a base coat of concrete over the waterproofed and prepared drywall surface. An additional finish coat was applied after the base coat dried. Achieving a realistic concrete look was about patiently applying these coats and ensuring even coverage.
Step 6: Flooring with LVP
Laying down the LVP flooring involved careful planning to ensure it ran seamlessly across the room. Each plank needed to be measured, cut, and snapped together. It was a repetitive process but seeing the floor come together piece by piece was incredibly satisfying.
Step 7: Installing the Drop Ceiling
Installing the drop ceiling involved cutting and installing wall moldings, then hanging the main beams and cross tees to build the grid framework. Each piece of ceiling tile was then placed into the grid, cutting tiles to fit around the edges and around any fixtures or vents.
Step 8: Final Touches
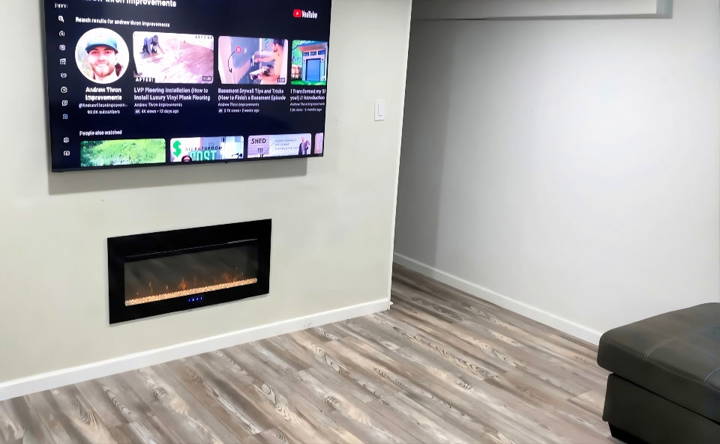
The final touches included installing the electric fireplace into its frame, mounting the TV above it, and ensuring all finishes and seals were perfect. Trimming out the room with baseboards and painting where necessary gave the space a polished look.
The process had challenges, from mastering concrete finishing to aligning LVP flooring. The key lesson was meticulous planning, as each step depended on the one before, showing the process's interconnectivity.
Advanced Features
Incorporating advanced features into your basement can transform it into a modern, multi-functional space. Here's how you can use the latest technology to enhance your basement's comfort, convenience, and entertainment value.
- Smart Home Integration Make your basement smarter with technology that connects and automates your home's systems. Install smart lighting that adjusts to the time of day or mood. Consider smart thermostats for optimal temperature control. With smart plugs, you can remotely control any device plugged into them, adding both convenience and energy efficiency.
- Soundproofing for Peace and Quiet Soundproofing is essential if you want to build a quiet retreat or a noise-contained entertainment area. Use acoustic caulk to seal gaps where noise leaks through. Install sound-absorbing materials between walls and ceilings to dampen sound transmission. For a more extensive setup, consider specialized soundproofing panels that can double as decorative elements.
- Lighting Solutions for Ambiance and Functionality Basement lighting should be both practical and atmospheric. Recessed lighting offers a sleek look and can be strategically placed to highlight areas or features. For a more dramatic effect, consider track lighting that can be adjusted to focus on artworks or architectural details. If your basement has a walk-out area, complement natural light with ceiling-mounted fixtures for a seamless transition from day to night.
Make your basement trendy and personalized with advanced features, prioritizing both aesthetics and functionality for a successful renovation.
Troubleshooting Common Basement Finishing Challenges
When finishing your basement, you might encounter a few hurdles along the way. Here's a guide to help you identify and solve some of the most common issues, ensuring your project stays on track.
- Moisture and Water Infiltration Moisture is a basement's nemesis. Look out for damp walls or a musty smell—these are telltale signs of moisture problems. To tackle this, ensure your basement is properly waterproofed. This might involve installing a drainage system, sealing cracks, and using waterproof coatings.
- Insulation Woes A cold basement is unwelcoming. If your basement feels chilly, check the insulation. Closed-cell foam is a great option as it provides a moisture barrier and keeps the warmth in.
- Low Ceilings Low ceilings can make a basement feel cramped. If raising the ceiling isn't an option, focus on lighting and color to give the illusion of height. Use bright, reflective colors and install recessed lighting to open up the space.
- Navigating Pipes and Wires: Pipes and wires can be an eyesore and a headache. If they're hanging low, consider rerouting them or building a drop ceiling to conceal them. Always consult a professional before making any changes to your home's infrastructure.
- Egress Windows Safety first! Egress windows are a must for any living space in the basement. They provide an escape route in case of emergencies and also let in natural light. Make sure they meet your local building codes.
Ensure a beautiful, functional, finished basement by addressing common issues early. Save time and money by consulting a professional when in doubt.
Safety and Compliance
Ensuring the safety and compliance of your basement renovation is not just about following rules—it's about protecting your home and the people in it. Here's a guide to help you navigate the essentials of safety and compliance during your basement project.
- Understanding Building Codes Building codes are there for a reason. They ensure that your basement is safe and structurally sound. Familiarize yourself with local building codes, which cover everything from the minimum ceiling height to the size of egress windows. These codes can vary, so check with your local building department for specifics.
- Securing the Necessary Permits Most basement renovations require a permit. This is a good thing—it means an expert will review your plans to ensure they're safe. Apply for permits before you start work, and expect inspections along the way.
- Waterproofing and Moisture Control Water issues can compromise your basement's structure and lead to mold. Address any moisture problems before you start, and consider adding waterproofing measures like sealants or a sump pump.
- Proper Insulation and Ventilation Insulation keeps your basement warm in winter and cool in summer. But it also prevents moisture buildup, which is crucial in a basement. Ventilation is equally important for air quality and preventing mold. Make sure your renovation includes both.
- Electrical and Fire Safety Hire a licensed electrician for any wiring work. This ensures your electrical system is up to code and safe. Also, install smoke and carbon monoxide detectors in your basement to keep it safe from fire hazards.
- Egress Requirements If your basement will be a living space, you need an egress window. It's a way out in case of emergency and a way in for emergency responders. Make sure it meets the size requirements set by your local codes.
Focus on these areas to make your basement a great, safe home addition. Don't cut corners on safety, as it can have serious consequences.
FAQs About How to Finish a Basement
Discover answers to common questions about finishing a basement with our comprehensive FAQs guide. It includes tips, costs, and more for your basement project.
Inspect and Repair
Check for any water leaks or structural issues. Repair these before starting your renovation.
Moisture Test
Use a moisture meter to ensure there are no hidden water problems.
Permits
Obtain the necessary building permits from your local authority.
Use Treated Lumber
For the bottom plates of your walls, use treated lumber to prevent moisture damage.
Insulation
Opt for foam insulation at the band joist for a higher R-value and moisture resistance.
Plan Your Space
Consider the function of your basement and design a layout that suits your needs, keeping traffic flow in mind.
Professional Help
Consulting with a designer can optimize your layout and prevent costly mistakes.
Drywall
It’s a popular choice due to its affordability and versatility.
Avoid Direct Contact
Ensure there’s a gap between the wall studs and the foundation wall to prevent moisture wicking.
Skipping Prep Work
Don't rush into construction without proper cleaning and moisture testing.
Ignoring Building Codes
Always adhere to local codes for materials and construction methods.
Closing Thoughts
Wrapping up, learning how to finish a basement on a budget: tips and tricks can transform your space without breaking the bank. By following cost-effective strategies, prioritizing essential tasks, and utilizing affordable materials, finishing a basement can become a manageable and rewarding project. Keep these tips in mind, and you'll soon enjoy a renovated basement that enhances your home's value and functionality.


