A broken ceiling fan chain can be frustrating, especially when you rely on it to control fan speed or turn the fan on and off. Replacing or fixing a broken ceiling fan pull switch is a straightforward process, but it's essential to do it safely and correctly to ensure long-lasting results. This guide will take you through each step, from identifying the issue to replacing the broken switch, making it easy for anyone to follow along.
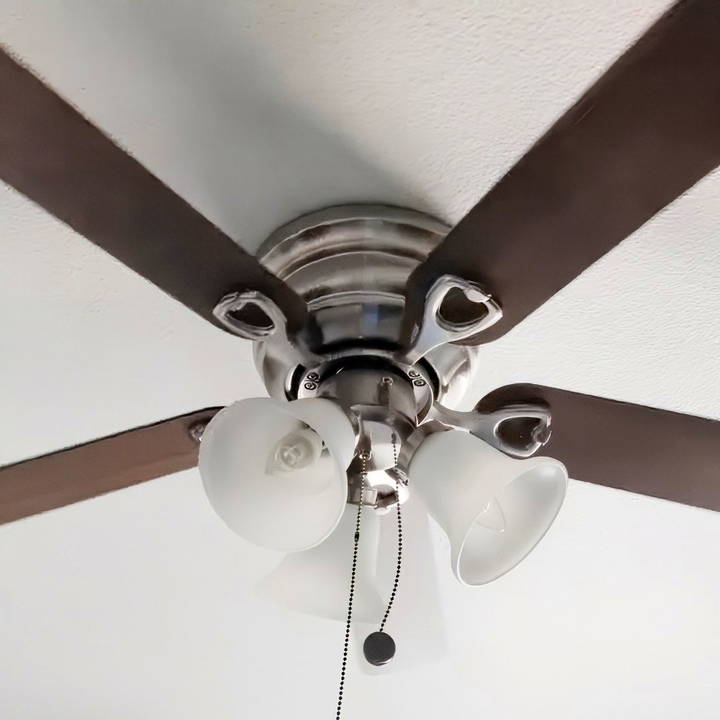
Why Ceiling Fan Chains Break
Ceiling fan chains can break for several reasons:
- Wear and Tear: Over time, pulling the chain repeatedly can weaken the internal mechanism, especially if it's a plastic component.
- Excessive Force: Pulling too hard on the chain can cause it to snap or damage the switch mechanism.
- Old or Faulty Parts: Older fans may have switches or chains that simply wear out due to aging materials.
Understanding why the chain broke can help prevent future issues, making replacement and careful handling a worthwhile long-term solution.
Safety Precautions
Before you begin any repair work, prioritize safety. Working with electrical devices can be dangerous, so take these precautions:
- Turn Off the Power: Shut off the power at the circuit breaker to eliminate any risk of electric shock.
- Use Insulated Tools: Make sure any tools you use are insulated to prevent accidental electric shocks.
- Wear Safety Goggles: Some parts, like springs or small wires, can snap or pop out unexpectedly. Goggles protect your eyes from potential hazards.
Tools and Parts Needed
Gather the necessary tools and parts to make the repair process smoother and more efficient.
Tools:
- Screwdriver (usually Phillips)
- Needle-nose pliers
- Wire cutters or strippers (optional)
- Small flashlight (optional, for visibility in tight spaces)
Parts:
- Replacement ceiling fan pull switch (three-speed switch if applicable)
- Replacement chain, if the original chain is too damaged
- Electrical tape
Step by Step Instructions
Learn how to fix your ceiling fan chain with easy step-by-step instructions. Follow our guide for a quick repair and tips on maintenance.
Step 1: Remove the Ceiling Fan Housing
- Locate the Screws: Find the screws holding the fan housing cover in place, typically found around the base of the fan.
- Unscrew Carefully: Unscrew each screw, holding the cover to prevent it from dropping suddenly.
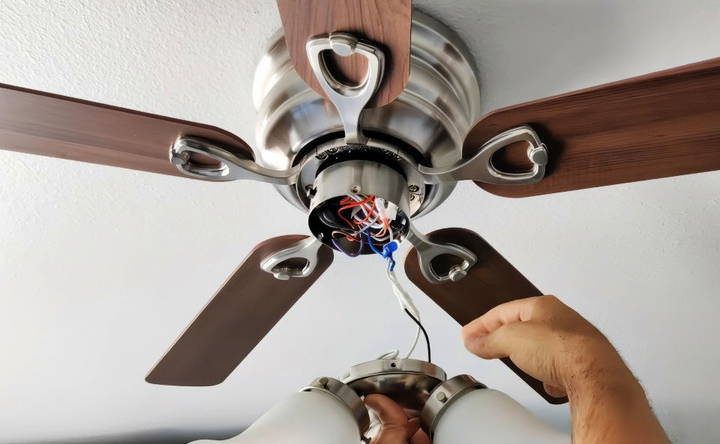
- Gently Lower the Housing: Once all screws are removed, carefully lower the housing cover to expose the internal wiring and the broken switch.
Step 2: Identify the Switch and Detach the Wires
- Locate the Old Switch: Find the pull switch, which usually has a few wires attached to it, often in different colors like black, brown, purple, or gray.
- Note Wire Positions: Observe and remember the wire colors and their positions in the switch. Taking a photo can be helpful to ensure you reconnect them correctly later.
- Disconnect the Wires: Using needle-nose pliers, carefully pull each wire from the old switch. Avoid yanking, as that could damage the wires.
Step 3: Remove the Old Switch
- Release the Switch: Depending on your fan model, the switch may either pull out directly or need to be unscrewed from the housing.
- Check for Part Numbers: Before discarding the old switch, look for a part number or model number. This will help you confirm that your replacement switch matches the old one.
- Dispose of the Old Switch: If the switch is beyond repair, dispose of it safely, keeping in mind that some components may be recyclable.
Step 4: Install the New Switch
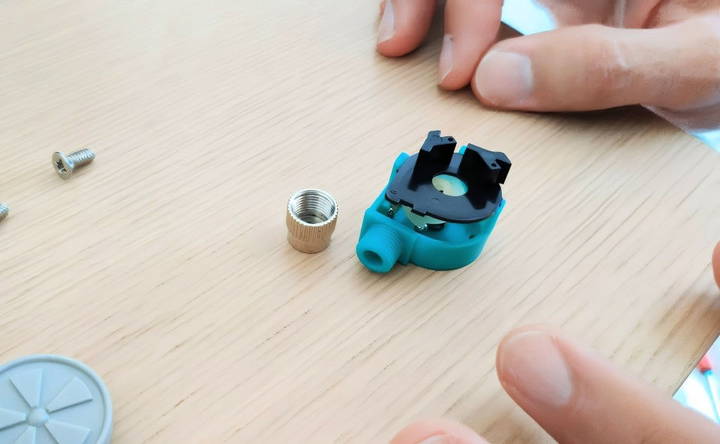
- Prepare the New Switch: Check that the new switch matches the part number or configuration of the old one.
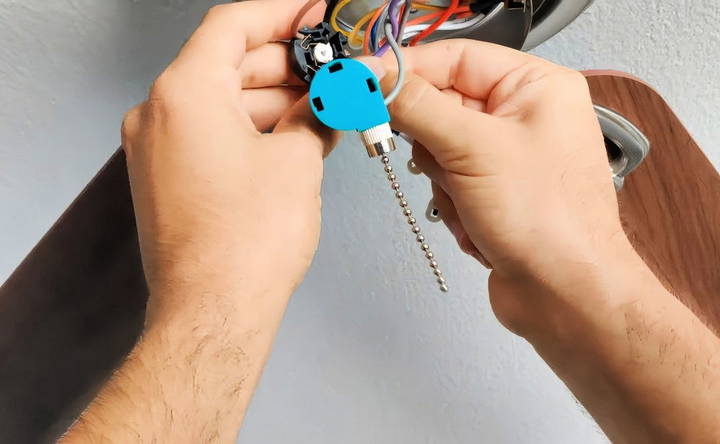
- Insert the Wires: Insert each wire into the appropriate hole or slot on the new switch, using the photo or notes you took for guidance. The wire colors should match the previous setup.
- Gray Wire: Insert into its designated slot.
- Purple Wire: Push it into the corresponding slot.
- Brown Wire: Place it in its assigned slot.
- Black Wire: Position it in the final slot.
- Ensure Secure Connections: After inserting each wire, tug gently to confirm that it's firmly seated in place.
Testing the New Switch
Before you fully reassemble the fan, test the new switch to confirm everything is working.
- Inspect for Safety: Ensure none of the wires are touching each other or exposed metal parts.
- Turn the Power On: Go back to the circuit breaker and switch the power back on.
- Test the Pull Chain: Carefully pull the chain to test the different fan speeds. If everything works smoothly, the new switch is installed correctly.
Note: If the fan doesn't work as expected, turn off the power immediately and check the wire connections. Loose connections are often the cause of issues.
Reassembly and Finishing UP
Effortlessly complete your ceiling fan project with our guide on reassembly and finishing techniques for a perfect installation.
Step 1: Reattach the Housing
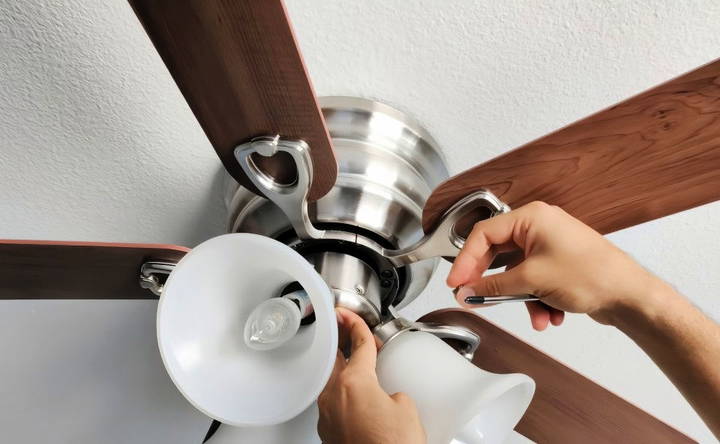
- Fit the Housing Back in Place: Position the housing cover back onto the fan, aligning it with the screw holes.
- Secure the Screws: Insert each screw and tighten securely. Avoid overtightening, as this could strip the screw threads or damage the fan housing.
Step 2: Attach the Chain Extension
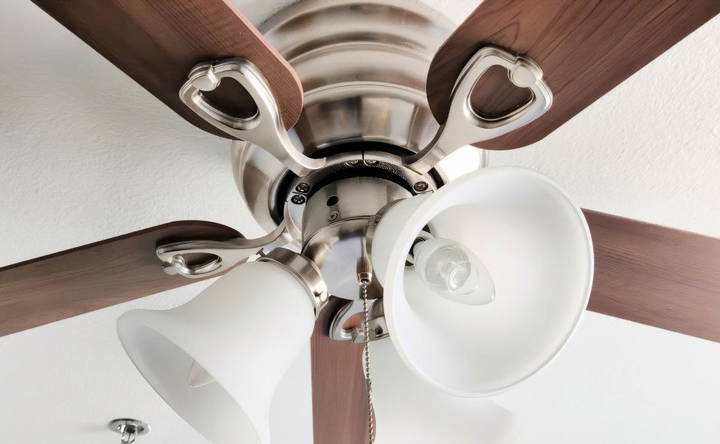
- Add an Extension Chain: Attach the extension chain (if you have one) to the new switch's pull chain to make it easier to reach.
- Cap Off the Chain: If your switch came with a decorative cap or pull, attach it to the end of the chain for easy use.
Step 3: Final Test Run
- Turn on the Power: Once more, restore power at the circuit breaker.
- Check for Full Functionality: Pull the chain to test all settings, ensuring the fan works at each speed without issues.
Tips for Future Maintenance
To keep your ceiling fan in top shape and avoid chain-related issues in the future, consider these maintenance tips:
- Pull Gently: Avoid pulling the chain too hard, as this can damage both the chain and the internal switch mechanism.
- Regularly Dust the Fan: Dust can accumulate inside the fan, potentially affecting its performance. Periodically clean the fan to prevent buildup.
- Inspect Chains Annually: Once a year, check the condition of the pull chain and switch. If it feels loose or worn, consider replacing it before it fails completely.
When to Call a Professional
While fixing a ceiling fan pull chain is generally a manageable DIY task, there are situations where professional assistance might be necessary:
- Complex Wiring Issues: If you encounter complex wiring configurations or additional wires that you're unsure how to handle, calling an electrician can prevent mistakes.
- Non-Responsive Fan: If replacing the switch doesn't restore functionality, the fan might have a more extensive electrical issue that requires expert diagnosis.
- Lack of Tools or Experience: If you lack the appropriate tools or feel uncertain about electrical work, hiring a professional is often safer and can save you time.
Conclusion
Fixing a broken ceiling fan chain can be an easy and rewarding DIY project with the right tools and a bit of patience. By following these steps, you can replace the pull switch, restore the fan's functionality, and save money compared to hiring a professional. Remember to follow safety precautions carefully and always check your work to ensure the fan operates smoothly. With routine maintenance, you can keep your ceiling fan functioning properly for years to come.
FAQs About Fixing Ceiling Fan Pull Chains
Discover quick solutions for fixing ceiling fan pull chains. Get answers to common FAQs and troubleshoot issues effectively.
Yes, you can try to fix the old switch. Often, the internal spring has loosened or stretched over time. Carefully rewind the spring to restore functionality. However, if the internal parts are damaged, it’s generally easier and more reliable to buy a replacement.
If the fan operates at only one speed, it may be a wiring issue, an incorrect switch model, or a weak capacitor. Double-check the wire connections and make sure you’ve used the correct switch for your fan model. If issues persist, testing or replacing the capacitor might be necessary.
Yes, wire color matters as it corresponds to specific terminals on the switch. Follow the wiring diagram provided or refer to the old switch setup. Incorrect wiring can prevent the fan from working properly, with potential issues like reversed speed sequences.
If the chain feels stuck or hard to pull, it might be misaligned internally or getting caught. Check the switch alignment and ensure it’s correctly installed. Applying gentle pressure when reattaching and testing can help avoid this issue.
Not all 3-speed switches are universal. While many fans use similar switches, some models have specific wiring sequences or terminal configurations. Always check compatibility before purchasing, especially if the wiring sequence differs from your current switch.
Yes, replacing the chain for a fan light switch follows similar steps: turn off the power, open the housing, replace the switch, and reattach the chain. However, light switches sometimes differ in wiring, so check for specific instructions for light switches if available.
Some switches have metal teeth or small springs inside that hold the wires in place. If the wires are loose, apply a bit of solder to reinforce the ends or gently push until they securely click in. This ensures a stable connection without the wires slipping out.
If there's no wall switch, you'll need to turn off the power at the circuit breaker. This will cut power to the entire fan and allow you to work safely until the replacement part arrives.


