Learn how to fix a dent in a car at home with simple DIY techniques. Save money and restore your car's appearance with an easy, effective method! Dents in cars are inevitable, whether they come from minor accidents, parking mishaps, or unexpected debris. While these imperfections can be annoying, repairing them at home is a feasible and cost-effective option. This guide provides a complete process for fixing a dent, from preparation to the final polish, helping you achieve a smooth, professional-looking result. By following these steps, you'll be able to restore your car's appearance without the need for a costly trip to the body shop.
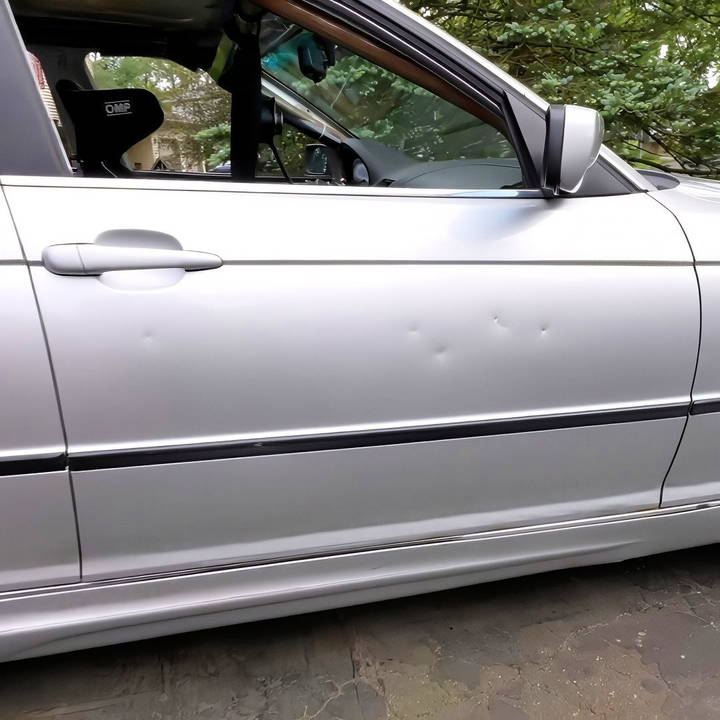
Understanding Dent Repair Methods
There are two primary methods for fixing dents on cars:
- Paintless Dent Removal (PDR): This method is ideal for small, shallow dents where the paint is intact. It involves using a PDR kit with tools like a slide hammer to gently pull out the dent without the need for painting.
- Body Filler Method: For larger, deeper dents where the metal is sharply bent or the paint is damaged, the body filler method is the way to go. This process involves sanding, applying filler, and repainting to achieve a smooth finish.
For this guide, we'll focus on the body filler method, which is effective for most DIY enthusiasts tackling significant dents.
Essential Tools and Materials
Before starting the repair process, gathering the right tools and materials is crucial. Here's what you'll need:
- Pro Grade Body Filler and Glazing Putty: These are professional-grade products that help fill dents and imperfections.
- Sanding Paper: Various grits from 80 to 5000 are necessary, starting with rougher grits for sanding down to bare metal and finishing with finer grits for a smooth surface.
- Sanding Block: A sanding block helps ensure a flat and even surface during the sanding process.
- Tack Cloth: Useful for removing dust between sanding and painting stages.
- Spray Paint: Including Primer, Base Coat, and 2K Clear Coat. Ensure that the base coat matches your car's color.
- Safety Gear: Use a dust mask, safety glasses, and a full-face respirator when working with fillers and spray paint.
- Other Supplies: Spreaders, degreaser (like soapy water), and isopropyl alcohol for cleaning surfaces.
Having these tools ready will streamline the process and help you achieve professional results.
Step by Step Instructions
Learn how to fix a dent in your car with our step-by-step guide, from preparing the area to achieving a professional finish.
Step 1: Preparing the Area
Proper preparation is key to achieving a smooth, flawless finish:
- Clean the Surface: Use a degreaser-like soapy water to remove dirt, oils, and waxes from the dented area. This prevents contaminants from interfering with the adhesion of the filler.
- Remove Trim if Necessary: If the dent is near the plastic trim, carefully remove it with a plastic trim removal tool. This allows you to work more freely around the dent.
- Mark the Dented Area: Use a marker to circle the dent and its surrounding area. This will help you focus your efforts and prevent over-sanding.
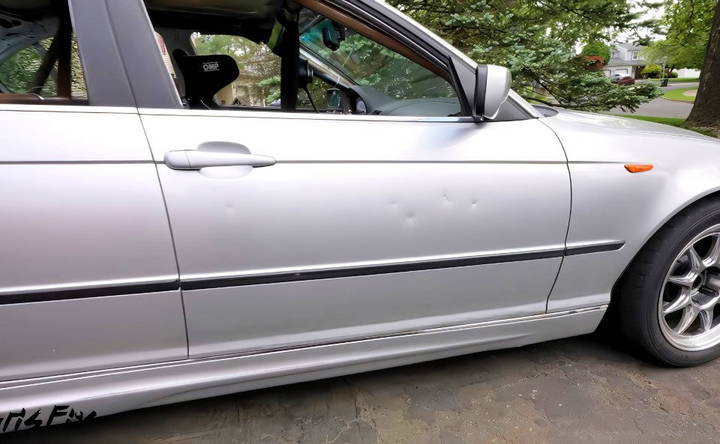
Step 2: Sanding the Dents to Bare Metal
Sanding is an essential step that ensures the filler bonds effectively to the car's surface:
- Start with 80 80-grit sandpaper: Using a sanding block wrapped with 80-grit sandpaper, sand the dent until you reach bare metal. Focus on keeping the sanding area localized around the dent.
- Feather Out the Edges: Sand about 1-2 inches beyond the dent to make a smooth transition between the bare metal and the painted surface. This will make the filler blend seamlessly with the surrounding area.
- Clean the Sanded Area: Use isopropyl alcohol to wipe down the sanded area, removing any remaining dust and debris. Let it dry completely before proceeding.
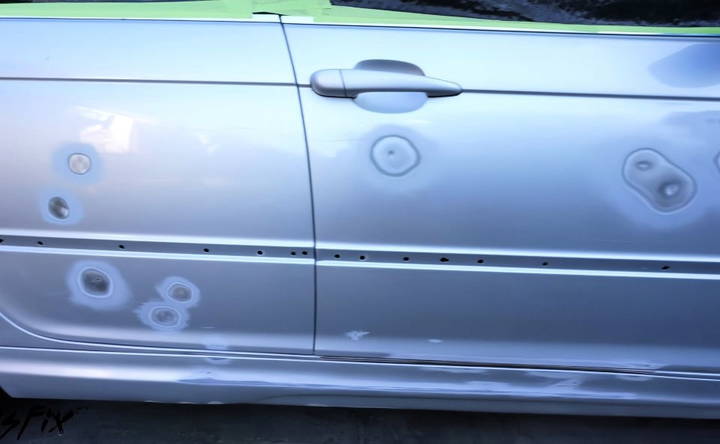
Step 3: Mixing and Applying Body Filler
With the dents sanded, it's time to fill them using a body filler:
- Mix the Filler: Open the body filler can and mix it thoroughly for a uniform consistency. Add the cream hardener according to the manufacturer's instructions, usually a bead of hardener for a specific amount of filler.
- Spread the Filler: Using a spreader, press a small amount of the mixed filler into the dent. Apply with firm pressure to ensure the resin adheres to the metal, which prevents air pockets.
- Build Up the Layers: Gradually add more filler, keeping it slightly higher than the surrounding surface. This makes it easier to sand the filler down evenly later.
- Let it Cure: Allow the filler to dry for about 15 minutes until it is firm to the touch.
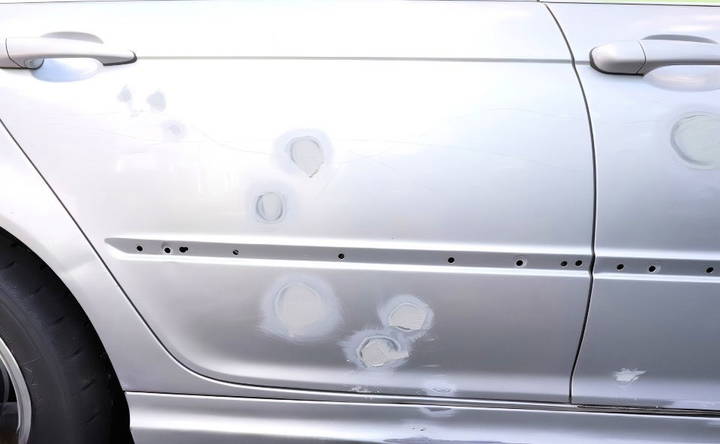
Step 4: Sanding the Body Filler
Once the filler is cured, the next step is to sand it down to match the car's contours:
- Use 80 Grit Sandpaper: Start with 80-grit sandpaper on a sanding block, sanding in an “X” pattern to achieve a smooth and even surface.
- Switch to 180 Grit Sandpaper: After leveling the filler, move to 180-grit sandpaper. This step helps feather the filler into the surrounding paint, blending the repaired area smoothly with the existing paintwork.
- Check for Imperfections: Run your hand over the repaired area. If it feels smooth without any noticeable ridges, it's ready for glazing putty.
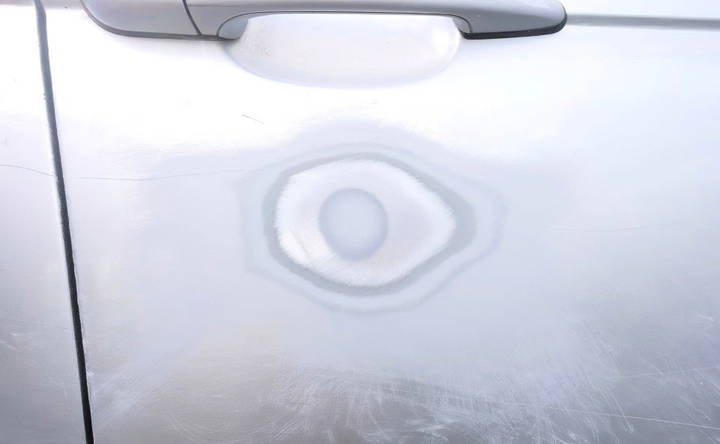
Step 5: Applying and Sanding Glazing Putty
Glazing putty fills any minor imperfections, low spots, or pinholes left in the body filler:
- Mix the Glazing Putty: Mix the putty with the hardener using a clean surface to ensure the correct ratio.
- Apply a Thin Layer: Spread a thin layer over the filler area, pressing it into any low spots. Add another layer if necessary to ensure the area is slightly higher than the surrounding surface.
- Sand Smooth with 320 Grit: After the putty has cured for about 15 minutes, sand it down using 320-grit sandpaper. Sand in smooth, consistent strokes for an even finish.
- Finish with 400 Grit: For a final smooth touch, sand the entire area with 400-grit sandpaper, prepping the surface for painting.
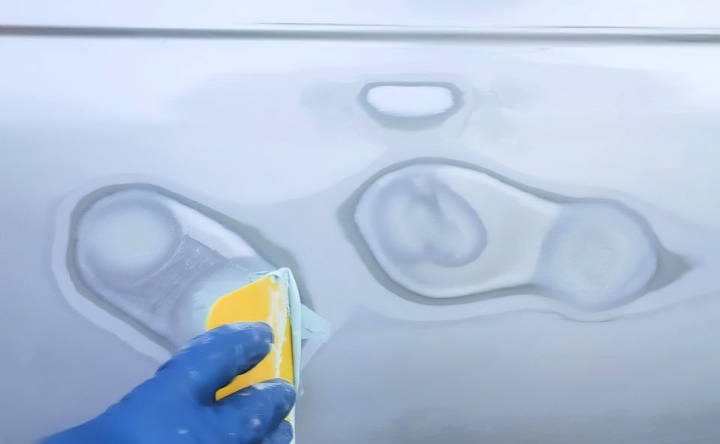
Step 6: Preparing for Paint
A good paint job can make the difference between an obvious repair and a flawless finish. Here's how to get the panel ready for paint:
- Remove Dust: Use a leaf blower or compressed air to remove any dust from the sanded surface. Dust can ruin a smooth paint finish, so it's important to be thorough.
- Wipe with Tack Cloth: Use a tack cloth to remove any remaining dust. Tack cloths are sticky and will pick up fine particles that other methods might miss.
- Mask Off the Area: Use painter's tape and masking paper to protect areas of the car that you do not want to paint. Be meticulous with this step to avoid overspray.
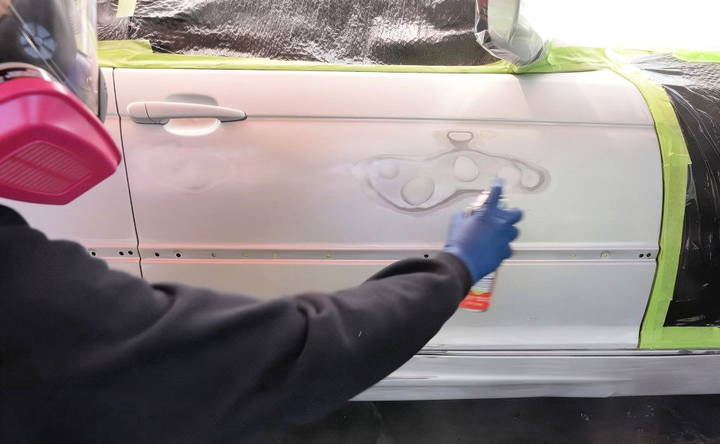
Step 7: Applying Primer
Applying primer makes a base layer for the color coat and ensures the paint adheres properly:
- Apply Light Coats: Spray a light coat of primer over the sanded areas. Hold the can about 8-12 inches from the surface and move it back and forth evenly.
- Build Up the Layers: Apply 2-3 coats of primer, allowing a few minutes between coats. Each coat should be slightly heavier than the last, but not so thick that it causes drips.
- Sand the Primer with 400 Grit: After the primer has dried, sand it with 400-grit sandpaper to smooth out any rough spots.
Step 8: Applying the Base Coat
After priming the surface, it's time to apply the base coat, which restores the original color of your car:
- Match the Paint Color: To ensure a seamless repair, use a base coat that matches your car's color code. The color code can usually be found on a sticker in the driver's side door jamb or under the hood.
- Apply the First Coat: Hold the spray can 8-12 inches from the surface and start spraying off the panel, moving steadily across the repair area. This prevents heavy spots or drips. Keep the first coat light, focusing on even coverage.
- Build Up Layers: After the first coat dries for a few minutes, apply 2-3 more coats. Shake the can occasionally to keep the metallic particles evenly suspended (if using a metallic paint). Aim for a smooth, even color distribution.
- Blend the Paint: For a seamless finish, gradually blend the new paint into the surrounding areas, feathering it out so that the transition between the new and existing paint is not noticeable.
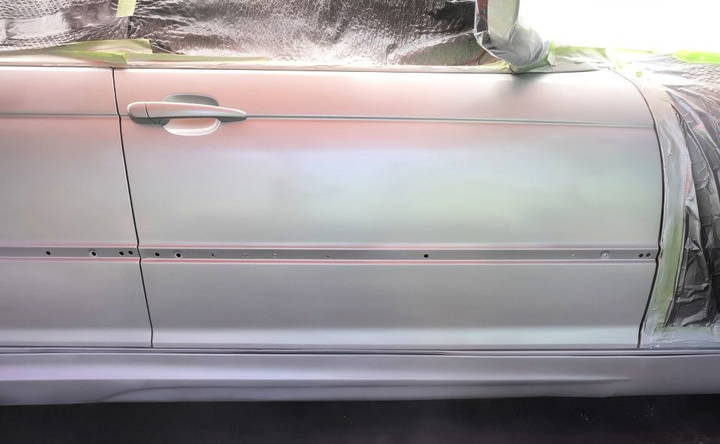
Step 9: Applying the Clear Coat
The clear coat is crucial for sealing in the color and adding a durable, glossy finish:
- Prepare the Clear Coat: If you are using a 2K clear coat, activate the hardener by following the instructions on the can. This type of clear coat is more durable and similar to factory finishes.
- Apply Light Coats: Just like the base coat, begin with a light coat, spraying in steady motions across the panel. Focus on even coverage, but avoid applying too much at once, as it can cause runs.
- Build Up Layers: Apply 2-3 coats of clear coat, making each layer slightly thicker than the last. Allow a few minutes between coats for the layers to dry.
- Final Drying Time: Let the clear coat dry for at least 24 hours in a well-ventilated area. Avoid touching the surface during this time to prevent imperfections.
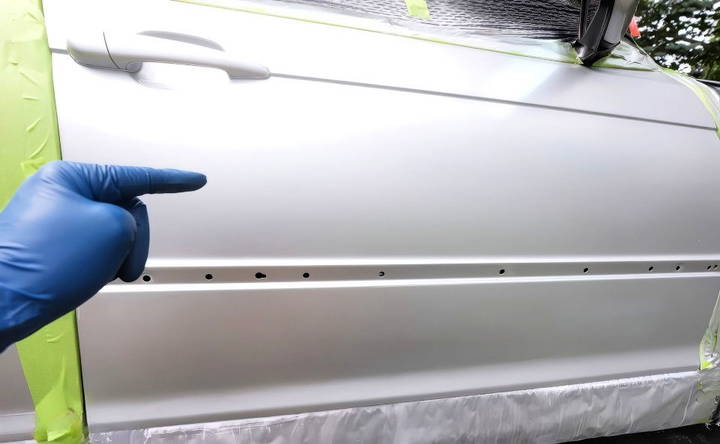
Step 10: Wet Sanding the Clear Coat
Wet sanding helps to smooth out imperfections in the clear coat, like orange peel or dust particles:
- Start with 1000 Grit Sandpaper: Spray the panel with soapy water and wrap 1000-grit sandpaper around a soft sponge. Sand the clear coat in straight lines, keeping the area wet to avoid scratches.
- Move Up to 2000 and 3000 Grit: After achieving a uniform haze with the 1000 grit, switch to 2000 grit, and then 3000 grit. These finer grits will refine the surface and remove any scratches left by the previous sandpaper.
- Finish with 5000 Grit: Use 5000-grit sandpaper for the final pass, which will leave a smooth surface ready for polishing. Wipe the surface clean with a microfiber towel between each step to monitor progress.
Step 11: Compounding the Surface
Compounding removes the fine scratches left by wet sanding, restoring the shine:
- Use a Compound: Apply a small amount of automotive compound (PC1) to a polishing pad. Work in small sections using medium-heavy pressure and circular motions.
- Buff the Area: Continue working the compound into the surface until the haze disappears, leaving behind a more reflective finish. Use a clean microfiber cloth to wipe away excess compound.
- Repeat as Needed: If some areas still appear dull, repeat the compounding process until the surface has a uniform shine.
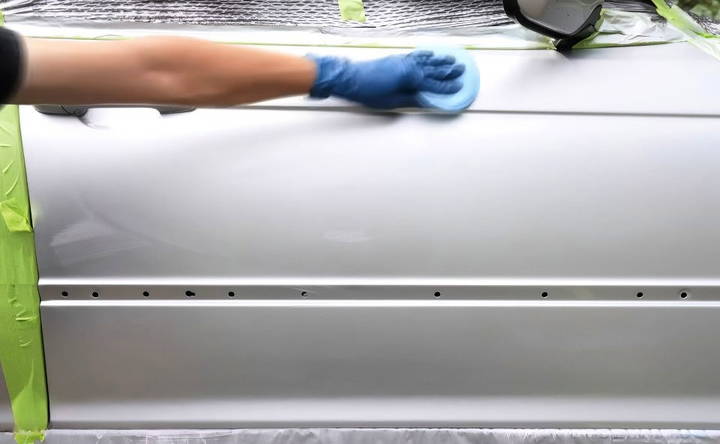
Step 12: Polishing for a Glossy Finish
Polishing is the final step to achieve a deep, glossy look:
- Apply Polish: Use an automotive polish (PC2) with a clean side of the polishing pad. Apply a small amount of polish and use the same circular buffing technique.
- Work in Sections: Buff the entire panel, focusing on achieving a consistent shine. Polish helps to refine the finish and bring out the depth in the clear coat.
- Finish with a Super Fine Polish: For a professional-grade finish, use a finishing polish (PC3). This step smoothens out any remaining fine scratches, leaving a deep, mirror-like gloss.
- Final Wipe Down: Use a clean microfiber towel to buff away any remaining polish residue and reveal a perfect shine.
Step 13: Reinstalling Trim and Finishing Touches
Now that the surface is smooth and shiny, it's time to put everything back together:
- Reinstall Plastic Trim: Snap the plastic trim back into place, using new clips if the old ones were damaged during removal. Align the trim carefully for a snug fit.
- Inspect for Touch-Ups: Check the entire panel for any missed spots or imperfections. Use a small touch-up brush if needed to cover any tiny scratches or chips.
- Let the Paint Cure: Even after polishing, it's a good idea to let the paint cure fully before washing the car. This usually takes about two weeks. Avoid waxing the area during this time to allow the paint to harden completely.
Tips for a Professional Finish
- Use Quality Products: The difference between a good and great DIY repair often comes down to using high-quality filler, primer, and paint.
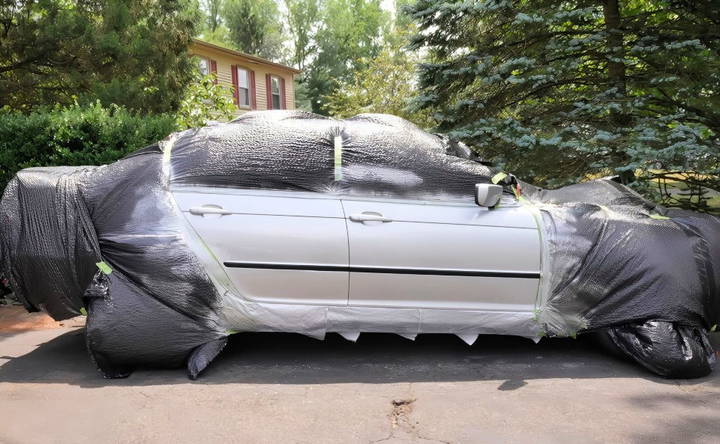
- Work in a Clean Environment: Dust and dirt can ruin a good paint job. Set up a temporary tent or paint inside a clean garage to minimize contaminants.
- Practice Patience: Rushing through the sanding, filling, or painting process can result in a less-than-perfect finish. Take your time to ensure each step is done correctly.
- Safety First: Always wear appropriate safety gear when sanding or using chemicals, especially during the painting process. Spray paints and clear coats can release harmful fumes.
Conclusion: Achieving a Flawless Repair
Fixing a dent in your car might seem like a daunting task, but with the right tools, materials, and a bit of patience, you can achieve professional results right at home. The body filler method is particularly effective for deeper dents, providing a durable and smooth finish that blends seamlessly with your car's existing paintwork. By following this comprehensive guide, you'll not only save money but also gain a sense of accomplishment every time you see that perfect, dent-free finish on your vehicle.
Whether you're repairing a single dent or tackling multiple imperfections, this step-by-step guide has you covered. Remember, the key is to take your time and trust the process. Happy repairing!
FAQs About Dent Repair and Bodywork
Get answers to frequently asked questions about dent repair and bodywork, including techniques, costs, and time estimates.
It’s essential to sand the primer coat with 400-grit sandpaper before applying the base coat. This step smooths out any rough spots or “dry spray” from the primer, ensuring a seamless finish once the base coat is applied.
Yes, gently warming the spray can with a heat gun can improve the flow of paint, making it come out more evenly. However, be careful not to overheat, as this could cause the can to explode.
Wet the ground around your workspace to prevent dust from being kicked up. This technique helps keep dust from settling onto your wet paint, especially when painting outside or in a garage.
While applying body filler directly to bare metal is common, it’s better to first use a metal primer or rust inhibitor, especially if the dent area has rust. This approach provides an additional layer of protection and helps prevent future rust.
Although many wait about 24 hours, it’s recommended to let the clear coat cure for at least 3-5 days for optimal results. This time allows the clear coat to harden fully, making it easier to wet sand and polish without damaging the finish.
Regular spray paint can be used for small touch-ups, but it won’t offer the same durability and UV protection as automotive-grade paints. For best results, use paint matched to your car’s color code from a specialized supplier.
If you notice a run while applying the clear coat, allow it to dry, then gently wet sand the area with 1000-grit sandpaper. Follow up with finer grits like 2000 or 3000 to smooth the surface before polishing.
Yes, the same body filler method can be used on aluminum panels. Just ensure the surface is clean and free of contaminants before applying filler or primer.
For small dents, consider Paintless Dent Removal (PDR), which uses tools to massage the dent from the inside out. This method works well if the paint isn't damaged and if the dent isn't too deep.
Yes, an electric sander can speed up the process, especially when sanding down larger areas. However, be careful around edges to avoid removing too much material, as electric sanders can be more aggressive.


