Does your leaky shower head keep you awake at night? Fixing a dripping showerhead doesn't have to be difficult. First, turn off your water supply to prevent any unwanted mess. Then, use a wrench to loosen the shower head and inspect the rubber washer. Often, replacing this small part can solve the leak.
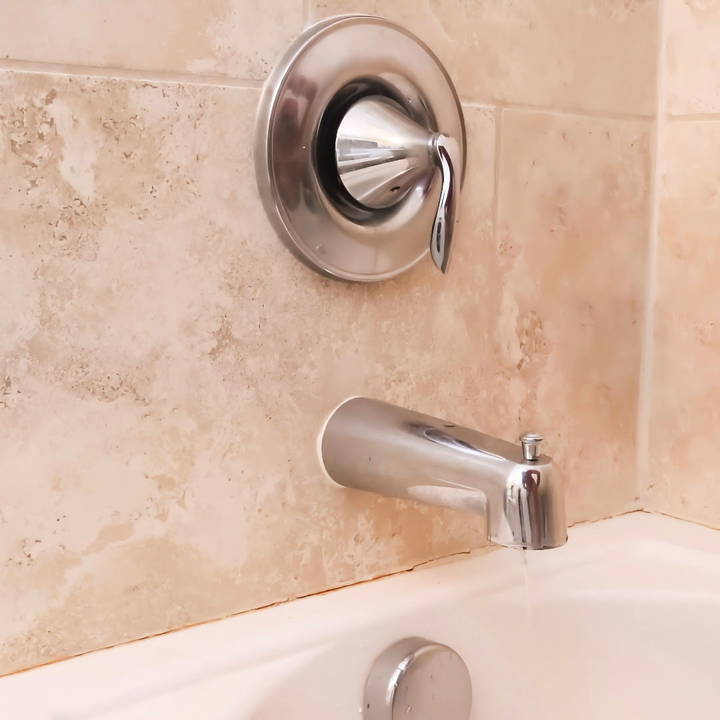
If the leak persists, try cleaning the shower head to remove any mineral build-up. Soak it in a vinegar solution for a few hours to break down the deposits. Your shower head will work like new once it's cleaned and reassembled.
Introduction to Shower Head Maintenance
Maintaining your shower head is key to ensuring a pleasant and efficient shower experience. Over time, shower heads can develop leaks due to various reasons, such as mineral buildup, wear and tear of parts, or improper installation. Regular maintenance not only prevents these issues but also conserves water and saves you money on your water bill.
Why Maintain Your Shower Head?
- Prevents leaks: Regular checks can catch early signs of wear or damage.
- Saves water: A leaky shower head can waste gallons of water.
- Reduces bills: Less water wasted means lower water bills.
- Improves performance: Maintenance ensures a strong and consistent water flow.
Simple Maintenance Tips:
- Regular cleaning: Use vinegar to remove mineral deposits.
- Check connections: Tighten any loose parts to prevent drips.
- Replace washers: Worn-out washers are often the culprit for leaks.
- Inspect for damage: Look for cracks or damage that might cause leaks.
By following these simple steps, you can extend the life of your shower head and enjoy a leak-free shower.
Understanding Your Shower Head Type
Shower heads come in various types and styles, each with its own specific maintenance needs. Knowing your shower head type is the first step to proper care.
Common Types of Shower Heads:
- Fixed: Mounted directly to the wall and typically requires less maintenance.
- Handheld: Connected by a hose, offering flexibility, but may need more frequent checks for leaks.
- Rain: The larger head for a gentle shower experience; check for clogs due to its wider spray area.
Maintenance Based on Type:
- Fixed: Regular descaling and checking for joint leaks.
- Handheld: Inspect the hose for kinks and replace it if needed.
- Rain: Clean the nozzles to prevent blockages from affecting the water flow.
Know your shower head to maintain it well. A bit of care ensures a comfy, eco-friendly shower. Keep it simple, and your shower head will thank you!
Gathering the Right Tools
First, understanding why each tool was needed greatly helped. Here's a breakdown:
- Phillips Screwdriver: For removing screws that were fastening the handle and trim piece.
- Needle Nose Pliers: Essential for pulling out the retaining clip from the faucet assembly.
- Allen Wrench: Needed for loosening the set screw that holds the faucet handle in place.
- Channel Locks: These came in handy for gripping and pulling out the old cartridge.
- Waterproof Grease: This was used to lubricate the new cartridge to ensure smooth operation and a good seal.
I gathered my tools, feeling a bit like a DIY superhero about to embark on a new mission.
Step by Step Instructions
Fix a leaky shower head step-by-step guide from turning off the water to reassembling it. Learn how to replace the cartridge and stop leaks efficiently.
Turning Off the Water Supply
I cannot stress enough the importance of this step - turn off the water supply! I located the main shut-off valve for my home and turned it to the off position to ensure no water was coming into the house. I also closed the drain and laid down a towel to catch any screws that might attempt an escape down the drain.
Removing the Faucet Handle
This was simpler than I thought. A hidden Allen wrench screw beneath the handle, once loosened, allowed me to remove the handle with ease. It was my first aha moment - I was actually doing this!
Dismantling to Reach the Cartridge
Here, things got a bit more intricate. I removed the Phillips screw to take off the trim piece. This revealed the old, faulty cartridge. To remove it, I had to pull a retaining clip with the needle-nose pliers, a slightly challenging task requiring some finesse.
Extracting the Old Cartridge
Channel locks became my best friend at this moment, gripping the old cartridge firmly and coaxing it out. Despite fearing I might damage something, the cartridge finally gave way after consistent pressure. This was a victorious moment!
Preparing and Inserting the New Cartridge
Using waterproof grease on the new cartridge was a step I almost overlooked. By applying it to the O-rings and seals, I ensured a smooth operation and longevity of the cartridge. Inserting it required aligning it properly - something I double-checked before proceeding.
Reassembling Everything
Putting everything back together was just a matter of reversing the disassembly steps — trim piece, retaining clip, handle, all finding their way back to their original positions. Each piece clicked into place, reassuring me I was on the right path.
The Moment of Truth
I turned the water supply back on, my heart racing with anticipation. As I turned the faucet handle, a smooth motion without the dreaded leak signified success! The showerhead was no longer dripping, and the faucet was as good as new.
Advanced Troubleshooting for Shower Heads
When your shower head still leaks after you've tried the basic fixes, it's time for some advanced troubleshooting. This section will guide you through the less common issues that can cause a shower head to leak and how to resolve them.
Identifying Complex Issues
- Internal Valve Problems: Sometimes, the issue isn't with the shower head but with the internal valve. If replacing washers and O-rings hasn't worked, check the valve for signs of wear or damage.
- Pressure Imbalances: Fluctuations in water pressure can cause leaks. Installing a pressure-balancing valve can help maintain a consistent pressure and prevent leakage.
- Corrosion Inside Pipes: Corrosion can lead to small fissures or weak spots in the piping, which may cause leaks. Inspect pipes for any signs of corrosion.
Solving Tough Leaks
- Valve Replacement: If the valve is damaged, it may need to be replaced. This is a more complex task and might require turning off the water supply and disassembling part of the shower unit.
- Pressure Valve Installation: A plumber can install a pressure-balancing valve for you, which can solve leaks caused by pressure imbalances.
- Pipe Repair: If you find corrosion, the affected section of the pipe may need to be replaced. This job typically requires a professional plumber.
Safety First
Always remember that safety comes first. If you're not comfortable performing these tasks, or if the repair involves major plumbing work, it's best to call a professional. They have the tools and expertise to safely and effectively fix the problem.
Address these issues to keep your shower head efficient and leak-free. Regular maintenance can prevent most problems.
When to Call a Professional
Fixing a leaky shower head can often be a simple DIY task, but there are times when it's best to call in a professional. Knowing when to seek help can save you time and prevent potential damage to your bathroom. Here's how to tell when professional assistance is needed:
Complex Internal Issues:
- If you've tried basic repairs and the leak persists, the problem may lie deeper within the plumbing system.
- A professional plumber can diagnose issues that aren't visible, such as problems with the internal valve or the water line connection.
Specialized Tools Required:
- Some repairs may require tools that aren't typically found in a standard toolbox.
- Plumbers have access to specialized equipment that can make the repair process quicker and more effective.
Risk of Water Damage:
- Incorrect repairs can lead to more significant leaks and water damage.
- A professional can ensure that the repair is done correctly, protecting your home from costly damage.
Warranty and Insurance:
- DIY repairs might void warranties on your shower head or plumbing.
- Professionals are often insured, which means if something goes wrong during the repair, it's covered.
When Time is of the Essence:
- If you're short on time or need the repair done urgently, a professional can usually address the issue quickly.
- This is particularly important if the leak is severe and causing immediate damage or inconvenience.
Safety Concerns:
- Plumbing repairs can sometimes involve risks, especially when dealing with hot water lines.
- Professionals are trained to handle these risks safely.
No shame in asking for help. Plumbers have the skills and tools for tough jobs. Know your limits to avoid stress and higher costs.
FAQs About Fixing a Leaky Shower Head
Get answers to your questions about fixing a leaky showerhead. Discover easy solutions and tips to stop leaks and save water.
A leaky shower head can often be attributed to mineral build-up or a worn-out gasket. Hard water, which contains minerals like calcium and magnesium, can clog the shower head’s holes, leading to leaks.
Yes, many shower head leaks can be fixed at home without professional help. Simple steps like cleaning the shower head, replacing the gasket, and using plumber’s tape can resolve most issues.
To clean your shower head, remove it and soak it in vinegar to dissolve the mineral deposits. After soaking, use a brush to scrub away any remaining build-up.
If cleaning doesn't work, check the gasket—the rubber ring inside the shower head. If it's damaged or worn out, replace it to make a proper seal and prevent leaks.
When reassembling, wrap plumber's tape (also known as Teflon tape) around the shower arm's threads before screwing the shower head back on. This helps prevent leaks by ensuring a snug fit.
Final Thoughts
In conclusion, knowing how to fix a leaky shower head can save you from unnecessary frustration and expense. By following simple steps to clean or replace parts, you can quickly resolve the issue. This quick & easy solution ensures your shower won't disturb your peace any longer. Thank you for reading, and happy fixing!


