Before diving into the fix, it's essential to understand what causes zippers to split in the first place. Through constant use, zipper sliders can become worn out, and the space between the slider's bottom plate (that part which brings the two sides of the zipper together) and the top plate can widen. When this gap gets too big, the slider can no longer press the zipper teeth closely enough together, leading to a split or a failure to close properly.
What You'll Need
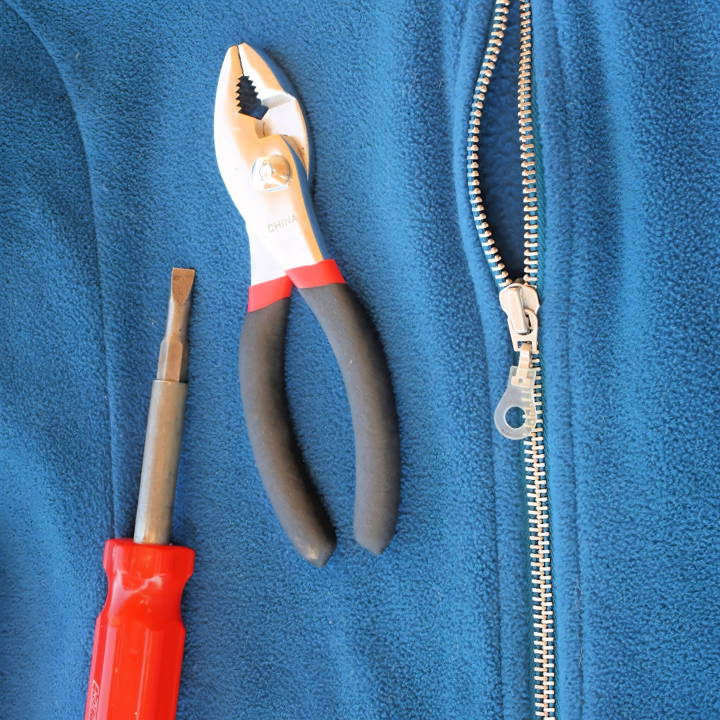
To correct a split zipper, you'll need only a couple of items:
- Pliers: Preferably, you should use smooth-jawed pliers because they are less likely to damage your zipper slider. The smoother the plier's surface, the better, as any serrations or rough edges can cause unnecessary wear to the slider.
- Scrap Fabric or Leather (optional): This is necessary if all you have are serrated pliers. The fabric or leather will protect the slider from potential damage caused by the serrated edges.
Step by Step Instructions
Learn how to fix a zipper with our step-by-step instructions. Easy-to-follow guide from examining to testing, ensuring your zipper works perfectly.
Step 1: Examine Your Zipper
Take a close look at your zipper slider. If it's visibly wider at the bottom when compared to a new or undamaged zipper slider, it's a clear sign that it's worn out and probably the cause of your zipper woes.
Step 2: Prep Your Tools
If you have smooth-jawed pliers, you're good to go. Otherwise, wrap a small piece of scrap fabric or leather around the zipper slider to protect it from the serrated pliers.
Step 3: Applying the Fix
Gently clamp the sides of the zipper slider with your pliers. Remember, you're focusing on the bottom plate of the slider. You don't need to apply a lot of pressure; a slight squeeze should be enough. It's better to tighten gradually than to overdo it and risk damaging the slider or the zipper teeth.
Step 4: Test It Out
After tightening the slider a bit, try sliding it along the zipper to see if there's an improvement. If the teeth still aren't interlocking properly, give it another gentle squeeze and test again. It sometimes requires a bit of patience and minor adjustments.
Step 5: Achieving Success
Once the slider moves smoothly and the teeth interlock as they should, you've successfully fixed your zipper! This little victory means you've just extended the life of your item, be it a garment, a bag, or outdoor equipment.
Why This Method Works
This method is effective because it tackles the root cause of the problem – a widened gap in the slider. By gently squeezing it back into its original shape, you ensure that the necessary pressure is applied to the zipper teeth, enabling them to mesh perfectly as they did when they were new.
Troubleshooting Common Zipper Issues
When it comes to zippers, a few common issues can arise that may hinder their functionality. Understanding how to address these problems can save you from the frustration of a malfunctioning zipper. Here's a straightforward guide to troubleshooting common zipper issues:
Stuck Zipper
- Cause: Dirt or fabric caught in the teeth.
- Fix: Gently wiggle the zipper back and forth to free any trapped material. Clean the teeth with a soft brush and lubricate with graphite from a pencil or a specialized zipper lubricant.
Separated Zipper
- Cause: The slider has come off the teeth.
- Fix: If the slider is not broken, slide it back onto the teeth's end. Press the zipper's bottom stop together with pliers if it's loose.
Misaligned Teeth
- Cause: Teeth not clasping correctly.
- Fix: Examine the teeth for any bends or damage. Use pliers to carefully realign any misshapen teeth. Ensure the slider is seated correctly and runs smoothly over the teeth.
Broken Slider
- Cause: Wear and tear or forceful use.
- Fix: Remove the old slider and replace it with a new one that matches the size and type of your zipper. Attach a new top stop to secure the slider in place.
Zipper Won't Stay Up
- Cause: A worn-out slider that doesn't lock.
- Fix: Tighten the slider's backplate gently with pliers to improve its grip. If this doesn't work, replace the slider.
Following these tips can often fix your zipper without replacement. Keep it clean and lubricated to prevent issues. If unsure or problems continue, get professional help.
FAQs About How to Fix a Zipper
Discover essential FAQs about how to fix a zipper. Get quick, effective solutions to common zipper problems. Save your favorite items today!
Inspect the slider. Often, a zipper won’t close if the slider is damaged. Check if one end of the slider is wider than the other. If so, it’s stretched and needs to be squeezed back to size. Use pliers to gently press the slider back into shape. Be careful not to make it too tight.
Realign the teeth. This usually happens when the teeth don’t mesh well. Start by closing the zipper completely. Then, using a pair of pliers, realign any misaligned teeth by gently guiding them back into place. Test the zipper to see if it closes properly.
Lubricate the zipper. Apply a small amount of lubricant, such as soap or wax, onto the teeth. Move the slider up and down to work the lubricant in. Avoid using too much force, which can cause more damage.
Attach a new pull. If the pull tab has come off, you can temporarily attach a paperclip or a key ring to serve as a makeshift pull. For a more permanent fix, you'll need to replace the slider with a new one that comes with a pull tab.
Replace the zipper. Unfortunately, if the teeth are broken or missing, the best solution is to replace the entire zipper. This might require sewing skills or the help of a professional.
Final Thoughts
Wrapping up, learning how to fix a zipper with an easy method can save you time and money. This straightforward approach ensures that your favorite clothing pieces remain in top shape. With these practical steps, you now know how to fix a broken zipper effectively. Keep this guide handy for any future wardrobe malfunctions. Your zipper-fixing skills will surely come in useful!


