Learn how to fix projector screen wrinkles quickly with our step-by-step guide. Enjoy a clear, smooth projection surface every time. I remember when my screen had so many wrinkles that it ruined my movie nights. I decided to take matters into my own hands. I researched and found simple ways to fix it. In this article, I'll share tips to make your projector screen wrinkle-free. These tips are easy to follow and will surely help you.
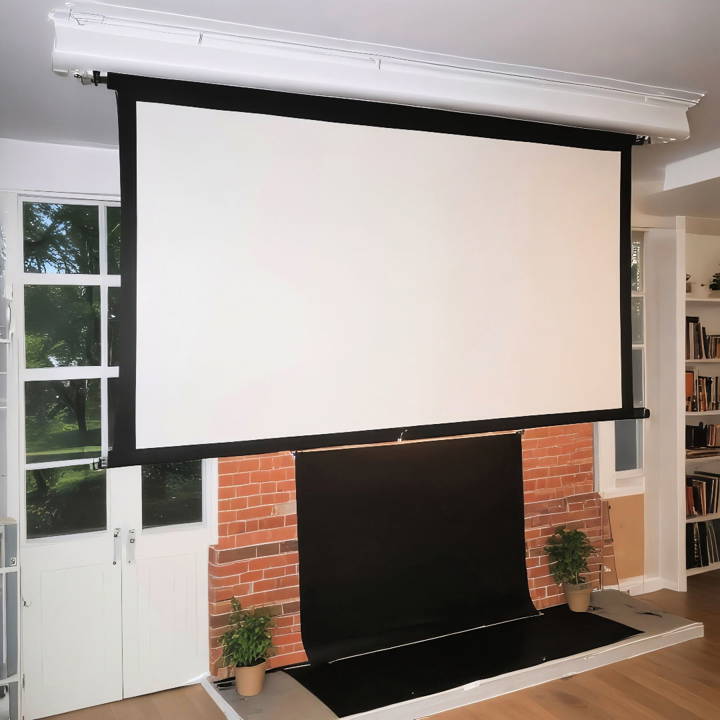
You can achieve a flawless view in no time. From gentle heat applications to proper storage techniques, these methods are effective. I'm helping with this guide to ensure you enjoy a smooth, wrinkle-free screen. Keep reading to find out how!
Understanding Projector Screen Wrinkles
Projector screen wrinkles can be frustrating, but understanding their causes and how to fix them is key to a great viewing experience.
What Causes Projector Screen Wrinkles?
- Shipping and Handling: Wrinkles often appear after shipping or moving the screen, especially if it's been rolled up tightly.
- Temperature Changes: Vinyl screens are particularly sensitive to temperature fluctuations, which can cause the material to expand or contract and lead to wrinkles.
- Humidity: High humidity can also affect screen materials, making them more prone to wrinkling.
- Improper Installation: Stretching the screen too tightly or unevenly during installation can make wrinkles.
- Material Type: Some screen materials, like vinyl, are naturally more susceptible to wrinkling than others.
Preventing Wrinkles in the First Place:
- Store Properly: Store your screen in a cool, dry place away from direct sunlight. Roll it up loosely if it's not in use.
- Handle with Care: Avoid creasing or folding the screen. When setting it up, stretch it evenly and avoid over-tightening.
- Use a Wrinkle-Resistant Screen: If you live in a humid climate or frequently move your screen, consider investing in a wrinkle-resistant screen material.
With proper care and attention, you can keep your projector screen wrinkle-free and enjoy a smooth, clear picture.
Materials Needed
- Metal Brackets and 2x4s for Reinforcement: To make the frame more rigid, ensuring no warping contributes to the fabric's distortion.
- Rounded Trim: This is crucial for a smoother stretching pathway for the fabric, minimizing resistance and avoiding sharp bends that could compromise the stretch.
- Canvas Stretching Tool: This nifty device allows for a more effective grip and stretch on the canvas, ensuring an even pull across the surface.
- Staple Gun: For securing the fabric tightly in place after stretching.
Why These Materials?
Understanding the root of the problem was crucial. The original frame's design wasn't robust enough to maintain tension, and the sharp corners weren't conducive to an even stretch. The materials listed above were selected to address these specific issues effectively.
Step by Step Instructions
Learn how to fix projector screen wrinkles step-by-step: from making the frame rigid to securing the fabric with precise stretching and finishing touches.
Making the Frame More Rigid
First, I reinforced the wooden frame with metal brackets and additional 2x4s. This included a diamond support in the middle and side supports, ensuring no sound obstruction for the acoustically transparent fabric.
Modifying the Frame Corners
Using rounded trim from a home improvement store, I modified the frame corners to allow the fabric to stretch over a less resistant path. This simple alteration makes a significant difference in the stretching process.
The Stretching Process
Stretching the fabric was a meticulous task that required patience and precision. With the help of my son, we used the canvas stretching tool to pull the fabric evenly. A critical insight was to follow the weave of the fabric, not simply stretching in perpendicular directions. This ensured a more natural stretch, aligning with the fabric's inherent structure.
Securing the Fabric
Once properly stretched, I used a staple gun to secure the fabric in place. It was important to maintain tension while stapling, ensuring no slack that could lead to wrinkles.
Additional Touches for Perfection
To further enhance the viewing experience, I incorporated masking panels to adjust the aspect ratio, using magnets integrated into the frame. This added a professional finish to my DIY project, ensuring the screen not only was wrinkle-free but also adaptable to different content formats.
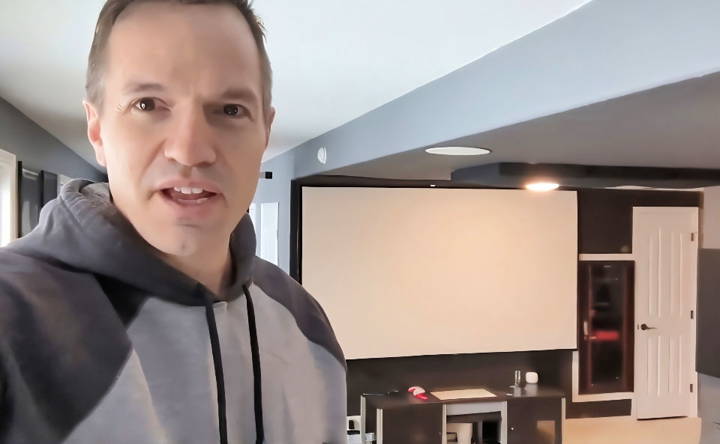
The transformation was remarkable. The previously wrinkled screen was now perfectly flat, showcasing images with stunning clarity and precision. The effort put into stretching the fabric and reinforcing the frame paid off, breathing new life into my home theater experience.
Troubleshooting Common Issues
Projector screens are essential for a clear and crisp display, but sometimes they encounter problems. If you're facing issues with your projector screen, don't worry. Here's a guide to help you troubleshoot some common problems and get back to enjoying your viewing experience.
Wrinkles or Waves on the Screen
If your screen looks like it's borrowed a few lines from a road map, it's likely due to improper storage or handling. To smooth things out:
- Lay the screen flat and let gravity do its work.
- Use a gentle heat source, like a hairdryer, on a low setting to relax the material.
- Consider a professional stretch and frame service for a long-term solution.
Image Doesn't Fit the Screen
When the movie's action seems to spill off the screen, or there's too much empty space, check the following:
- Ensure the projector is directly facing the screen.
- Adjust the zoom and focus settings on your projector.
- Check the aspect ratio settings—sometimes it's as simple as switching from 16:9 to 4:3.
Faint or Dull Image Quality
A dim display can be a real downer. Brighten up your life by:
- Cleaning the projector lens to remove any dust or smudges.
- Replacing an old or worn-out projector bulb.
- Adjusting the brightness and contrast settings on your projector.
Screen Shows Strange Colors
If your white whale looks green, or other colors seem off, it's time to:
- Reset the color settings on your projector.
- Check for any loose cable connections.
- Update your projector's firmware, if available.
Remote Control Not Responding
Nothing happens when you press the buttons? Here's what to do:
- Replace the batteries in the remote.
- Clear any obstacles between the remote and the projector.
- Check if the remote is compatible with your projector model.
Proper setup and maintenance can prevent issues. Keep your projector and screen clean, store them well, and enjoy! If problems persist, consult a professional.
Safety Precautions
Ensuring safety while using a projector screen is crucial, not just for the longevity of the equipment but also for personal well-being. Here are some key safety tips to keep in mind:
Proper Installation
- Make sure the screen is securely mounted on the wall or ceiling. Loose fittings can lead to accidents.
- If you're using a portable screen, ensure it's fully stable and won't tip over.
Handling Heat
- Projectors generate heat, so allow for adequate ventilation around the projector and screen.
- Never touch the projector bulb with bare hands; it gets extremely hot and can cause burns.
Electrical Safety
- Always turn off the projector and unplug it before performing any maintenance.
- Keep liquids away from the projector and screen to prevent electrical hazards.
Light Exposure
- Avoid looking directly into the projector's lens. The intense light can harm your eyes.
- Use screens that diffuse light well to protect your eyes and ensure comfortable viewing.
Maintenance
- Clean the screen with appropriate materials to avoid damage.
- Check for any signs of wear and tear regularly to prevent unexpected issues.
General Precautions
- Be mindful of the projector's position to prevent tripping over cables or the equipment itself.
- Follow the manufacturer's guidelines for use and care of the projector screen.
Follow these safety tips to ensure a safe and optimal viewing experience. Proper equipment setup and maintenance can prevent hazards and extend your projector screen's life.
FAQs About How to Fix Projector Screen Wrinkles
Discover effective solutions to fix projector screen wrinkles with our faqs. Learn easy steps to smooth your screen for optimal viewing.
Wrinkles on projector screens can occur due to improper storage, like folding or rolling the screen too tightly. They can also form if the screen isn’t stretched properly during installation or if it’s exposed to heat or humidity.
Yes, but with great caution. Set the iron to the lowest heat setting and place a towel between the iron and the screen. Iron gently and avoid pressing too hard to prevent damage to the screen's surface.
Certainly! You can stretch the screen on a frame to apply even tension, which can help smooth out wrinkles. Another method is to lay the screen flat and place heavy, flat objects on top of the wrinkles for an extended period.
Using a hairdryer can be effective. Hold it at a safe distance and use a sweeping motion to avoid overheating any area. The warm air can help the material relax and reduce the appearance of wrinkles.
Avoid using excessive heat, which can melt or distort the screen material. Also, do not use sharp objects or excessive force, as these can cause tears or permanent damage to the screen.
Closing Thoughts
I've successfully removed wrinkles from my projector screen using these methods. It's amazing how a few simple steps can make such a big difference. I encourage you to try these tips and see the magic for yourself. These will help you achieve a flawless view and enhance your viewing experience. Let's get those wrinkles out together with these easy steps!


