Learn how to frame a puzzle like a pro with this easy guide. Preserve, mount, and display your favorite puzzles perfectly at home. This guide provides step-by-step instructions, covering everything from materials to finishing touches.
Why Build a Custom Puzzle Frame?
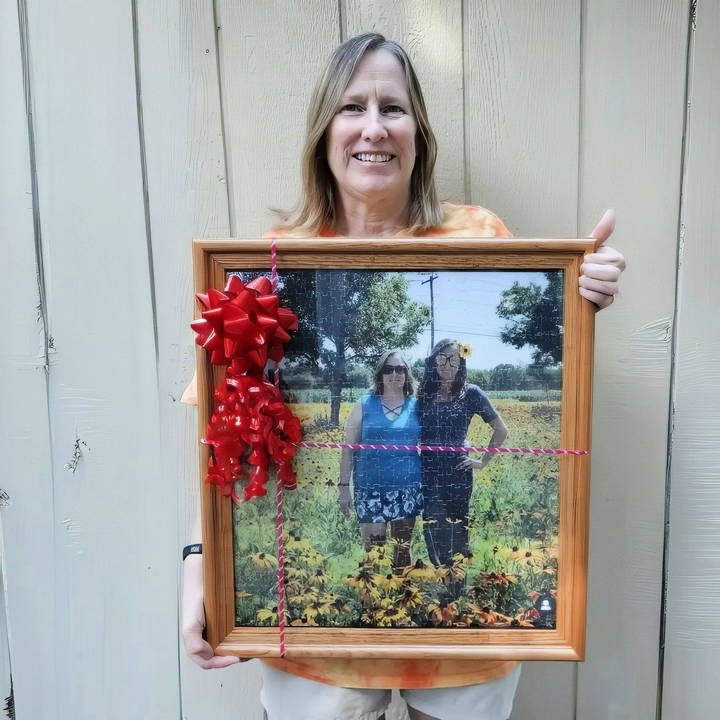
Puzzles come in all shapes and sizes, making it challenging to find a standard frame that fits. Building a custom frame solves this problem while allowing you to choose materials, finishes, and design elements that best highlight your puzzle. For example, you can select a specific wood type or stain that complements the puzzle image and your decor.
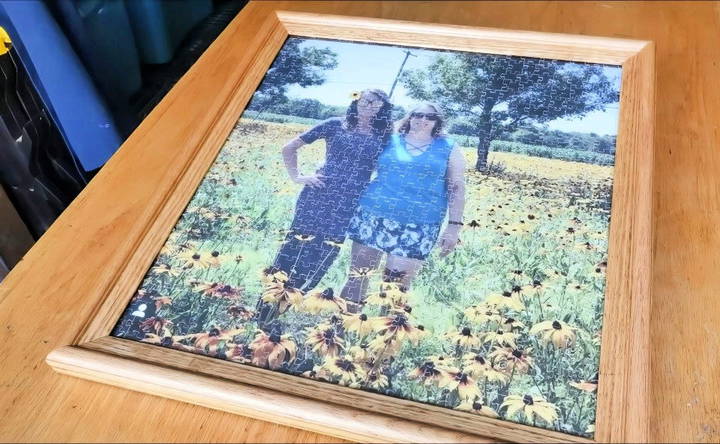
In our example, we'll be framing a 20x20-inch puzzle—a size that isn't readily available in pre-made frames. This custom frame will hold a picture puzzle, featuring a special family photo preserved with a protective coating. We'll use wood, plywood, and a custom-sized piece of glass to make a beautiful, durable frame that lasts.
Materials You'll Need
To build a custom puzzle frame, you'll need a few essential materials:
- Puzzle: Finished and coated for durability.
- Wood for Frame: Solid wood (such as oak) for the frame sides.
- Plywood Backer Board: To provide a sturdy backing.
- Glass: Cut to fit your puzzle dimensions.
- Wood Glue: For secure joins.
- Half-Round Trim: Optional, for decorative detailing.
- Glazing Points: To secure the puzzle and glass in place.
- Wood Stain: A finish like Ipswich Pine for a nice color.
- Polyurethane: For a durable, protective finish.
- Strap Clamp: To hold the frame corners while gluing.
- Small Rubber Bumpers: For stability on the wall.
Tools:
- Measuring tape
- Saw (for cutting wood and trim)
- Clamps
- Wood chisel (for corner reinforcement)
- Brush (for staining and finishing)
- Glass cleaner
Step by Step Instructions
Learn how to frame a puzzle with easy, step-by-step instructions. From measuring materials to adding finishing touches, make your perfect frame today!
Step 1: Measure and Cut Materials
- Measure the Puzzle: Use a tape measure to find the exact size of your puzzle. For example, our puzzle measures 20x20 inches.
- Trim the Puzzle (If Needed): If the puzzle has a white border that you don't want to include, carefully trim the edges. This step ensures the puzzle fits perfectly within the dimensions you desire.
- Cut the Glass: Lay the glass over the puzzle and mark where it needs trimming, then use a glass cutter to make precise cuts.
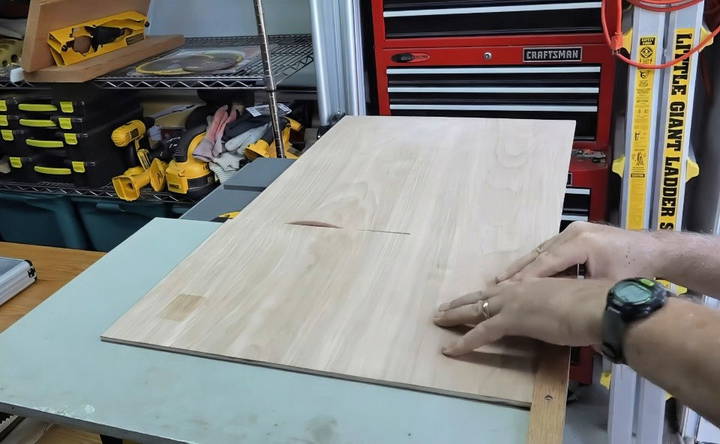
- Cut the Plywood Backer Board: Cut a piece of plywood to match the puzzle's size; this board will provide structure and support for the puzzle.
- Cut the Frame Wood: Using your puzzle and glass measurements as a guide, cut the pieces of wood for your frame. Add a small allowance (about 1/16 of an inch) to each dimension for a snug but comfortable fit.
Step 2: Assemble the Frame
- Make the Frame Profile: Once your wood pieces are cut, you can make a profile by adding a chamfer (angled cut) to the inner edge where the puzzle will sit. This chamfer gives a clean, professional look.
- Add Decorative Trim (Optional): To add character, consider attaching a half-round trim along the top edge of the frame. Use wood glue and clamps to secure the trim without nails, keeping the design clean.
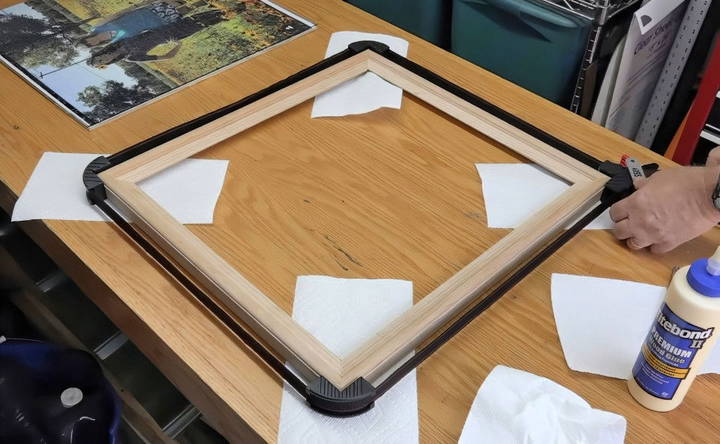
- Glue the Corners: Use wood glue to join the frame's corners. Apply glue, align the edges, and secure them with a strap clamp. Tighten the clamp gradually to pull the frame together.
- Square the Frame: Before the glue sets, use a carpenter's square to ensure each corner is at a 90-degree angle.
Step 3: Reinforce the Corners
For added strength and durability:
- Cut Slots for Splines: Using a saw or chisel, cut small slots into each corner of the frame. These slots are for splines, thin pieces of wood that reinforce the corners.
- Insert Splines: Insert the splines into the slots with wood glue. This technique strengthens the corners and prevents them from coming apart over time.
- Trim and Sand: Once the glue dries, trim any excess spline material and sand the corners smooth.
Step 4: Apply Stain and Finish
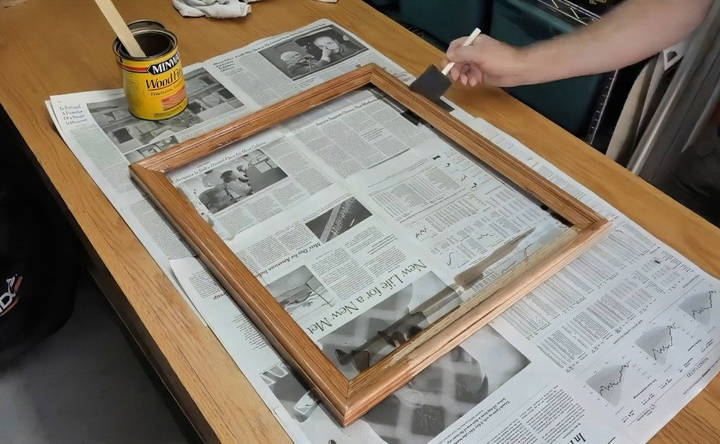
- Choose Your Stain: Apply a wood stain that complements the puzzle. For a natural look, Ipswich Pine is a light, warm brown that brings out the wood grain.
- Apply the Stain: Using a brush, apply an even layer of stain across the entire frame. Allow it to dry as per the manufacturer's instructions.
- Polyurethane Finish: For durability, apply a coat of polyurethane once the stain dries. Helmsman Spar Urethane is excellent for both indoor and outdoor frames, providing lasting protection.
- Allow to Dry: Let the polyurethane dry completely before handling the frame.
Step 5: Assemble the Frame with the Puzzle
Once the frame is dry, you're ready to assemble it with the puzzle.
- Clean the Glass: Before placing it in the frame, clean both sides of the glass with a glass cleaner to remove any dust or fingerprints.
- Insert the Glass: Place the glass at the front of the frame.
- Position the Puzzle: Lay the puzzle over the glass, ensuring it's centered and aligned.
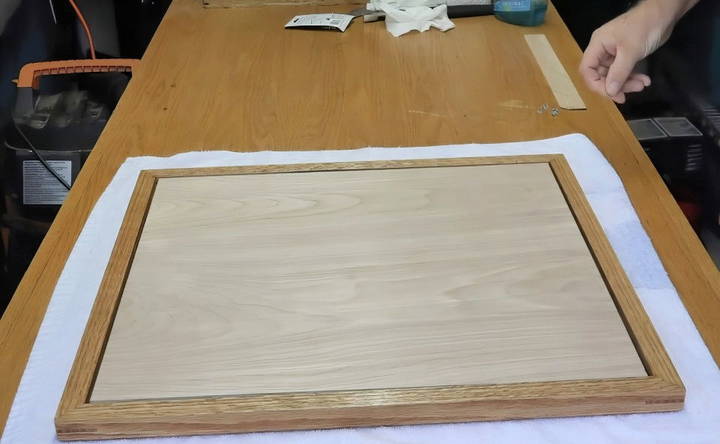
- Attach the Backer Board: Place the plywood backer board over the puzzle, securing everything in place.
- Insert Glazing Points: Use a small tool to press glazing points into the frame sides, holding the puzzle, glass, and backer board firmly in place.
Step 6: Add Finishing Touches
- Install Rubber Bumpers: Place small rubber bumpers at the frame's corners on the back. These bumpers protect your wall and help the frame stay level when hung.
- Add Hanging Hardware: Attach your preferred hanging hardware to the back of the frame, such as D-rings or sawtooth hangers.
Tips and Tricks for Success
- Take Your Time with Staining: Proper staining takes patience, as each coat needs adequate drying time to prevent smudging or uneven color.
- Ensure Precision with Measurements: Careful measurements help avoid frustrating adjustments later, especially for the glass and backer board.
- Use Spline Reinforcements: Although optional, spline reinforcements add a significant level of durability to your frame.
Troubleshooting Common Issues
- Uneven Cuts: If you notice slight gaps in your woodcuts, sand the edges lightly or use wood filler in small gaps.
- Excess Glue Seepage: Wipe any excess glue immediately with a damp cloth to prevent staining on the wood surface.
- Crooked Corners: Recheck the square of your frame with a carpenter's square before the glue dries, as crooked corners affect the overall appearance and fit.
Alternatives to Consider
If woodworking tools aren't readily available, consider these alternatives:
- Pre-Cut Wood Kits: Many craft stores sell pre-cut wood kits that you can assemble and customize with stain or paint.
- Online Frame Builders: Some websites allow you to enter custom dimensions and choose materials, though these may be pricier.
- Magnetic Frames: For a simpler approach, magnetic frames can hold puzzles without the need for custom wood cutting. However, they may lack the durability and aesthetic appeal of a custom frame.
Final Thoughts
Building a DIY puzzle frame can be a fulfilling project that brings a unique personal touch to your home decor. Whether it's a photo puzzle or a stunning landscape, your framed puzzle can become a focal point on your wall, sparking conversations and memories for years to come.
This guide covered each step in detail—from cutting and assembling to staining and final touches. With patience and careful attention, you'll have a stunning custom frame that's both functional and beautiful.
FAQs About DIY Puzzle Frame
Discover answers to common questions about DIY puzzle frames, including materials, assembly tips, and display options for your puzzles.
Apply a special puzzle glue or clear coating to the front and back of the assembled puzzle. This step ensures the pieces stay together as one solid unit when you’re framing it.
If your puzzle doesn’t fit standard glass sizes, measure the exact dimensions and trim the puzzle edges if necessary. You can also purchase a larger piece of glass and cut it down to size with a glass cutter.
Choose a sturdy hardwood like oak or maple for durability. Oak, for example, provides a classic, strong structure that’s easy to stain and complements most puzzle images.
Yes, it’s possible to glue the frame together without nails, which gives a cleaner finish. Use a strong wood glue, apply even pressure with a strap clamp, and ensure the frame stays square during drying.
Adding splines to each corner strengthens the frame and prevents the joints from loosening over time. It’s especially useful for larger or heavier frames, as it provides additional support.
A light wood stain like Ipswich Pine works well for a natural look. After staining, apply a protective coat of polyurethane, such as Helmsman Spar Urethane, which is suitable for both indoor and outdoor use.
Use small metal glazing points to hold the puzzle and glass securely in the frame. Place them around the edges to ensure everything stays in place without shifting.
Before the glue sets, use a carpenter’s square to adjust each corner. Ensure all edges are aligned, and tighten the strap clamp slowly to keep the frame square as the glue dries.
Attach small rubber bumpers to the bottom corners of the frame's back to keep it level on the wall and prevent scratches. Use appropriate hanging hardware based on the frame's weight.


