Growing mushrooms in your own space is a captivating and satisfying hobby. With the right preparation, a bit of patience, and this step-by-step guide, you can grow delicious, edible mushrooms in your own space. Here, we'll cover the essential equipment, the process, and troubleshooting tips to ensure a successful mushroom harvest.
Why Grow Mushrooms at Home?
Mushrooms are unique organisms that grow quickly and require minimal space. Growing them at home provides a fresh supply of high-protein, nutrient-dense food that is not only tasty but also fun to cultivate. Foraging mushrooms in the wild carries risks, but growing them yourself offers a safe and enjoyable way to learn about fungi and their lifecycle.
Step by Step Instructions
Learn how to grow mushrooms with step-by-step instructions, from gathering equipment to harvesting. Maximize yield and address common issues.
Step 1: Gathering the Necessary Equipment
The first part of your mushroom-growing journey involves gathering essential supplies and materials. Here's what you'll need:
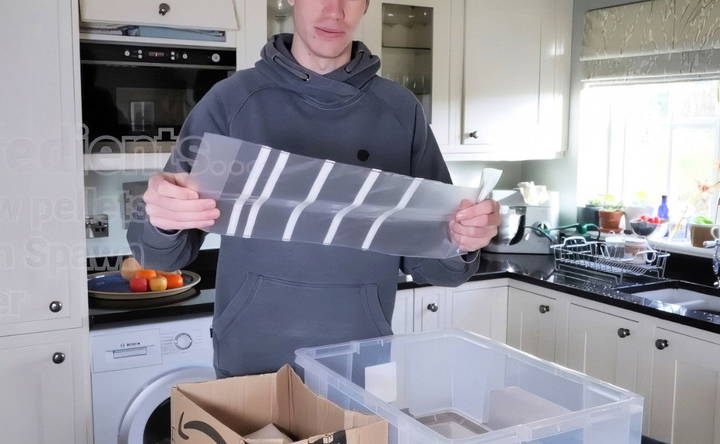
Mushroom Grow Bags
- Why They're Essential: Mushroom grow bags come with filter patches to allow air exchange while keeping out contaminants. This feature is critical because mushrooms are sensitive to competing bacteria or molds.
- Where to Get Them: These specialized bags can be found at gardening or mushroom supply stores or online. Ensure they have air filters for the best results.
Substrate (Straw Pellets)
- Purpose: Straw pellets provide food for the mushrooms. Unlike plants, mushrooms don't photosynthesize; instead, they absorb nutrients from organic matter like straw.
- Why Straw Pellets?: Straw pellets are compacted and pasteurized, which helps eliminate contaminants, providing a cleaner starting point. Other substrate options include sawdust and hardwood chips, but straw pellets are easy to handle and ideal for beginners.
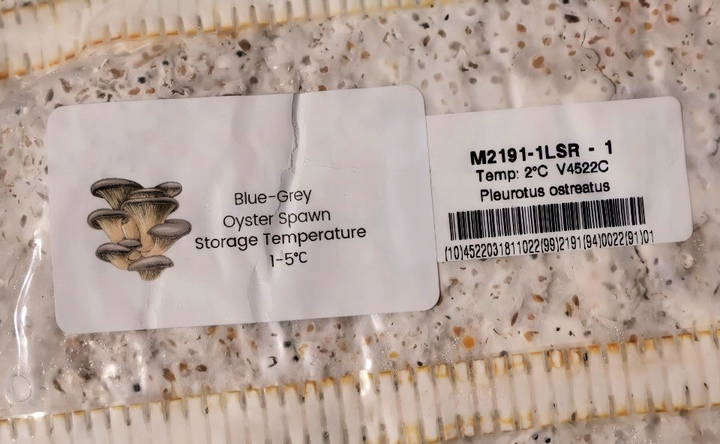
Mushroom Grain Spawn
- What It Is: Grain spawn is essentially a medium like rye or wheat inoculated with mushroom mycelium (the vegetative part of a fungus).
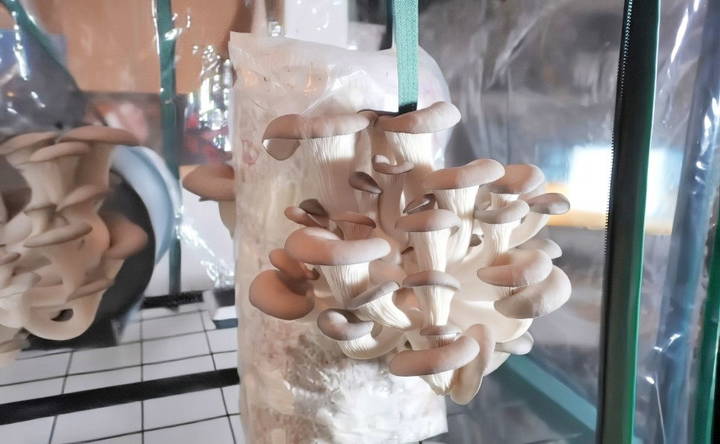
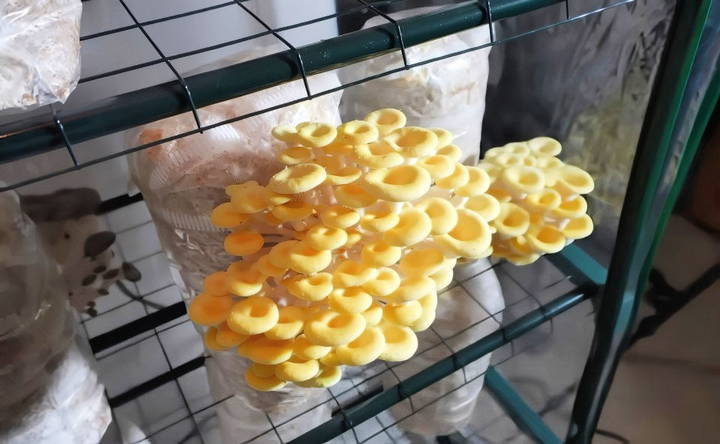
- Choosing Spawn Types: The type of mushroom you choose will determine the grain spawn. Popular choices for beginners are oyster mushrooms (blue-gray or golden) due to their robustness and ease of growth.
- Where to Buy: Mushroom spawn is available from specialty suppliers. Ensure you're buying from a reputable source to avoid contamination issues.
Mixing Container and Weighing Scale
- Mixing Container: For mixing your substrate with spawn, use a large container that's easy to clean.
- Weighing Scale: You'll need a scale to measure the exact quantities of straw pellets and water to create the perfect environment for your mushrooms.
Additional Supplies
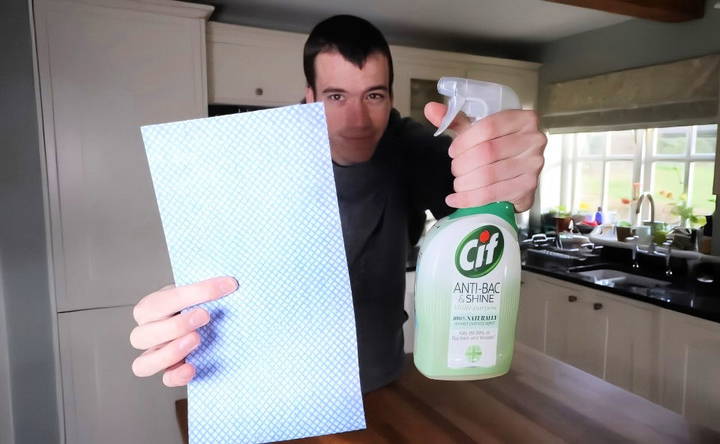
- Anti-bacterial Spray: To clean surfaces and reduce the risk of contamination.
- Hydrometer and Thermometer: To monitor humidity and temperature, especially important during the fruiting stage.
- Fan or Air Exchange System: Helps maintain optimal CO₂ levels for mushroom growth.
Step 2: Preparing the Substrate
With all the equipment in place, it's time to prepare the substrate, which is crucial for the mushrooms' growth.
Measure the Straw Pellets and Water:
- Ratio: For a 60% hydration mix, use approximately 60% water to 40% straw pellets. For example, if you're using 720 grams of straw, add around 1,080 grams of water.
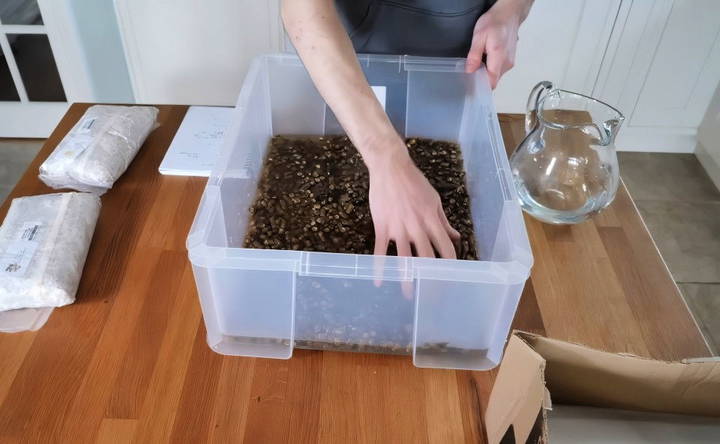
- Hydration: Pour the water over the pellets and allow them to soak. The pellets will expand and absorb the water, becoming a fluffy, nutrient-rich substrate.
Allow Time for Absorption:
- Leave the pellets to soak for at least 15-30 minutes. This will ensure they're adequately hydrated and ready for the mushroom spawn.
Maintaining Cleanliness:
- Since contamination is a primary concern in mushroom cultivation, clean all surfaces and equipment with an anti-bacterial spray before handling the substrate.
Step 3: Inoculating the Substrate with Spawn
Inoculation is the process of adding mushroom spawn to the substrate, kick-starting the growth process.
- Calculate Spawn Quantity: Use about 10% of the weight of the substrate for the spawn. For instance, if your hydrated substrate weighs around 1,800 grams, you'll need 180 grams of spawn.
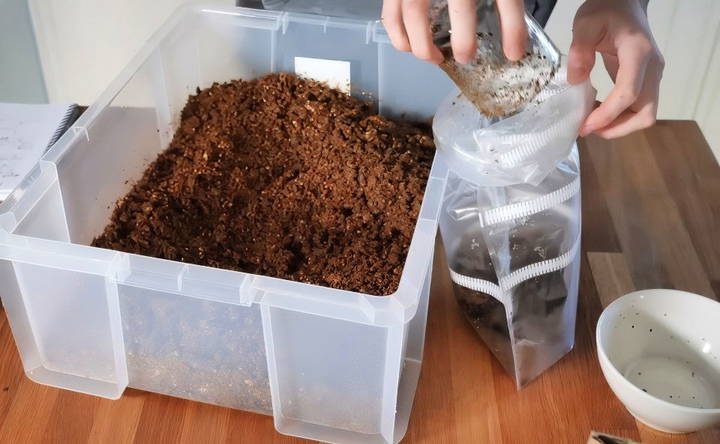
- Break Up the Spawn: Grain spawn comes in a block, which you'll need to break up before mixing. This ensures even distribution, allowing the mycelium to colonize the substrate faster.
- Mix the Spawn with the Substrate: Carefully combine the spawn with the straw pellets, ensuring an even mix. This uniform distribution is essential for optimal growth and minimizes the chance of contamination.
- Filling the Grow Bags: Fill each grow bag with the inoculated substrate mixture. Leave some room at the top for air circulation. Seal the bags, making sure the filter patch is not blocked, to allow air exchange.
Step 4: Incubation – Letting the Mycelium Grow
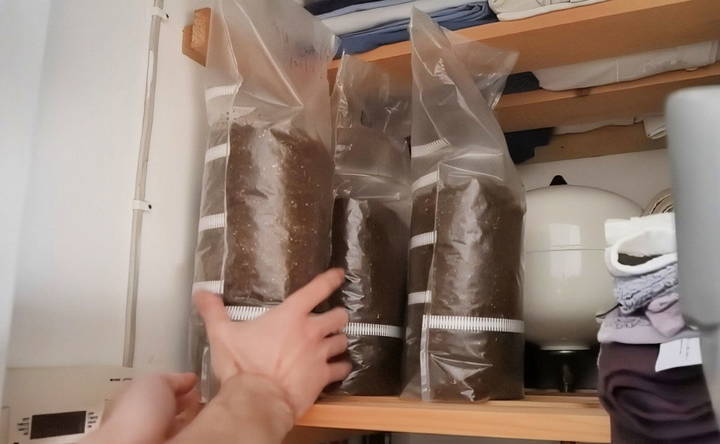
Once inoculated, the bags need to rest in a warm, dark place to allow the mycelium to colonize the substrate fully. Here's how to handle the incubation stage:
- Find a Warm Spot: Ideal temperature for incubation is around 20-25°C (68-77°F). A warm cupboard or a room with steady temperatures works well.
- Monitor Regularly: Within a week, you should see white threads (mycelium) spreading throughout the substrate. This is a sign that the mycelium is colonizing successfully.
- Waiting Period: The bags usually take 3-4 weeks to be fully colonized. Once the entire bag turns white, it's ready for the next stage. Colonization indicates that the substrate has been fully taken over by the mushroom mycelium, reducing the risk of contamination.
- Avoid Disturbing the Bags: During this time, try not to move or handle the bags unnecessarily. The mycelium is sensitive to disturbances, which can slow down the process.
Step 5: Setting Up the Fruiting Chamber
Once the bags are fully colonized, it's time to move them into a fruiting chamber to trigger mushroom growth.
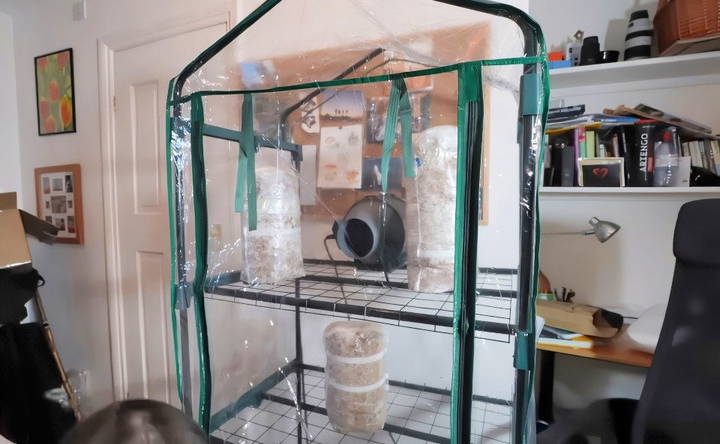
- Creating Humidity: Mushrooms require high humidity for fruiting. Setting up a mini greenhouse or “Martha tent” with a humidifier or misting system is a great option. A simple greenhouse tent, fan, and a washing machine drip tray to catch water will work well.
- Ventilation and CO₂ Control: Mushrooms release CO₂ as they grow, so fresh air exchange is essential. You can achieve this by using a fan to circulate air within the tent or by opening the tent periodically to let fresh air in.
- Light Requirements: Mushrooms don't require much light, but indirect light helps them orient and grow. Place the tent in a space with natural light, or use a low-intensity light source if necessary.
- Temperature Monitoring: Fruiting occurs best between 18-22°C (64-72°F), slightly cooler than the incubation phase. Use a thermometer to ensure stable conditions.
Step 6: Initiating the Fruiting Process
Now that your mushrooms are ready to fruit, follow these tips to encourage growth.
- Cutting Slits in the Bags: Once you see the mycelium reaching the edges, make small cuts or holes in the bags. These slits act as exit points for the mushrooms to emerge.
- Regular Misting: Misting the bags once or twice a day helps maintain high humidity, mimicking the damp conditions mushrooms need to fruit.
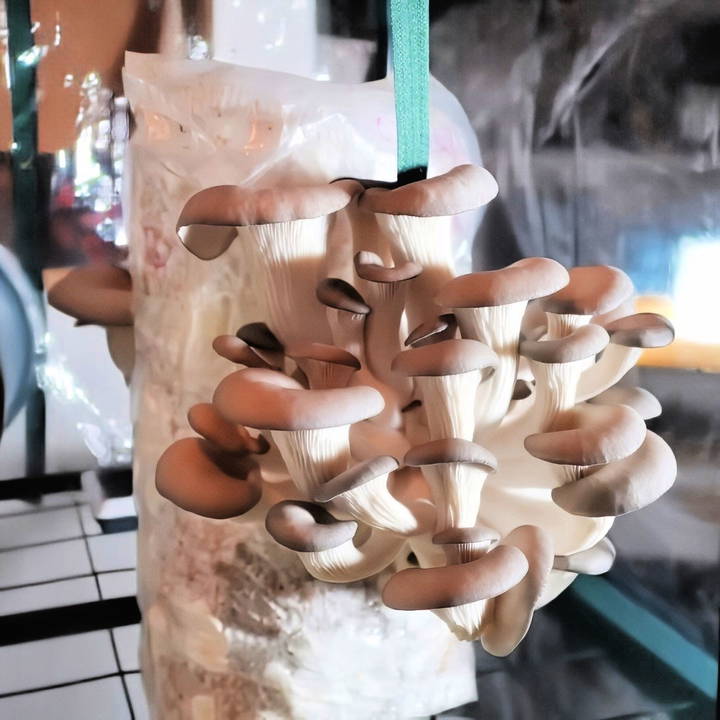
- Watching for Pins: Within days, you'll notice tiny mushrooms, or “pins,” forming around the cuts. These pins will quickly develop into full mushrooms. Adjust humidity and CO₂ levels as needed to prevent deformities.
Step 7: Harvesting Your Mushrooms
Once your mushrooms have grown to maturity, it's time to harvest. Knowing when and how to harvest ensures you'll enjoy them at their peak freshness and flavor.
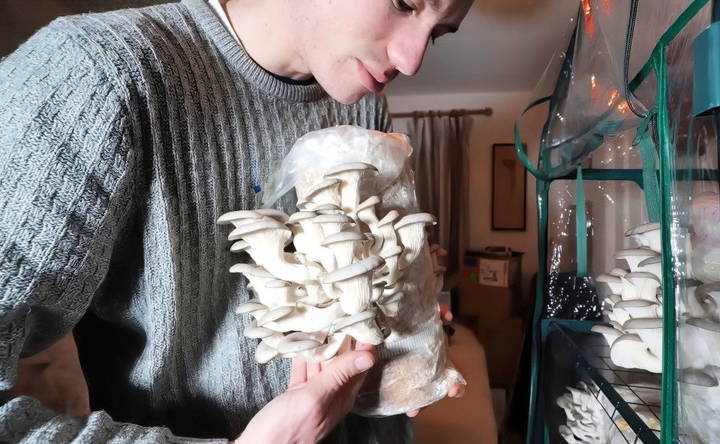
- Identifying Maturity: Mushrooms are generally ready to harvest when the caps start to open up and separate from the stems. For oyster mushrooms, look for a slightly curled edge on the cap before it flattens out, which usually indicates they're ready to be picked.
- Avoid waiting too long; if the caps start to curl back further or the mushrooms release spores, they may be past their prime.
- Harvesting Technique: Gently twist or cut the mushrooms near the base of the stem to remove them without damaging the substrate. Avoid pulling as this can disturb the mycelium, potentially affecting future flushes.
- Documenting the Yield: Weigh and document your first yield. This not only tracks the success of your first flush but also helps you predict future harvests. A standard oyster mushroom grow bag can yield between 300-600 grams of mushrooms in its first flush if conditions are optimal.
Step 8: Encouraging Multiple Flushes
One of the most rewarding aspects of mushroom growing is that a single batch can yield multiple harvests, known as “flushes.” Here's how to manage and encourage subsequent flushes.
- Preparing for the Next Flush: After the first harvest, allow the substrate to rest for a few days. Continue to mist the bags daily to maintain humidity levels.
- If the substrate has dried out significantly, you can gently rehydrate it by spraying more water or even soaking the entire bag briefly in water, then letting it drain before placing it back in the fruiting chamber.
- Optimal Conditions for Continuous Fruiting: Maintain the same fruiting conditions as before: high humidity, adequate air exchange, and a temperature between 18-22°C. Continue misting daily, keeping a close eye on humidity levels to ensure the substrate remains moist.
- Second and Third Flushes: After a few days to a week, you should begin to see new pins forming, which indicates the next flush is on its way.
- While the yield may be slightly less with each successive flush, you can often get 2-4 flushes from a well-maintained bag, with about a week or two between each flush.
- When to Stop: After several flushes, the substrate will likely become depleted of nutrients. If you notice minimal growth or very small mushrooms, it's a sign the substrate is exhausted and can be composted.
Troubleshooting Common Mushroom Growing Issues
Despite your best efforts, challenges can arise during the growing process. Here are solutions to common issues that mushroom growers may encounter.
High CO₂ Levels:
- Symptom: Long stems with small caps often indicate high CO₂ levels.
- Solution: Improve air circulation by adding a fan, opening the tent slightly, or placing the setup in a more ventilated room.
Low Humidity:
- Symptom: Dry, cracked mushrooms, or slow growth.
- Solution: Increase misting, or add a humidifier if you're in a very dry environment. Use a hygrometer to monitor humidity, aiming for around 90% during fruiting.
Slow or Stunted Growth:
- Possible Causes: Low temperature, insufficient spawn, or improper hydration.
- Solution: Check that temperatures are between 18-22°C. Ensure the substrate is adequately hydrated and that the spawn was properly mixed in during inoculation.
Contamination (Green Mold or Bacteria):
- Symptom: Green, blue, or dark-colored mold spots on the substrate.
- Solution: While contamination is more common in earlier stages, it's still possible later on. Carefully remove contaminated sections if possible. Maintain a clean environment, and avoid touching the bags unnecessarily.
Shriveled or Small Caps:
- Symptom: Mushrooms with small or deformed caps.
- Solution: This often indicates a need for more humidity and fresh air. Increase misting and make sure your ventilation setup is adequate.
Tips for Maximizing Yield and Quality
For mushroom growers looking to optimize their setup and improve yield, these advanced tips will help ensure the best possible harvests.
- Choose the Right Location: Try to place your fruiting chamber in a quiet, stable environment. Areas prone to sudden temperature changes or drafts can disrupt mushroom growth.
- Monitor CO₂ Levels Regularly: Mushrooms thrive in fresh air with low CO₂ levels. Invest in a CO₂ monitor if possible, and keep levels below 1,000 parts per million (ppm) to prevent issues with growth deformities.
- Experiment with Different Substrate Ratios: Adjusting the straw pellet-to-water ratio or trying different substrates, like sawdust or wood chips, can affect growth. Once you're comfortable, experimenting can lead to better or faster yields.
- Adjust Spawn Ratios: Higher spawn rates generally yield faster colonization, but they're also more expensive. Start with the standard 10% spawn ratio and increase it if you want faster growth.
- Optimize Humidity and Temperature Levels: Since mushrooms are sensitive to environmental conditions, closely monitor temperature and humidity. Keep the humidity around 85-90% and the temperature between 18-22°C for optimal fruiting.
Storing and Using Your Harvested Mushrooms
Once harvested, mushrooms are best used fresh, but they can also be preserved for later use.
- Storing Fresh Mushrooms: Refrigeration: Store harvested mushrooms in a paper bag in the refrigerator to maintain freshness for up to one week. Avoid plastic bags, as they trap moisture and can cause mushrooms to spoil more quickly.
- Drying Mushrooms: If you have a large harvest, consider drying some of your mushrooms. Lay them out on a drying rack in a well-ventilated space, or use a food dehydrator. Once dried, they can be stored in airtight containers for several months.
- Freezing Mushrooms: While not ideal for all types, freezing is an option for some mushrooms. Blanching before freezing helps retain texture, but frozen mushrooms are best used in soups or stews, as freezing can affect texture.
Is Mushroom Growing Cost-Effective?
Growing mushrooms can be more of a fun, rewarding hobby than a significant money-saving venture, especially initially. Here's a breakdown of potential costs and savings:
- Initial Investment: Costs include grain spawn, grow bags, straw pellets, a small greenhouse setup, and any additional tools like humidifiers or CO₂ monitors.
- Estimated Costs: A full setup with supplies may cost around $50-$100 for a basic operation. As your skills and scale grow, costs may rise if you add specialized equipment.
- Mushroom Yield Value: If you grow around 3 kg of oyster mushrooms, you might save approximately $30-40 compared to purchasing them at a grocery store. The primary benefit, however, is the enjoyment of cultivating your own fresh produce.
Final Thoughts and Next Steps for Mushroom Growers
Growing mushrooms at home offers a unique look into the lifecycle of fungi, providing fresh and tasty harvests in a relatively small space. While it may not save a substantial amount on grocery costs, the enjoyment, learning experience, and satisfaction of cultivating your own food make mushroom growing worthwhile.
If you're inspired by your first round of mushroom growing, consider experimenting with new species, adjusting your setup, or even trying to cultivate mushrooms from spores for an even deeper dive into the world of mycology. Happy growing, and may your mushroom yields be bountiful!
FAQs About How to Grow Mushrooms
Learn how to grow mushrooms with our comprehensive FAQs, covering everything from substrate preparation to harvesting techniques.
After your first harvest, you can rehydrate the spent substrate by soaking it in water for 8-12 hours. Once rehydrated, it can potentially yield another flush. Additionally, you can break it up and mix it with fresh, pasteurized straw or wood chips to create a new fruiting block, effectively reducing the cost of future harvests.
CO₂ buildup can affect mushroom growth by causing long stems and small caps. Position an exhaust fan at the bottom of your grow chamber, as CO₂ is heavier than air and sinks. Some growers also introduce houseplants outside the chamber to help manage CO₂, though this should be done cautiously to avoid contamination.
It’s generally not recommended to grow mushrooms in the same room as houseplants due to the risk of cross-contamination and pest issues, such as fungus gnats. However, if you keep the environments separate or maintain high cleanliness, you can reduce risks.
No, mushrooms do not need total darkness. While some varieties prefer low light, indirect or ambient lighting is typically sufficient to stimulate growth. Ensure light exposure is minimal, as mushrooms do not photosynthesize like plants.
Coffee grounds can be used but should be treated carefully as they introduce moisture and potential contaminants. Use fresh, unspent grounds, or pasteurize them before adding to the substrate. Be cautious of mold and bacterial growth if coffee grounds are part of your substrate.
On average, a mushroom block can produce 2-4 flushes, with diminishing yields over time. After each flush, rehydrate the block to encourage further growth. Keep an eye on contamination, as risks increase with each subsequent flush.
Mushrooms thrive in cool, dark, and humid environments. Aim for temperatures between 18-22°C (64-72°F) and a humidity level of 85-90%. A small greenhouse with a humidifier and regular misting can help maintain these conditions.
Mushroom spores can irritate respiratory systems when grown in closed spaces, such as bedrooms. For safety, grow mushrooms in well-ventilated or isolated areas, like basements or garages, to avoid prolonged spore exposure.
While it is possible, spore collection requires a sterile environment and specific knowledge to avoid contamination. Beginners are advised to start with commercially purchased grain spawn or colonized blocks for better success.


