Learn how to grow potatoes at home with this easy guide. Potatoes are among the most popular and versatile vegetables you can grow, suitable for everything from salads to hearty main dishes. Whether you have a large garden, a modest patio, or even just a balcony, cultivating potatoes can be simple and rewarding. Follow this guide to learn each important stage of the process, from picking the right variety to proper harvesting and storage.
Choosing the Right Type of Potato
Potatoes can be categorized based on their growth cycle, texture, and suitability for different dishes. Understanding these categories will help you choose the best types for your needs and space.
- First Earlies (Early Season): These are the quickest to mature, typically taking around 10 weeks from planting to harvest. They have thinner skins, making them ideal for salads and light, fresh dishes. First earlies often don't require peeling, which saves time in the kitchen and preserves nutrients.
- Second Earlies (Midseason): Second earlies mature in 12-14 weeks, becoming ready from midsummer onwards. These potatoes are slightly more robust than first earlies and are often used in recipes that call for boiling or roasting.
- Maincrop Potatoes (Late Season): Maincrop varieties take longer to mature, are ready for harvest from late summer onward, and require more space. However, they generally produce larger tubers that can be stored for several months, making them ideal for baking, mashing, and long-term storage.
Each category contains a wide range of varieties, so read up on the specifics of each one to find the best match for your garden and culinary preferences. Some gardeners may prioritize disease resistance, such as varieties resistant to common issues like blight or slug damage.
Preparing Seed Potatoes
Once you've chosen your varieties, the next step is to prepare your seed potatoes. "Chitting" or "sprouting" potatoes before planting can speed up growth, especially in cooler seasons, helping you get a head start.
How to Chit Potatoes
- Select a Cool, Bright Spot: Arrange your seed potatoes with the side that has the most "eyes" (the little dimples where sprouts will emerge) facing up.
- Encourage Stubby Sprouts: Chitting in a bright but frost-free environment encourages short, stubby sprouts rather than long, weak ones, which are prone to snapping.
- Control Sprout Quantity: More sprouts typically result in more potatoes, though they may be smaller. If you want fewer, larger tubers, you can remove some sprouts by rubbing them off gently or cutting away some of the eyes.
Understanding Determinate and Indeterminate Varieties
Potatoes, like their tomato relatives, can be determinate or indeterminate, and understanding the difference is essential for successful growth.
- Determinate Potatoes: These grow in a single layer, meaning they produce their tubers in one zone. They benefit from a mulch cover to shade the soil, protecting any exposed tubers from turning green.
- Indeterminate Potatoes: These grow vertically in multiple layers, allowing for more tubers. For this type, you'll need to mound or "hill" soil up around the plant stems as they grow, making more space for tubers to develop.
Knowing whether your potatoes are determinate or indeterminate allows you to tailor your planting method to maximize yield and quality.
Step by Step Instructions
Learn how to grow potatoes with step-by-step instructions, from container setup to harvesting. Optimize your yield with essential care tips and pest management.
Growing Potatoes in Containers
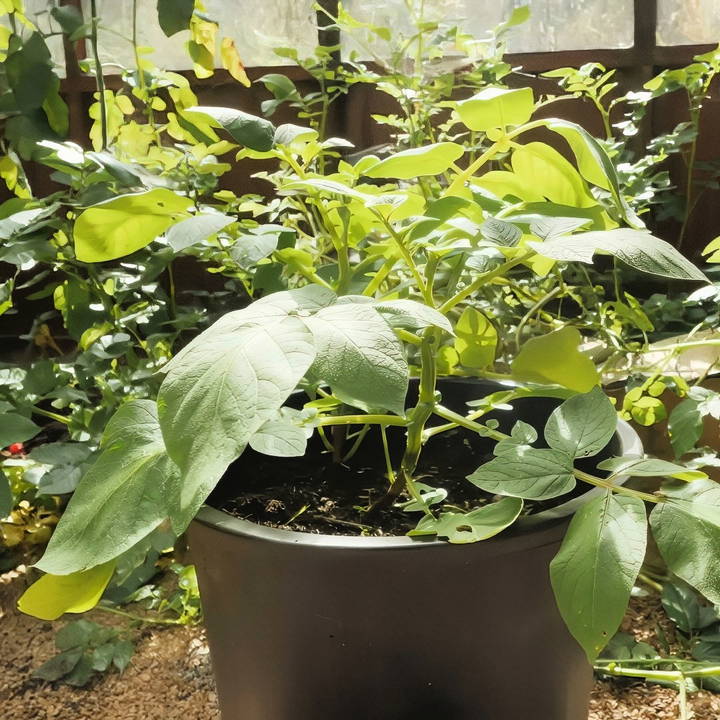
For those with limited space, container growing is a fantastic solution. Containers can be placed on patios, balconies, or any spare corner, and offer a flexible and manageable approach to potato cultivation.
Container Setup
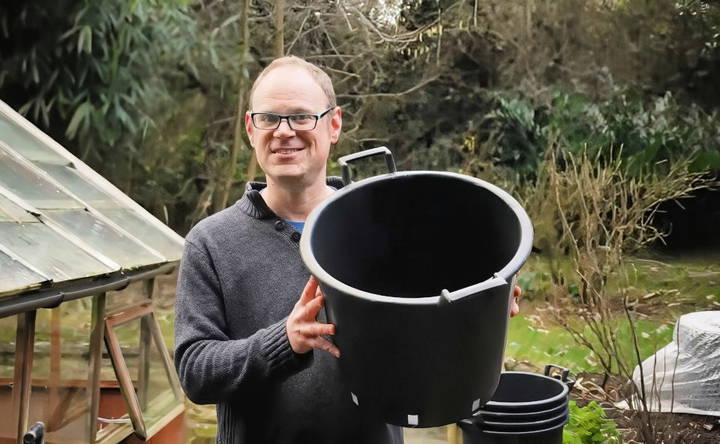
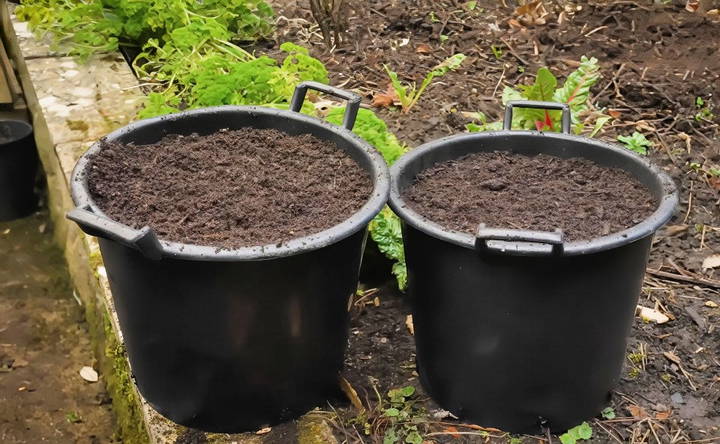
- Container Size: Aim for a container that holds at least 30 liters (8 US gallons). Larger containers provide more room for tuber development and retain moisture longer, which is especially helpful in hot weather.
- Growing Medium: Use a mix of compost, reused potting soil, and fresh potting mix. For added nutrition, add a small amount of general-purpose organic fertilizer, such as blood, fish, and bone meal, or even organic potato fertilizer if available.
Planting Potatoes in Containers
- Layering for Determinate Potatoes: Begin by filling the container one-third full with soil, then place two seed potatoes. Cover with another third of soil and add two more seed potatoes at a right angle to the first layer to ensure even foliage growth.
- Single Layer for Indeterminate Potatoes: Plant at the bottom of the container and gradually add soil as the plant grows to allow tubers to form along the buried stems.
- Watering and Mulching: After planting, water thoroughly and cover with a layer of mulch (straw or dried grass clippings) to maintain consistent moisture and regulate soil temperature. Containers will need more frequent watering than ground-planted potatoes.
Planting Potatoes in the Ground
For those with more garden space, ground planting is the most traditional method. This allows you to plant larger quantities, and there are a few options for layout and techniques to increase yield and minimize disease.
Spacing and Depth
- Early and Midseason Varieties: Space seed potatoes about 14-16 inches (35-40 cm) apart. Dig holes about 6-8 inches (15-20 cm) deep to give roots ample space.
- Late Season (Maincrop) Varieties: Space these potatoes slightly further apart, around 18 inches (45 cm), to support larger tuber growth.
Hilling or Earthing Up
For indeterminate varieties, hilling is essential to increase tuber production. This technique involves drawing soil around the stems as the plant grows, making a mound that protects tubers from sunlight and helps keep moisture consistent.
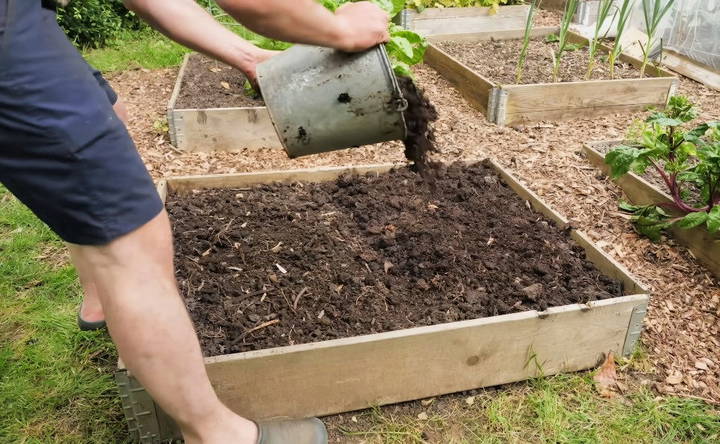
- When to Hill: Hill early in the morning when foliage is full and upright. This helps prevent the plant from getting damaged as you draw up the soil.
- How Often: Hilling is usually done once or twice throughout the growing season, or until the foliage fills in, making a natural shade over the soil.
Essential Care Tips: Watering and Pest Management
Potatoes are relatively hardy, but they require consistent watering and protection from pests and diseases to thrive.
Watering
While potatoes don't require excessive watering, they need consistent moisture, especially during tuber formation. A few key tips include:
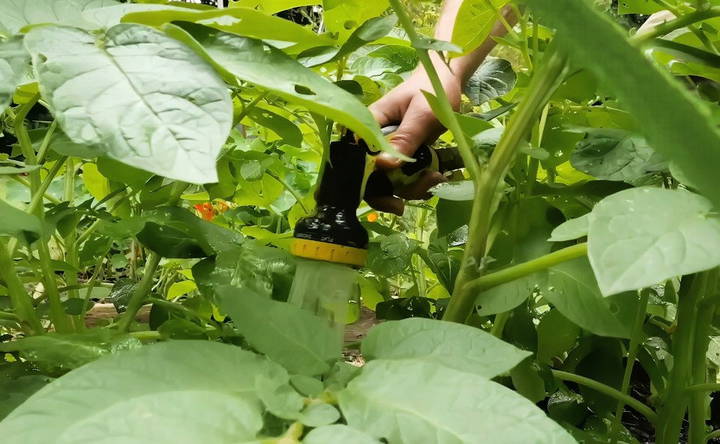
- Base Watering: Always water at the base to keep the leaves dry, reducing the risk of fungal infections.
- Container Potatoes: These need more frequent watering than those planted in the ground, particularly during dry spells.
- Avoid Waterlogging: Overwatering can lead to waterlogged soil, which may cause tuber rot or invite diseases. Be sure containers have drainage holes and, if possible, water in the morning to allow excess moisture to evaporate throughout the day.
Pest and Disease Prevention
One of the most common diseases for potatoes is potato blight, which thrives in wet, humid conditions. To reduce the risk of blight:
- Choose Resistant Varieties: Some varieties, like Sarpo Mira, are known for their blight resistance.
- Avoid Wetting the Foliage: When watering, focus on the soil around the plant rather than the leaves to keep humidity low around the foliage.
- Early Harvesting: Growing early-maturing potatoes can help you avoid blight, as they're often harvested before the blight season peaks.
If blight appears, promptly cut back the foliage to ground level and wait a few weeks before harvesting. This allows any spores to die off, preventing them from spreading to other plants. Composting the affected foliage is possible, as long as it's covered well to prevent spores from traveling back into the garden.
Harvesting Potatoes
Harvesting potatoes can be a rewarding experience, but timing and technique are crucial to ensure you get the best possible yield with minimal damage. The timing of your harvest depends largely on the type of potato you're growing.
1. Early and Midseason Potatoes (First and Second Earlies)
- Harvest Timing: First and second earlies are typically harvested while the foliage is still green, around 10-14 weeks after planting. These potatoes are best enjoyed fresh, as their thin skins make them less suitable for long-term storage.
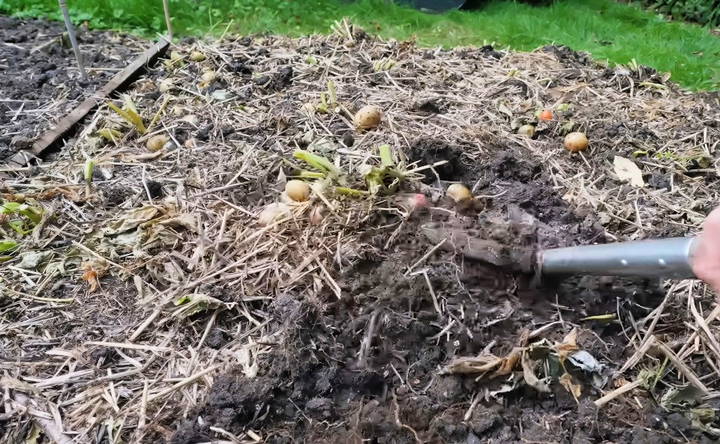
- Harvest Method: If growing in containers, simply tip the container over and gently sift through the soil to collect your potatoes. For in-ground potatoes, use a garden fork to carefully lift the soil around the plant, starting at the edges to avoid puncturing the tubers.
2. Maincrop Potatoes (Late Season)
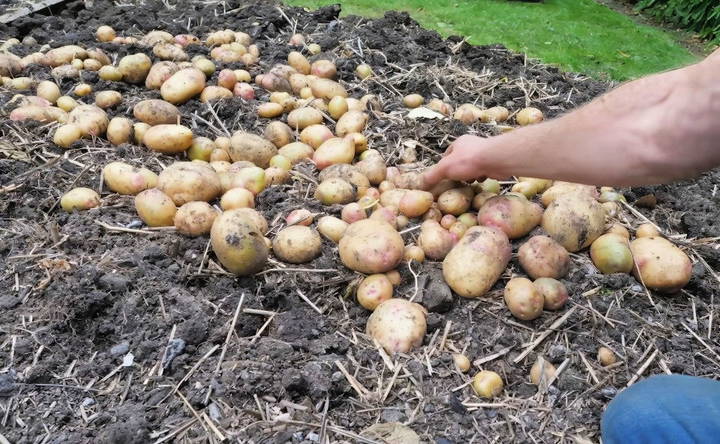
- Harvest Timing: Maincrop potatoes are generally harvested when the foliage begins to yellow and die back. This usually happens 18-20 weeks after planting. Maincrops are ideal for storing over winter due to their thicker skins.
- Preparing for Harvest: Two to three weeks before harvesting, stop watering your maincrop potatoes. This allows their skins to thicken, which improves storage quality and reduces the risk of rot.
- Harvest Method: Use a fork to loosen the soil around each plant, gently lifting the tubers. Leave the potatoes on the soil surface for a few hours to dry, which further strengthens the skins before storage.
Storing Your Potato Harvest
Proper storage is essential to keep your potatoes fresh and prevent sprouting, greening, or rot. By following a few best practices, you can enjoy your harvest for several months.
1. Storage Environment
- Temperature: Store potatoes in a cool, frost-free area with a stable temperature, ideally around 45-50°F (7-10°C).
- Darkness: Potatoes should be stored in a dark place to prevent greening, which occurs when exposed to light and produces solanine, a bitter and potentially harmful compound.
- Humidity: Keep potatoes in a relatively humid environment to prevent shriveling. Avoid overly damp spaces, which may encourage mold or rot.
2. Ideal Containers
Store your potatoes in breathable bags such as hessian or burlap sacks, which allow air circulation and reduce the chance of moisture build-up. Avoid plastic bags, as they trap moisture, increasing the risk of rot. Only store blemish-free, undamaged potatoes; any bruised, punctured, or green potatoes should be set aside for immediate use or discarded.
Troubleshooting Common Potato Growing Issues
While potatoes are generally easy to grow, they can be affected by pests and diseases. Here's how to tackle some of the most common issues.
1. Potato Blight
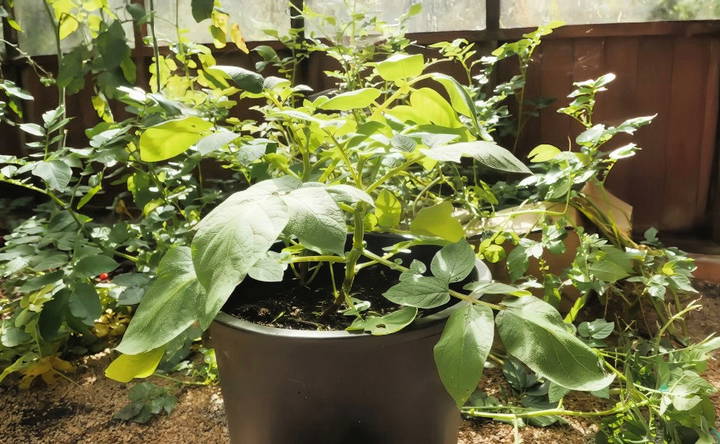
Blight is a fungal disease that thrives in warm, humid conditions and can rapidly destroy a potato crop. Symptoms include dark spots on leaves and brown lesions on stems.
- Prevention: Plant blight-resistant varieties, such as Sarpo Mira, and water only at the base of the plant to keep foliage dry.
- If Blight Appears: Remove and destroy infected foliage immediately to prevent it from spreading. After removing the foliage, leave the potatoes in the ground for a few weeks to allow any blight spores on the soil surface to die off. Harvest the potatoes after this period and use them promptly.
2. Pests
Several pests can affect potato plants, including slugs, aphids, and wireworms.
- Slug Control: Slugs often feast on young potato plants. Introducing natural predators like frogs or hedgehogs, or using organic slug traps, can help keep them at bay.
- Aphids: These tiny insects can weaken plants by sucking sap from leaves. Use insecticidal soaps or encourage beneficial insects, such as ladybugs, to help manage aphid populations.
- Wireworms: These larvae burrow into tubers, causing unsightly holes. Crop rotation and removing old, decaying plant material from the soil can reduce wireworm populations.
Maximizing Your Potato Yield
To get the best possible yield from your potato plants, consider these advanced tips for care and maintenance.
- Mulching and Watering: Mulching potatoes with straw or dried grass clippings helps regulate soil temperature, retain moisture, and reduce weed competition. This is particularly helpful during dry spells, as potatoes need consistent moisture levels to grow well. For container-grown potatoes, check moisture levels regularly, as containers dry out faster than soil.
- Fertilizing: Potatoes benefit from a balanced fertilizer applied at planting. If you see signs of nutrient deficiency (such as yellowing leaves), a side dressing of organic fertilizer, like blood meal or compost, can give them a boost. Avoid over-fertilizing, as this can lead to lush foliage at the expense of tuber growth.
- Timing Your Planting for Success: Planting potatoes early in the season, as soon as the risk of frost has passed, allows them to establish before hot weather. In milder climates, you might even experiment with planting in late winter or early spring for an extra-early harvest. Just be prepared to protect young plants from unexpected frosts with fleece or cloches.
Summary and Final Tips
Growing potatoes can be a gratifying experience, yielding an abundant and versatile harvest. Here are a few final reminders to ensure your potato-growing journey is successful:
- Choose the Right Variety: Select potato varieties based on your climate, space, and culinary preferences.
- Prepare Seed Potatoes: Chit your seed potatoes to give them a head start, particularly in cooler climates.
- Use Appropriate Planting Techniques: Understand whether your variety is determinate or indeterminate to optimize planting depth and spacing.
- Manage Watering and Pest Control: Keep the soil moist but not waterlogged, and monitor for pests and diseases.
- Harvest and Store Properly: Harvest carefully to avoid damaging tubers, cure them by drying for a few hours, and store them in a cool, dark, well-ventilated space.
With patience and care, you'll be rewarded with a bountiful potato crop that can be enjoyed fresh, stored for the winter, or shared with friends and family. Happy growing!
FAQs About How to Grow Potatoes
Learn how to grow potatoes with our comprehensive FAQs, covering planting, care, harvesting, and tips for a bountiful potato yield.
Many seed suppliers don’t label potatoes as determinate or indeterminate, which can be frustrating. Most early varieties are determinate and grow in a single layer, while late or maincrop varieties are typically indeterminate, forming tubers in multiple layers. If uncertain, check online resources or gardening communities to confirm the type based on the variety name.
Yes, many gardeners successfully grow potatoes from grocery store potatoes, especially if they’ve sprouted. However, seed potatoes are preferred as they are certified disease-free, minimizing the risk of introducing diseases like blight into your soil. Always choose organic or untreated store potatoes if using this method.
If the soil is already moist, you may not need to water immediately after planting. Excessive moisture can increase the risk of rot before the plants sprout. Start regular watering once you see the potato shoots breaking through the soil, but adjust depending on rainfall and soil dryness.
Yes, containers are excellent for small spaces, with 30-liter containers being ideal. Use a good-quality potting mix and ensure proper drainage by adding holes at the base. You can layer seed potatoes within the container for better yield in limited space, following the specific instructions for determinate or indeterminate varieties.
To boost yield, ensure consistent moisture, particularly during tuber formation. Fertilize with compost at planting and use mulch to retain moisture and regulate temperature. For indeterminate potatoes, hilling or mounding soil around the stems as they grow encourages more tubers along the buried stems.
Slugs, wireworms, and aphids can harm potatoes. For slugs, add copper tape around container edges or introduce natural predators like frogs. Wireworm populations can be reduced with crop rotation and avoiding planting potatoes in infested areas. Aphids can be managed by introducing ladybugs or using insecticidal soap as needed.
Yes, you can grow a second crop by planting in mid-summer for a late fall or early winter harvest, particularly with certain varieties that mature quickly. Use containers for easy mobility and cover plants in cooler climates to extend the season. Look for “second cropping” varieties, which are often available seasonally.
Store potatoes in a dark, cool, and well-ventilated space, ideally around 7-10°C (45-50°F), to prevent sprouting and greening. Use burlap or breathable bags to allow airflow, and avoid storing damaged or green potatoes with the rest of the crop as they spoil faster.
Yes, it's possible to grow potatoes by planting only the eyes or “chits.” Some gardeners remove the eyes and plant them individually to save space, though traditional seed potatoes often provide the most consistent results. This approach can also be economical if using store-bought potatoes.


