Learn how to hang drywall on a ceiling with these easy steps, tools needed, and pro tips for a smooth finish and secure installation. This guide will cover each step you need to take, from planning and preparation to installation and finishing, ensuring you achieve a professional-grade finish.
What You'll Need
Here's a list of tools and materials for this project:
- Drywall sheets (4x12 sheets are commonly used)
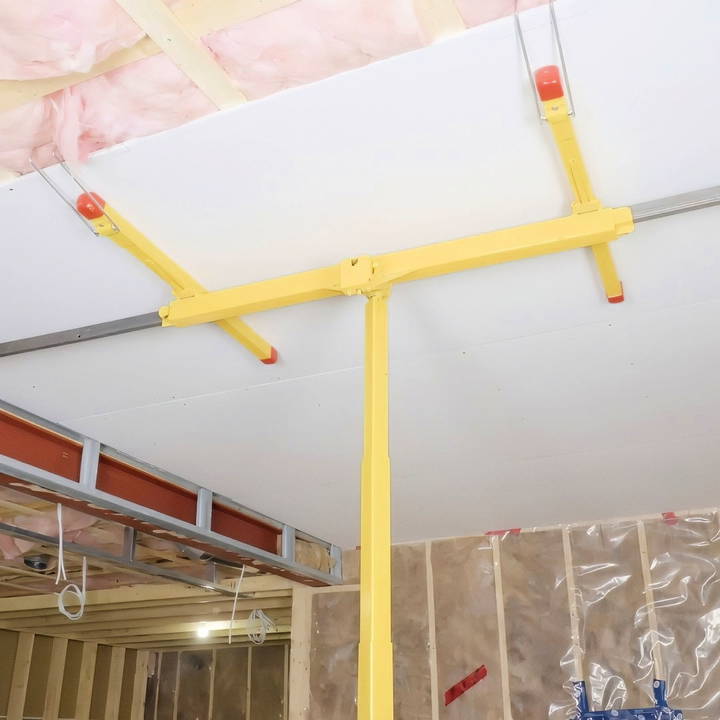
- Drywall panel lift (rental recommended for easy handling)
- Tape measure (preferably with a magnetic tip)
- Utility knife and drywall square for cutting
- Screw gun or drywall screw gun with a depth-setting attachment
- Drywall screws (1-1/4 inch for 1/2 inch drywall or 1-5/8 inch for 5/8 inch drywall)
- Rotozip or rotary cutout tool for cutting holes for fixtures
- Pencil or marker
- Expansion foam for duct sealing (optional)
Pre-Installation Planning
- Map Your Ceiling: Before starting, make a detailed map of your ceiling, including the layout and placement of lights, vents, and any plumbing or electrical elements. This step will ensure you know where everything is located after covering it with drywall.
- Mark Strapping and Joists: Using a marker, clearly mark your ceiling where strapping or joists are located. This helps you know exactly where to place screws when securing the drywall. Your ceiling should have strapping or joists spaced 16 inches apart for adequate support.
- Inspect for Obstacles: Carefully inspect your ceiling for any protruding nails or uneven surfaces. Hammer in any raised nails, as these could interfere with drywall installation.
- Check for Plumbing and Electrical: Double-check any areas where plumbing or electrical lines run close to the surface. This will prevent accidental punctures from screws, which could result in leaks or electrical issues.
Step by Step Instructions
Learn how to hang drywall on ceilings with our step-by-step guide. From positioning to final touches, achieve perfect installation easily!
1. Positioning and Cutting the Drywall Sheets
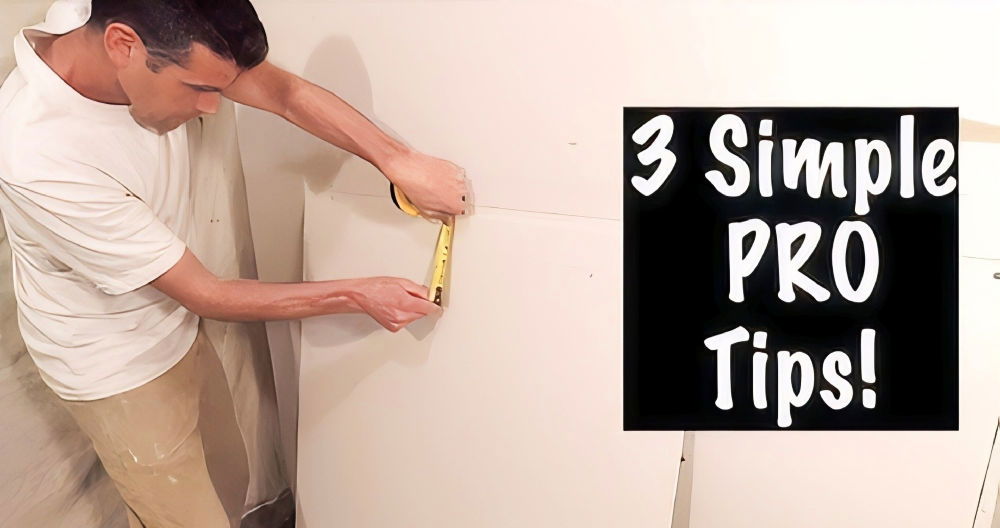
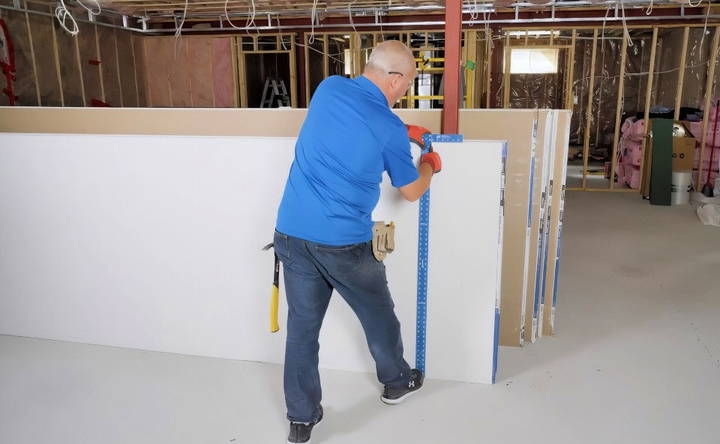
- Measure Twice, Cut Once: Measure the space carefully, marking each measurement at the ends of the drywall. Aim to cut the drywall slightly smaller than the exact measurement to allow a small amount of wiggle room when positioning it on the ceiling.
- Cutting the Drywall: Use a drywall square and utility knife to score the drywall paper along your marked lines. You don't need to cut through the entire thickness; just score the paper and then snap the board along the line. After snapping, use the knife to cut through the paper on the other side to separate the pieces.
2. Lifting and Positioning
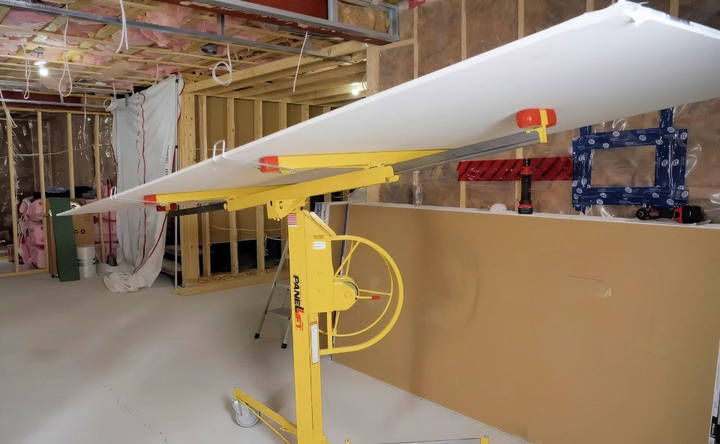
- Using a Drywall Lift: A drywall panel lift is essential for ceiling work, especially if you're working alone. Place the drywall sheet on the lift with the white (smooth) paper side facing down. Lock it in place, and carefully lift the drywall sheet until it reaches the ceiling.
- Align the Sheet: Start by placing the first sheet near the middle of the room or along a straight wall edge if possible. This will allow you to make necessary adjustments if your walls are slightly out of square.
3. Securing the Drywall to the Ceiling
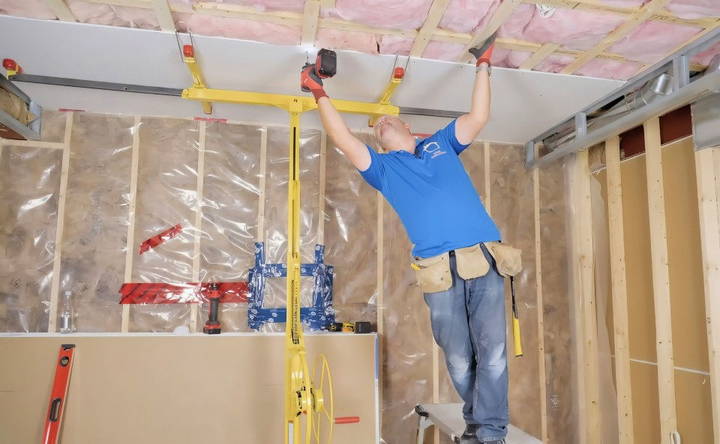
- Drilling Screws: Use a screw gun with a depth-setting attachment to secure the drywall. Place screws every 12 inches along each joist or strap for a secure hold. For 4x12 sheets, this generally means 12 screws per sheet—six along each edge.
- Depth Control: Screw depth is crucial in drywall installation. The screw head should slightly dimple the surface without breaking the paper layer. If the screw goes in too deep, it can tear the drywall paper and reduce holding strength. A dimpler bit or screw gun with depth adjustment is ideal for achieving the perfect screw depth every time.
4. Cutting Openings for Fixtures
- Locating Fixtures: Reference your ceiling map to locate any lights, vents, or other fixtures that need openings. Measure from the walls to each fixture and mark the locations on the drywall.
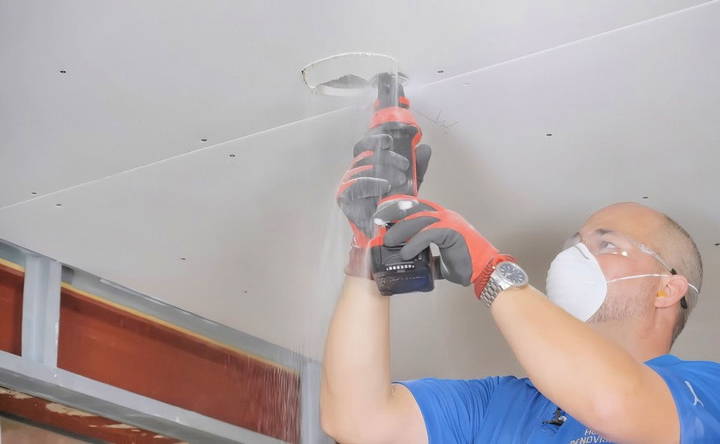
- Using a Rotary Cutout Tool: With the drywall sheet secured to the ceiling, use a rotary cutout tool to make openings for lights and vents. Insert the bit in the center of the fixture area, and guide it to the edge, allowing the guide tip to follow the edge of the fixture.
- Finishing the Cut: Once cut, the fixture should fit cleanly through the opening, allowing for easy installation after the drywall is painted and finished.
5. Additional Securing and Quality Control
- Additional Screws: Place five screws for each strap or joist—one on each end, one in the middle, and one in between these points. This spacing ensures the drywall is tightly secured without overloading it with screws.
- Remove Extra Screws: If you miss the strapping or joist when inserting a screw, remove it, and use a putty knife to make a small indentation around the hole to prepare it for mudding. This will give you a smoother finish.
Final Touches
- Level and Align: Use a level or 2x4 to check the alignment of the edges against the wall. Adjust the drywall lift as needed to press the sheet firmly into position.
- Double-Check Screws: Go over each screw to ensure it is flush with or slightly below the drywall surface without tearing the paper. This is your last chance to adjust screws before finishing, so take your time to ensure each one is correct.
Tips for Advanced Drywall Ceiling Finishing
- Use the Longest Sheets Possible: Larger sheets reduce the number of joints, making the ceiling smoother and easier to tape and finish. For example, in a 12x12 room, using a 4x12 sheet means only two joints to tape.
- Sealing Around Ducts with Foam: For ducts and vents, use expanding foam to secure the duct to the drywall. This will help seal air leaks and ensure the duct doesn't shift over time. Once dry, trim the excess foam and cover it with tape and mud for a seamless finish.
- System for Marking Fixtures: When cutting out openings for fixtures, label and measure each opening's position on the drywall for easy reference. This organization will prevent mistakes and save you time and rework.
Troubleshooting Common Issues
- Uneven Screw Depth: If your screws are either too deep or not deep enough, it can cause problems when you start taping. Use a depth-setting bit to control screw depth consistently.
- Out-of-Square Rooms: Rooms may not always be square. If the ceiling seems uneven, consider starting with a sheet positioned in the center of the room. Measure from this starting point to account for irregularities at the edges.
- Messy Fixture Cutouts: If your cutout tool slips or the opening is uneven, apply drywall tape and joint compound to smooth out imperfections. For significant gaps, use a drywall patch.
- Dust and Debris: Dust from cutting drywall can make a mess. Lay down a tarp and wear protective gear to keep the area as clean as possible. Dust control is especially important when working with rotary cutout tools.
Recap: Key Points for a Successful Drywall Ceiling Installation
- Plan and Map the Ceiling Layout: Make a detailed map, mark strapping, and locate all fixtures before you start.
- Measure and Cut Carefully: Slightly undersize your cuts to allow wiggle room and prevent gaps.
- Use a Drywall Lift: This essential tool simplifies positioning and securing drywall sheets on the ceiling.
- Secure with the Correct Screws and Depth: Use appropriately sized screws, and ensure they're flush with the drywall surface.
- Make Precise Fixture Cutouts: Utilize a rotary cutout tool for clean openings around fixtures.
- Inspect and Adjust as You Go: Regularly check screw placement, drywall alignment, and fixture positions to avoid rework.
- Seal and Finish Duct Openings: For a professional look, seal ducts with expanding foam to eliminate movement and air leaks.
Step-by-Step Video Tutorial
Final Thoughts
Hanging drywall on a ceiling may seem challenging, but by following these steps, you can accomplish the task with professional results. Remember, preparation and organization are crucial to ensuring a smooth installation process. With a bit of patience and attention to detail, you'll make a beautiful, seamless ceiling ready for finishing.
FAQs About Hanging Drywall on a Ceiling
Discover answers with these FAQs about hanging drywall on a ceiling, covering tools, techniques, and expert tips for a flawless finish.
If your room isn’t square, start by placing the first drywall sheet in the middle of the ceiling. Measure carefully from this starting point to adjust each panel, keeping all subsequent sheets aligned with the initial sheet. This approach minimizes visible gaps or irregularities along the edges.
Yes, cutting drywall into smaller sections can make it easier to handle if you don’t have a lift. However, keep in mind that smaller pieces will increase the number of joints, which means more taping, mudding, and potential weak points. Try using the largest pieces you can comfortably manage.
Construction adhesive is generally unnecessary for ceiling drywall, especially if the drywall is well-secured to the joists or strapping. In some regions, like New Zealand, it’s a standard practice, but in most cases, screws alone are sufficient for a strong hold.
Yes, a Dremel tool can work as a substitute for a Rotozip, but it may require practice to achieve clean cuts. Ensure you have a drywall cutting bit and go slowly to maintain control, especially around tight spots like electrical boxes or vent openings.
Cutting holes for pot lights after painting prevents dust and debris from contaminating the fresh paint. Leaving this step until the paint is dry allows for a cleaner, smoother ceiling finish without embedded dust particles.
Always use screws that are appropriate for drywall thickness—usually 1-1/4 to 1-5/8 inches for ceiling installations. Avoid longer screws that might puncture hidden pipes or wires. Inspect the area for any plumbing or electrical lines, and use metal brackets over vulnerable spots if necessary.
Lock one wheel of the drywall lift to keep it stable. If your lift doesn’t have wheel locks, consider using a small scrap piece as a wedge to prevent movement while positioning the drywall.
Properly installed strapping, especially with adequate screw spacing, typically provides sufficient support for drywall. However, if your ceiling spans are long or you’re using heavier 5/8" drywall, consider closer strapping or consult local codes for weight recommendations.
Yes, expanding foam is an effective solution for securing and sealing ducts or fixtures to the drywall. Once dry, the foam can be trimmed and covered with joint compound, building a stable, airtight seal that won't shift over time.
One method is to draw lines directly onto the drywall sheets corresponding to the joist locations. This approach can simplify the installation process by giving you a clear visual guide for screw placement as you work.


