Learn how to install a range hood vent through the ceiling with step-by-step guidance, ensuring proper ventilation for a cleaner kitchen environment. This guide will cover how to install a range hood vent if your kitchen doesn't already have one, explaining each step and sharing tips along the way. Follow along, and soon you'll have a fully functional, vented range hood that expels fumes outside, keeping your kitchen fresh and comfortable.
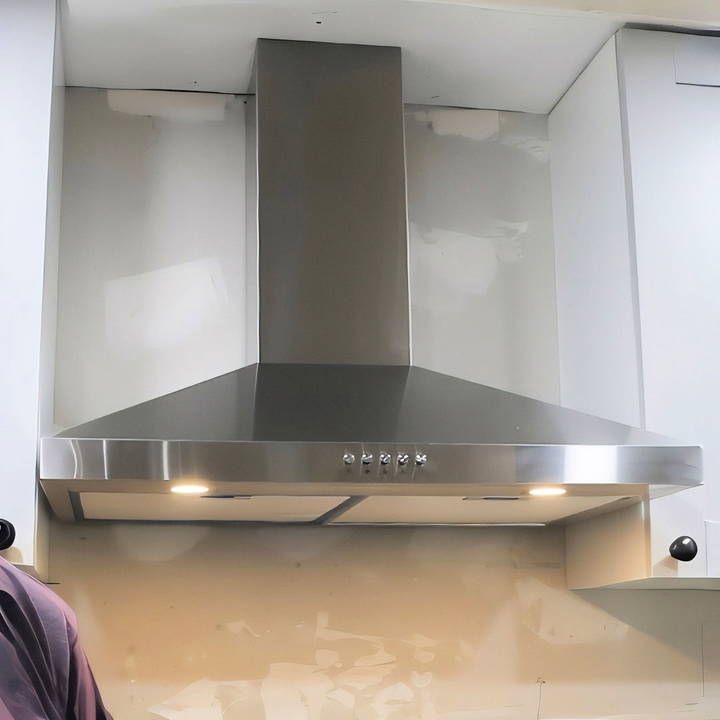
Why Install a Vented Range Hood?
A vented range hood offers several advantages:
- Improved Air Quality: It removes cooking fumes, smoke, and odors from the kitchen.
- Reduced Grease Build-Up: Vented hoods capture grease, reducing grime accumulation on surfaces.
- Lower Heat and Humidity Levels: Vents expel heat and moisture, making cooking more comfortable.
If you're upgrading from a recirculating hood, which only recycles air within the kitchen, a vented hood is a significant upgrade. This project assumes basic DIY skills, but no special contractor expertise.
Tools and Materials Needed
Before diving in, ensure you have these tools and materials:
- Range Hood Kit: Includes the vent hood and ducting kit.
- Measuring Tape and Pencil: For accurate measurements and markings.
- Power Drill and Drill Bits: A long drill bit is ideal for reaching through ceiling and roofing materials.
- Oscillating Saw: Helps with cutting holes in the ceiling and roof.
- Safety Gear: Dust mask, safety goggles, and gloves.
- Screws and Anchors: For securing the hood and ductwork.
- Flexible Ducting and Clamps: Use metal ducting for optimal airflow.
- Duct Sealant and Weatherproofing Caulk: Prevents leaks and keeps the installation secure.
- Fishing Rod or Wire: Useful for guiding the duct through hard-to-reach areas.
Step by Step Instructions
Learn how to install a range hood vent through the ceiling with our step-by-step guide. From choosing a location to the final touches, ensure a safe setup.
Step 1: Choosing the Right Location
Selecting the correct placement is essential for an effective installation. Ideally, the range hood should align with your stovetop, with the duct running straight up through the ceiling and roof.
- Measure Carefully: Find the center point between your kitchen cabinets, directly above the stovetop.
- Mark the Position: Use a pencil to draw a 6-inch diameter circle on the ceiling where the duct will pass through.
- Check Above-Ceiling Obstacles: If accessible, inspect your attic or ceiling to ensure there's enough clearance around the marked spot for ducting.
Step 2: Cut a Hole in the Ceiling
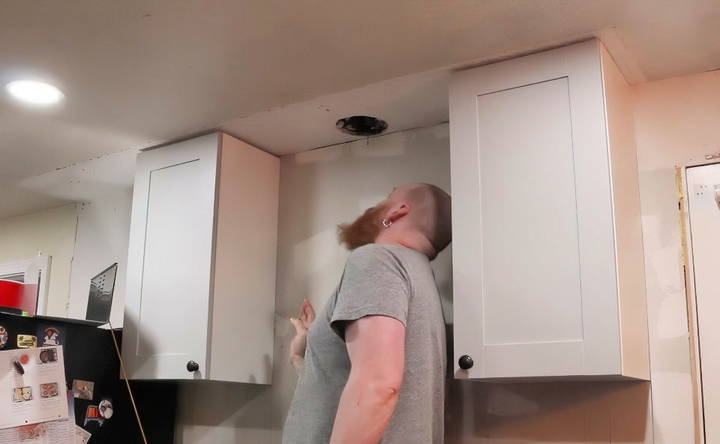
Once the location is marked, cut a hole in the ceiling where the vent will pass through.
- Use Ducting as a Template: Hold the duct against the ceiling to outline the 6-inch diameter. This template will ensure the duct fits snugly.
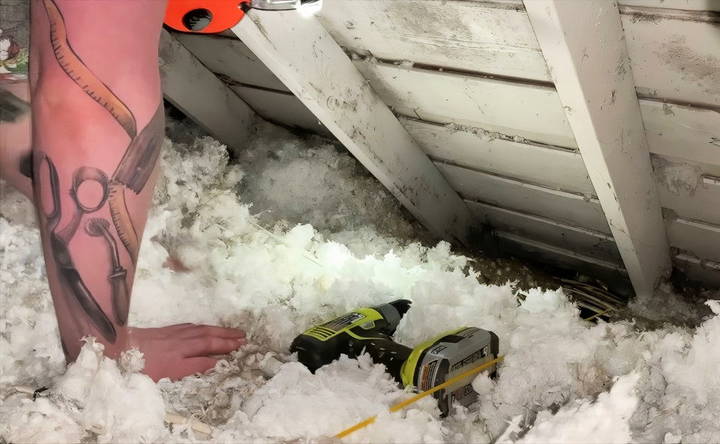
- Cut the Hole: Use an oscillating saw or another cutting tool to make a circular hole. Cutting through drywall should be straightforward, but if you encounter insulation, remove it carefully.
- Prepare for Attic Access: If you can reach the spot from the attic, you may find it easier to work from above.
Pro Tip: Ceiling drywall can generate dust and debris. Wear safety goggles, gloves, and a dust mask, especially if there is old insulation.
Step 3: Locate the Hole from Above
Now it's time to go into the attic to locate the hole and prepare for roof drilling.
- Find the Ceiling Hole: Once in the attic, locate the hole by looking for light or using a flashlight. This will help you align the ducting with the roof hole.
- Clear the Area: Remove any insulation or obstructions around the hole.
- Prepare for Roof Drilling: Use a long drill bit and drill upward through the ceiling hole to mark where the roof vent will go. The drill bit should be long enough to create a visible mark on the roof.
Pro Tip: Attics can be tricky to navigate. Use a sturdy flashlight, step on joists, and proceed carefully.
Step 4: Drilling Through the Roof
With your ceiling hole marked on the roof, it's time to drill through the roof to complete the duct pathway.
- Locate the Marked Spot on the Roof: Find the small hole made by the drill bit on the roof. It's your starting point for the vent.
- Mark the Vent Size: Use the duct as a template to draw a circle around the drill hole on the roof. The diameter should match your ducting size, typically 6 inches.
- Cut the Hole in the Roof: Use an oscillating saw or a power saw to cut out the circular hole for the duct. Cutting through roofing materials is tougher than drywall, so take your time.
- Check for Clearance: Ensure that the hole allows the duct to run straight from the ceiling up through the roof without obstruction.
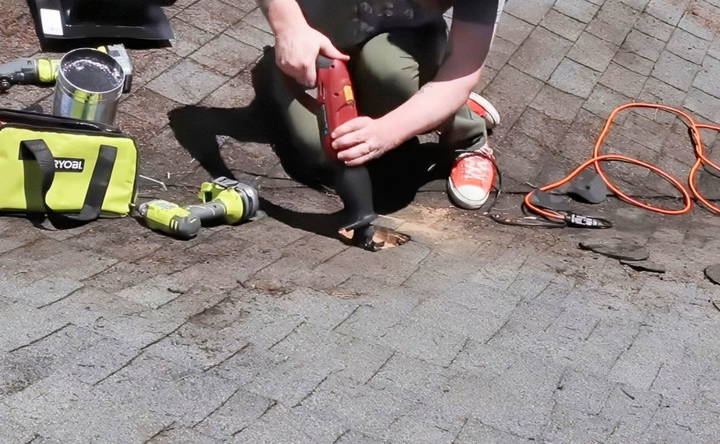
Safety Note: Always use caution when working on a roof. Avoid working in wet or icy conditions, and wear non-slip shoes.
Step 5: Installing the Roof Vent
With the hole ready, it's time to install the roof vent, which will house the duct and provide weatherproofing.
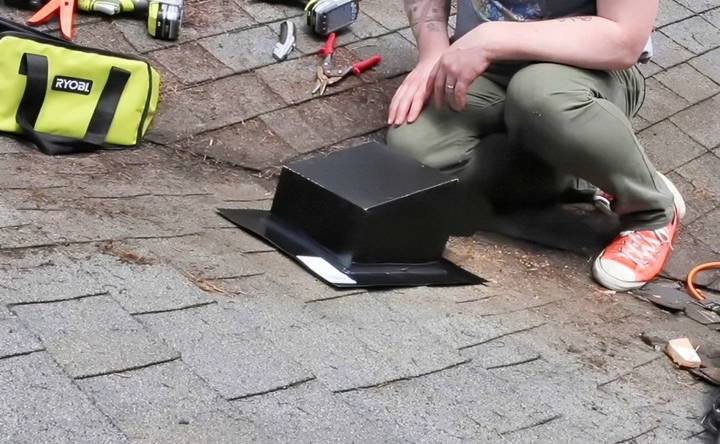
- Position the Vent on the Roof: The vent cap should fit over the hole and align with a row of shingles. The bottom edge should sit flush with the shingles, while the top flange tucks under a row above.
- Mark and Trim the Shingles: Trace the vent flange onto the shingles, then use the oscillating saw to trim around the outline so that the vent can sit flush.
- Secure the Vent Cap: Apply weatherproofing caulk along the flange edge, then secure the vent to the roof with screws. The caulk will help prevent water leaks.
- Weatherproof the Installation: Add more caulk along the edges of the vent, focusing on the flange's outer edge and where it meets the shingles. This ensures a watertight seal.
Step 6: Attach Flexible Ducting
With the roof vent installed, you can now run flexible ducting from the range hood up through the ceiling and out the roof.
- Secure the Duct to the Range Hood: Use a clamp to attach one end of the flexible ducting to the range hood's exhaust port. Tighten it firmly to prevent leaks.
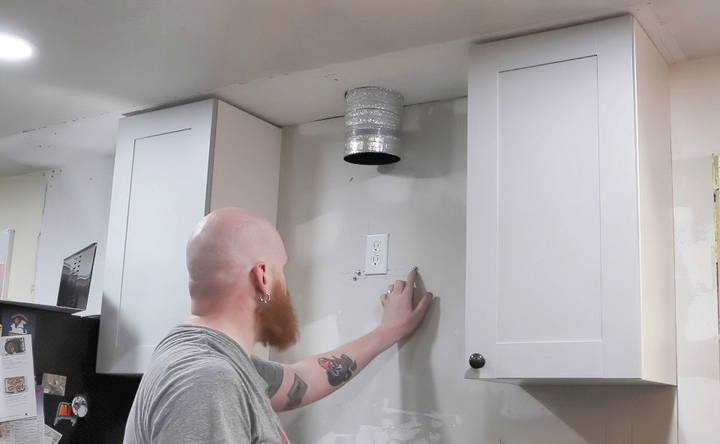
- Feed the Ducting Up Through the Ceiling Hole: Push the other end of the ducting up through the ceiling hole you cut earlier. Flexible ducts are easier to maneuver in tight spaces, making this step more manageable.
- Attach Ducting to Roof Vent: Secure the top end of the ducting to the roof vent, using another clamp to hold it in place. This connection should be tight to ensure proper ventilation.
Step 7: Secure the Range Hood to the Wall
Now that the ductwork is in place, you'll mount the range hood to the wall above your stovetop.
- Locate Wall Anchors: Most range hoods require sturdy wall anchors to hold their weight. Mark anchor points on the wall that align with your range hood's mounting holes.
- Drill Pilot Holes: Drill pilot holes at each anchor point to ensure a secure fit. Use screws and anchors appropriate for your wall type; drywall anchors are usually sufficient, but toggle bolts work well for heavier units.
- Mount the Hood on Anchors: With help, lift the range hood and line it up with the anchors. Secure it to the wall with screws, ensuring it is level.
- Check for Stability: Gently tug the range hood to confirm it's securely mounted. The hood should be flush against the wall without any wobble.
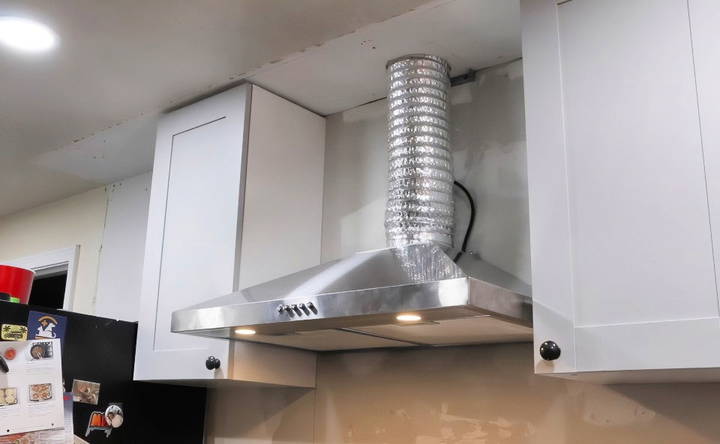
Tip: Make sure the range hood's exhaust port aligns perfectly with the ducting you installed earlier to avoid air leaks or inefficiencies.
Step 8: Install the Ceiling Bracket for the Duct Cover
The duct cover conceals the ductwork running from the hood to the ceiling, giving your installation a polished, professional look.
- Mark the Bracket Position on the Ceiling: Measure and mark the position for the ceiling bracket where the duct cover will attach. Ensure it's aligned with the duct and range hood below.
- Attach the Bracket to the Ceiling: Use screws to secure the bracket to the ceiling. Check that it's level and centered.
- Prepare the Duct Cover: Many duct covers consist of two pieces (an inner and an outer section) to allow for height adjustments. Fit the pieces together according to your desired height.
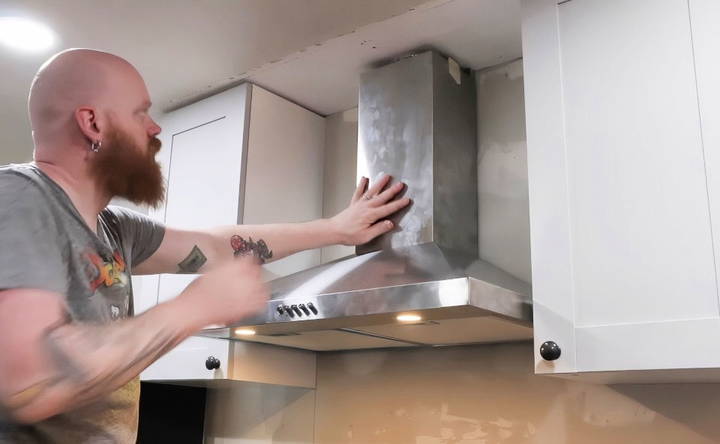
Pro Tip: If the duct cover pieces are not fitting snugly, use masking tape to hold them temporarily in place while you secure them.
Step 9: Secure the Duct Cover to the Bracket
Once the bracket is installed, secure the duct cover to hide the ducting and create a seamless look.
- Slide the Duct Cover Up: Starting from the range hood, slide the inner duct cover up towards the ceiling bracket.
- Align and Secure: Ensure the duct cover is straight and aligned with the bracket. Secure it to the bracket with screws, tightening each one for a firm hold.
- Final Adjustment: If necessary, adjust the duct cover for a snug fit, ensuring there are no gaps around the edges.
Tip: Be cautious when handling duct covers; they can be sharp along the edges. Wear gloves to prevent cuts.
Step 10: Seal All Connections
Ensuring airtight connections in your ductwork and vents is crucial for proper exhaust flow and preventing air leaks.
- Apply Duct Sealant: Use duct sealant around the connections between the range hood and the duct, and again where the duct connects to the roof vent.
- Inspect for Gaps: Check all connections for any visible gaps or loose sections, applying additional sealant if needed.
- Weatherproof the Roof Vent: Apply exterior-grade caulk around the edges of the roof vent, sealing any exposed joints between the flange and shingles.
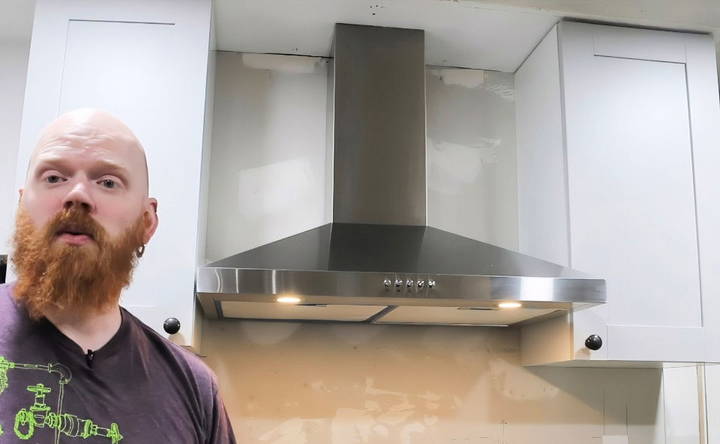
Note: High-quality duct sealant can improve the efficiency of your vented range hood, reducing energy loss and maintaining a strong airflow.
Step 11: Test the Range Hood
With everything secured and sealed, it's time to test the range hood and confirm that the installation is working as intended.
- Turn on the Range Hood: Switch on the range hood to check that the fan operates smoothly and that air is flowing through the vent properly.
- Inspect for Leaks or Vibrations: Stand near the roof vent while the hood is running. You should feel a strong exhaust flow without leaks around the duct connections.
- Listen for Noise: Excessive noise may indicate loose parts or an incomplete seal. Double-check all screws, brackets, and clamps if you hear rattling.
Step 12: Final Touches and Maintenance Tips
Now that your range hood is installed, consider a few finishing touches and maintenance tips to keep it running smoothly.
- Clean the Area: Remove any dust or debris left from drilling and cutting. This ensures no lingering particles affect your kitchen air quality.
- Inspect the Roof Vent Regularly: Periodically check your roof vent to ensure it's clear of debris or blockages, especially after storms or seasonal changes.
- Replace Hood Filters: Clean or replace the range hood filters according to the manufacturer's recommendations. This will maintain proper airflow and efficiency.
- Check for Leaks Annually: Inspect the ducting and seals annually, reapplying duct sealant if needed to prevent air leaks and maintain proper venting.
Reminder: Regular maintenance not only extends the life of your range hood but also ensures it continues to perform at peak efficiency.
Troubleshooting Tips
If you encounter any issues, here are common troubleshooting tips:
- Weak Airflow: Check for blockages in the ducting or clogged filters.
- Excessive Noise: Tighten screws and clamps along the ducting and hood, as loose connections can cause rattling.
- Leaks Around the Roof Vent: Reapply weatherproof caulk around the vent edges, especially after harsh weather.
Conclusion
Installing a range hood vent through the ceiling is a DIY project that requires planning and patience but delivers substantial benefits to your kitchen environment. With the steps covered in this guide, you now have the knowledge to complete this installation successfully. By carefully following each phase—from cutting and securing the ducting to sealing and testing—you'll enjoy a vented range hood that keeps your kitchen air fresh and your cooking experience comfortable.
Remember, safety is paramount. Always wear appropriate safety gear, work cautiously on roofs, and double-check all seals and connections to avoid leaks. With regular maintenance, your new range hood vent will remain effective and durable for years to come.
FAQs About How to Install a Range Hood Vent Through Ceiling
Discover essential FAQs about installing a range hood vent through the ceiling. Get step-by-step guidance and expert tips for a smooth installation.
While flexible ducting is easier to install, it’s generally not recommended due to potential fire hazards and code violations. The ridges in flexible ducts trap grease, reduce airflow, and can accumulate grime over time. Using rigid, smooth-walled galvanized metal ducting is safer, more efficient, and typically required by building codes.
Installing a vent near a roof valley can lead to leaks, as valleys channel large amounts of water. Aim to position the vent as far as possible from the valley. If this isn't feasible, consider using additional waterproofing measures or consulting a roofing professional to avoid water damage risks.
Insulating the ducting is advised, especially in colder climates, to prevent condensation. When warm kitchen air meets the cold metal duct, it can cause moisture to form, potentially leading to mold or water damage. Insulation reduces condensation and is particularly useful in areas with extreme seasonal temperatures.
If you have a second story above your kitchen, venting becomes more complex. One alternative is to vent horizontally through an exterior wall if accessible. Avoid combining the kitchen exhaust with bathroom vents, as this could violate building codes and decrease airflow efficiency.
For best performance and safety, mount the range hood between 24 and 30 inches above the stovetop. This height captures fumes effectively without being too close to the heat source. If mounted too low, it may obstruct cooking or become damaged by high heat.
Although screens or mesh might seem practical for keeping pests out, they can obstruct airflow and trap grease, leading to build-up and even fire risks. Instead, opt for a roof vent with a built-in backdraft damper, which will prevent pests from entering while allowing exhaust air to flow freely.
Yes, vertical ducting is common for range hood installations. However, ensure the duct is as straight and short as possible to maximize airflow. Avoid long, complex duct routes, as they reduce efficiency and may lead to grease build-up inside the duct over time.
If you find your planned vent hole aligns with a ceiling joist, stop drilling and relocate the hole slightly to avoid cutting through the structural support. Always measure carefully before drilling, or consult a professional if the new placement conflicts with other structural elements.


