Installing artificial grass in my backyard last summer was a game-changer. First, I cleared the area of any rocks and debris. Then, I measured the space to fit my roll of grass perfectly. These first steps made a big difference in how the final lawn looked. This process is practical and user-friendly. Done correctly, it can save you a lot of trouble later on.
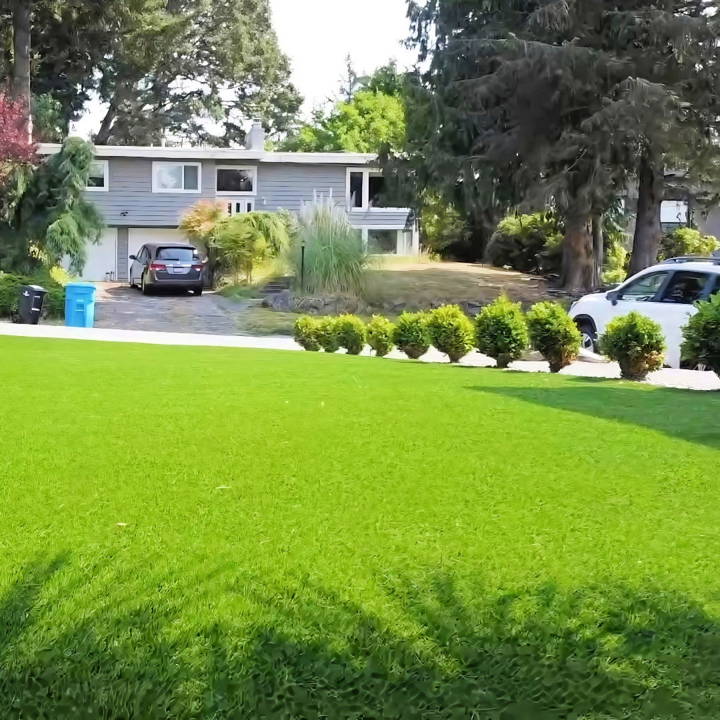
The next step was laying a base layer of sand for evenness, followed by a weed barrier to prevent any future growth. Finally, I rolled out the artificial grass, secured it with landscape pins, and brushed it to make it look natural. It wasn't just an outdoor improvement; it transformed my daily living. For anyone eager to install artificial turf, I encourage you to try it—it's super rewarding.
I'm helping with this guide about how to install artificial grass for a year-round green," giving you the confidence to go green.
Why Synthetic Grass?
After watching several tutorials and reading extensively on the benefits of synthetic grass, including water conservation, minimal maintenance, and long-term cost savings, I was convinced. Plus, the promise of a green and pristine lawn year-round without mowing or watering was alluring.
Step by Step Instructions
Learn how to install artificial turf step by step, from removing the old lawn to securing and adding the finishing touches, in this comprehensive guide.
Step 1: Removing the Old Lawn
Armed with a rented sod cutter, I embarked on the labor-intensive task of removing my old lawn. The sod cutter was a lifesaver; it allowed me to cut uniform strips of sod, which I then rolled up for removal. This process was physically demanding and a stark reminder of the importance of staying hydrated and taking breaks. The sod itself was surprisingly heavy—my yard yielded about 3,000 pounds of grass and soil!
Step 2: Leveling the Ground
Once the grass was removed, I faced the uneven terrain of my yard. Leveling was essential for a successful synthetic grass installation. I crafted a makeshift screed system from materials I had on hand, which simplified the process of smoothing out the high and low spots across the yard. This step required patience and precision to ensure a flat surface for the turf installation.
Step 3: Choosing and Laying the Foundation Material
After researching, I decided on a quarter-inch crushed minus rock for its excellent drainage and compacting qualities. Spreading and leveling the rock base was a workout, but with the help of a hard-faced rake, I achieved a uniform layer. The importance of a solid, well-compacted base cannot be overstated—it ensures the longevity and aesthetics of the synthetic lawn.
Step 4: Installing the Weed Barrier
My priority list was to prevent weeds from encroaching on my beautiful new lawn. I opted for a durable fabric weed barrier, laying it meticulously across the yard and securing it with galvanized spikes. The barrier I chose allows water to seep through while keeping the weeds at bay, an essential feature for any synthetic lawn.
Step 5: Rolling Out the Synthetic Grass
I chose a high-quality synthetic grass equipped with antimicrobial protection to deter bacteria and odors, which is especially important since I have pets. It was a heavy roll, so I roped in my father for assistance. We carefully laid out the turf, cutting it to fit the yard precisely. Aligning the grass correctly to ensure a natural appearance was tricky but crucial.
Step 6: Seaming the Grass Perfectly
Joining multiple pieces of turf seamlessly was daunting. I used specialized seam tape and adhesive to bond the sections, ensuring no gaps or mismatches. This step required a keen eye for detail and a steady hand, but the result was worth every concentrated effort.
Step 7: Securing and Finishing Touches
With the turf in position, I anchored it down with long nails, ensuring it was secured firmly to the ground, especially around the edges and seams. The last step was spreading a fine layer of antimicrobial infill across the lawn. This not only weighed down the turf, ensuring it stayed flat and secure but also contributed to the lawn's natural feel underfoot. Using a stiff brush, I worked the infill into the grass, which also helped the blades stand up and look unfailingly realistic.
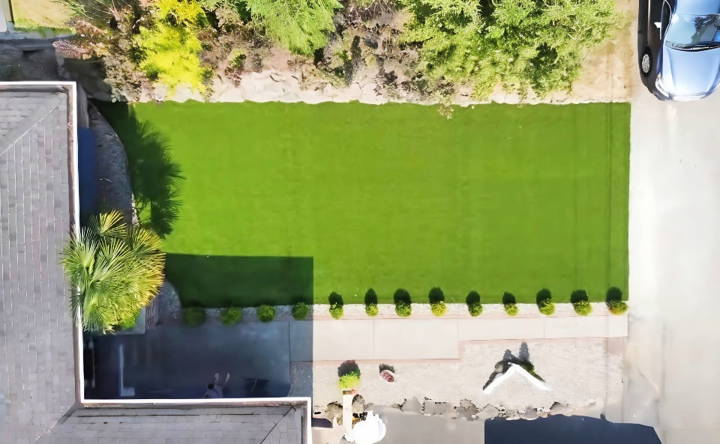
Transforming my yard was miraculous. The lush synthetic lawn drew admiration and was perfect for outdoor activities. The labor-intensive project tested my DIY skills, but the perpetual green and neat lawn made it all worthwhile.
Customization Ideas for DIY Artificial Turf Installation
When it comes to installing artificial turf, customization is key to achieving a personal touch that complements your home and lifestyle. Here are some creative ideas to help you tailor your artificial turf installation to your unique preferences:
Choose the Right Pile Height and Density
- Pile height refers to the length of the grass blades. A shorter pile is ideal for sports surfaces or areas with high foot traffic, while a longer pile gives a lush, ornamental lawn look.
- Density is the number of fibers per square inch. Higher-density turfs offer more cushioning and durability.
Selecting the Color and Texture
- Artificial turf comes in various shades of green and even other colors for playful designs.
- Consider the texture of the grass. Some are soft and suitable for children to play on, while others are coarser and better for sports or heavy use.
Incorporate Patterns and Logos
- You can cut and arrange turf into patterns or include family crests or favorite team logos for a personalized touch.
Mix and Match with Natural Elements
- Integrate the turf with natural landscaping elements like stone paths, flower beds, or real plants to make a more organic look.
Lighting and Accessories
- Add outdoor lighting to highlight certain areas of your turf at night.
- Consider accessories like golf holes, soccer goals, or a sandbox for kids, turning your turf into a multipurpose area.
Safety and Comfort Enhancements
- Install shock pads underneath the turf for extra cushioning, which is especially beneficial for play areas.
- Use non-toxic, lead-free materials to ensure the safety of children and pets.
Edge Finishing
- Choose from a variety of edging materials like metal, plastic, or wood to frame your turf and give it a neat, finished appearance.
Seasonal Decor
- Plan for easy removal of certain turf sections to accommodate seasonal decorations or temporary features like a Christmas tree stand or a summer gazebo.
Consider these customization options to ensure your DIY artificial turf meets your needs and reflects your style. Plan ahead for a successful project and envision your ideal space before starting.
Troubleshooting Common Issues in DIY Artificial Turf Installation
Installing artificial turf can be a rewarding DIY project, but it's not without its challenges. Here are some common issues you might encounter and how to solve them:
Uneven Ground
- Problem: Bumps and dips in the ground can lead to an uneven surface.
- Solution: Use a level and rake to even out the ground. Add or remove soil as needed and compact it before laying the turf.
Seams Showing
- Problem: Visible seams can disrupt the look of your turf.
- Solution: Ensure the turf pieces are tightly butted against each other without overlapping. Use seam tape and adhesive to secure the seams.
Poor Drainage
- Problem: Water pooling on the surface indicates inadequate drainage.
- Solution: Install a drainage layer of crushed stone or sand beneath the turf. Make sure the base slopes slightly for water runoff.
Turf Not Securing
- Problem: The turf lifts or shifts, especially around the edges.
- Solution: Secure the perimeter with nails or staples every few inches. For extra hold, tuck the edges into a border or use a specialized turf adhesive.
Wrinkles and Ripples
- Problem: The turf may develop wrinkles after installation.
- Solution: Stretch the turf during installation and secure it properly. If wrinkles appear later, they can often be flattened with a heavy roller.
Color Mismatch
- Problem: Different batches of turf can have slight color variations.
- Solution: Purchase all your turf at once, and if possible, from the same batch. If you need more later, blend the new pieces in less noticeable areas.
Grass Blade Direction
- Problem: The turf looks unnatural because the blades face different directions.
- Solution: Lay all turf pieces with the grass blades facing the same way, usually towards the main point of view.
Cutting Mistakes
- Problem: Incorrect cuts can waste material and look unsightly.
- Solution: Measure twice and cut once. Use a sharp utility knife and make precise cuts for a professional finish.
Anticipating these issues prepares you for your DIY artificial turf project. Patience and attention to detail are key for a beautiful, lasting installation.
Maintenance and Long-Term Care for Artificial Turf
Maintaining your artificial turf is essential to ensure it stays looking great and lasts for many years. Here's a straightforward guide to help you take care of your turf:
Regular Cleaning
- Light Cleaning: Use a leaf blower or a soft-bristle broom to remove leaves and debris.
- Deep Cleaning: Once a month, rinse your turf with water to wash away dust and small particles.
Spot Cleaning
- Stains: Remove spills and stains promptly using a mixture of water and a gentle, non-abrasive cleaner.
- Gum or Tar: Freeze the spot with ice cubes before gently scraping it off.
Weed Control
- Although weeds rarely penetrate quality artificial turf, you can apply a water-based weed killer annually as a preventative measure.
Pet Considerations
- For pet owners, clean up waste immediately and rinse the area with water. You might also use an enzyme cleaner to neutralize odors.
Brushing the Turf
- Keep the fibers upright and looking natural by brushing the turf with a synthetic bristle brush, especially in high-traffic areas.
Avoid Heat Exposure
- Artificial turf can melt or get damaged by high heat. Avoid placing hot items like grills directly on the surface.
Repairing Damages
- If your turf gets damaged, small sections can be cut out and replaced. Always keep some spare turf from the original installation for this purpose.
Professional Maintenance
- Consider having a professional service every couple of years to ensure the turf is in top condition.
By following these simple steps, you can enjoy a beautiful, low-maintenance lawn that withstands the test of time. A little care goes a long way in preserving the look and functionality of your artificial turf.
FAQs About DIY Artificial Turf Installation
FAQs about DIY artificial turf installation: get answers to common questions and find tips for a smooth, successful artificial turf installation at home.
Preparing the base is crucial for a successful installation. Start by removing any existing grass and leveling the ground. Compact the soil to make a firm foundation. If needed, add a layer of crushed stone or gravel and compact it again. This ensures proper drainage and a flat surface for the turf.
No, you cannot install artificial turf directly on top of an existing lawn. The grass and its root system must be completely removed to prevent unevenness and ensure long-term stability. After removal, the soil should be compacted, and a suitable base layer should be applied before laying the turf.
After laying out the turf, it’s important to secure it properly. Use the galvanized spiral turf spikes to pin down the edges of the turf at intervals of about six inches. For seams, use seam tape and adhesive to bond the pieces together. Make sure the turf is stretched tight to avoid wrinkles or bubbles.
Artificial turf requires minimal maintenance. Regularly remove debris with a leaf blower or a broom. Rinse the turf occasionally to clean off dust and pollen. If you have pets, clean up after them promptly. Brush the turf periodically to keep the blades standing upright and to ensure even distribution of the infill.
Selecting the right artificial turf depends on its intended use and your personal preferences. Consider the pile height, density, and color of the turf. For high-traffic areas, choose a shorter and denser pile. If you have pets, look for turf that's easy to clean and has good drainage. Always request samples to feel the texture and see the color in person before making a decision.
Conclusion:
In conclusion, understanding how to install artificial grass ensures your lawn stays green all year long. Follow these simple steps to transform your outdoor space. With proper installation, maintenance is minimal, allowing you more time to enjoy your lush, green lawn. Learn how to install artificial turf for a perfect, hassle-free solution to traditional grass.


