Installing trim can be an intimidating project for many homeowners, but with modern techniques and materials, achieving a professional, clean look doesn't have to be difficult. This guide on how to install door trim covers straightforward, time-saving methods that eliminate the need for complicated miter joints—perfect for beginners or seasoned DIYers. Whether you're finishing a basement project or simply updating the trim in your home, this guide will help you achieve a sleek, modern finish without the headaches.

Tools and Materials
Before you start your door trim project, it's important to gather all the necessary tools and materials. Here's a comprehensive list to get you going:
Tools:
- Tape measure
- Carpenter's pencil
- Circular saw or track saw
- Level or laser level
- Hammer or nail gun (16 gauge and 18 gauge nails)
- Shims
- Safety glasses
- Clamps
- Sandpaper or a palm sander
- Utility knife
- Pliers
- Construction screws
- Multi-tool (optional but helpful)
Materials:
- Pre-hung door (if applicable)
- Door jambs (if needed)
- Square stock for casing
- 16-gauge and 18-gauge nails
- Caulking and caulking gun
- Wood adhesive
- Finishing materials (paint or stain)
Step by Step Instructions
Learn how to install door Trim with our DIY door trim guide. Follow step-by-step instructions for measuring, fitting, installing, finishing, and troubleshooting.
Step 1: Measuring and Preparing the Door Jamb
Before trimming your door, you need to ensure that the door jamb is properly installed and aligned. Here's how to measure and prepare your door jamb:
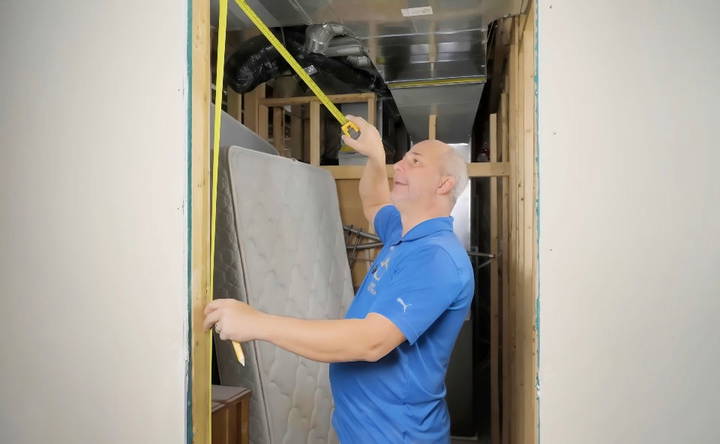
- Measure the Door Frame: Start by measuring the rough opening where your door will sit. Standard door heights are typically around 80 inches. Measure the height from the finished floor to the top of the 2x4 framing. If you've installed subflooring and hardwood, account for the extra height this adds. Jeff recommends taking about a quarter inch off the total height to leave a small gap at the bottom, allowing the door to swing freely.
- Check for Squareness: Use a level to check that your door frame is square. Measure the width at the top, middle, and bottom of the frame to ensure that they're all equal. If the measurements differ, you'll need to adjust the frame using shims to square it up.
- Cutting the Jamb: Once you have your measurements, transfer them to the door jamb and make precise cuts using a circular saw. Jeff suggests cutting the door jamb slightly shorter than the height of the door opening (about 80¼ inches). This ensures the jamb will sit flush on both sides, even if the floor is slightly sloped.
- Sanding and Finishing: After cutting, sand the edges of the door jamb with a palm sander to smooth out any rough cuts. If you're planning to stain the jamb, make sure to remove any pencil marks before proceeding.
Step 2: Fitting the Door
With the door jamb prepared, the next step is to fit the door into the opening. Jeff's approach simplifies this process, especially for DIYers working alone.
- Align the Door with the Jamb: Place the door into the opening and check for gaps on all sides. The goal is to ensure the door has an even gap at the top and bottom for smooth operation. Jeff recommends leaving about an eighth of an inch at the top and a quarter inch at the bottom.
- Attach the Hinges: Reattach the door to the jamb by securing the hinges. Use construction screws and a drill to fix the hinges securely, but don't tighten them fully just yet—you may need to make slight adjustments later.
- Check for Level and Plumb: Use a level to ensure the door is hanging perfectly plumb. If the door naturally swings open or shut, it's a sign that it's not level. In this case, you'll need to use shims to adjust the alignment.
- Shimming the Jamb: Once the door is plumb, insert shims between the door jamb and the framing to fill any gaps and secure the jamb in place. Trim off any excess shim material using a utility knife or multi-tool.

Step 3: Installing the Casing
Now that the door is fitted, it's time to install the trim or casing around the door. Instead of using traditional miter joints, Jeff's method uses square stock, which not only looks modern but is also simpler to install.
- Cutting the Header: The header is the piece of casing that goes across the top of the door. Measure the width of the door frame plus the width of the casing on both sides, and add an additional inch on each side for overhang. This extra inch makes a small reveal that looks clean and professional. For example, if the door frame is 28½ inches wide and the casing is 2¾ inches wide, your total header length should be 36 inches (28½ inches + 2¾ inches on each side + 1-inch overhang on each side).
- Cutting the Side Casings: Measure the height of the door from the floor to the top of the door frame, and cut the side pieces of casing accordingly. Jeff suggests being as precise as possible here to avoid any gaps. When cutting the side pieces, remember to account for the reveal you maked with the header.
- Nailing the Casing: Nail the casing to the door jamb, starting with the header. Jeff recommends using 16-gauge nails for MDF or heavier trim, as they provide better holding power. For the jamb itself, use shorter nails—around 1¼ inches—so they don't penetrate too deeply and cause damage.
- Securing the Casing: Ensure the casing is flush with the wall, using shims if necessary. If the wall is not perfectly straight, shimming can help align the casing. Check that the reveal is consistent along the top and sides.
Step 4: Baseboards and Finishing Touches
With the door and casing installed, the final step is to add baseboards and finish any gaps with caulking or wood filler.
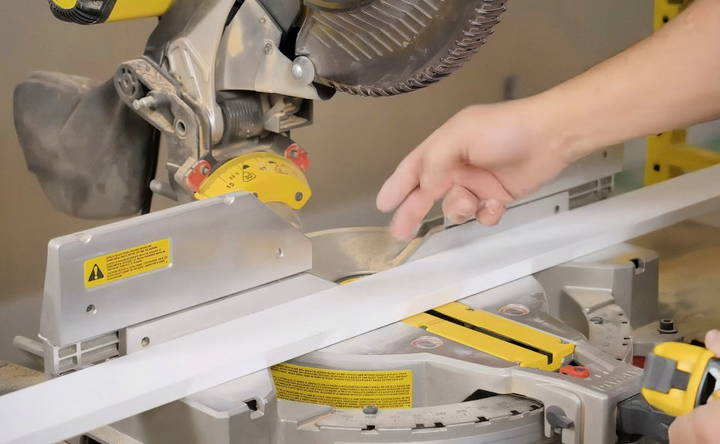
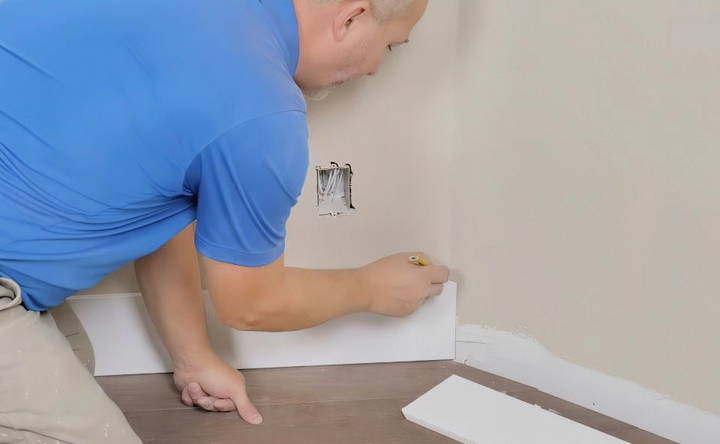
- Installing Baseboards: Measure the length of the walls on either side of the door and cut baseboards to fit. If your room has corners, you'll need to cut miters. Use a 45-degree angle for inside and outside corners, and make sure the back of the joint is snug. Jeff emphasizes that perfection is not necessary, as caulking will hide minor imperfections.
- Caulking the Gaps: Apply caulking around the edges of the casing and baseboards to fill any gaps between the trim and the wall. Use a caulking tool or your finger to make a smooth, concave finish. For best results, choose a high-quality, flexible caulk that will expand and contract with changes in temperature and humidity.
- Finishing the Trim: Once the caulking is dry, you can finish the trim by either painting or staining it to match your décor. Be sure to sand any rough spots before applying your finish for a smooth, professional look.
Step 5: Dealing with Tricky Corners and Miters
No room is perfectly square, and this is where tricky corners come into play. Whether you're dealing with uneven walls or corners that don't meet at a perfect 90-degree angle, there are ways to make your trim look seamless.
Inside Corners
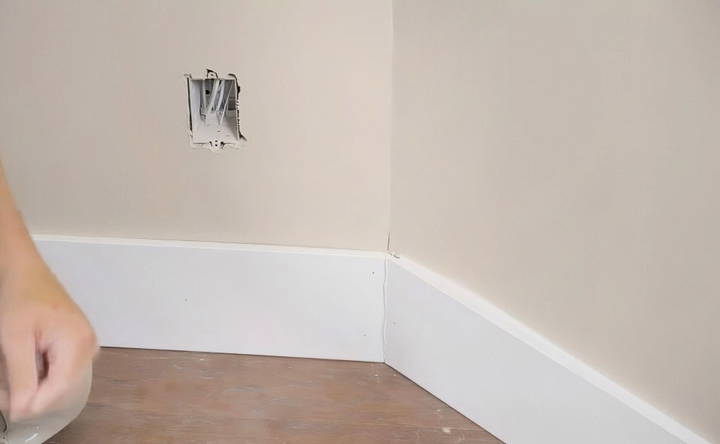
For inside corners, the goal is to make a tight seam where the two baseboards meet. Instead of cutting both pieces of baseboard at 45-degree angles, Jeff recommends using a coping technique. This method is highly effective when working with baseboards, especially if you're dealing with uneven walls.
- Coping the First Piece: Install the first piece of baseboard so that it runs flush against the wall, cut square at the end.
- Cutting the Second Piece: For the second piece, cut a 45-degree miter as if you were going to join the two baseboards with a traditional miter joint. Once you have the 45-degree cut, use a coping saw to follow the contour of the cut, removing the material behind it. This allows the second piece to overlap the first and fit snugly, even if the corner isn't perfectly square.
- Test Fit and Adjust: Test the fit by placing the second piece against the first. If it doesn't fit perfectly, use a rasp or sandpaper to adjust the coping until you get a seamless fit.
Outside Corners
Outside corners, such as those where two walls meet at a corner or where trim wraps around a door frame, are also common in baseboard installation.
- Measure and Cut: Measure the length of both pieces that will meet at the outside corner, and cut each one at a 45-degree angle so that they meet at the corner.
- Glue and Nail: Before nailing, use wood glue on the joint to strengthen the corner. Align the two pieces so that the outer edge meets perfectly, and then nail them in place. If the corner is not perfectly aligned, caulking can help cover up minor gaps, but try to get the joint as close as possible.
- Use Caulk for Final Touches: Even with the most precise cuts, gaps can appear in miter joints. Fill these gaps with caulking or wood filler for a professional look.
Step 6: Filling Gaps and Nail Holes
No matter how carefully you cut and install the trim, small gaps and nail holes are inevitable. Here's how to make them disappear:
Caulking Gaps
For any small gaps between the trim and the wall, use a high-quality, paintable caulk. Jeff recommends using acrylic latex caulk with good flexibility. This type of caulk can expand and contract with temperature changes, which is essential for areas prone to movement like doors.
- Apply a thin bead of caulk along the edge of the trim.
- Use your finger or a caulking tool to smooth it out, making a clean, concave line.
- Wipe away any excess caulk with a damp cloth to prevent smudging on the wall or trim.
Filling Nail Holes
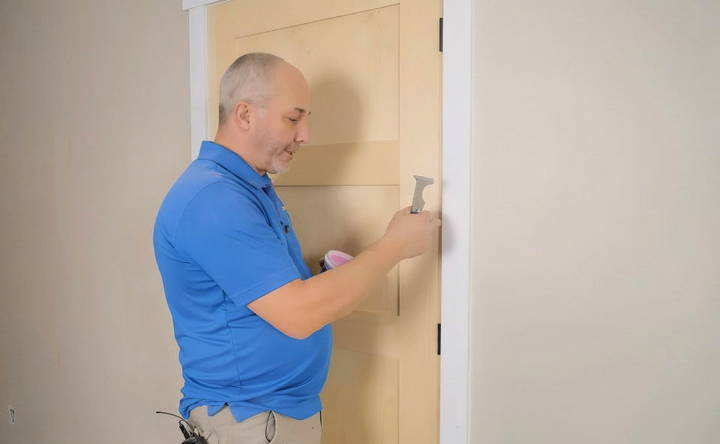
Nail holes can be filled with either caulk or wood filler. For smaller 18-gauge nail holes, caulk is usually sufficient. For larger holes made by 16-gauge nails, wood filler is a better option.
- Apply a small amount of wood filler to the nail hole using a putty knife or your finger.
- Let it dry completely, and then sand it smooth before painting or staining.
- If using caulk for small nail holes, apply a tiny dab of caulk and smooth it out with your finger.
Sanding
After the wood filler has dried, sand the surface to ensure it's flush with the surrounding trim. This step is essential for achieving a smooth, seamless finish once the trim is painted or stained.
Step 7: Painting or Staining the Trim
Once your trim is installed and all gaps and nail holes are filled, it's time to apply the finishing touches.
Painting the Trim
If you're painting the trim, follow these steps for the best results:
- Primer First: If you're working with raw MDF or wood, start with a primer coat. This helps the paint adhere better and provides a smoother finish. Use a stain-blocking primer if the wood has any knots or imperfections that could bleed through the paint.
- Choose the Right Paint: Use a high-quality, semi-gloss or gloss paint for trim. These finishes are more durable and easier to clean than flat or eggshell finishes, making them ideal for trim around doors and baseboards.
- Apply Thin Coats: Use a small brush or roller to apply thin, even coats of paint. Multiple thin coats will give you a smoother finish than one thick coat, which can lead to drips and uneven coverage. Allow each coat to dry completely before applying the next.
- Sanding Between Coats: Lightly sand the trim between coats of paint to remove any brush strokes or imperfections. This will give you a glass-smooth finish.
Staining the Trim
If you prefer a natural wood look, staining is a great option. Here's how to do it:
- Sand the Surface: Before staining, sand the entire surface of the trim with fine-grit sandpaper (220 grit works well). This opens up the wood grain and allows the stain to penetrate evenly.
- Apply Wood Conditioner: If you're working with softwoods like pine or poplar, use a wood conditioner before applying the stain. This helps prevent blotching and ensures a more even finish.
- Apply the Stain: Using a clean rag or brush, apply the stain in the direction of the wood grain. Wipe off any excess stain with a clean cloth to prevent streaks. Let the stain dry according to the manufacturer's instructions.
- Apply a Clear Coat: Once the stain has dried, apply a clear polyurethane or varnish to protect the wood and enhance the finish. For a smooth, durable finish, apply at least two coats, sanding lightly between each coat.
Step 8: Installing Baseboards and Finishing Touches
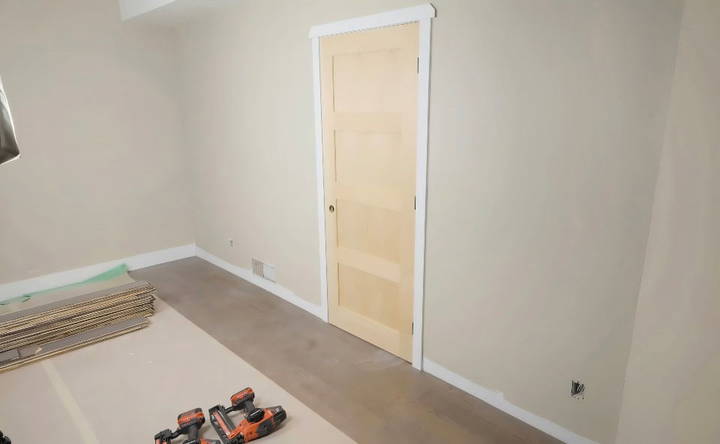
With the door trim complete, it's time to focus on the baseboards. Baseboards provide the finishing touch and tie the entire room together. Here are a few final tips to ensure your baseboard installation is seamless:
- Cutting Baseboards to Length: Measure the length of the walls and cut the baseboards accordingly. For outside corners, remember to cut 45-degree miters to make a tight joint. For inside corners, use the coping technique mentioned earlier.
- Attaching the Baseboards: Secure the baseboards to the wall with nails, ensuring that the baseboard sits flush against the wall. For best results, use 16-gauge nails to secure the baseboard to the studs.
- Caulking the Baseboards: Caulk any gaps between the baseboard and the wall or floor. This will give the baseboards a clean, finished look and prevent dust or dirt from collecting in the gaps.
- Finishing the Baseboards: Whether you're painting or staining the baseboards, follow the same process used for the door trim. Apply primer, paint, or stain in thin, even coats, sanding between coats for a smooth finish.
Step 9: Troubleshooting Common Issues
Even with careful planning, you may run into a few challenges during your door trim installation. Here are some common issues and how to address them:
- Uneven Walls: If your walls aren't perfectly straight, you may notice gaps between the trim and the wall. Use shims behind the trim to fill these gaps, and apply caulk to cover any remaining imperfections.
- Misaligned Joints: If your miter joints aren't lining up perfectly, you can use wood filler or caulk to fill the gaps. Sand the area smooth after the filler has dried, and then paint or stain the trim.
- Nail Pops: Occasionally, nails may pop out over time due to movement in the wall or door frame. To fix this, simply hammer the nail back in place and fill the hole with wood filler or caulk.
Step-by-Step Video Tutorial
Conclusion: Enjoy Your Professional-Looking Trim
With your door trim and baseboards installed, you've transformed the look of your room. The techniques outlined in this guide make the process simpler, even for beginners, and ensure that your trim looks professional, modern, and clean. Whether you opted for paint or stain, mitered or square stock trim, the results should enhance the overall aesthetics of your space.
By following these steps and using the right tools and materials, you can complete your door trim project efficiently and achieve a high-end look without the need for expensive contractors or complex tools. Now that you're equipped with the knowledge, all that's left to do is step back and admire your work!
FAQs About DIY Door Trim
Discover answers to common questions about DIY door trim projects, from materials to installation tips, and elevate your home renovation skills.
If the frame isn’t square, use shims to adjust it. Place shims between the door jamb and the framing to correct any alignment issues. Ensure that the door hangs level, and that the gaps between the door and jamb are even on all sides before securing with nails or screws.
Yes, Jeff's method uses square stock casing, eliminating the need for miter joints. Instead of angled cuts, you simply cut the trim to size and join the pieces together for a modern, clean look.
Use a sharp blade when cutting, and avoid free-handing. Jeff suggests skipping the tape if the blade is sharp enough. However, you can also score the surface with a utility knife before cutting to prevent tear-out.
Gluing is generally not recommended for door casings, especially if future adjustments are needed. Use nails instead, which are easier to remove and won’t damage the jamb if repairs are required later.
For 18-gauge nail holes, you can use acrylic caulk or wood filler. For larger 16-gauge nail holes, wood filler is better. Always sand after filling to ensure a smooth finish before painting or staining.
Use shims behind the baseboard to follow the contours of the floor. For any gaps, apply caulk to make a seamless look. This method ensures that the baseboard sits flush, even on an uneven floor.
To ensure airflow, especially over carpet or hardwood floors, leave a gap of about 1 inch for carpet or ½ inch for hardwood beneath the door. This is essential for ventilation when doors are closed.
Use a high-quality acrylic latex caulk. Apply a thin bead, then smooth it out with your finger or a caulking tool. For a professional look, work slowly and wipe off any excess caulk with a damp cloth.
For a cleaner, more polished look, Jeff recommends installing flooring first, followed by the door and trim. This avoids the need to cut around the floor and gives a seamless finish.
Use construction adhesive in addition to nails when attaching baseboards to drywall. This ensures a strong hold and prevents the baseboards from pulling away over time, especially in high-traffic areas.


