Starting a big project at home can sometimes feel challenging. I remember the first time I installed drywall in my living room. I was a bit nervous but excited for the transformation. The first step was to measure the walls carefully and cut the drywall to the right size. This ensured every piece fit perfectly and saved me a lot of hassle later.
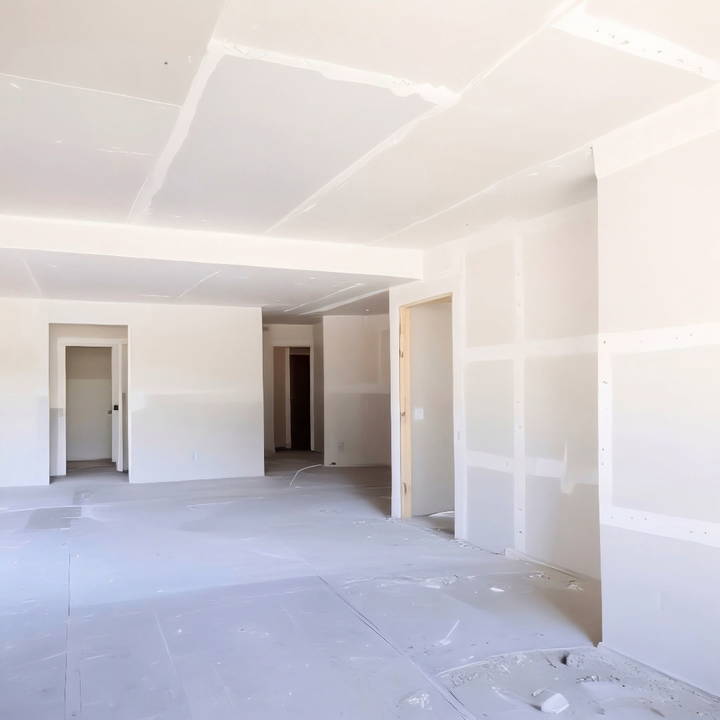
When you start installing drywall, you’ll need the right tools: a utility knife, a drywall saw, screws, and a drill. I began by attaching the drywall to the wooden studs using screws, making sure they were placed evenly. After that, taping and applying joint compound covered the seams. It felt rewarding to see the smooth walls taking shape.
Now, get started with the content below on how to install drywall in your home. These tips will surely help you, just like they helped me.
Preparation: Laying the Groundwork
Learn the essential materials and steps for preparation: laying the groundwork to ensure a solid foundation for your project. Discover why each material is crucial.
Materials Needed and Why:
- Drywall Sheets: Essential for making smooth walls and ceilings.
- Drywall Screws: To securely fasten the drywall panels to the structure.
- Joint Tape: For covering the seams between panels.
- Joint Compound: Also known as mud, used to fill gaps and smooth out the joint tape.
- Tools (Saw, Drill, Taping Knives, Sanding Block): Each plays a crucial role from cutting, installing, to finishing the drywall.
Step by Step Instructions
Follow our step-by-step drywall installation guide for precise measurements, efficient setup, and expert finishing. Make your walls perfect today!
First Steps
Before diving into the project, I thoroughly inspected the area for any issues that could affect the drywall installation, such as moisture or structural damage. Once confident in the space's integrity, I measured twice to avoid unnecessary cuts and potential wasted materials.
Measuring and Cutting: Precision is Key
The mantra "measure twice, cut once" was never more relevant than during this project. Using a drywall T-square ensured straight cuts, and marking the measurements clearly on the drywall with a pencil guided me towards precision. A key insight I learned was to score the drywall's paper layer with a utility knife and then snap it for a clean break. This method saved time and effort, giving me cleaner results.
Installing Drywall: Ceiling Comes First
Contrary to what one might think, starting with the ceiling provided a solid foundation and made it easier to align the walls afterwards. Armed with a DeWALT drill and screws, I worked my way across the ceiling, ensuring each piece was securely fixed. Balancing on ladders and lifting heavy sheets was challenging, but the sense of accomplishment when viewing the completed ceiling was unparalleled.
Walls: The Vertical Challenge
With the ceiling done, it was time to tackle the walls. I found this part slightly less intimidating, given the gravity was more of a friend than a foe here. A critical tip that made a significant difference was staggering the seams between the drywall sheets, which enhanced the overall structural integrity and reduced the risk of cracking.
Mud, Tape, and Sanding: The Finishing Touches
- Mud Taping: Applying the joint compound was therapeutic, though it demanded patience and a steady hand. The joint tape required a careful application, pressed firmly into the wet mud without making air bubbles.
- Sanding: After the mud dried, sanding down the surfaces ensured a smooth finish. It was messy, yet vital to achieving professional-looking walls. The Radius 360 sanding tool proved invaluable during this phase, allowing for even and efficient sanding.
- Final Steps: Before painting, I applied a prime check to ensure the smoothness of the walls, filling any imperfections with additional joint compound and sanding down again if necessary. Cleanup was a breeze with the right tools, preparing the room for the transformational coat of paint.
Reflections and Recommendations
Through this DIY journey, patience, precision, and preparation were my greatest teachers. Investing in quality tools, like the DeWALT drill and the Radius 360 sanding tool, not only made the job easier but also ensured a finish I could be proud of.
For those embarking on this DIY adventure, do not underestimate the importance of the prep work. It makes all the difference in the execution and final look of your project. Lastly, ensure you have adequate protective gear, particularly for sanding, to keep yourself safe throughout the process.
https://www.youtube.com/watch?v=VQIMaR7hWtM&ab_channel=HomeRenoVisionDIY
Personalization Tips for DIY Drywall Installation
When it comes to DIY drywall installation, personalizing your project can make a significant difference in the final look and feel of your space. Here are some tips to help you tailor the installation to your preferences:
- Choose the Right Drywall Type: Drywall comes in various types, such as standard, moisture-resistant, and fire-resistant. Select the one that best suits the conditions of the room you're working on.
- Consider the Thickness: Drywall panels vary in thickness. Thicker panels offer better soundproofing, which might be ideal for bedrooms or home offices.
- Plan Your Layout: Before you start, sketch out a layout plan. This helps in minimizing the number of cuts and joints, making the installation cleaner and more tailored to your space.
- Decorative Finishes: Think about the finish you want. Options include smooth, textured, or even patterned finishes that can add character to your walls.
- Incorporate Niches and Shelves: Plan for built-in niches or shelves within your drywall. This not only adds a personal touch but also provides functional storage space.
- Paint and Color: Choose a paint suitable for drywall and select a color that matches your interior design theme. Remember, lighter colors can make a room feel larger.
- DIY Art: If you're artistic, consider making a mural or pattern directly on the drywall before painting. This can be a unique feature in your home.
- Soundproofing: For added privacy, install soundproofing materials behind the drywall. This is especially useful in shared walls or noisy areas.
- Energy Efficiency: Install insulation behind the drywall to improve energy efficiency. This keeps your home warmer in winter and cooler in summer.
- Accessibility: If you need to access plumbing or wiring in the future, install access panels that blend seamlessly with the drywall.
Use these tips to make your DIY drywall both practical and stylish. Plan, measure, cut, and install with care. Seek professional advice if needed.
Advanced Techniques in DIY Drywall Installation
For those who have mastered the basics of drywall installation and are looking to take their skills to the next level, here are some advanced techniques that can enhance the quality and functionality of your work:
- Soundproofing: To reduce noise transmission, use specialized sound-dampening drywall or add a layer of mass-loaded vinyl (MLV) between the studs and the drywall.
- Curved Walls: For making curved walls or arches, use flexible drywall, which can bend to fit the desired shape. Secure it with screws and use joint compound to smooth out the edges.
- Level 5 Finish: Achieve a flawless finish by applying a skim coat over the entire surface of the drywall. This makes a smooth, uniform surface that's perfect for high-end painting and decorating.
- Mold and Moisture Resistance: In areas prone to moisture, like bathrooms or basements, opt for mold-resistant drywall and use a vapor barrier to protect against dampness.
- Fire Resistance: Enhance safety by using Type X or Type C fire-rated drywall in areas where fire resistance is a concern, such as around fireplaces or in garages.
- Thermal Insulation: Improve energy efficiency by installing rigid foam insulation boards before hanging the drywall. This adds an extra layer of insulation without taking up too much space.
- Decorative Textures: Experiment with different texturing techniques, like knockdown, orange peel, or Venetian plaster, to add a decorative touch to your walls or ceilings.
- Recessed Lighting: Plan for recessed lighting by marking out the locations before installing the drywall. Cut out the holes with a drywall saw or rotary tool for a precise fit.
- Integrated Technology: Consider the integration of technology, such as built-in speakers or smart home wiring, before sealing the walls. This requires careful planning and execution.
- Artistic Features: For a truly unique touch, embed artistic elements like stained glass or custom woodwork into the drywall. This requires precision cutting and a creative vision.
Using these advanced drywall techniques, you can make a functional and beautiful space. Research and practice may be necessary, so consult professionals or other resources if needed. Your effort will result in a finish you can be proud of.
Common Mistakes and How to Avoid Them in DIY Drywall Installation
Installing drywall can be a rewarding DIY project, but it's also one where small mistakes can lead to big headaches. Here are some common pitfalls and how to steer clear of them:
Incorrect Measuring
One of the most frequent errors is cutting drywall panels to the wrong size.
- Avoid this by double-checking your measurements before cutting. Remember the old carpenter's rule: “Measure twice, cut once.”
Over Sanding
It's easy to overdo it when sanding joint compounds, which can lead to uneven surfaces.
- Avoid this by using a light touch and checking your work frequently.
Too Much Joint Compound
Applying too much joint compound can make sanding more difficult and can lead to cracking.
- Avoid this by applying thin layers and allowing each to dry completely before adding another.
Ignoring Manufacturer Instructions
Each type of drywall and joint compound comes with specific instructions.
- Avoid problems by following these guidelines closely.
Not Using Enough Screws
Drywall needs to be securely attached to the studs.
- Avoid sagging or bulging by using enough screws and spacing them properly, typically every 6 to 8 inches along the studs.
Mismatched Edges
When two pieces of drywall don't line up perfectly, it can make a visible seam.
- Avoid this by ensuring your edges are flush before securing the panels.
Skipping the Primer
Primer helps the paint adhere to the drywall and provides a uniform surface.
- Avoid poor paint jobs by applying primer before painting.
Forgetting to Check for Electrical Boxes
Cutting around electrical boxes can be tricky.
- Avoid misaligned cuts by marking their locations accurately on the drywall before you start cutting.
Not Planning for Waste
Drywall installation can produce waste.
- Avoid excess by planning your cuts to minimize scraps.
Rushing the Job
Finally, the biggest mistake is to rush.
- Avoid this by taking your time at each step to ensure quality work.
By being mindful of these common errors and taking steps to avoid them, you'll be on your way to a successful DIY drywall installation.
Troubleshooting Tips for DIY Drywall Installation
Encountering issues during a DIY drywall project is common, especially if you're new to the task. Here are some troubleshooting tips to help you overcome common challenges:
Bubbles in Tape
- Cause: Air trapped under the tape due to insufficient joint compound.
- Solution: Gently cut the bubble, press out the air, add a bit more compound, and smooth it out.
Cracks in Joints
- Cause: Drywall movement or applying too thick a layer of joint compound.
- Solution: Use mesh tape for better flexibility, apply thin layers of compound, and ensure it's thoroughly dry before sanding.
Screw Pops
- Cause: Screws not set correctly or movement in the wall framing.
- Solution: Drive the screw slightly deeper into the stud and cover with compound, or replace it with a new one if necessary.
Uneven Joints
- Cause: Poorly finished joints or uneven taping.
- Solution: Sand the area lightly and reapply joint compound smoothly.
Visible Seams
- Cause: Insufficient feathering of joint compound.
- Solution: Apply wider layers of compound, feathering out the edges to blend with the wall.
Difficulty Cutting Drywall
- Cause: Dull blade or improper scoring technique.
- Solution: Use a sharp utility knife, score deeply enough, and snap the panel cleanly.
Mismatched Texture
- Cause: Inconsistent application or wrong tools.
- Solution: Practice your texturing technique on a scrap piece and use the right tools for the desired texture.
Paint Not Adhering
- Cause: Skipping primer or dirty surface.
- Solution: Always apply a primer designed for drywall and ensure the surface is clean before painting.
Dust Everywhere
- Cause: Sanding without proper containment.
- Solution: Use dust barriers, wet sanding techniques, or a vacuum sander to minimize dust.
Anticipate and fix issues to better tackle problems during drywall installation. Patience and careful work ensure a professional finish.
FAQs About DIY Drywall Installation
Discover everything you need to know about DIY drywall installation. Get answers to common faqs and master your next home improvement project.
Drywall comes in various thicknesses and types. The most common thickness is 1/2-inch, suitable for most walls. Use 5/8-inch (Type X) for ceilings or where fire resistance is needed. For moisture-prone areas like bathrooms, use water-resistant drywall.
Start by preparing the installation site. Remove any old materials and ensure the studs are clean and flat. Check for any damage or irregularities that might affect the installation, such as moisture or termite damage.
Measure the space where the drywall will go and subtract 1/4-inch for easier fitting. Use a drywall square to mark your cutting lines. When cutting, ensure your cuts are straight and precise to avoid gaps and uneven seams.
Avoid over-tightening screws, which can tear the drywall paper or cause the screw to break through the surface. Make sure your cuts are straight, and apply joint compound and tape properly to achieve a smooth finish.
To achieve a smooth finish, follow these steps:
Apply joint compound smoothly over the seams between drywall sheets.
Place drywall tape over the compound along the seams, pressing firmly to adhere it.
Apply another layer of joint compound over the tape, feathering the edges to blend with the wall.
Allow the compound to dry completely before sanding it down to a smooth finish.
Inspect the wall for any imperfections and apply additional compound if necessary.
Sand the final layer lightly to ensure a smooth, paint-ready surface.
Conclusion: A Labor of Love
Taking on drywall installation yourself can seem overwhelming, but the satisfaction of completing it is immense. You'll be amazed at how attainable it is with the right guidance.


