Learning how to install hardwood floors can be rewarding and save money. Begin by selecting the right type of wood that fits your space. Gather all necessary tools like saws, nails, and measuring tape. Preparing the subfloor and ensuring it's clean and dry is crucial. Proper installation needs patience and precision to ensure each plank fits perfectly.
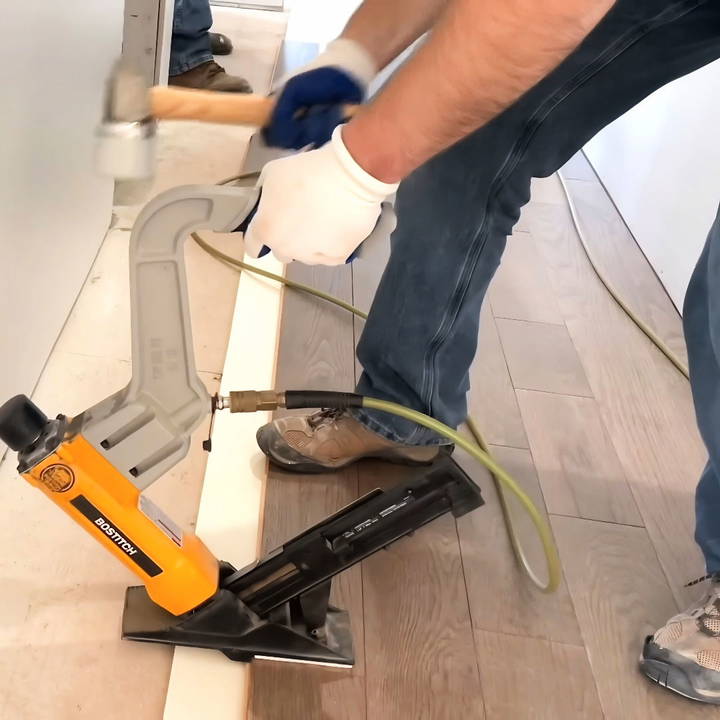
Understanding the steps for installing hardwood floors boosts your confidence. Start by measuring the room to determine the floor layout. Cut the boards to fit, leaving room for expansion. Lay the first row carefully and use spacers to fill in gaps. Nailing or gluing, based on wood type, secures the planks. Follow a consistent pattern for a seamless look and finish with trim for perfection.
Ready to explore more? The next section covers detailed steps and expert tips for how to lay hardwood flooring efficiently.
Materials You'll Need
Before diving into the steps, let's talk about the materials you'll need and why each one is important:
Materials List
- Hardwood Flooring: This is the star of the show. Choose between pre-finished or unfinished wood based on your preference. Pre-finished wood cuts down on the time and effort required since it's already stained and sealed.
- Vapor Barrier or Felt Paper: Essential for moisture control, this layer goes between the hardwood and subfloor.
- Trim Head Screws & Wood Glue: Use these to secure the flooring, especially the first and last rows.
- Pneumatic Floor Nailer: For fastening the hardwood planks securely. You can also use manual nailers, but pneumatic is easier.
- Chalk Line: To guide you in laying straight rows.
- Miter Saw & Jigsaw: For precise cutting of wood pieces.
- Tape Measure & Speed Square: To measure and mark your cuts accurately.
- Underlayment: Specialized underlayment designed for hardwood floors adds a protective layer.
- Safety Gear: Don't forget knee pads, eye protection, and ear protection.
- Moisture Meter: Ensures the moisture levels in your subfloor are acceptable.
- Stapler: This is used to attach the vapor barrier to the subfloor.
- Hammer & Mallet: This is used to secure the wood pieces and tap them into place.
Step by Step Instructions
Discover step-by-step instructions for installing hardwood floors, from wood acclimation to finishing touches. Your perfect guide for a flawless finish!
Step 1: Acclimate the Hardwood
Start by acclimating your hardwood planks. This entails leaving them in the room where you'll be installing them for about 7-14 days. This step is crucial because hardwood needs to adjust to the room's humidity and temperature to prevent expansion or contraction after installation.
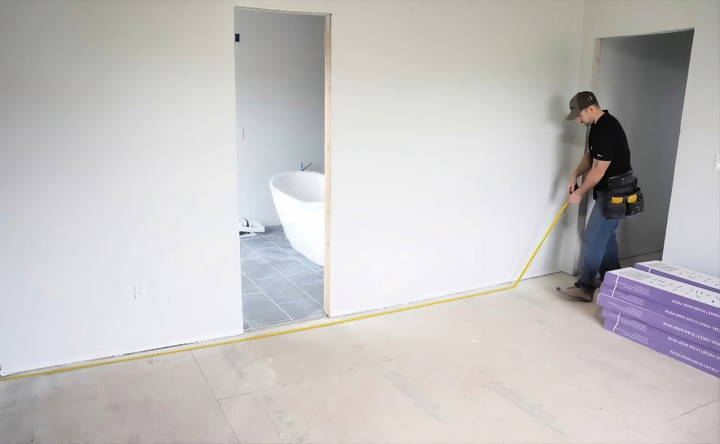
Step 2: Prepare the Subfloor
Ensure your subfloor is clean and dry. Use a putty knife to remove any debris, and consider a belt sander if there are any raised areas. Check the moisture content with a moisture meter; it should be between 6-9%.
Step 3: Lay the Vapor Barrier
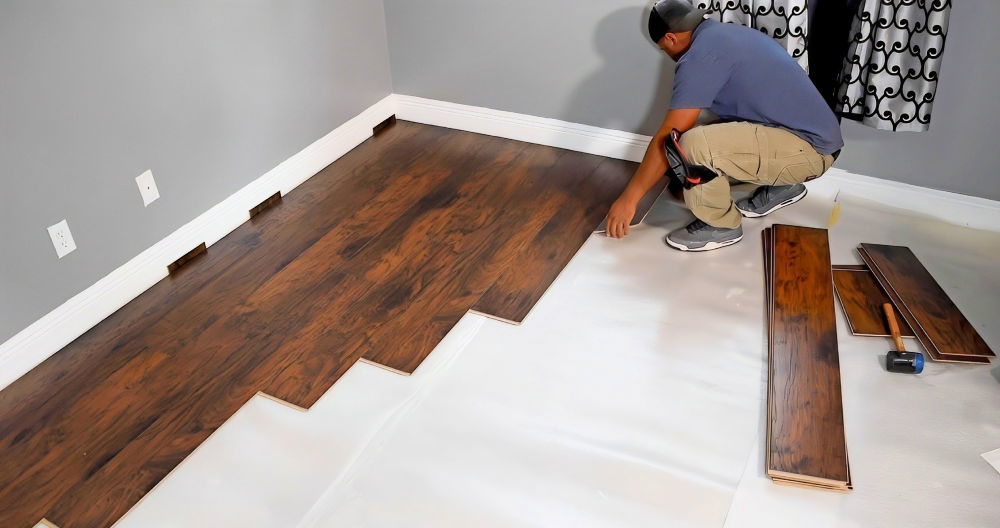
Roll out your vapor barrier or felt paper across the subfloor. Secure it with quarter-inch staples to hold it in place, making sure you overlap the edges by about four inches. This vapor barrier helps in preventing moisture from seeping through and damaging the hardwood.
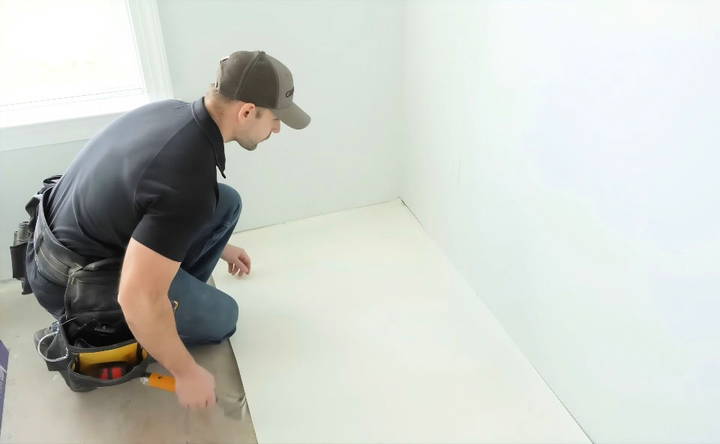
Step 4: Mark Your Starting Line
If you're doing a whole house, start by marking a straight line along the longest focal point, like a hallway. Measure and snap a chalk line to serve as your guide. This ensures your rows are straight from the beginning.
For a single room, you'll start at the farthest wall and work your way out. Measure your first plank and subtract a three-quarter inch for the expansion gap. Snap a chalk line for reference.
Step 5: Install the First Row
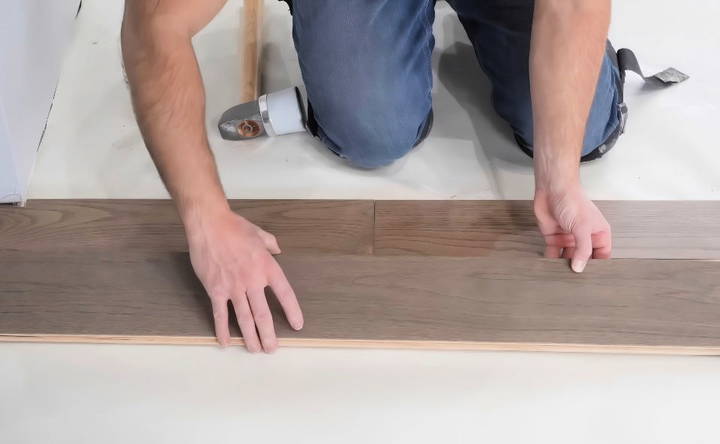
Lay the first row along the chalk line, with the tongue facing out. Pre-drill holes in the planks and secure them with trim head screws every six to eight inches. Make sure to countersink the screws slightly so the next row can fit snugly over them.
Step 6: Continue Laying Rows
Slide the next plank into the tongue of the first plank. Use a rubber mallet to tap it into place. Once fitted, use the pneumatic nailer to nail the plank down at an angle. Repeat this process, keeping a close eye on your chalk line to ensure everything stays straight.
Step 7: Rip Cuts and Transitions
As you proceed, you may encounter obstacles such as vents or doorways. Measure these areas carefully and use your miter saw or jigsaw to make precise cuts. Always allow for a three-quarter inch expansion gap around the edges.
Step 8: Handle Special Cases
When transitioning from one room to another or around obstacles like a fireplace, you may need to install a spline (or slip tongue). Apply wood glue within the groove and tap the spline into place. This technique allows the hardwood to continue seamlessly into another room.
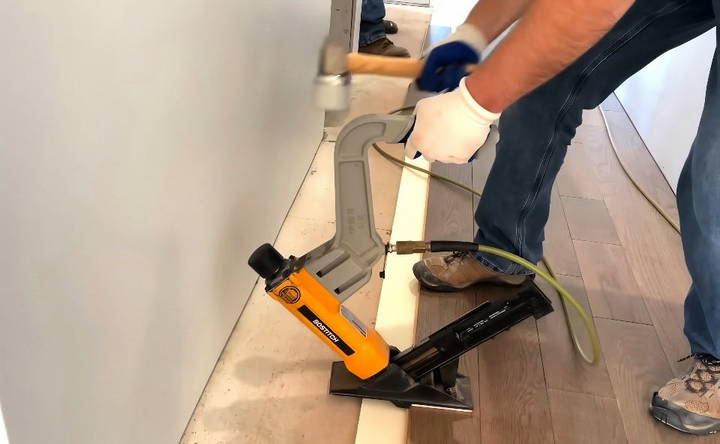
Step 9: Install the Last Row
The last row often requires ripping down the width of the planks to fit. Measure carefully and cut accordingly, ensuring you maintain the three-quarter inch expansion gap. Secure these final planks with trim head screws, countersinking them sufficiently.
Step 10: Add Finishing Touches
After installing all the hardwood, you likely have gaps between the wood and other flooring types or walls. Use transition strips or t-molding to cover these gaps for a clean, professional look. Cut these to size, apply adhesive, and nail them down as necessary.
Pro Tips:
- Safety First: Always wear your knee pads, eye protection, and ear protection.
- Precise Measurements: Always double-check your measurements before cutting.
- Tight Joints: Ensure every board is snug against the previous board before nailing.
- Clean Up: Keep your workspace clean to avoid debris affecting your work.
Common Mistakes and How to Avoid Them
When installing hardwood floors, it's easy to get caught up in the excitement and overlook some critical steps. Here are some common mistakes and practical tips to avoid them:
Not Acclimating the Wood
Hardwood needs to adjust to the humidity and temperature of your home to prevent warping.
- Solution: Store the flooring in the installation room for at least 48-72 hours before installation.
Skipping Subfloor Preparation
A clean, level subfloor is essential for a smooth installation.
- Solution: Clean thoroughly and check for levelness, sanding down, or filling in as necessary.
Ignoring Expansion Gaps
Wood expands and contracts with temperature changes.
- Solution: Leave a gap of about 3/8" to 1/2" around the room's perimeter.
Incorrect Layout Planning
Starting without a plan can lead to aesthetic and structural issues.
- Solution: Measure the room, plan the layout, and start from the longest, most visible wall.
Inadequate Nailing
Too few nails can cause boards to shift or squeak.
- Solution: Follow the manufacturer's guidelines for nailing schedules, usually every 6-8 inches along the board's length.
Rushing the Job
Haste can lead to mistakes that are hard to undo.
- Solution: Take your time, especially when cutting and placing boards.
Not Using the Right Tools
The wrong tools can damage the wood or result in poor installation.
- Solution: Invest in or rent the correct tools, such as a flooring nailer, saws, and spacers.
Failing to Check for Defects:
Boards with defects can compromise the floor's look and integrity.
- Solution: Inspect each board before installation and set aside any noticeable defects.
Avoid common pitfalls and follow solutions to achieve a lasting, professional hardwood floor.
Maintenance and Care Tips
Proper maintenance is key to preserving the beauty and extending the life of your hardwood floors. Here are some straightforward tips to keep your floors looking their best:
Regular Cleaning
Dust and dirt can scratch the wood.
- Solution: Sweep, dust mop, or vacuum regularly using a soft-bristle attachment to remove particles.
Immediate Spill Cleanup
Liquids can damage the wood if left standing.
- Solution: Wipe up spills promptly with a dry or slightly damp cloth.
Use Protective Pads
Furniture can cause dents and scratches.
- Solution: Place felt pads under furniture legs and avoid dragging furniture across the floor.
Avoid Harsh Cleaners
Some cleaning products can strip the finish off your floors.
- Solution: Use cleaners specifically designed for hardwood floors and follow the manufacturer's instructions.
Control Humidity Levels
Too much moisture can cause the wood to swell, while too little can cause it to shrink and crack.
- Solution: Maintain indoor humidity levels between 35% and 55%.
Protect from Sunlight
Prolonged exposure to sunlight can fade the wood.
- Solution: Use curtains or blinds to shield floors from direct sunlight during peak hours.
Regular Inspections
Small issues can become big problems if ignored.
- Solution: Check for signs of wear or damage regularly and address them promptly.
Professional Refinishing
Over time, floors may need a new finish.
- Solution: Hire a professional to sand and refinish your floors every 7-10 years, depending on traffic and wear.
With these tips, your hardwood floors will stay beautiful for years. Consistent care avoids repairs and maintains their condition.
FAQs About Hardwood Floor Installation
Discover answers to common questions about hardwood floor installation. Get tips, costs, and expert advice for flawless hardwood flooring results.
The best type of hardwood for your home depends on factors like subfloor type and foot traffic. Oak, hickory, maple, and walnut are popular choices due to their durability and appearance. An experienced installer can help you choose the right one for your home's specific needs.
Yes, an in-home estimate helps determine the type of flooring suitable for your home and the total amount needed. Some installers may charge for this service, but often the fee is applied to the final cost of installation.
Absolutely. Ensure your installer is certified and insured. This protects you from any liability and ensures that the installation follows proper guidelines, which is crucial for maintaining your warranty.
Moisture can cause wood to warp or cup. Discuss with your installer how they plan to handle moisture issues. They should measure moisture levels in your home and explain how it will affect your hardwood flooring over time.
Your installer should provide a clear outline of the installation timeline, total costs, and how they will ensure your home remains in good condition during the process. Ask for specifics to avoid surprises later on.
Conclusion
Wrapping up, mastering how to install hardwood floors can truly transform your living space. With the right tools and clear steps, installing hardwood floors becomes an engaging and rewarding project. Enjoy the beauty and durability that hardwood brings to your home. Remember, patience and attention to detail are key to a job well done. Happy flooring!


