Learning how to install laminate flooring was a game-changer for my home renovation. It seemed like a daunting task, but with the right tools and some patience, it became easy. Starting with a clean, flat surface is key. I carefully measured the room, leaving a bit of space along the walls for the flooring to expand.
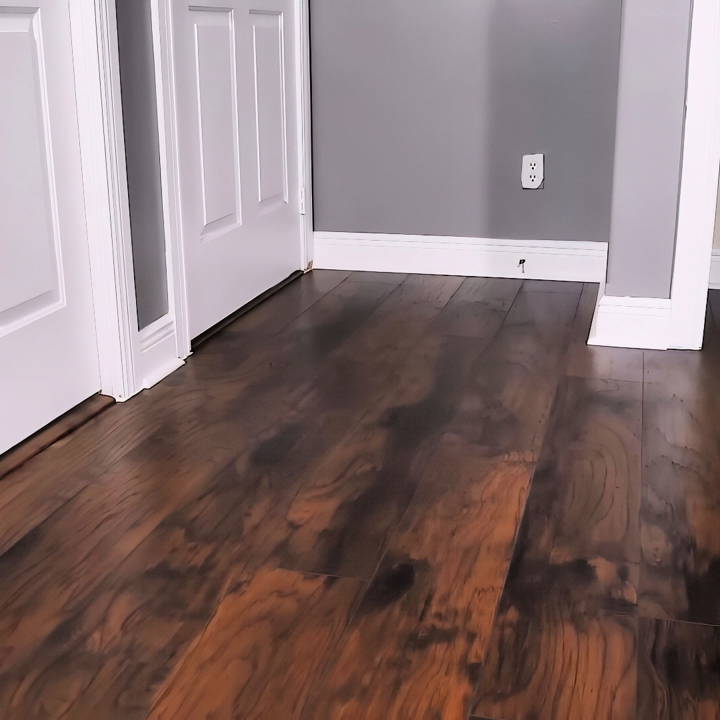
Understanding each step ensured a smooth process. I placed the planks in a staggered pattern to make them look natural. Using a tapping block, I gently locked them together. The final touch was installing the trim to cover the gaps.
This guide will give you confidence in installing your own laminate flooring with ease. Take the first step and transform your space!
Materials Needed and Why
Before diving into the installation process, it's crucial to understand the materials you'll need and their purpose:
- Laminate Flooring: The main component of this project. Choose a style that fits your aesthetic and make sure to buy extra to account for mistakes and tricky cuts.
- Underlayment: Acts as a moisture barrier and provides a flat surface for the laminate. This is essential, especially over concrete floors, to prevent moisture damage.
- Quarter Round: Necessary if you're not removing baseboards, as it covers the expansion gap between the flooring and the wall.
- Transition Strips: These make a smooth transition between different flooring types or levels, preventing tripping hazards and protecting the edges of your laminate.
- Spacers: To maintain a consistent expansion gap around the room's perimeter, allowing the laminate to expand and contract naturally.
- Tape (specifically for underlayment): To seamlessly join sections of underlayment, ensuring a continuous moisture barrier.
Step by Step Instructions
Learn how to install laminate flooring with step-by-step instructions. Perfect for beginners to achieve a professional finish in any room.
Cleaning and Preparing the Floor
After removing any remaining nails or debris from the previous carpet, I made sure the concrete slab was clean and ready for underlayment. It's critical to start with a clean, flat surface to avoid any problems after your flooring is laid down.
Choosing and Installing Underlayment
Since I was working over a concrete slab, selecting the right underlayment to serve as a moisture barrier was crucial. I opted for a standard option with its own adhesive strip, which simplifies the installation process. Rolling it out and sticking the seams together ensured full coverage of the floor.
Determining the Direction of the Flooring
The direction in which you lay the flooring can significantly impact the room's overall appearance. In most cases, laying the planks parallel to the room's longest wall is visually appealing and makes the space appear larger. This was the approach I decided to take, ensuring a cohesive and spacious look.
The Installation Process
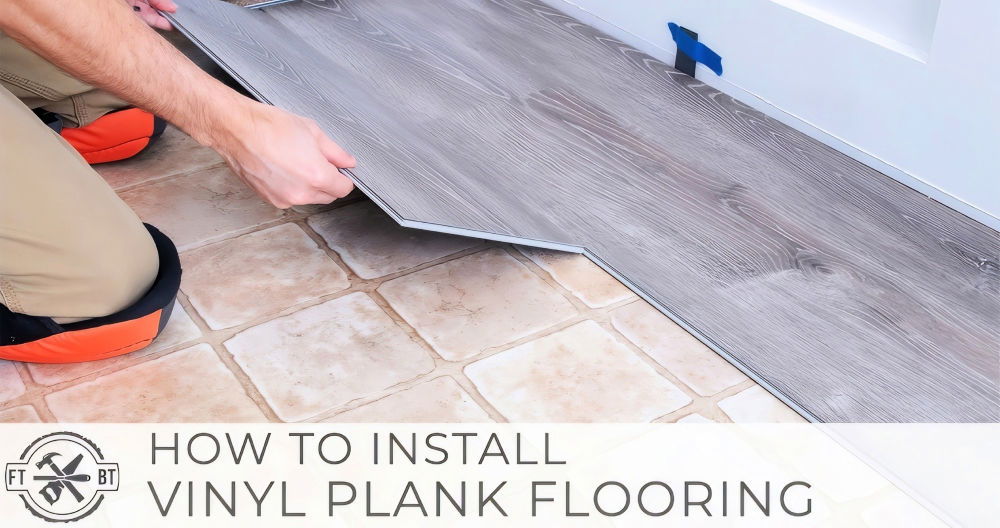
- Cutting the First Row: Remove the tongue from the first row of planks for a flush edge against the wall. It's essential to cut these pieces accurately to ensure a smooth start to your project.
- Utilizing Spacers: I placed spacers along the starting wall to keep a consistent gap for expansion. This step is vital for preventing buckling of the floor down the line.
- Laying the Planks: Starting from the longest wall, I began snapping the planks together, careful to stagger the seams for added durability and a more natural appearance.
- Cutting for Obstacles: When I reached door frames or other protrusions, I measured and cut the planks accordingly. An oscillating tool was invaluable for making precise cuts around the door frames.
- Finishing Touches: The last row may require custom cuts to fit, and a pull bar helps to snugly install these planks against the wall. It's a tool designed to facilitate the installation of the last row by pulling the planks tightly together without damaging the edges.
Adding Transition Strips
Transition strips not only protect the edges of your laminate but also provide a safe and elegant transition to adjacent floors. I installed the metal track provided with the transitions, ensuring it was firmly anchored before snapping the transition piece into place.
Installing Quarter Round
To conceal the expansion gap and give the room a finished look, I installed quarter round molding along the baseboards, mitering the corners for a clean, professional appearance. This step effectively masked any irregularities between the laminate and the wall and added a polished touch to the room.
Lessons Learned
Discover why detailed planning, high-quality materials, and patience and precision are crucial for successful projects. Ensure your success with the right approach.
Underestimating the Importance of Detailed Planning
Taking the time to thoroughly plan the layout and understand the room's dimensions can significantly streamline the installation process. Knowing where each piece will go before you start can save time and reduce waste.
The Value of High-Quality Materials
Choosing the right underlayment and laminate quality can make a significant difference in the look and longevity of your floor. Don't skimp on these materials, as they are foundational to your project's success.
The Need for Patience and Precision
Rushing the installation process can lead to mistakes and imperfections. Taking your time to measure twice and cut once, ensuring each piece fits perfectly before moving on, is crucial for a successful install.
Troubleshooting Guide for Laminate Flooring Installation
When installing laminate flooring, you might encounter a few hiccups along the way. Here's a helpful guide to troubleshoot common issues, ensuring your installation process is smooth and stress-free.
Uneven Subfloor
- Solution: Before laying your laminate, check the subfloor with a level. If it's uneven, use a self-leveling compound to make a flat surface. Allow it to dry completely before proceeding.
Gaps Between Planks
- Solution: Gaps can occur if planks are not clicked together properly. Remove the baseboard, then use a pull bar to gently tap the planks into a snug fit.
Peaking
- Solution: Peaking happens when planks push against each other, making a raised area. To fix this, remove the baseboard and trim the flooring's expansion gap to allow more room for the planks to expand.
Chipped or Damaged Planks
- Solution: If a plank gets damaged during installation, it can be replaced. Lift the damaged plank out and click a new one into place, ensuring it fits perfectly.
Laminate Not Locking
- Solution: Sometimes, the locking mechanism can be tricky. Make sure the planks are at a 45-degree angle when clicking them together and apply even pressure.
Scratches on New Flooring
- Solution: Prevent scratches by using furniture pads. If scratches occur, a repair kit can be used to fill in and color-match the scratches.
Bubbling or Lifting
- Solution: This can be due to moisture. Make sure to clean spills immediately and consider using a dehumidifier if your room has high humidity.
Patience is crucial for installing laminate flooring. Follow each step carefully and refer to the manufacturer's guidelines for specific advice.
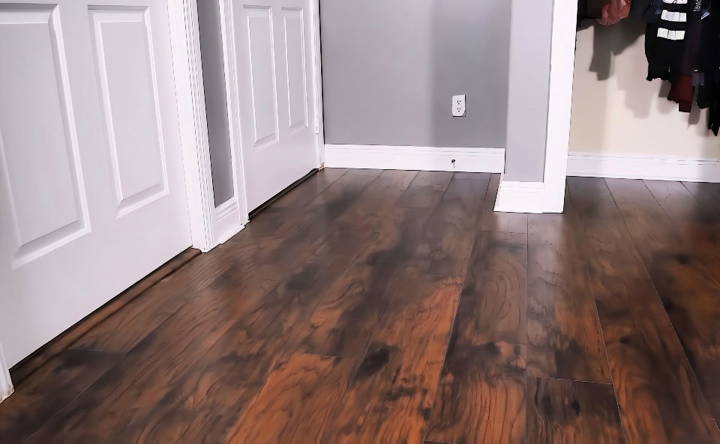
Post-Installation Care for Laminate Flooring
After successfully installing your laminate flooring, it's important to know how to maintain its beauty and longevity. Here's a straightforward guide to caring for your new floor.
Daily Maintenance
- Sweep or Vacuum: Regularly sweep or vacuum to remove dirt and grit that can scratch the surface.
- Use Soft Bristles: Always use a broom with soft bristles or a vacuum with a hard floor attachment.
Spills and Stains
- Act Quickly: Clean spills immediately to prevent moisture from seeping into the seams.
- Gentle Cleaning: Use a damp cloth and a mild cleaner specifically designed for laminate floors.
Avoiding Damage
- Furniture Pads: Place felt pads under furniture legs to avoid scratches when moving objects.
- No Steam Mops: Avoid using steam mops or wet mops, which can cause warping.
Long-Term Care
- Protect from Sunlight: Use curtains or blinds to protect the flooring from prolonged exposure to direct sunlight, which can cause fading.
- Routine Checks: Periodically check for signs of wear or damage, especially in high-traffic areas.
Repairing Minor Damages
- Scratch Kits: For minor scratches, use a laminate floor repair kit that matches your floor color.
- Plank Replacement: If a section is severely damaged, consider replacing the affected planks.
By following these simple steps, you can ensure your laminate flooring remains attractive and durable for years to come.
FAQs About How to Install Laminate Flooring
Discover answers to common questions about how to install laminate flooring. Get expert tips and step-by-step guidance in our comprehensive faqs guide.
Before you begin, ensure your subfloor is clean, level, and ready. Remove any existing flooring, and if necessary, lay a vapor barrier. Measure your room to determine how much laminate flooring you’ll need, adding 10% for waste. Let your new flooring acclimate to your home’s conditions for 24-48 hours before installation.
Start by laying the underlayment, which acts as a cushion and moisture barrier. For the first row of laminate planks, cut off the tongue side and place them with spacers along the wall. This will ensure there is room for expansion. Snap the planks together at an angle and tap them to tighten the joints.
Use a laminate floor cutter or a handsaw to cut the planks to the right size. This will help you avoid dust and noise. Remember to cut the planks to fit around doorways and other obstacles, ensuring a quarter-inch space from the wall for expansion.
After the first row, continue laying the flooring from left to right. Stagger the joints and lock the boards together until you reach the other side of the room. Use a hammer and a tapping block to secure the planks in place, and move the flooring from the opposite side of the room to add weight and prevent sliding.
Once all the planks are laid, remove the spacers and install matching thresholds, baseboards, and molding. Caulk the edges for a smooth finish. For doorways, install transition pieces using a metal track to secure them in place. Finally, caulk any gaps under the trim and touch up the paint on the baseboard and trim.
Closing Thoughts
By following this beginner's guide, you'll be able to install laminate flooring effortlessly. These tips will make your project easier. I'm sharing this to help you make a beautiful space. Get started now and enjoy the satisfaction of a job well done!


