Installing a stair railing post, or newel post, is a crucial part of making a safe and sturdy staircase. Whether you're working on a home renovation or building from scratch, following the right steps will ensure your railing not only looks great but also meets safety standards. In this article, we'll cover the detailed process of installing a stair railing post, including tools, measurements, cuts, and securing the post to the wall. Let's dive into the essential steps to install a stair railing post effectively.
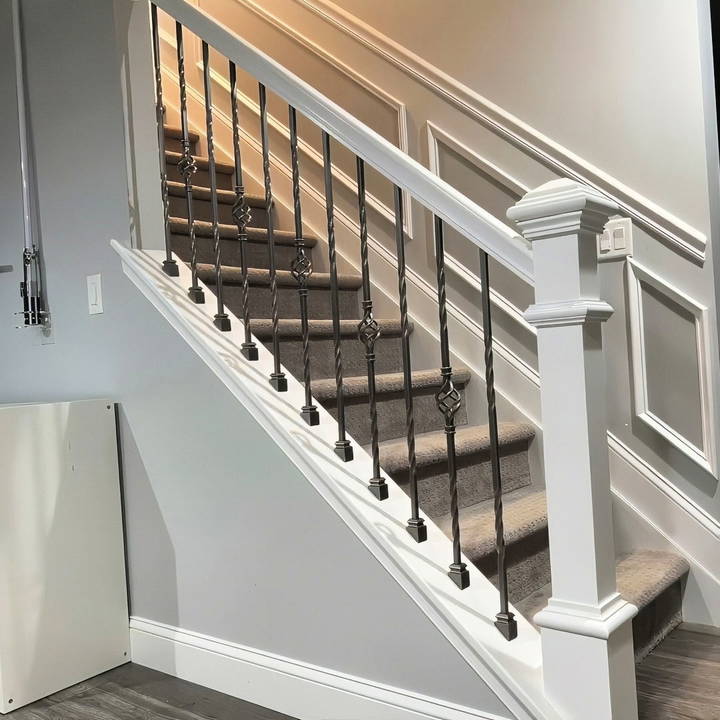
Tools and Materials You Will Need
Before beginning the installation, gather the necessary tools and materials. Here's a list of items you will need:
- Measuring tape
- Miter saw (or hand saw for smaller adjustments)
- Carpenter's square
- Pencil for marking
- Drill with various drill bits
- Screws (approximately 4-inch for securing post)
- Wood glue
- Clamps
- Hand saw or jigsaw (for finishing cuts)
- Level (preferably a short one for easy handling)
- 2x4 lumber for reinforcement (if needed for hollow posts)
- Spacers and wood shims
- Sandpaper (for smoothing cuts and adjustments)
- Caulk (optional, for painting and final finishing)
Step by Step Instructions
Learn how to install a stair railing post with step-by-step instructions. From measuring height to securing balusters, achieve a flawless finish.
Step 1: Understanding the Stair Railing Post Layout
The first step in installing your stair railing post involves determining the exact layout and dimensions. Typically, the post will sit at the bottom of the staircase and serve as the primary support for the handrail. Accurate measurement is vital to ensure the post aligns with the handrail.
Measure for Proper Height
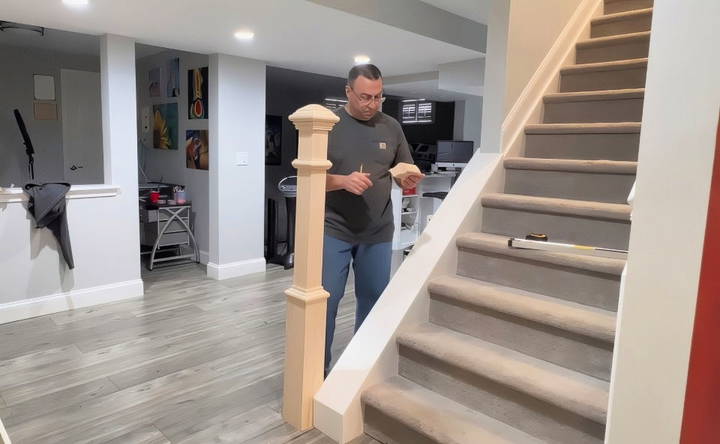
Begin by measuring the height of your newel post. Depending on the height of your staircase, your post may come in too tall. In this case, you'll need to trim it down to the correct size. Use your measuring tape to measure the distance between the bottom step (the tread) and the desired height of the top of the handrail, which is usually around 33 to 36 inches above the tread for most building codes.
Make a mark on your post where it will need to be cut. Typically, stair railing posts are about five inches wide, so find the center of the post by marking 2.5 inches from either edge. You'll then draw a line down the center of the post using a carpenter's square, as this will guide your cutting.
Step 2: Cutting the Stair Railing Post
Once you have your measurements ready, it's time to make your cuts.
Cutting the Height
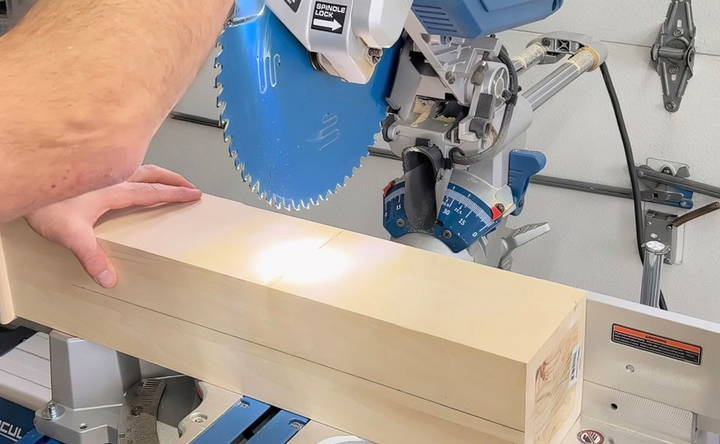
Using a miter saw, carefully cut the post to the required height. When cutting, remember to leave some extra space (about ½ inch or so) in case adjustments are needed later. It's always easier to trim more wood than to deal with a post that's cut too short.
Test-fit the post to ensure that the height is perfect. If the post is still too tall, repeat the process until you achieve the desired fit.
Cutting the Notch
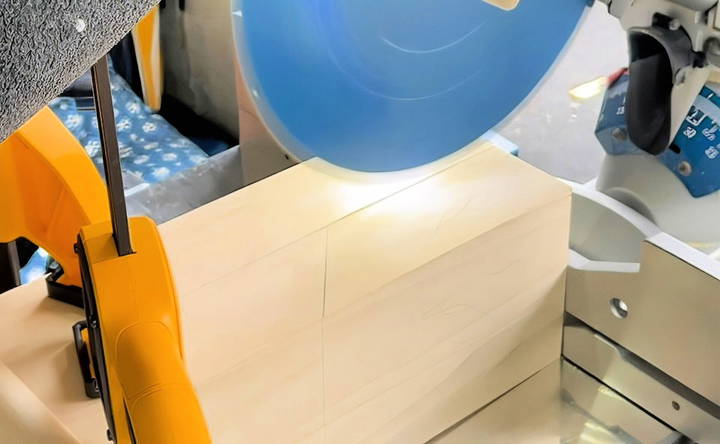
Next, you'll need to make a notch at the bottom of the post to allow it to sit flush with the floor or the wall cap at the bottom of the staircase. Measure how much of a notch is required by fitting the post against the stair's bottom step or wall.
After measuring, mark where the notch needs to be on the post. You can use a jigsaw or a miter saw for this cut, making sure to go slow to get a clean and precise cut. Once done, test-fit the post again to ensure it sits flush and makes contact with both the floor and the wall.
Step 3: Preparing the Post for Securing
Once the post is properly cut and test-fitted, it's time to get it ready for installation.
Anchoring the Post to the Wall
In most cases, the post will need to be anchored to a wall or floor for added stability. This process requires a solid anchoring point, so if the post is hollow inside (common in newel posts), you'll need to fill it with something solid, like a 2x4 or similar wood piece, to ensure it has something firm to attach to.
Measure the inside dimensions of the hollow post and cut a piece of 2x4 lumber to fit snugly inside. Apply wood glue to the piece and carefully slide it inside the post. Clamp the post down and let the glue dry for about an hour before proceeding with installation.
Drilling Pilot Holes
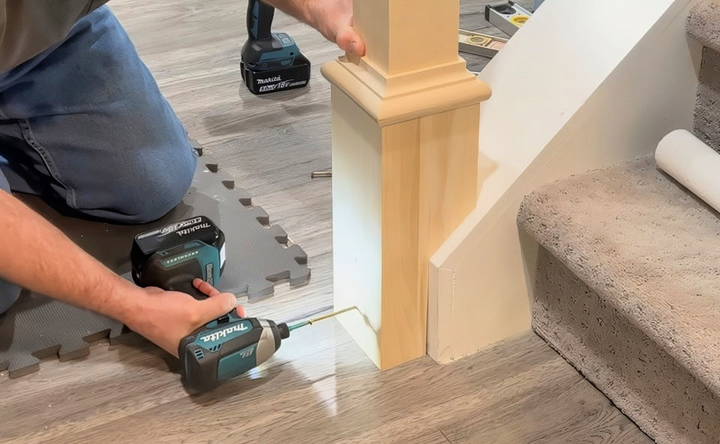
Once the post is reinforced, you'll need to drill pilot holes through both the post and the supporting wood behind it. This helps prevent the wood from splitting when you drive screws through the post into the wall. For this, use an ⅛-inch drill bit and drill two holes about 2.5 inches apart vertically on the face of the post. These holes will be used to secure the post in place.
Step 4: Securing the Stair Railing Post
Now comes the most critical part of the installation: securing the post to the wall and floor.
Driving Screws into Place
Using the pilot holes you drilled earlier, insert long screws (around 4 inches) through the post and into the supporting structure behind it. Drive the screws in slowly, ensuring they go in straight and do not push the post out of alignment. If necessary, use wood shims to keep the post aligned and plumb (straight up and down).
After driving in the first screw, check for plumb with a level. Adjust the post as needed, then drive in the second screw. Continue to check for plumb and alignment as you go. This is important because once the screws are fully in, adjusting the post will be difficult without removing them.
Step 5: Final Adjustments and Finishing
With the post secured in place, the next step is to ensure it's plumb and properly aligned with the rest of the staircase.
Shimming and Adjusting
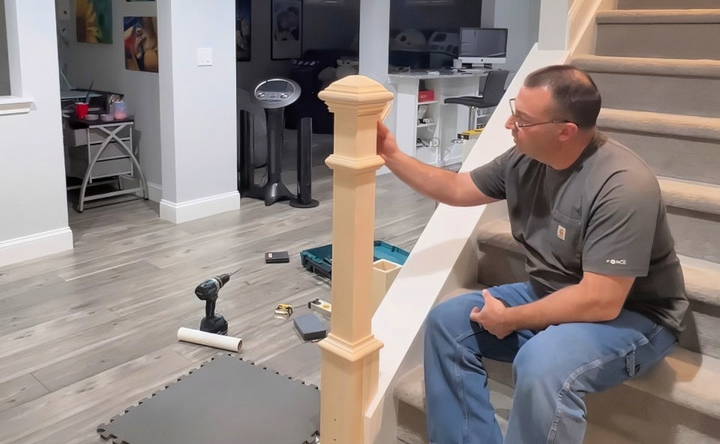
If the post is slightly out of alignment, use shims to adjust it. Slide thin wooden or plastic shims underneath or around the post to help correct any slants. Keep checking with a level to ensure the post is perfectly plumb in both directions.
Caulking for a Finished Look
If you find that there are small gaps between the post and the wall or floor, you can apply a bead of caulk to fill the gaps. This is especially useful if the post will be painted afterward, as the caulk will blend in seamlessly and give a finished look.
Step 6: Installing the Handrail
Once the post is secured and adjusted, it's time to move on to installing the handrail. This involves taking additional measurements and ensuring the handrail meets the proper height requirements and aligns with the post.
Measuring for the Handrail
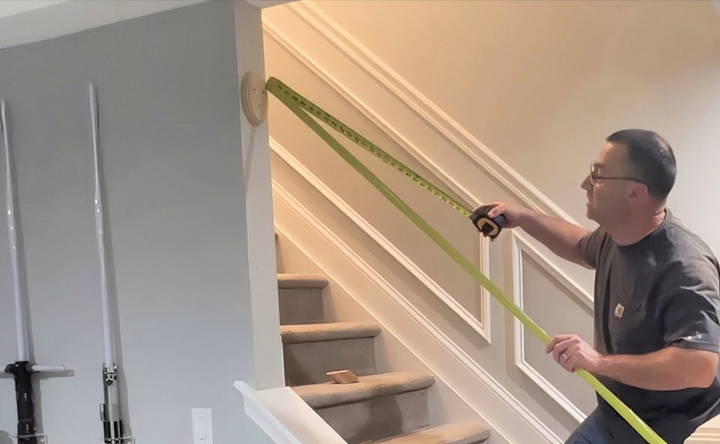
The handrail needs to be installed at the same height as the top of the post. Measure the distance from the floor to the top of the post and mark this height on the wall where the handrail will attach. Most building codes require a handrail height between 34 and 38 inches above the stair tread, so make sure your handrail meets these regulations.
Use a miter saw to cut the handrail at a 40-degree angle to match the slope of the stairs. Then, test-fit the handrail against the post to ensure it fits snugly.
Step 7: Securing the Handrail to the Post and Wall
Once your stair railing post is secured and correctly aligned, it's time to install the handrail. This section will walk you through ensuring the handrail fits perfectly between the post and the wall while maintaining the correct height.
Cutting the Handrail to the Correct Length
Start by measuring the distance between the stair railing post and the wall where the handrail will terminate. This is important because your handrail will need to fit snugly between these two points. Use a stiff tape measure for accuracy, as a sagging tape could lead to inaccurate measurements.
For the handrail:
- Measure the height from the bottom of the stairs to where the top of the rail will sit, ideally between 34 and 38 inches from the tread (this varies based on local building codes).
- Ensure that the handrail is cut at a 40-degree angle to match the slope of the stairs, just as we did for the newel post notch earlier.
It's recommended to cut the handrail slightly longer than your measurement (by about 1 inch) to allow for fine adjustments during installation. Use a miter saw to make these cuts.

Test Fitting the Handrail
After cutting the handrail to length, do a dry fit by placing it between the post and the wall. You'll want to make sure both ends of the rail sit flush with the newel post and the rosette (or handrail bracket) attached to the wall. If there are any gaps, adjust the angle or trim the length as needed.
It's crucial to ensure that the handrail is parallel to the slope of the stairs and that both ends align properly with your measurements. Mark the top and bottom edges of the rail to guide its final positioning.
Step 8: Installing the Rosettes (or Wall Brackets)
A rosette is a decorative, circular fitting that anchors the handrail to the wall. If you're not using a rosette, you might have a bracket instead, but the installation process is similar.
Securing the Rosette to the Wall
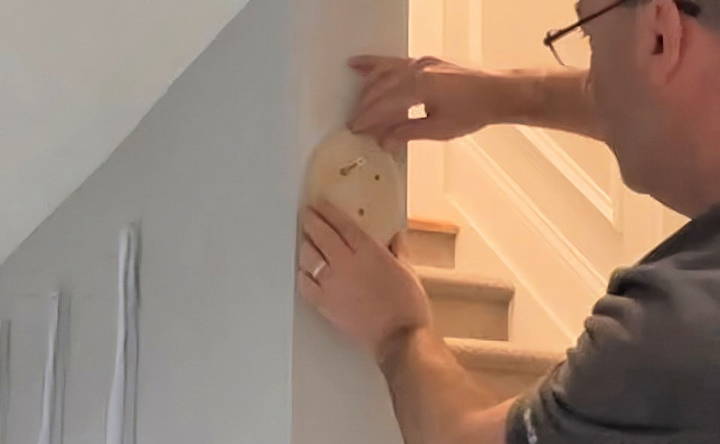
Locate where the handrail will meet the wall. Typically, you'll want the rosette centered at the same height as the top of the handrail on the post, around 34 to 38 inches from the stair tread.
- Mark the position for the rosette on the wall.
- Drill two pilot holes for the screws that will secure the rosette to the wall.
- Drive screws through the rosette into the wall studs or use wall anchors if necessary.
Once the rosette is secured to the wall, it will provide a solid attachment point for the handrail.
Step 9: Attaching the Handrail to the Post and Wall
After the rosette is installed and the handrail is cut to length, it's time to attach the handrail.
Attaching the Handrail to the Post
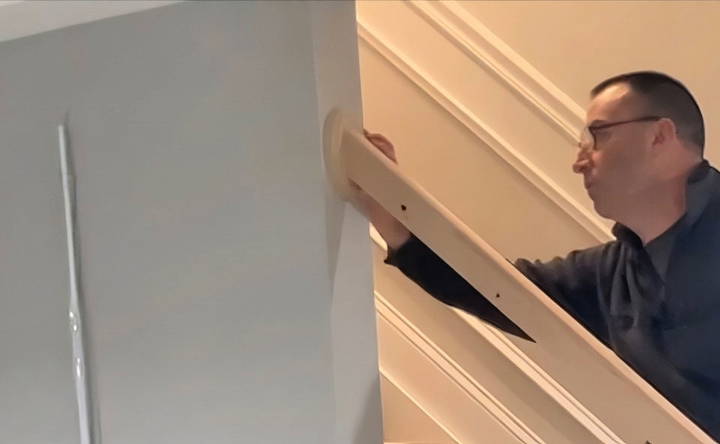
To attach the handrail to the newel post, you'll need to drill a pilot hole at an angle through the handrail and into the post. Here's how:
- Mark the Pilot Hole: With the handrail in position, mark where the screw will enter the handrail and go into the post. This should be near the top of the handrail for maximum strength.
- Drill the Pilot Hole: Using a 7/64 drill bit, drill the hole at an angle through the handrail and into the post. Take your time to ensure the drill is lined up correctly. A slight misalignment could result in a loose or crooked handrail.
- Countersink the Screw: Use a 3/8-inch spade bit to countersink the hole, so the screw head will sit flush with the surface of the handrail. This makes it easier to hide the screw with a wooden plug later.
- Drive the Screw: Use a long, strong screw (typically around 3 inches) to secure the handrail to the post. Drive it in until the screw is tight and the handrail doesn't move. Be cautious not to over-tighten, which could strip the wood or pull the screw too deep.
Attaching the Handrail to the Rosette or Wall Bracket
Now that the handrail is secured to the newel post, the next step is to attach it to the rosette or bracket on the wall.
- Mark and Drill the Pilot Hole: Line the handrail up with the rosette, making sure it's positioned correctly. Drill a pilot hole through the center of the handrail where it meets the rosette.
- Screw into the Rosette: Use a long screw (around 2 to 2.5 inches) and drive it through the handrail into the rosette. Make sure the handrail is tight against the rosette without any gaps.
At this point, your handrail should be securely fastened to both the newel post and the rosette or bracket, providing a solid, stable rail for the staircase.
Step 10: Installing the Balusters
With the handrail and newel post firmly in place, the next step is to install the balusters (the vertical posts that provide support to the handrail). Balusters are not only functional but also a decorative part of your staircase.
Measuring for Baluster Placement
First, determine how many balusters you'll need. The standard spacing between balusters is around 4 inches (check your local building codes for specific requirements).
- Measure the distance between the newel post and the top of the handrail.
- Divide this distance by the number of balusters you plan to install, ensuring you maintain even spacing and do not exceed the maximum distance required by code.
Mark where each baluster will be placed on the bottom rail (or floor) and the underside of the handrail.
Cutting the Balusters to Size
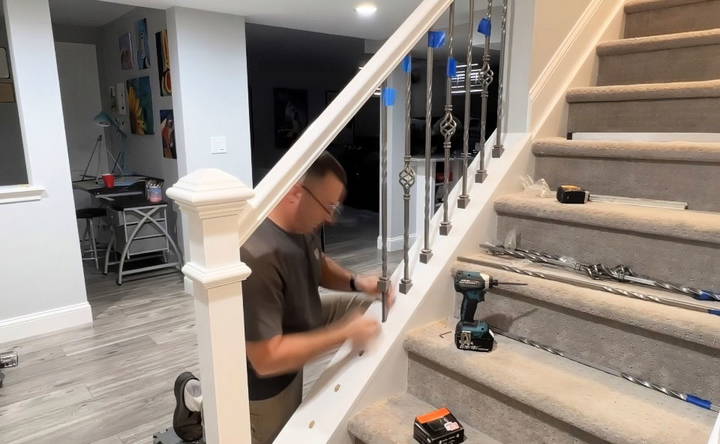
Balusters usually come in standard lengths, but they will likely need to be trimmed to fit your specific stair height. Measure the distance from the bottom rail (or step) to the underside of the handrail for each baluster and cut accordingly.
Use a miter saw to make these cuts and ensure they are straight and accurate. You want each baluster to sit flush with the underside of the handrail and the bottom rail or tread.
Securing the Balusters
To secure each baluster:
- Drill Pilot Holes: Drill small pilot holes where the baluster will be attached to both the handrail and the bottom rail or tread.
- Screw the Balusters in Place: Use finishing screws to attach the balusters to the handrail and bottom rail. Make sure the screws are tight but not so tight that they split the wood.
- Use Baluster Connectors (Optional): If your balusters come with connectors or you prefer using them, these will simplify the installation process and provide additional stability.
Step 11: Finishing Touches
Now that the newel post, handrail, and balusters are installed, it's time to add the finishing touches to your staircase project.
Plugging Screw Holes
If you countersunk any screws in the handrail or newel post, you'll want to cover these holes with wooden plugs for a clean, finished look.
- Insert the Wooden Plugs: Apply a small amount of wood glue to the inside of the screw hole and insert the plug.
- Sand and Paint: Once the glue has dried, sand the plug down until it's flush with the surface. You can then paint or stain the handrail and newel post to match the rest of the staircase.
Caulking and Painting
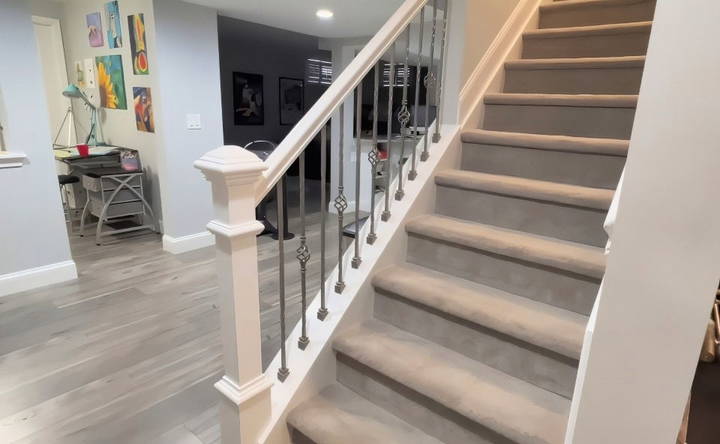
If you used caulk to fill gaps earlier, now is the time to smooth out the caulk and let it dry completely. After it's dry, paint the newel post, handrail, and balusters to give them a unified, polished appearance.
Conclusion
Installing a stair railing post and handrail may seem daunting, but by following the steps outlined in this guide, you can achieve professional results. From cutting and securing the post, fitting and fastening the handrail, to installing the balusters and adding finishing touches, each part of the process requires attention to detail and careful measurements.
The key takeaway from this guide is to take your time with each step, especially when cutting and measuring. By doing so, you'll ensure that the finished product is sturdy, safe, and aesthetically pleasing. Now that you've completed the project, your staircase is not only safer but also adds a visually striking element to your home.
FAQs About How To Install Stair Railing Post
Get answers to FAQs about how to install stair railing posts, including tools needed, a step-by-step guide, and safety tips for a secure installation.
The standard height for a stair railing post is generally between 34 and 38 inches above the stair tread, depending on local building codes. Always check your local requirements before cutting, as some states measure from the nosing, not the riser.
To measure for handrail height, start from the tread (or nosing) of the stairs and measure upward to the desired height (34 to 38 inches). Use a level to ensure accuracy, especially if your stairs are sloped.
Yes, it’s recommended to use glue in addition to screws for added stability. Many professionals suggest using subfloor adhesive for a rock-solid installation. Apply glue when attaching posts, wall caps, and balusters for extra durability.
To secure a rosette, screw it to the handrail first, then drill a ½-inch hole above the rail and attach it to the wall using another screw. Use wood glue and a plug to cover the screw hole for a clean finish.
To prevent splitting, always drill pilot holes before driving screws into wood, even if you’re using construction screws designed to minimize splitting. This is especially important with harder woods like oak.
A miter saw is essential for cutting angles on the newel post. Make sure you have a sharp blade (10 or 12 inches) and use a board or blocks to help stabilize your post for accurate cuts.
When installing the handrail, cut it slightly longer than needed, then gradually trim it down as you test the fit. Ensure the handrail is aligned parallel to the stair slope, and check for gaps before securing it.
Yes, it's a good idea to countersink screws to build a smooth surface. After driving the screws, cover the holes with wood plugs or putty, then sand them flush for a clean, professional look.


