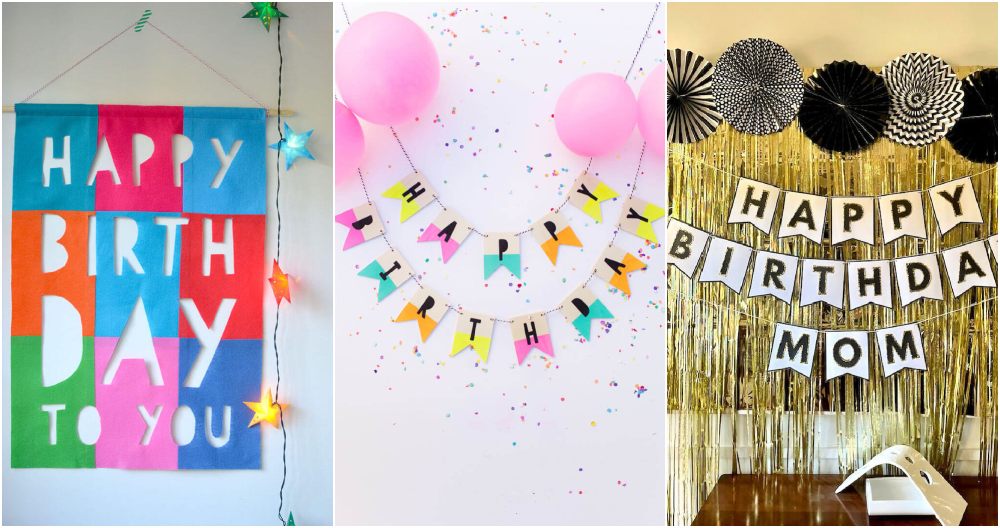
Making DIY banners that grab attention can be simple and fun. Start by choosing a clear message and bright, contrasting colors to make your text stand out. Your banner should be large enough to be seen from a distance but not cluttered with too much information. Use images or graphics that support your message, as visuals can often speak louder than words.
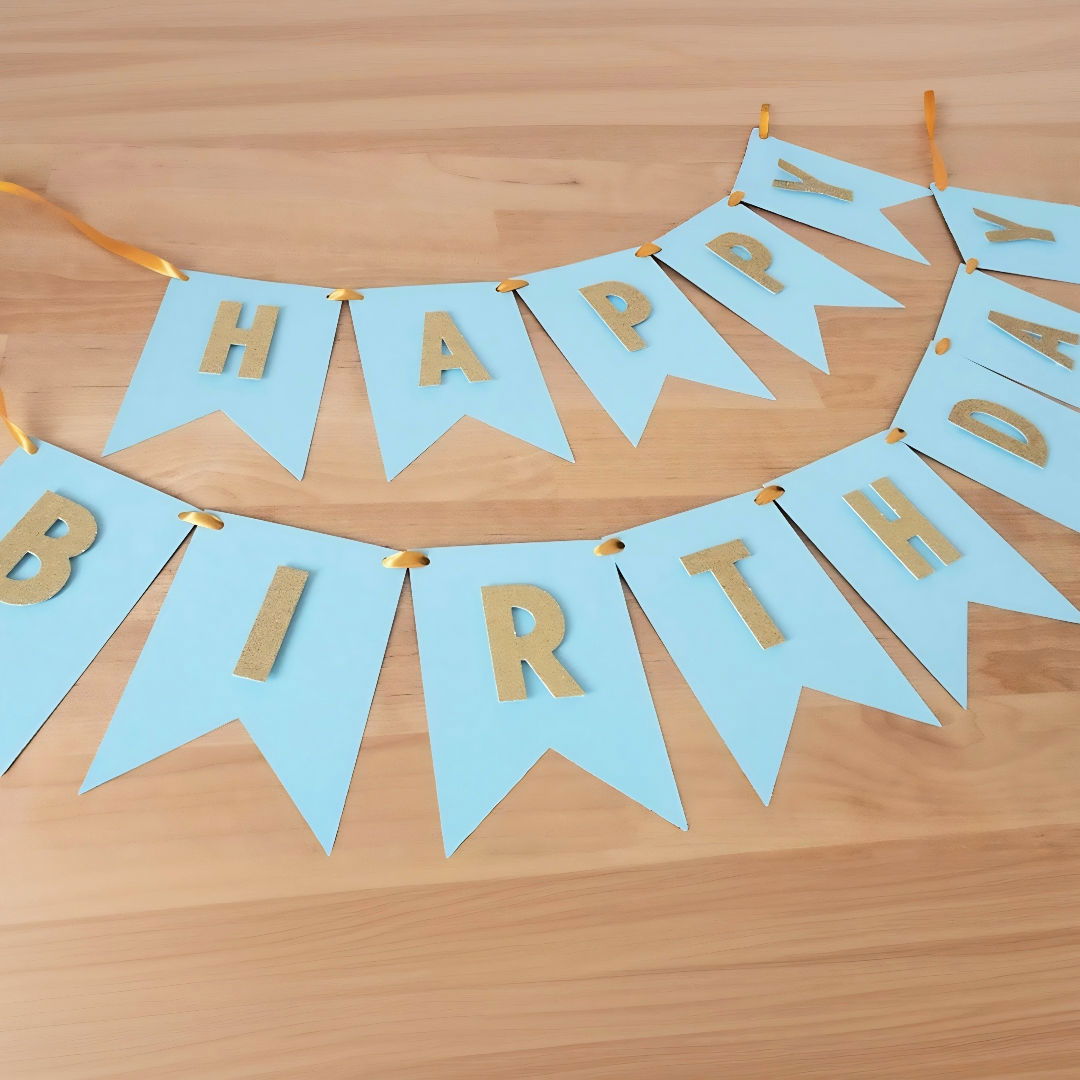
Whether you want to try a DIY banner for a special event or just to add some personal flair to your space, it's easy to customize. Select high-quality materials that will withstand outdoor conditions if necessary, and consider adding elements like balloons or lights for extra pizzazz.
Follow these simple tips, and your banner will surely attract the attention you want. Keep reading to delve deeper into the steps and tips for making the perfect banner.
Gathering Your Materials
Before jumping in, let's talk about the materials you'll need for this project. Each item plays a crucial role in ensuring your banner turns out just right.
- Cricut Machine: The star of the show, capable of precision cuts that are essential for detailed designs.
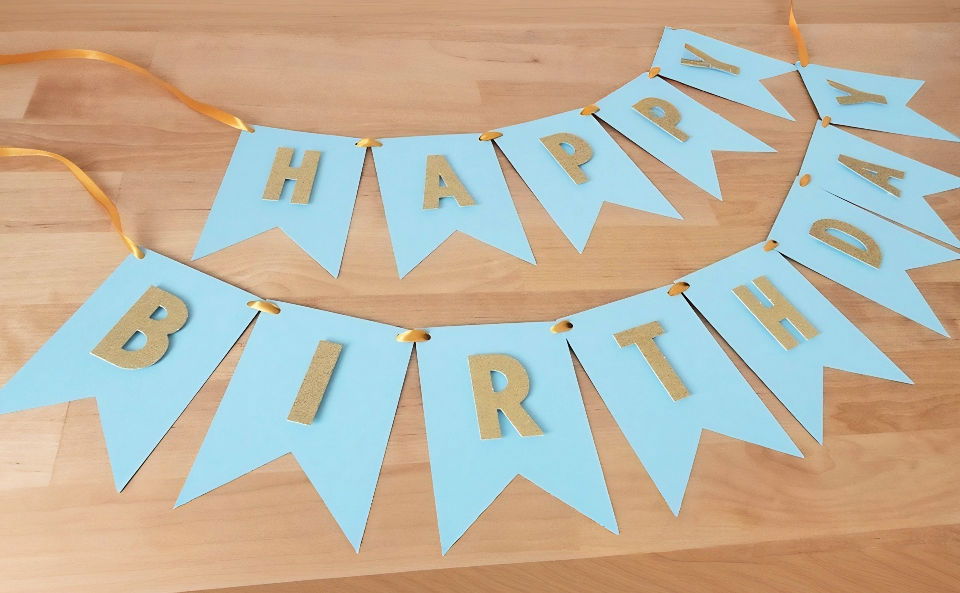
- Cardstock: I used 170 GSM for the flags and 300 GSM glitter cardstock for the letters. The heavier cardstock for the letters adds a touch of elegance and durability.
- Standard Grip Mat (or Light Grip if available): This mat holds your cardstock in place during cutting. If your mat isn't very sticky, a Light Grip mat is preferable, but the Standard works fine with a less sticky surface.
- Masking Tape: This helps secure the cardstock to the mat, preventing any sliding during the cutting process.
- Gold Ribbon: For threading through the banner pieces, adding a luxurious finish.
- Design Software: The Cricut Design Space software is where you'll design your flags and letters before cutting.
Understanding why each material is chosen sets the stage for a smoother crafting experience. Now, let's dive into the crafting process!
Step by Step Instructions
Make a personalized DIY banner with our easy step-by-step instructions. Perfect for any occasion. Learn precision cutting and stylish design tips.
Designing the Flags
- Start with a Template: Whether you find a flag template online or make one from scratch, this is your first step. To custom-make a flag, insert a rectangle shape in Cricut Design Space, adjusting the size to 5 inches in width and 3.5 inches in height.
- Add a Triangle: Place a triangle at the base of your rectangle and adjust until it resembles the traditional flag shape.
- Make Holes for the Ribbon: I used a 0.2-inch circle for the holes on each top corner of the flag. This is critical for threading the ribbon through later.
Why This Process?
Crafting your flags allows for personalized touches, ensuring your banner fits the theme and space perfectly. The size adjustments ensure that the flag is visible and proportionate when hung.
Preparing for Cutting
- Secure the Cardstock: I placed four flag designs on my cutting mat in the software to maximize space. Using masking tape to secure the cardstock to the mat prevents any movement, ensuring precise cuts.
- Cutting Process: I chose the 'Bonded Fabric' setting due to my mat's condition, but 'Cardstock' is ideal if your mat is in better shape.
The Importance of Precision
Securing your cardstock and choosing the right cut setting are vital steps. They prevent wasting materials and ensure each cut is clean, making the assembly much smoother.
Crafting the Letters
- Designing in Cricut Design Space: I adjusted the height of my text to 2 inches to ensure visibility and proportionality with the flags. Attaching the letters before cutting keeps them organized.
- Selecting Material Settings: For the glitter cardstock, I used the 'Poster Board' setting to account for its thickness.
Choosing Your Style
The thickness of the letters adds a luxurious feel, while the glitter provides a festive touch. Adjusting the size ensures they will be readable and fit well on your flags.
Assembling the Banner
- Threading the Flags: Measure and cut your gold ribbon, making sure you have extra length for hanging. A lighter can be used to seal the ends of the ribbon to prevent fraying.
- Adding Letters: Using double-sided tape gives the letters a 3D effect, enhancing the banner's visual appeal.
Why This Method Works
This step-by-step approach ensures that each part of the project is handled with care, resulting in a professional-looking banner. The use of a Cricut machine allows for precision in design and cutting, making personalized decorations accessible to everyone.
Design Tips for Attractive Banners
Making an attractive banner is all about capturing attention while conveying your message clearly and effectively. Here are some design tips to help you make banners that stand out:
- Understand Your Audience: Before you start designing, think about who will be viewing the banner. What are their interests? What will catch their eye? Tailoring your design to your audience can make your banner more effective.
- Keep It Simple: A cluttered banner can be overwhelming and hard to read. Use a simple layout with plenty of space around your text and images. This makes your banner look cleaner and your message clearer.
- Choose Colors Wisely: Colors can influence how people feel about your banner. Use colors that reflect the mood of your event or message. For example, bright colors can be great for a celebration, while cooler tones might be better for a professional conference.
- Readable Fonts: Select fonts that are easy to read from a distance. Bold, sans-serif fonts are often the best choice for banners. Avoid using too many different fonts, as this can make your design look disorganized.
- High-Quality Images: If you're using images, make sure they are high resolution so they don't appear pixelated when printed. Images should be relevant to your message and add to the design, not distract from it.
- Contrast for Legibility: Use contrasting colors for your background and text to ensure that your message is legible. Dark text on a light background or vice versa can be read easily.
- Call to Action: If you want people to do something after seeing your banner, like visit a website or join a club, make sure your call to action is prominent and compelling.
- Test Your Design: Before finalizing your banner, test it out. Look at it from a distance and see if the main message is clear. Ask others for feedback to see if your banner is effective.
Follow these tips to make a visually appealing, effective banner that communicates your message to your audience.
Innovative Decoration Techniques
When it comes to decorating banners, innovation can set your creation apart. Here are some techniques that blend creativity with simplicity, ensuring your banner makes a memorable impact:
- Layering for Depth: Make a sense of depth by layering materials. Use lighter materials like tissue paper or fabric on top of a sturdier base. This adds dimension and interest to your banner.
- Stencil Art: Stencils are a great way to achieve clean and consistent designs. You can make your own stencils with cardboard or buy them from craft stores. Use paint or markers to fill in the designs for a professional look.
- Digital Design Integration: If you're tech-savvy, design elements of your banner on a computer or tablet. Print your designs onto transfer paper and iron them onto your banner for a polished, modern touch.
- Handmade Touches: Incorporate handmade elements such as crochet, knitting, or embroidery. These textures add a personal and cozy feel to your banner, making it stand out.
- Upcycling with Style: Use materials you already have, like old clothes or magazines, to make something new. Cut out patterns or interesting text to add a unique and eco-friendly element to your banner.
- Light It Up: Add small LED lights or glow-in-the-dark paint to make your banner pop, especially in low-light settings. This can be particularly effective for evening events.
- Interactive Elements: Make your banner interactive by adding elements that move or change. Velcro pieces that can be rearranged or flaps that reveal hidden messages can engage your audience.
- Seasonal Flair: Reflect the current season in your banner's design. Use leaves and warm colors for autumn, flowers for spring, or snowflakes and cool colors for winter.
Think outside the box for innovative decoration, but keep the design relatable. Enhance your message without overshadowing it.
Troubleshooting Common Issues
When crafting a DIY banner, you might encounter a few hiccups along the way. Here's a helpful guide to troubleshooting common issues, ensuring your banner-making process is as smooth as possible:
Wrinkles or Creases in Paper or Fabric
- Solution: Use a low-heat iron for fabric or a hairdryer for paper to gently smooth out any wrinkles. Always test a small area first to avoid damage.
Paint Bleeding on Material
- Solution: Prevent paint from bleeding by using painter's tape to secure the edges of your design. For fabric banners, a fabric medium mixed with the paint can reduce bleeding.
Banner Not Hanging Straight
- Solution: Ensure that the top of the banner is reinforced. You can sew a rod pocket or attach a dowel to the back to keep it straight. Weights on the bottom corners can also help.
Faded Colors on Outdoor Banners
- Solution: If your banner will be displayed outdoors, use UV-resistant materials or apply a UV-resistant spray to protect the colors from fading in the sunlight.
Difficulty in Lettering
- Solution: For neat and uniform lettering, use stencils or print out letters to trace. You can also make a lettering guide with a ruler and pencil to ensure alignment.
Decorations Falling Off
- Solution: Use the appropriate adhesive for your materials. Fabric glue for fabrics, hot glue for heavier items, and double-sided tape for lighter decorations can make a difference.
Banner Looks Too Plain
- Solution: Add visual interest with borders, ribbons, or cut-out shapes. Use contrasting colors or patterns to make elements pop.
Text Not Visible from a Distance
- Solution: Increase the size of your text and choose bold, contrasting colors. Keep your message concise so it can be read quickly and easily from afar.
Anticipating these issues and knowing fixes will help you make a durable banner. Patience and creativity are key to solving any problems.
FAQs About DIY Banner
Discover essential faqs about DIY banner creation. Learn tips, materials, and techniques to craft stunning banners effortlessly.
Yes, there are many simple techniques for making banners. One of the easiest involves using pre-cut letters and stringing them together. Another beginner-friendly method is to cut triangles from paper and attach them to a string. You can also use sticker dots and baker’s twine for a quick and charming look.
Absolutely! Many DIY banners can be made without any sewing. You can use glue or double-sided tape to secure your materials. If you’re using fabric, iron-on hemming tape is a great no-sew option to create clean edges.
To hang your banner, first decide on the location. Use removable hooks or tape for walls and ceilings. If you’re hanging it outdoors, twine and clothespins can be useful for attaching it to fences or between trees. Make sure to space out your letters or shapes evenly and secure them well to prevent flipping or tangling.
The size of your banner will depend on the space where you plan to display it. For indoor events, a standard size is about 5 to 8 feet long. If you’re placing it on a wall, measure the area first to ensure the banner will fit. For outdoor events, consider larger sizes for visibility. Remember, each letter or shape should be visible from a distance, so adjust the size of your elements accordingly.
Get creative with your display! Hang your banner across a fireplace mantel for a cozy touch, or drape it over a dessert table for a festive look. You can also attach it to balloons to float above a party area. For outdoor events, string it between trees or across a patio. If you're feeling crafty, make a stand-alone banner with dowels and a base to place anywhere.
Final Thoughts
Wrapping up, learning how to make a banner that captures attention can be both fun and rewarding. By using simple materials and your creativity, you can design banners that stand out. Remember to choose vibrant colors and clear, bold text to make an impact. DIY banners not only save money but also add a personal touch. Enjoy the process, and watch as your banners catch everyone's eye!


