Making your own bean bag chair is a fun and rewarding project. Start by choosing your fabric – opt for something durable like canvas or denim. Once you have your fabric, cut two large circles for the top and bottom and a long strip for the sides. Sew the pieces together, leaving a small gap for filling. The next step involves turning the fabric right side out and preparing it for the filling.
Next, you'll need to choose the right filling for your DIY bean bag chair. Beans, beads, or shredded foam are popular choices. Carefully fill the chair through the gap you left earlier, adding more filling until it's plump and comfortable. Finish by sewing up the gap securely.
Now you have a cozy DIY bean bag ready for relaxation. Ready to dive into the detailed steps and tips? Let's move to the next section!
Step by Step Instructions
Learn how to make a bean bag chair with our step-by-step guide. From materials to final touches, make a cozy seat with ease!
Choosing the Right Materials
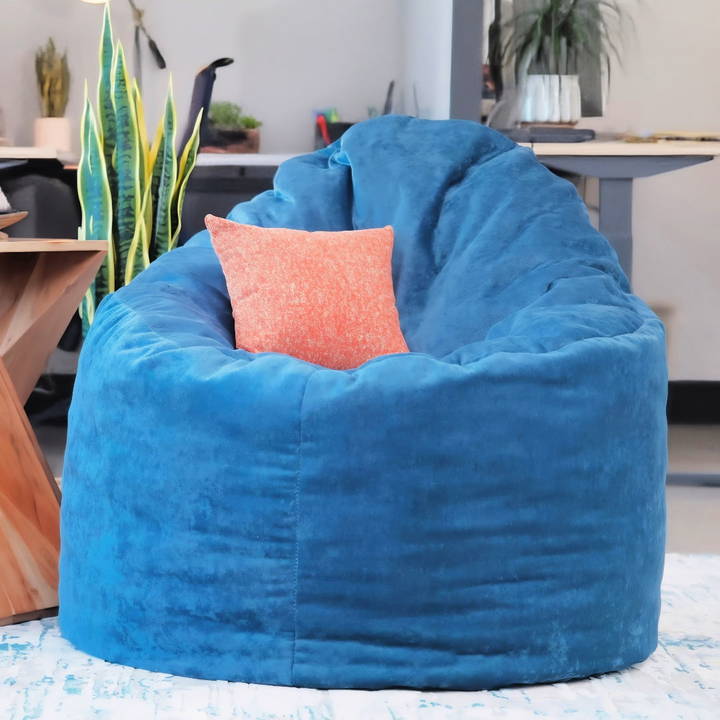
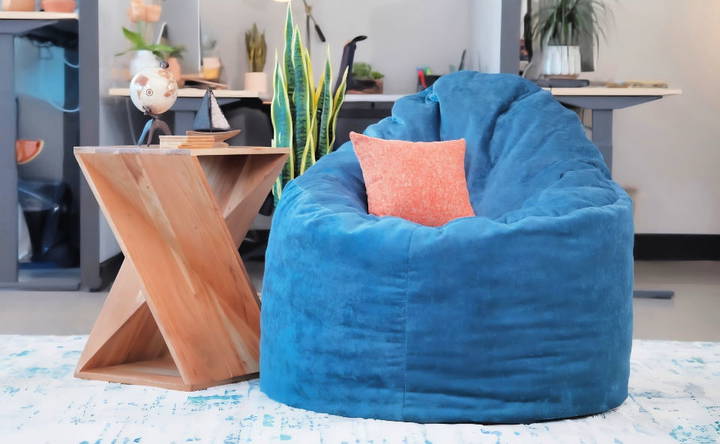
The heart of any DIY project lies in selecting the right materials. For my beanbag, I went for Crypton home fabric, specifically in the color Sapphire. Why Crypton? Its durability, softness, and stain-resistant technology made it an unbeatable choice, especially considering my two hyperactive cats and a penchant for hosting wine nights. Along with the fabric, other materials like firm cushion foam, spray adhesive, and batting were gathered. The foam was chosen over traditional beans or pellets for its comfort and longevity—no one wants a saggy beanbag after a few months of lounging.
Preparation and Cutting
Equipped with a cordless rotary cutter, Sailrite blade foam saw, an acrylic ruler among other tools, I embarked on the task. The first step involved patterning and cutting out the fabric on my living room floor, transforming it into a makeshift workshop. I carefully followed the provided measurements, paying extra attention to the circles that would form the top and bottom of my beanbag. The rectangular piece that would become the beanbag's body was next, and I must admit, cutting a perfect curve required patience and a few attempts to get just right.
Adding Batting for That Plush Feel
Before assembling the pieces, each fabric section was laid out and attached to quarter-inch batting with spray adhesive. This step wasn't originally in my plan, but a spur-of-the-moment decision aimed at adding extra plushness and warmth to the beanbag. Cutting the batting to align with the fabric shapes using the cordless rotary cutter turned out to be strangely therapeutic.
Sewing It All Together
With my trusty Ultrafeed LS sewing machine armed and ready, I began joining the pieces together. The dense fabric and batting needed a machine that could handle the task with ease, and the Ultrafeed LS didn't disappoint. Sewing the circular top and bottom to the body with a half-inch seam allowance, I left an opening on the bottom to add the foam filling later. This step required concentration, a steady hand, and the soothing hum of the sewing machine filling the room.
The Foam Filling Adventure
Cutting the foam into one-inch squares was, by far, the most time-consuming part. Armed with the Sailrite blade foam saw, I embarked on what felt like an endless cutting spree. It was worth it, though. Filling the beanbag with these foam squares instead of traditional beans was a game-changer in comfort and durability.
The Final Touch
With the beanbag filled to the brim and offering an inviting plumpness, the only thing left was to sew the opening shut. Opting for hand sewing, I meticulously closed the gap, making sure the stitch was strong yet invisible. The moment of flipping the beanbag right side out and seeing it in all its glory was nothing short of magical.
Customization Ideas for Your Bean Bag Chair
Making a bean bag chair that reflects your personal style and meets your comfort needs can be a rewarding DIY project. Here are some customization ideas to help you make a bean bag chair that's uniquely yours:
- Choose Your Fabric Wisely: Select a fabric that not only matches your decor but is also durable and easy to clean. Consider materials like cotton, microsuede, or outdoor fabric for different textures and resilience.
- Color and Patterns: Go bold with vibrant colors, or choose calming neutrals. Patterns can add a fun twist—think stripes, polka dots, or even themed prints that showcase your interests.
- Size and Shape: Tailor the size of your bean bag to fit the intended space. Want something more structured? Try making a teardrop shape or a high-back chair for added support.
- Add Pockets: Sew on side pockets to hold remotes, books, or your phone. It's a practical addition that increases the functionality of your bean bag chair.
- Incorporate Handles: For easy movement, attach handles on the top or sides. Use strong materials like nylon straps for durability.
- Make a Removable Cover: Make cleaning a breeze with a removable cover. This also allows you to change the design whenever you wish without making a new bean bag.
- Experiment with Fillers: Traditional beans are not your only option. Consider memory foam for a softer feel or recycled polystyrene beads for an eco-friendly choice.
- Personal Touches: Embroider your initials, add decorative trims, or use fabric paint to draw your own designs. These personal touches make your bean bag chair one-of-a-kind.
- Mix and Match: Don't be afraid to mix fabrics and textures. A leather bottom can add sophistication, while a fluffy top brings coziness.
- Safety First: Ensure all seams are double-stitched to prevent any spillage of the filler, and use child-proof zippers if kids will use the chair.
By incorporating these ideas, you'll make a bean bag chair that's not just a seat but a reflection of your personality and creativity.
Troubleshooting Common Issues with Bean Bag Chairs
When crafting your bean bag chair, you might encounter a few hiccups along the way. Here's a guide to solving some common issues, ensuring your DIY project turns out just right.
Fabric Tears or Rips
- Solution: Use a patch kit designed for the fabric type or sew a patch over the tear. For future projects, choose a more durable fabric like denim or canvas.
Filler Leakage
- Solution: Double-stitch the seams and use a liner inside the bean bag cover. If beads escape, check for small holes and patch them up promptly.
Uneven Shape
- Solution: Distribute the filler evenly by shaking the bean bag chair. If it still looks lopsided, open it up and adjust the filler manually.
Bean Bag is Too Firm or Too Soft
- Solution: If it's too firm, remove some filler. If it's too soft, add more filler. Aim for a balance that supports your body comfortably.
Zipper Gets Stuck
- Solution: Apply a lubricant like soap or wax to the zipper. If it's broken, replace the zipper with a heavy-duty one designed for upholstery.
Fabric Fades or Stains
- Solution: For fading, use a fabric protector spray to prevent sun damage. For stains, spot clean with a mixture of mild detergent and water.
Bean Bag Doesn't Sit Right
- Solution: It might be due to uneven floor surfaces. Try placing it on a different spot or add a base to stabilize the bean bag.
Sewing Issues
- Solution: If you're new to sewing, practice with scrap fabric first. Use a sewing machine for stronger seams and follow a pattern for guidance.
Choosing the Wrong Filler
- Solution: Research fillers before starting. Polystyrene beads are common, but consider alternatives like shredded foam for a different feel.
Difficulty in Handling the Size
- Solution: If the bean bag is too large to manage, consider making a smaller one or a modular design that can be assembled in parts.
Tackling these issues will make your bean bag chair comfy, stylish, durable, and functional. Patience and careful work can resolve most DIY problems.
Safety Tips for Making a Bean Bag Chair
When making a bean bag chair, safety is paramount. Here are some tips to ensure your DIY project is not only successful but also safe:
- Choose the Right Fabric: Opt for sturdy fabrics that are less likely to tear and spill the filler. Fabrics like corduroy, denim, or canvas are great choices.
- Secure Seams: Double-stitch your seams to prevent any accidental spillage of the bean bag filling. This is especially important if you have children or pets at home.
- Childproof Zippers: If your bean bag will be used by children, install a childproof zipper or a zipper with a safety latch to keep the filling securely inside.
- Non-toxic Fillers: Use fillers that are non-toxic and pose no choking hazard. Polystyrene beads are commonly used, but ensure they are ‘virgin' beads, which are less likely to contain contaminants.
- Ventilation: While filling your bean bag, work in a well-ventilated area to avoid inhaling any dust from the filler.
- Avoid Sharp Objects: Keep scissors, needles, and other sharp tools away from children and store them safely after use.
- Fire Safety: Keep the bean bag away from open flames or heat sources, as the filler material can be flammable.
- Regular Checks: Periodically check the bean bag for any signs of wear and tear, and repair any damages immediately to maintain safety.
- Proper Filling: Do not overfill your bean bag chair, as this can cause the seams to burst under pressure. Fill it to a comfortable level that allows the bean bag to mold to your shape.
- Wash Hands After Handling Filler: Always wash your hands thoroughly after handling the bean bag filler, especially before eating or touching your face.
By following these safety tips, you can enjoy your homemade bean bag chair with peace of mind, knowing that you've taken the necessary precautions to make a safe and comfortable product.
FAQs About How to Make a Bean Bag Chair
Discover answers to frequently asked questions about making a bean bag chair, including materials, steps, and tips for a perfect DIY seating solution.
You’ll need to cut two large pieces of fabric:
Inner bag: Cut two rectangles from the inner fabric. The size will depend on your desired bean bag size.
Outer cover: Cut two identical pieces from the outer fabric, adding a few inches for seam allowance. For a circular bean bag, you may need to cut two circles with a diameter that matches your design.
Yes, you can wash the outer cover of your bean bag chair if it’s made with washable fabric. Remove the inner bag with the filler before washing the cover. Follow the care instructions for your specific fabric to avoid damage.
To ensure comfort, consider the following:
Choose the right filler: The type of filler impacts the comfort level. Foam provides a softer, more adaptable seating experience, while beads offer firmer support.
Get the right size: Make sure the dimensions of your bean bag chair fit your space and body size for maximum comfort.
Test and adjust: After filling your bean bag, test it out and add or remove filler as needed to achieve your desired firmness.
The size of your bean bag chair should be based on the available space in your room and who will be using it. For children, a smaller size might be sufficient, while adults may prefer a larger chair for extra comfort. A standard adult bean bag chair is typically around 70 to 90 inches in circumference. Measure your space and consider the user's comfort before deciding on the size.
Apart from traditional polystyrene beads or foam, you can use a variety of materials to fill your bean bag chair. Some creative and eco-friendly options include:
Recycled textiles: Old clothes, towels, or bedding cut into small pieces can make a soft and sustainable filler.
Natural fibers: Buckwheat hulls or natural latex pieces offer a firmer feel and are biodegradable.
Packing peanuts: If you opt for packing peanuts, ensure they are the non-dissolving type to prevent them from shrinking if the chair gets wet.
The Verdict
Wrapping up, learning how to make a bean bag chair: from fabric to filling can be a fun and rewarding project. By following these steps, you'll make a custom-made piece that's perfect for relaxation. Remember, DIY bean bag chairs are not only stylish but also a cost-effective solution for comfortable seating. Enjoy your new creation!


