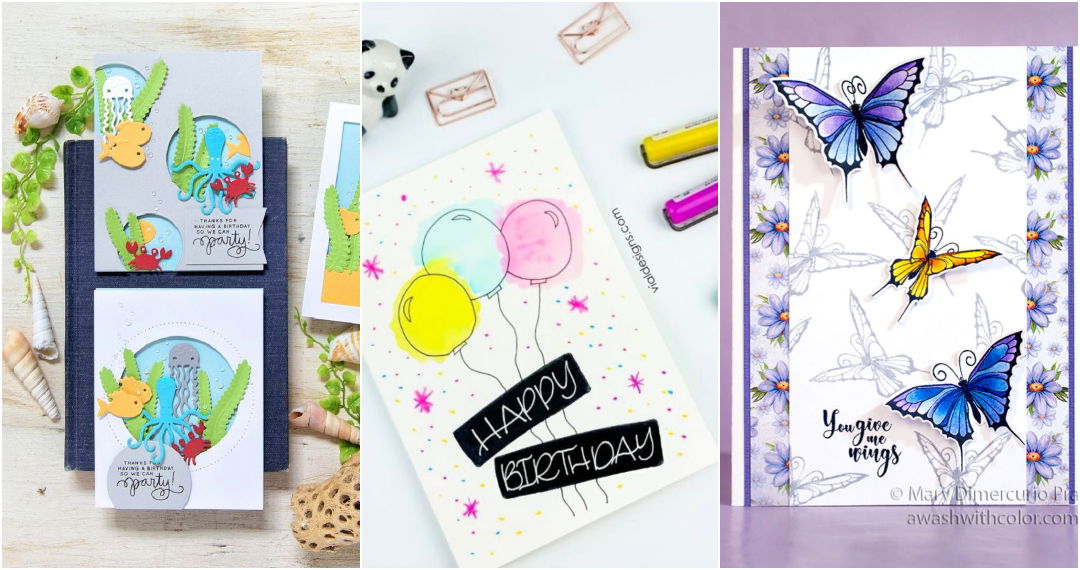
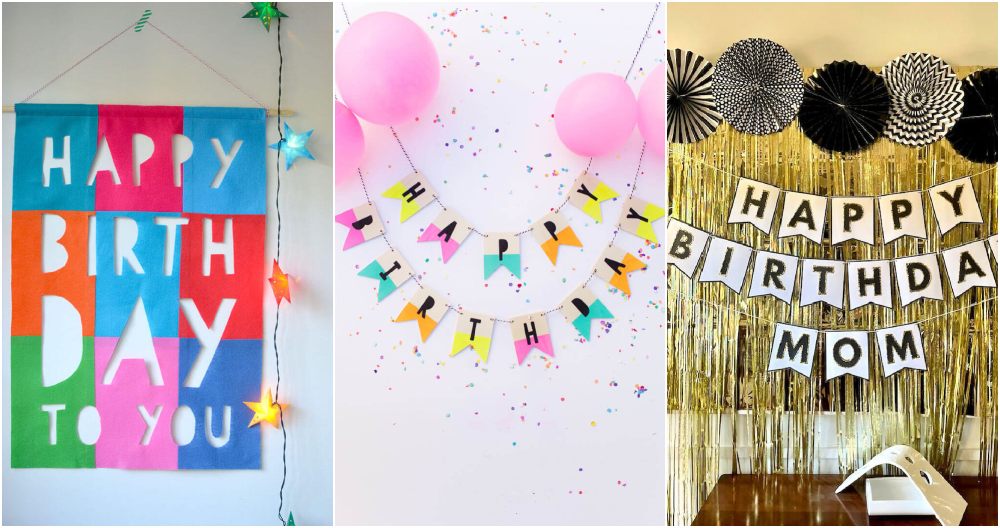
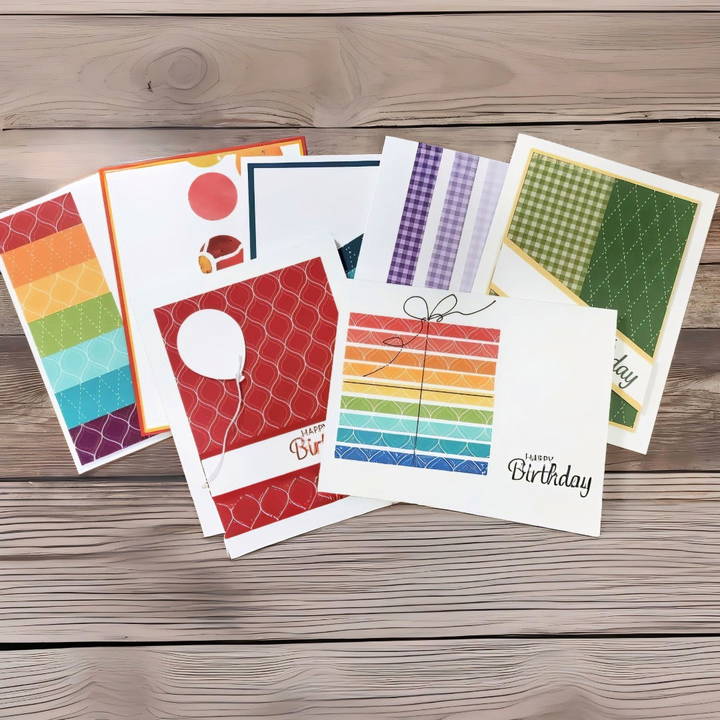
Making a birthday card by hand is not just a fun and creative way to express your love and appreciation, but it also adds a personal touch that store-bought cards often lack. Whether you are an experienced crafter or just starting out, making a handmade birthday card is a wonderful way to showcase your creativity. In this guide, we will walk through various techniques and materials you can use to make a birthday card that is simple, elegant, and sure to impress.
Materials Needed for Handmade Birthday Cards
Before diving into the card-making process, it's important to gather all the necessary materials. While there is flexibility in what you can use, here's a list of essential items that can make the process smoother and easier:
- Cardstock: This will be the base of your card. You can choose from different colors and thicknesses. White or neutral shades are versatile options.
- Designer Series Paper: These are patterned papers that can be used to decorate the card. They add a pop of color and visual interest.
- Ink Pads: These are essential for stamping greetings or designs on your card. Popular colors include black, red, and other vibrant shades.
- Stamps: Stamps can be used to imprint the main message or decoration onto the card. A simple "Happy Birthday" stamp is a must-have.
- Adhesive: You will need glue, tape, or other forms of adhesive to attach layers of paper and embellishments.
- Scissors and Paper Trimmers: These tools are used for cutting cardstock and designer paper into precise sizes and shapes.
- Bone Folder: This tool helps to make sharp creases in the cardstock, ensuring your card folds neatly.
- Punches: Punches, such as balloon or circle punches, can be used to make fun shapes that add an extra dimension to the card.
- Baker's Twine: A lightweight string used for tying elements together or adding texture to the design.
- Dimensionals: Foam adhesive pieces that give your card elements a 3D effect, adding depth to the design.
- Markers or Pens: These are useful for adding hand-drawn elements, such as bows or borders.
Step by Step Instructions
Learn how to make a birthday card with step-by-step instructions. From choosing a card base to adding layers and embellishments, make the perfect card!
1. Choosing the Card Base
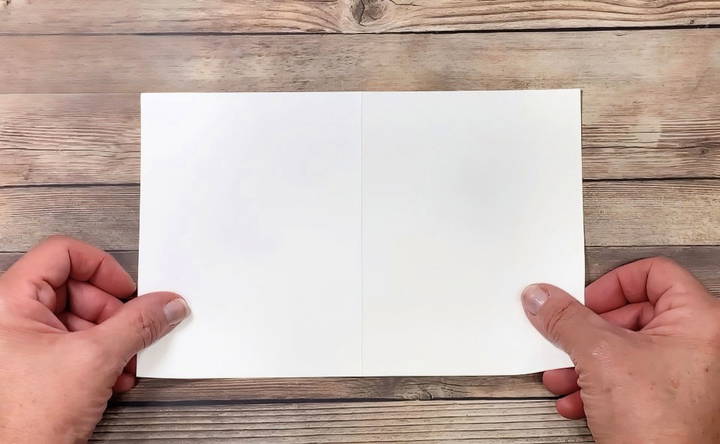
The first step in making a handmade birthday card is selecting your card base. The standard size for a card base is typically 5.5 inches by 8.5 inches, folded in half to make a 4.25 by 5.5-inch card. You can choose from a variety of cardstock colors, but a classic choice is whisper-white cardstock, which provides a clean, neutral background for your decorations.
Using a bone folder, carefully fold the cardstock in half. This ensures that your card has a crisp, professional look.
2. Adding Designer Series Paper
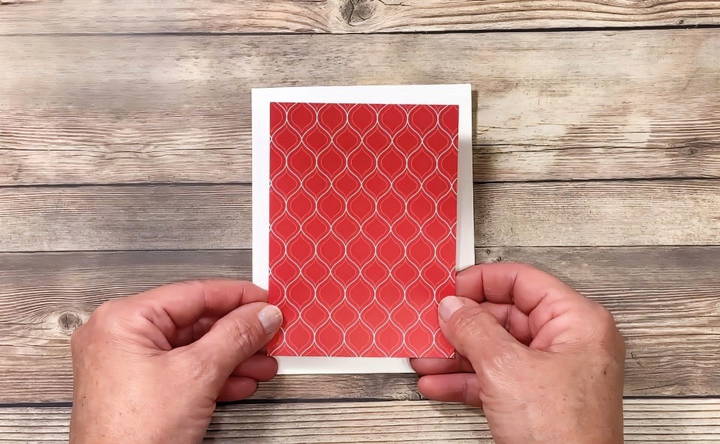
Once the card base is ready, the next step is to add some color and pattern with designer series paper. Designer paper is perfect for adding a pop of color without overwhelming the card. You can cut the paper to different sizes to make layers or borders around the greeting.
For a simple and effective design, cut a piece of designer series paper to measure around 3.5 inches by 4.75 inches. This will allow the patterned paper to sit neatly in the center of the card, leaving a border of cardstock visible around the edges.
Once you have your designer paper cut to the right size, adhere it to the center of the card base using a strong adhesive.
3. Stamping the Greeting
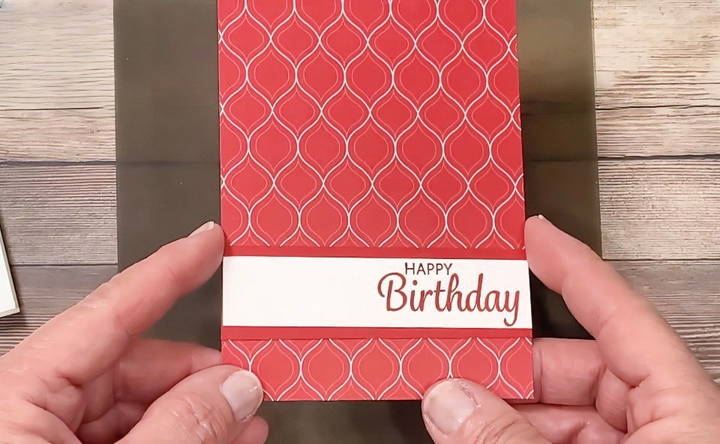
A key component of any birthday card is the greeting. Using a stamp that says “Happy Birthday” keeps things simple yet elegant. For this step, choose an ink pad color that complements the designer paper.
For example, if your designer paper has red accents, you might want to use a real red ink pad. Stamp your greeting onto a piece of white cardstock that you can layer onto the card. Be sure to stamp the greeting near the right or left side, so there is room to add additional embellishments.
Once the greeting is stamped, layer it onto a piece of colored cardstock that coordinates with the designer's paper. This helps the greeting stand out and gives the card a polished look. You can then adhere this to the card.
4. Using Punches for Fun Shapes
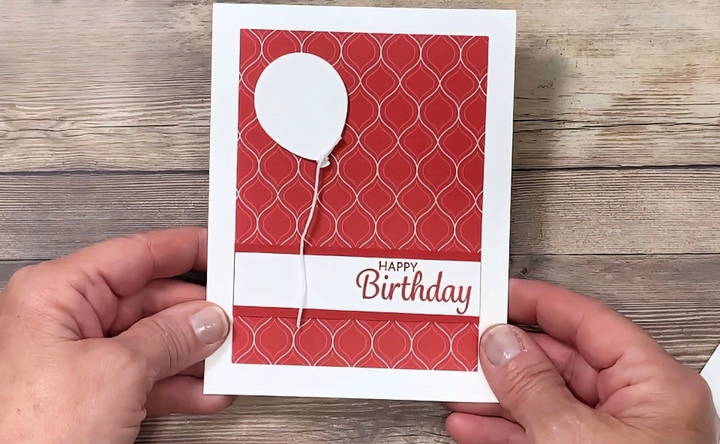
Adding shapes such as balloons or circles can bring an extra level of creativity to your birthday card. Punches are great tools for cutting shapes out of cardstock or designer paper. For a birthday card, a balloon punch is a fantastic option.
To make a balloon decoration:
- Punch out a balloon shape from whisper-white cardstock or another color that matches your theme.
- Tie a piece of Baker's twine to the bottom of the balloon shape to give it a realistic look.
- Attach the balloon to the card using dimensionals, which will make the balloon pop out from the card, adding a fun 3D effect.
5. Making a Simple Gift Box Design
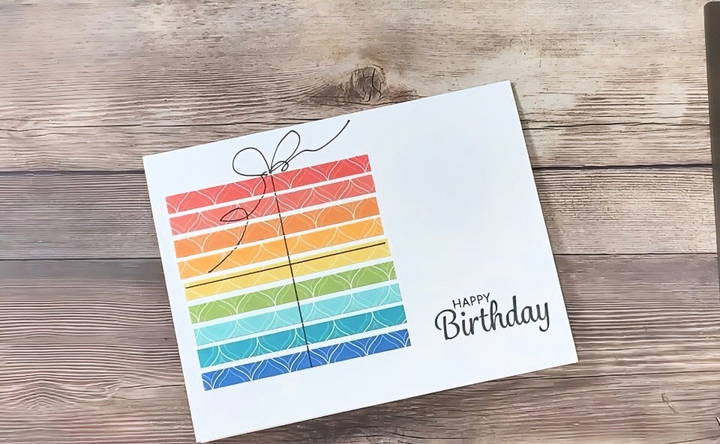
A creative and easy way to decorate a birthday card is to make the front look like a gift box. This can be done using strips of designer series paper in different colors.
Here's how:
- Cut strips of paper that measure about 1.25 inches by 3 inches. You will need about four strips in different colors or patterns.
- Starting from the bottom, adhere the strips to the front of the card, leaving a small space between each one. This makes a “stacked” appearance that resembles wrapped layers of a gift.
- Use a black marker to draw a ribbon across the strips. Draw a vertical line from the top to the bottom of the card and then add a horizontal line to make a cross pattern, just like a ribbon wrapped around a present.
- Finally, draw a simple bow at the intersection of the two lines. Don't worry if the lines are not perfectly straight; a little bit of imperfection adds character!
6. Adding Layers for Dimension
To make your birthday card stand out, adding layers can provide depth and make the card more visually appealing. Start by layering designer series paper over the cardstock base, as described earlier. However, you can also add more layers with smaller pieces of paper, such as a contrasting color of cardstock or vellum.
If you're aiming for a layered look, consider using a variety of paper textures, such as glossy or embossed papers, to bring in some visual contrast.
A clever trick to add dimension without making the card too bulky is to use foam dimensionals. These are small, sticky foam pieces that elevate certain elements, such as your greeting or a decorative shape, making them “pop” off the card. For example, after stamping your “Happy Birthday” sentiment, layer it onto a piece of contrasting cardstock and then use dimensionals to adhere it to the card base.
7. Adding Embellishments for Extra Flair
Embellishments are a great way to give your card a professional and finished look. There are a variety of options you can choose from, depending on the style of your card.
Some popular embellishments include:
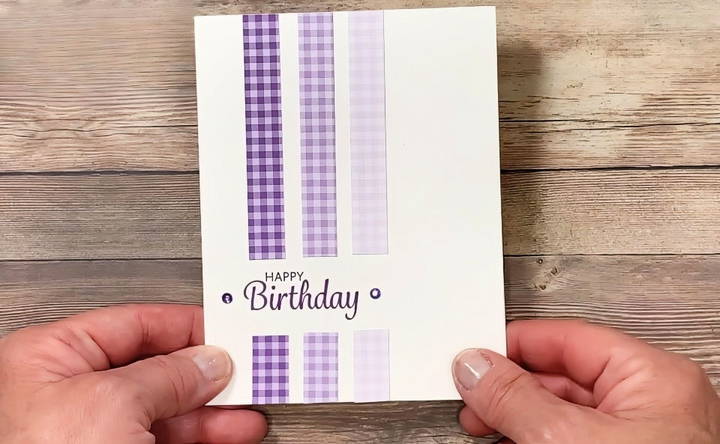
- Rhinestones or Gems: Adding a few noble peacock rhinestones can give your card a subtle shimmer and elegance. These embellishments come in different colors and sizes, allowing you to match them with your designer paper. They're self-adhesive, making them easy to apply.
- Ribbons: A real ribbon can mimic the look of a wrapped present. You can tie a small bow and adhere it to the front of your card, either on top of a stamped bow or as a standalone decoration.
- Buttons: Small decorative buttons can add a charming and whimsical touch to your card. If you're going for a crafty, handmade feel, buttons in bright colors can complement the design.
- Die-Cuts: Using die-cut shapes or letters is another way to embellish your card. You can cut out words like “Happy Birthday” or small shapes, such as stars, flowers, or hearts, and adhere them to your card for a polished look.
To apply embellishments, make sure you use a strong adhesive, especially for bulkier items like buttons or thick ribbons. Use them sparingly so as not to overwhelm the design.
8. Making a Freehand Design
If you have a steady hand and enjoy drawing, why not add your personal touch by making a freehand design on your card? Drawing directly on the card is a fantastic way to add custom details that truly make the card one of a kind.
For example:
- Doodles: Simple drawings like hearts, stars, or swirls can decorate the border of the card or accentuate the greeting.
- Bows: Instead of using real ribbon, draw a bow and ribbon pattern on the card with a black journaling marker. Start by drawing two loops for the bow and then extend the lines downward to make the look of a ribbon.
When freehand drawing, using fine-tip markers will give you more control and precision. If you're not confident about drawing directly on the card, practice on a piece of scrap paper first. Once you're satisfied, replicate the design on your card.
9. Using Scrap Paper for Eco-Friendly Cards
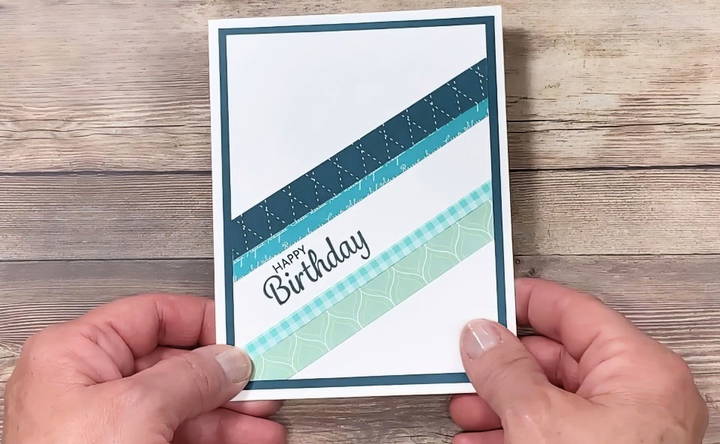
One of the best ways to make beautiful handmade cards without wasting materials is by using scrap paper. These are leftover pieces from previous projects, and they can be repurposed into a new design for your birthday card.
Here's how to make a stylish card using scraps:
- Choose scraps of varying sizes and colors: Try to coordinate the scraps so they complement each other. You can use pieces of designer series paper that have different patterns but belong to the same color family.
- Cut the scraps into strips or squares: For a neat and organized look, cut the paper into uniform shapes. If you want a more artistic look, leave them in irregular sizes.
- Make a stacked or layered design: Lay the strips or squares across the card base, either horizontally or vertically. You can also layer the scraps diagonally to make a more dynamic effect.
To add interest, use foam dimensionals on some of the scraps to give them a raised appearance. This makes a sense of depth, making the card more engaging.
10. Making a Rainbow Stack Design
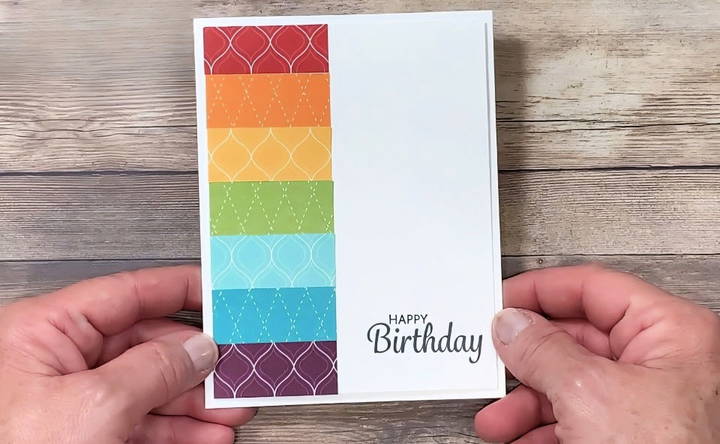
A rainbow stack design is an eye-catching way to use multiple colors and patterns. Here's how to make this vibrant card:
- Cut strips of designer series paper in various shades. Start with one darker color and gradually lighten the shades as you work your way up the card.
- Adhere the strips horizontally across the card base, leaving a small gap between each layer. This will make a gradient, rainbow-like effect.
- Once the layers are adhered, use a black marker to draw a ribbon across the layers, similar to the gift box design described earlier. You can also draw a bow to complete the look.
This design is especially great for children's birthday cards, as the bright colors and playful design will instantly catch their attention.
11. Incorporating Circular Patterns
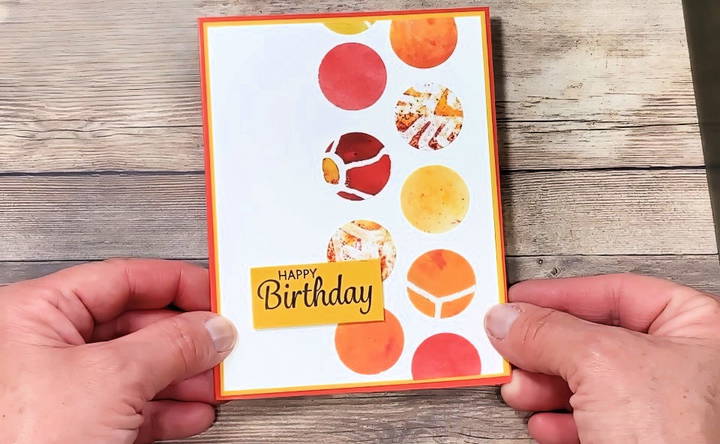
For a more modern and geometric look, try incorporating circular patterns into your design. This method works particularly well if you have a circle punch.
Here's how:
- Punch out circles from different designer series papers. Choose papers with contrasting colors and patterns to make the circles stand out.
- Arrange the circles in rows or scatter them across the card in a random pattern. Before adhering them, place the circles on the card first to see what layout looks best.
- Once you're happy with the layout, attach the circles using adhesive. You can even use foam dimensionals on some of the circles to make a 3D effect.
For a finishing touch, you can stamp or handwrite a birthday greeting in the center of one of the circles.
12. Diagonal Layouts for a Unique Look
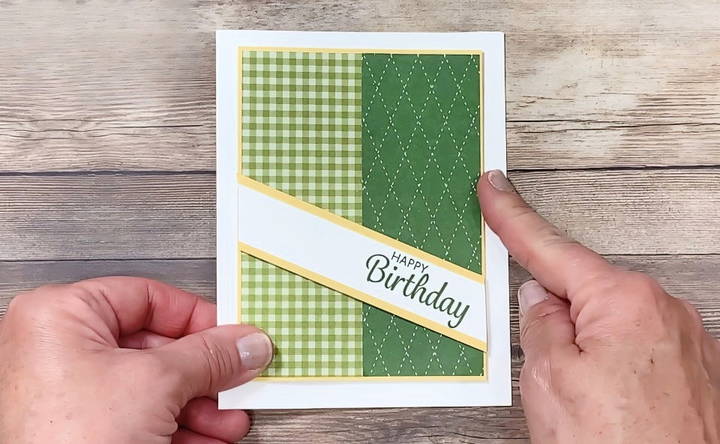
If you want to try something a little different, making a diagonal layout can give your card a sense of movement and energy. Instead of layering your designer paper in a traditional horizontal or vertical arrangement, cut your paper at angles.
Here's how to achieve this look:
- Start by stamping your greeting at an angle on the card base.
- Cut designer series paper strips or blocks at a diagonal. Make sure the pieces are longer than the width of your card base, so you can trim them down to fit once they're adhered.
- Layer the paper diagonally across the card, starting from the center and working outward. Once all the pieces are attached, use scissors to trim the excess.
A diagonal layout instantly makes the card more dynamic and interesting. It's perfect for a modern or abstract design.
13. Utilizing Layered Circles and Panels
For a simple but effective card, you can use a combination of layered circles and panels. This technique works especially well with punches and scraps of designer paper.
Here's how:
- Punch out multiple circles using a one-inch circle punch. Choose designer series paper with complementary colors but varying patterns.
- Arrange the circles on the card, making sure they don't overlap the greeting. You can layer some of the circles on top of others to make depth.
- Adhere the circles with dimensionals for a raised effect.
Additionally, adding panel layers can make your card more visually engaging. To do this, layer a smaller piece of designer paper or cardstock over the card base. Place the circles on top of the panel to highlight the different elements.
14. Finishing Touches and Presentation
To finish your card, consider adding a layered sentiment. You can stamp the “Happy Birthday” greeting on a contrasting piece of cardstock, layer it onto another color, and then adhere it to the card using dimensionals. This will make the sentiment stand out as the focal point of the card.
Once your card is complete, make sure to double-check that all elements are securely attached. A loose embellishment or uneven edge can detract from the overall design.
Finally, if you're giving the card as a gift, pair it with a handmade envelope that matches the color scheme of the card. A little bit of extra attention to detail in the presentation can go a long way.
FAQs About How to Make a Birthday Card
Discover our FAQs about how to make a birthday card, offering step-by-step guidance, creative tips, and resources for a personalized touch.
Use a bone folder to score and crease the card base. This tool ensures a sharp, clean fold, giving your card a professional finish.
If you find your stamped greeting crooked, consider using a stamp positioning tool or simply layer additional cardstock or embellishments around the greeting to redirect focus.
Use a silicone craft sheet. Adhesives won’t stick to it, making cleanup easy. It helps with precision when working with small or intricate paper pieces.
Yes! Designer paper scraps are perfect for layered or mosaic designs. Arrange them in stacked patterns, or cut into uniform shapes to make a cohesive look.
Foam dimensionals are ideal for adding subtle 3D effects to card elements like balloons or greetings without making the card too bulky for mailing.
To maintain visual balance, use the rule of thirds when placing elements. Divide your card mentally into thirds and place key elements at intersections or along lines.
Pre-cut cardstock, designer paper, and other materials in batches. Assembly line-style crafting, focusing on one step for all cards at a time, speeds up the process.
You can hand-cut simple shapes like balloons or circles using scissors or trace objects like cups for uniform circles. Freehand drawing is another creative option for personalized touches.
Allow stamped images to fully dry or use quick-drying ink like Memento ink. If smudging occurs, strategically place embellishments to cover mistakes.
Besides rhinestones or gems, consider washi tape, buttons, or even burlap pieces for added texture.
Conclusion
Making a DIY birthday card by hand is a thoughtful and rewarding process. Whether you're using simple designs or experimenting with more advanced techniques, the key is to have fun and let your creativity flow. With materials like cardstock, designer series paper, stamps, punches, and embellishments, the possibilities for making unique and beautiful birthday cards are endless.
By following the steps outlined in this guide—from layering papers and using punches to incorporating embellishments and scraps—you can make a card that is not only beautiful but also a heartfelt expression of your love and appreciation.
The best part of handmade cards is that they are one of a kind. No two cards are ever exactly the same, and that's what makes them so special. So gather your supplies, and get started on your next handmade birthday card today!


