Making a bottle rocket is not only a fun activity, but it also serves as a simple introduction to science, technology, engineering, and math (STEM) principles. This DIY project teaches about aerodynamics, propulsion, and forces like air pressure, making it an engaging and educational experience.
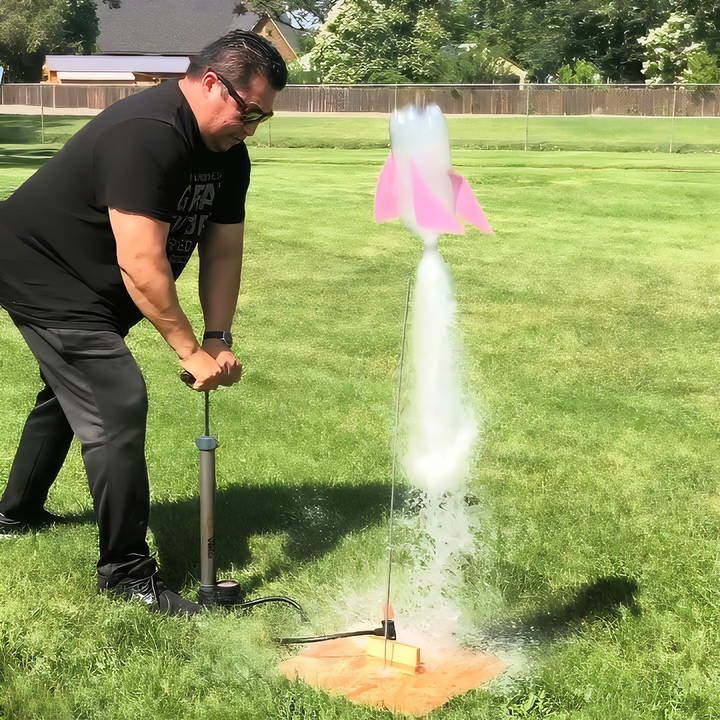
In this comprehensive guide, we'll walk you through each step needed to make and launch your own bottle rocket. With basic household materials and a little creativity, you'll be launching your homemade bottle rocket into the sky in no time!
Materials You Will Need
To build your own bottle rocket, you'll need the following items:
- Two-liter plastic bottle: This will serve as the body of your rocket.
- Scissors: To cut materials like paper or to adjust other components.
- Straw: Acts as a guide to ensure the rocket launches in a straight line.
- Cork or Wine Stopper: Used to seal the bottle's opening and build pressure.
- Air Pump with Needle: Essential for pressurizing the bottle before launch.
- Paperclip: To hold and release the pressure.
- Construction Paper: For decorating your rocket and making fins.
- Tape: To secure parts like the straw and fins to the bottle.
- Launch Pad: You can make this using plywood or PVC pipe for guiding the rocket during launch.
- Water: This will act as the fuel for the rocket.
Step by Step Instructions
Learn how to make a bottle rocket with our easy step-by-step instructions. Fun and educational DIY project for all ages!
Step 1: Preparing the Bottle
Start with an empty two-liter plastic bottle. This bottle will act as your rocket's main body. Ensure it's clean and free of any liquid before beginning the build. The larger the bottle, the more air and pressure it can hold, which increases the distance the rocket will travel.
Step 2: Attaching the Straw (The Guide)
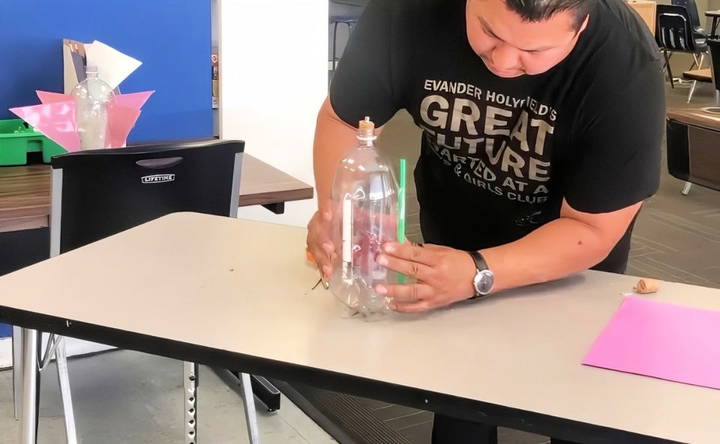
The straw will be attached to the side of the bottle and act as a guide to help the rocket fly straight.
- Cut the straw to the same length as your bottle.
- Use tape to secure the straw along the length of the bottle. Make sure it's parallel to the bottle, as this will help stabilize the rocket during its flight.
- The straw should be firmly taped down, but ensure the open ends are not blocked.
Step 3: Making Fins
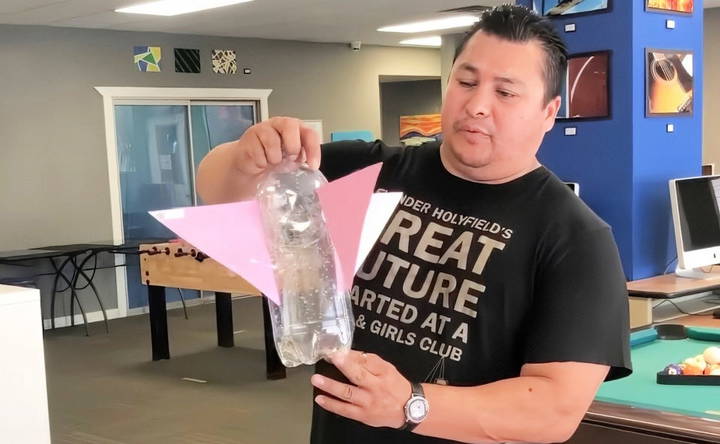
Now it's time to make the fins, which are important for stabilizing the rocket and making it fly straight.
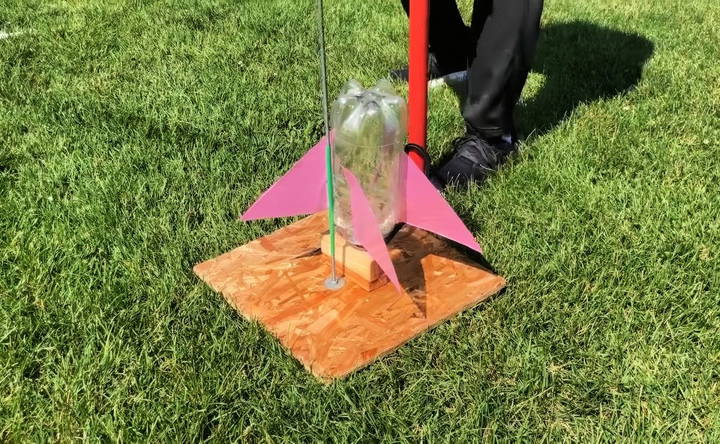
- Cut three or four triangular shapes out of construction paper or sturdy cardboard. These will be your fins.
- Attach the fins to the lower half of the bottle, close to the base (the end where the cork will be placed). You can use tape or glue to secure them in place.
- Make sure the fins are evenly spaced around the bottle for balanced flight. This symmetry ensures the rocket doesn't veer off course.
Step 4: Decorating the Rocket
Now is the fun part—decorating your rocket! You can cover the bottle in construction paper, draw designs, or even add extra decorations like paper cones at the top to make it look like a real rocket. This part is entirely up to you and adds a creative element to the project.
- Optional: Add a nose cone by rolling a piece of paper into a cone shape and taping it to the bottle's top. This can reduce air resistance and help your rocket fly higher.
Step 5: Making the Launch Pad
You will need a simple launch pad to guide your rocket during the launch. This ensures the rocket stays aligned and launches straight into the air. Here are two ways to make a basic launch pad:
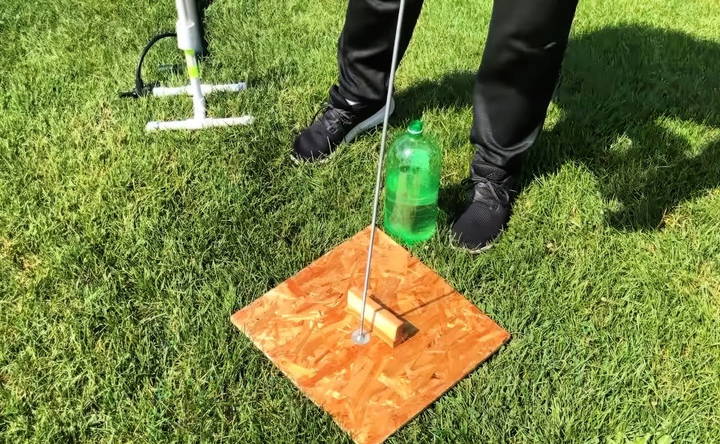
Using Plywood and a Metal Rod:
- Take a sturdy piece of plywood and attach a metal rod vertically.
- The straw attached to the bottle will act as a guide to slide along the metal rod, ensuring the rocket flies straight up.
Using PVC Pipe:
- You can also use PVC pipe to make a more structured launch pad.
- Cut a PVC pipe to around 1 meter in length and attach it vertically to a sturdy base.
- The rocket's straw will slide along the pipe, directing the rocket skyward.
Step 6: Preparing for Launch
Now that your bottle rocket is assembled, it's time to prepare it for launch.
Filling the Bottle with Water:
- Add about 1/4 to 1/3 of the bottle's volume in water. The water acts as the fuel by increasing the pressure inside the bottle. Too much water will make the rocket heavy, while too little water won't provide enough force for a strong launch.
Inserting the Cork:
- Insert the cork or wine stopper tightly into the mouth of the bottle. This cork is crucial because it will keep the pressure contained until the rocket is ready to launch.
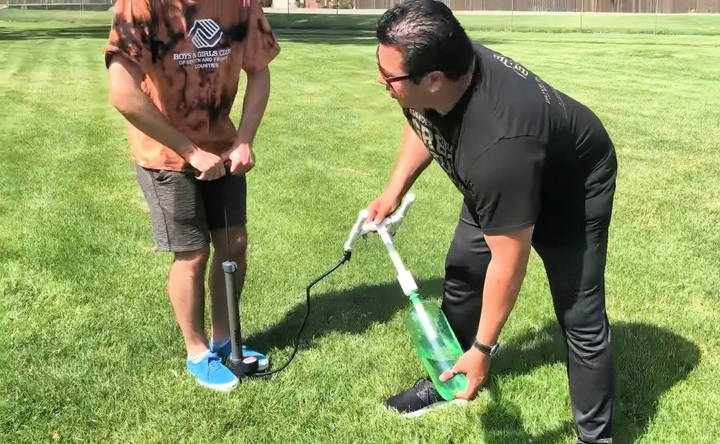
Attaching the Air Pump:
- Insert the needle from your air pump through the cork until it pierces through to the inside of the bottle.
- Make sure the connection between the cork and the pump is tight to prevent air from leaking.
Step 7: Launching the Rocket
Now that your rocket is set up and the launch pad is ready, it's time to take it outside and launch it!
- Position the Rocket on the Launch Pad: Place the rocket on your launch pad with the straw fitting over the guiding rod or pipe. Ensure the rocket is pointing straight up and clear from any obstructions.
- Pumping Air into the Bottle: Start pumping air into the bottle using the air pump. As you pump, the air will pressurize inside the bottle. The water acts as the rocket's propellant, and as the air pressure builds, it pushes against the water.
- Countdown and Launch: Once the pressure inside the bottle reaches a high enough level, it will overcome the cork's resistance. The cork will pop out, and the rocket will be propelled into the air by the force of the water shooting out of the bottle's opening.
Safety Note: Stand a safe distance away when pumping the rocket. The launch can happen quickly and with a lot of force.
How Does It Work? The Science Behind Bottle Rockets
Bottle rockets are an excellent way to introduce kids (and adults!) to the principles of physics, particularly Newton's third law of motion: For every action, there is an equal and opposite reaction. When the air pressure inside the bottle forces the water out, it pushes the rocket in the opposite direction—upwards.
The amount of water, air pressure, and the design of your rocket all play crucial roles in determining how high the rocket will fly. By experimenting with different amounts of water and various fin designs, you can observe how these changes affect the flight of the rocket.
Tips for Improving Your Rocket
If you want to tweak your rocket's design or experiment with different variables, here are some tips:
- Experiment with Water Levels: Try varying the amount of water in the bottle to see how it affects flight. More water means more mass but also more force pushing the rocket upward.
- Adjust the Air Pressure: Try using different amounts of air pressure by pumping more or fewer times. More pressure can make the rocket fly higher, but be cautious of over-pressurizing, as this could damage the bottle.
- Refine the Fin Design: Test different sizes, shapes, and angles of fins. The more aerodynamic your fins, the more stable and higher your rocket will fly.
- Nose Cone Shape: A well-shaped nose cone can reduce drag and help your rocket cut through the air more smoothly. Try experimenting with different shapes and materials to see which works best.
Troubleshooting Common Problems
If your rocket doesn't launch or doesn't fly very high, here are some common issues to check:
- Air Leakage: Make sure the cork is tightly sealed, and no air is escaping around the air pump needle.
- Uneven Fins: If the rocket tilts or spins wildly during flight, the fins may be uneven or improperly spaced. Ensure they are all the same size and evenly spaced.
- Too Little Water: Without enough water, the rocket won't have enough propellant to make a strong upward force. Try adding more water.
Conclusion: Launch Into Fun Learning
Building and launching a bottle rocket is a fun, hands-on activity that introduces key STEM concepts like air pressure, forces, and aerodynamics. It's a great way to engage kids in learning while giving them a tangible result—a soaring rocket in the sky! By experimenting with different designs and variables, you can see the real-world applications of science and engineering in action.
So, gather your materials, follow the steps, and get ready to launch your own bottle rocket. Don't forget to share your results with friends and family, and see whose rocket flies the highest!
FAQs About How to Make a Bottle Rocket
Explore our FAQs about how to make a bottle rocket. Learn simple steps, materials needed, and safety tips for a fun DIY project.
To build a PVC pipe launcher, use a 1-meter length of PVC pipe attached vertically to a sturdy base (like a wooden board). The pipe will serve as a guide for the rocket's straw, ensuring it launches in a straight line. Secure the pipe with brackets or strong glue to keep it stable during the launch.
Yes, you can use an air compressor for faster pressurization. However, be cautious not to over-pressurize the bottle, as this could lead to a dangerous launch. Always use safety gear like goggles.
A basic launch pad can be built using a piece of plywood and a metal rod or PVC pipe. The rocket’s straw will act as a guide, sliding over the rod or pipe to ensure a straight launch. Make sure the base is sturdy enough to handle the launch pressure.
Always wear safety glasses and ensure you stand clear of the rocket’s path when pumping air. Avoid leaning over the rocket, as it can launch unexpectedly when enough pressure builds. It’s also best to launch outdoors in an open area.
Use about 1/4 to 1/3 of the bottle's volume in water. Too much water can make the rocket heavy, while too little may reduce the force generated during launch. Experiment with different amounts to find the best balance.
Yes, adding a nose cone made of paper or lightweight materials can improve aerodynamics and reduce drag. This can help your rocket fly higher and more smoothly.
Ensure that the fins are evenly spaced and securely attached to the lower part of the bottle. Uneven fins or loose attachments can cause the rocket to spin or tilt during launch.
Check for air leakage around the cork or air pump needle. Make sure the cork is tightly sealed and that there's no air escaping. Also, verify that the air pressure is sufficient by pumping more air into the bottle.
Yes, you can personalize your launch pad by painting it or adding other decorations. This makes the project more fun and gives it a unique look.


