Have you ever needed an efficient way to dispose of yard waste, brush, or other burnable materials without the hassle of an open fire? I've been there too. Building a burn barrel is an easy and inexpensive way to handle those needs while controlling the burn safely and effectively. In this guide, I'm going to share how I made my own DIY burn barrel, tips that I learned along the way, and a few handy tricks that you might want to try yourself. Let's dive in.
Why Use a Burn Barrel?
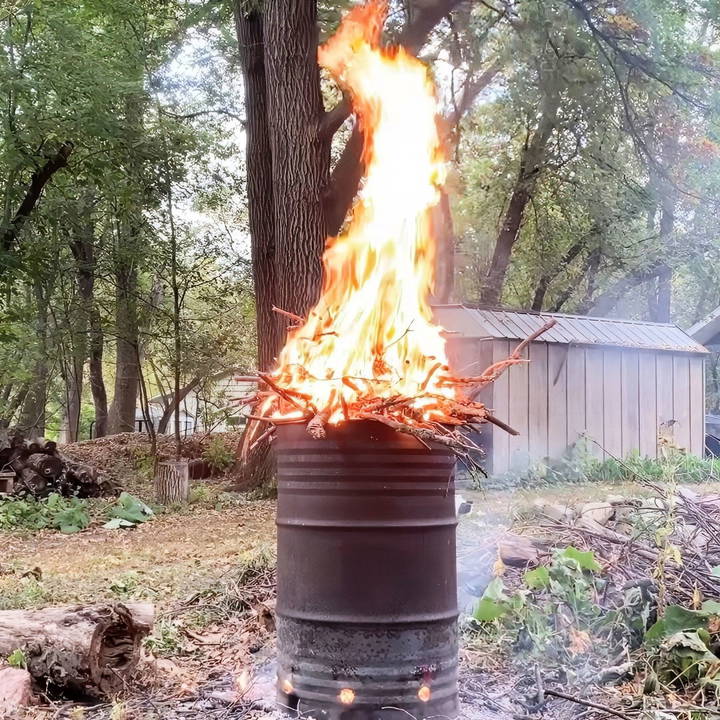
Before we get into the steps, let's talk about why burn barrels are so handy. Burn barrels make a more controlled burn compared to a regular open fire. Because of the design—particularly with the airflow from holes near the bottom—they burn hotter and faster, reducing waste more quickly. Plus, they're safer since the barrel contains the fire, keeping it from spreading to other areas.
What You'll Need to Get Started
Here's what you'll need to make your own burn barrel:
- A 55-gallon barrel: You can easily source one of these on Facebook Marketplace, Craigslist, or other secondhand places. Try not to spend more than $10. My barrel happened to be food-grade, which originally held applesauce. It was nice to know it was clean and safe for repurposing.
- A way to cut the barrel: Depending on your barrel, you might need some metal-cutting tools. I got lucky with a barrel that had removable lids on both ends, so I didn't need to cut anything. But if your barrel has a solid bottom, you'll need to cut that out.
- A drill or metal punch: You'll need to make some air holes at the bottom of the barrel to allow proper airflow.
- A blow torch (optional but highly recommended): This is the fastest and easiest way to start your fire.
Step by Step Instructions
Learn how to make a DIY burn barrel with step-by-step instructions, from prepping the barrel to safety tips. Perfect for efficient burning and ash management.
Step 1: Prepping the Barrel
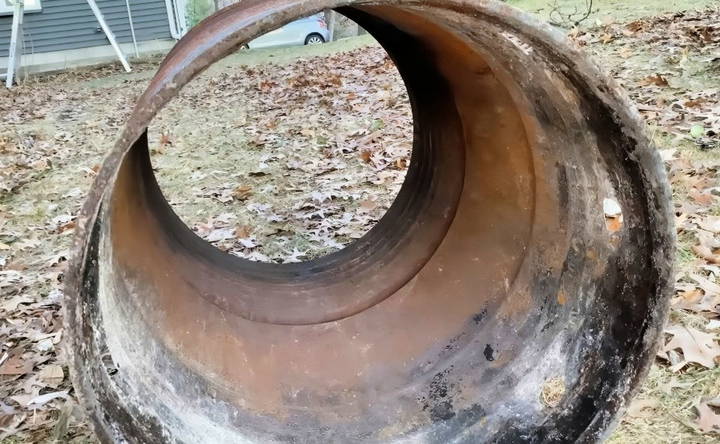
The first thing you need to do is prep your barrel. If your barrel has a solid bottom, you'll want to remove it. Cutting out the bottom will allow air to flow through the barrel, feeding the fire and helping it burn efficiently.
Tips for Cutting the Bottom
If you're cutting out the bottom yourself, it helps to use a reciprocating saw or grinder. Be careful during this step—wear protective gloves and eyewear to avoid any metal shards flying around. In my case, both lids were removable, so I was able to skip this step and move on.
Step 2: Adding Airflow Holes
After prepping the barrel, it's time to add some airflow. This is where your drill or metal punch comes in. The airflow is crucial because it allows oxygen to feed the fire, which helps it burn hotter and faster.
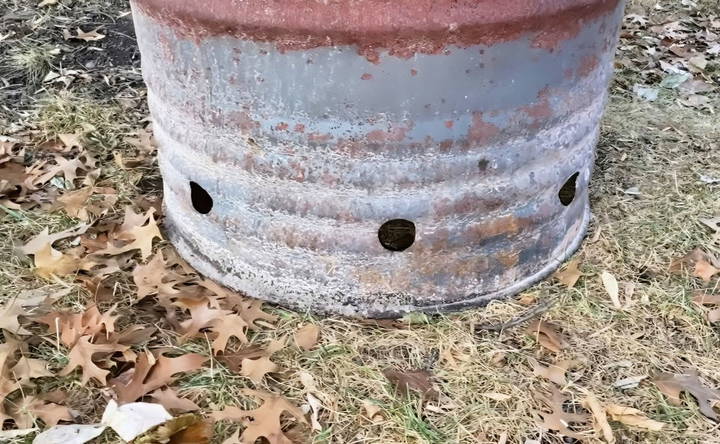
I drilled a single row of holes around the bottom of the barrel, just above where the bottom used to be. Some people like to do two rows, or cut slits instead of drilling holes. There's no hard-and-fast rule here, so feel free to customize it as you like. I kept it simple with one row, and it works perfectly fine for my needs.
Step 3: Setting Up the Burn Barrel
Once you have your barrel prepped with holes, you can set it up in your yard. Make sure to place it on a level surface away from any flammable materials like dry grass or leaves. If you want to improve airflow even more, consider setting the barrel on cinder blocks or bricks. This way, air can flow from underneath, keeping your fire strong and consistent.
Step 4: Start Burning!
Now comes the fun part—actually using your burn barrel. I used my blow torch to start the fire, but you can use matches or a lighter if you don't have a torch on hand. Just ignite the fire through one of the holes at the bottom.
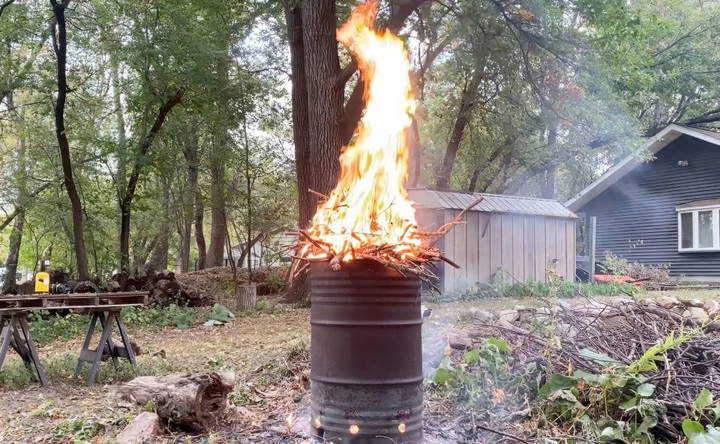
Once the fire is going, it will burn upwards through the barrel. It only takes a few minutes for the fire to really take off. I found that it burns much faster than an open fire due to the airflow design, making it an efficient way to get rid of brush, leaves, and other burnable materials.
Step 5: Managing Ash Build-Up
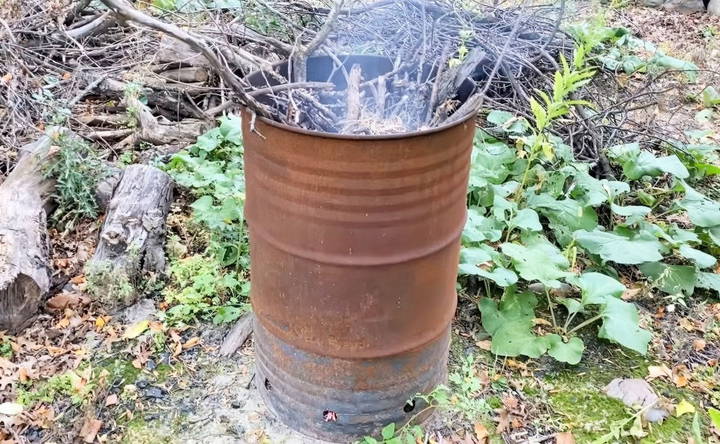
After a few hours of burning, you'll start to see ash build up at the bottom of the barrel. This is normal and nothing to worry about. I used a stick to clear the holes to make sure air was still flowing properly. You can also empty out the ash periodically to keep the fire breathing well.
If you notice the fire dying down because of ash build-up, you can either clean out the barrel or consider adding a second row of holes for more airflow. I don't burn a ton of brush, so this doesn't happen often for me, but it's a good trick if you're planning on doing a lot of burning.
Lessons Learned: What Worked and What Didn't
When I first started using my burn barrel, I made the mistake of piling too much wood on top. While it made for a cool effect, it wasn't practical. The fire spread outside the barrel, defeating the purpose of using it for containment. My advice is to keep everything inside the barrel to prevent the fire from getting out of control.
Another tip: If you have a significant amount of material to burn, feed it into the barrel gradually. This keeps the fire going steadily without smothering it.
Safety Tips for Using a Burn Barrel
Safety is always the top priority when dealing with fire. Here are some essential safety tips to keep in mind:
- Always have a water source nearby: Whether it's a hose or a bucket of water, make sure you can quickly put out the fire if needed.
- Never leave the fire unattended: It might seem like a contained fire, but things can change quickly.
- Watch for wind: Wind can carry embers and cause them to land outside the barrel, potentially starting a wildfire.
- Keep the area clear: Make sure there's nothing around the barrel that can catch fire, like dry grass, woodpiles, or leaves.
Environmental Considerations
When using a burn barrel, it's important to think about the environment. Here are some key points to consider:
1. What to Burn and What Not to Burn
Safe Materials to Burn:
- Yard Waste: Leaves, branches, and grass clippings.
- Paper Products: Newspapers, cardboard, and plain paper.
Materials to Avoid:
- Plastics: Burning plastics releases harmful chemicals into the air.
- Treated Wood: This includes wood that has been painted, stained, or chemically treated.
- Household Trash: Items like food waste, batteries, and electronics should never be burned.
2. Ash Disposal
Safe Disposal Methods:
- Cool Completely: Ensure the ash is completely cool before handling.
- Use a Metal Container: Store cooled ash in a metal container with a tight lid.
- Avoid Plastic Bags: Never use plastic bags for ash disposal as they can melt or catch fire.
Repurposing Ash:
- Garden Fertilizer: Ash can be used as a soil amendment in gardens. It adds nutrients like potassium and calcium.
- Pest Control: Sprinkle ash around plants to deter pests like slugs and snails.
3. Air Quality
Minimize Smoke:
- Dry Materials: Use dry materials to reduce smoke production.
- Proper Ventilation: Ensure your burn barrel has adequate ventilation to promote complete combustion.
Impact on Neighbors:
- Be Considerate: Inform neighbors before burning to avoid causing discomfort or health issues.
- Burn During Optimal Times: Choose times when the wind is calm and air quality is good.
4. Legal Regulations
Check Local Laws:
- Permits: Some areas require permits for open burning.
- Fire Bans: Be aware of any fire bans or restrictions in your area.
Compliance:
- Follow Guidelines: Adhere to local guidelines to avoid fines and ensure safety.
Using your burn barrel responsibly protects air quality, follows local regulations, and maintains good neighbor relations.
Common Issues and Troubleshooting
Using a burn barrel can sometimes come with challenges. Here are some common issues and how to troubleshoot them:
1. Excessive Smoke
Causes:
- Wet Materials: Burning wet or damp materials can produce a lot of smoke.
- Poor Ventilation: Insufficient air holes can lead to incomplete combustion.
Solutions:
- Use Dry Materials: Ensure all materials are dry before burning.
- Improve Ventilation: Drill more holes in the sides and bottom of the barrel to allow better airflow.
2. Incomplete Burning
Causes:
- Large Pieces: Large pieces of material may not burn completely.
- Low Temperature: A fire that isn't hot enough can leave unburned material.
Solutions:
- Break Down Materials: Cut or break materials into smaller pieces before burning.
- Increase Airflow: Ensure there is enough oxygen by adding more ventilation holes.
3. Rust and Corrosion
Causes:
- Exposure to Elements: Rain and moisture can cause the barrel to rust.
- Lack of Maintenance: Not cleaning the barrel regularly can accelerate rusting.
Solutions:
- Cover the Barrel: Use a metal lid or cover to protect the barrel from rain.
- Regular Cleaning: Clean out ash and debris after each use to prevent moisture buildup.
4. Difficulty Starting the Fire
Causes:
- Wet Kindling: Wet or damp kindling can make it hard to start a fire.
- Insufficient Airflow: Not enough air can prevent the fire from catching.
Solutions:
- Use Dry Kindling: Always use dry kindling to start your fire.
- Check Air Holes: Make sure the air holes are not blocked and are sufficient in number.
5. Safety Concerns
Causes:
- Unattended Fires: Leaving the fire unattended can be dangerous.
- Flammable Surroundings: Burning near flammable materials can cause accidental fires.
Solutions:
- Never Leave Unattended: Always stay with your burn barrel while it is in use.
- Clear Surroundings: Ensure the area around the barrel is free of flammable materials.
6. Ash Disposal
Causes:
- Improper Disposal: Disposing of hot ash can cause fires.
- Accumulation: Allowing ash to build up can reduce airflow.
Solutions:
- Cool Completely: Make sure ash is completely cool before disposing of it.
- Regular Removal: Remove ash regularly to maintain proper airflow.
Maintain and use your burn barrel properly to ensure it works efficiently and safely. Regular care prevents most issues.
FAQs About DIY Burn Barrels
Discover the essential FAQs about DIY burn barrels, including safety tips, materials needed, and legal guidelines to ensure effective and safe use.
A burn barrel is a metal drum used to burn yard waste and other burnable trash. It helps manage waste efficiently and safely, especially in rural areas.
Place your burn barrel away from buildings, trees, and other flammable materials. Ensure it’s on a flat, non-combustible surface like gravel or concrete.
Yes, check local regulations before using a burn barrel. Some areas have restrictions or require permits due to fire hazards.
Yes, by ensuring proper ventilation and using dry materials, you can minimize smoke. Some designs include additional air holes and a secondary burn chamber to reduce smoke.
Once cooled, you can dispose of ash in your regular trash or use it as a soil amendment in your garden. Ensure it doesn't contain harmful residues.
Final Thoughts
Building a DIY burn barrel is a straightforward project that anyone can do with a few basic tools. Whether you're burning brush, old wood, or just doing a seasonal clean-up, a burn barrel is a practical solution that speeds up the process and keeps things safe and contained. After using mine for a while, I can confidently say that it's become a tool I can't imagine living without. Plus, it's simple to maintain and highly effective.
If you're thinking about building one yourself, go for it. The process is easy, and the benefits are well worth the effort. Just remember to stay safe, have fun with the customization, and enjoy the efficiency of a well-designed burn barrel.


