A unique experience can be very helpful. I remember when I first tried making a DIY candy lei at home for my brother's graduation. It was fun and easy to do. I gathered candies, clear plastic wrap, and some colorful ribbons. My brother loved it and all his friends were amazed by it. This project added a richer memory to a special day.
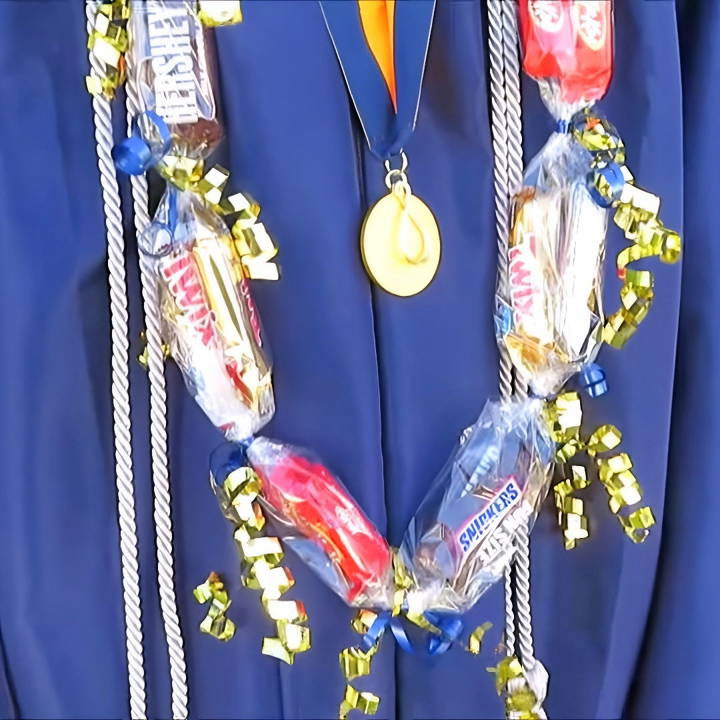
Making a DIY graduation lei was a heartwarming experience. I just followed a few simple steps, and my brother couldn't stop smiling. This task was not only an enjoyable activity but also brought joy to my family. If you're looking to add that extra special touch to someone's big day, give this project a try.
I'm helping with these steps to guide you below:
Gathering Your Materials
Before we dive into the crafting process, let's talk about what you'll need. A visit to your local Dollar Tree or any similar budget store should have you covered. Here's your shopping list:
- Candy: I picked five packs of miniature candy bars, emphasizing variety for a more visually appealing lei. Choose flavors or colors that resonate with the occasion or the recipient's tastes.
- Ribbon: Scope out the gift wrap section for colorful ribbons. Matching it with the occasion's theme or the recipient's favorite color adds a nice touch.
- Clear Wrap: A roll of clear foil wrap is essential for assembling the lei. It's not only affordable but will also hold your candies in place while showcasing them beautifully.
Why these materials?
It's all about striking a balance between aesthetics, functionality, and budget. The candy serves as a sweet treat, the ribbon adds a decorative touch, and the clear wrap brings it all together, ensuring the lei is both attractive and sturdy.
Step by Step Instructions
Learn how to make a candy lei at home easily with our step-by-step guide. Perfect for special occasions or as a sweet gift!
Step 1: Prepare Your Clear Wrap
Lay out your clear wrap and cut two long strips, approximately six to eight inches wide. These strips will act as the base of your lei. Tip: No need for perfection when cutting; eyeballing the measurements is totally fine.
Step 2: Place Your Candy
Line up your candies face down on one of the clear wrap strips. I like to double up on candies for a fuller look, but you can adjust based on your preference or budget. If it's warm out, consider non-chocolate options to avoid melting.
Step 3: Secure and Twist
Once your candies are aligned, roll them in the clear wrap, securing each piece with a small piece of tape at the back. Then, give the section between each candy a good twist to keep them separated. Secure these twisted sections with colorful ribbons, adding a festive flair to your lei.
Step 4: Repeat for Fullness
Depending on your lei's desired length, you may want to make a second strand following the same pattern. This ensures a lavish and balanced look, especially if you're catering to adults or special occasions like graduation.
Step 5: Joining the Ends
To make a circular lei, bring the ends of your candy strands together, overlaying them slightly to ensure continuity in the candy pattern. Secure this intersection with more ribbon, ensuring the lei holds its shape well.
Step 6: The Finishing Touches
Here's where you can get extra creative. Add more ribbons to conceal any tape or to simply make your lei more vibrant. Curling the ribbon ends with scissors can add a whimsical effect.
Personal Insights and Tips
Throughout my many lei-making adventures, I've realized a few things that might help you too:
- Temperature Matters: Consider the climate. If it's hot, opt for non-meltable sweets.
- Customization is Key: Tailor your lei with the recipient's favorite colors and candies. It adds a personal touch that goes a long way.
- Fun for All Ages: These leis aren't just for graduates. Customize them for birthdays, sports events, or any celebration.
- Bulk Buying: If making multiple leis, buying in bulk can save you even more.
Personalization Ideas
When it comes to making DIY candy leis, personalization is key. These sweet creations are not just treats; they're expressions of care and celebration. Here are some ideas to help you make each candy lei special and unique:
- Choose a Theme: Start by selecting a theme that resonates with the occasion or the recipient's interests. For a birthday, you might choose their favorite colors or characters. For a graduation, consider school colors or a future college emblem.
- Incorporate Favorite Candies: Find out what candies the recipient loves and include those in your lei. This not only makes the lei more personal but also ensures it will be enjoyed.
- Add Meaningful Charms: Attach small charms or trinkets that have significance to the person receiving the lei. This could be anything from a miniature book for a book lover to a tiny soccer ball for a sports enthusiast.
- Include Messages: Tuck little notes or quotes within the lei. These can be words of encouragement, inside jokes, or simple expressions of affection.
- Vary the Patterns: Don't be afraid to mix and match colors and textures. Use different wrapping styles or alternate the candies with beads or other decorative items to make an eye-catching pattern.
- Consider the Packaging: The way you present the lei can add to its personal touch. Consider using a custom box or wrapping that complements the lei's design.
- Make It Interactive: Make a lei that has elements the recipient can interact with, like unwrapping the candies or discovering hidden items within.
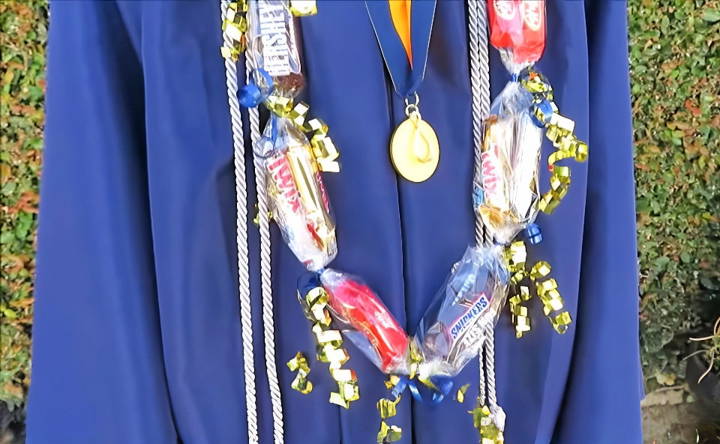
Adding personal touches makes your DIY candy lei a delightful and memorable gift, showing thoughtfulness and creativity.
Troubleshooting Common Issues
Making DIY candy leis can be a fun and rewarding activity, but sometimes you might run into a few hiccups. Here are some common issues you might face and how to solve them:
- Candy Slipping Off the Ribbon: If your candies are slipping off the ribbon or string, try double-knotting between each piece of candy. This will make a secure barrier to keep everything in place.
- Sticky Candies: In warm weather, candies might get sticky. To prevent this, choose candies with hard shells or individually wrapped options. If they do get sticky, pop them in the fridge for a bit before handling them.
- Uneven Lei Length: To ensure your lei has an even length, measure your ribbon or string before you start. A good rule of thumb is to make it at least 40 inches long for an adult or adjust it accordingly for a child.
- Difficulties with Threading: If you're having trouble threading the candies, use a stronger needle or a beading needle. You can also stiffen the end of the ribbon with clear nail polish to make it easier to thread through the candies.
- Lei Looks Sparse: If your lei looks a bit sparse, you can add more candies or include decorative elements like beads or paper flowers to fill in the gaps.
- Allergies or Dietary Restrictions: Always consider any allergies or dietary restrictions of the person who will wear the lei. Opt for allergen-free candies or non-edible items if necessary.
Keep these tips in mind to make beautiful candy leis with fewer problems. Practice makes perfect, so keep trying even if it isn't perfect at first.
FAQs About DIY Candy Leis
Discover answers to FAQs about making DIY candy leis, from the materials needed to step-by-step instructions, perfect for any celebration or gifting.
Begin by cutting a piece of cellophane about 35 to 40 inches long. Place your candies down the center, leaving about an inch of space between each. Fold the cellophane over the candies and roll it towards the other end, maintaining the spaces between candies.
After rolling the candies in cellophane, cut pieces of ribbon about 6 to 8 inches long. Tie the ribbon between each candy snugly to keep them in place. You can tie the ribbons into bows or curl them for a decorative touch.
Yes, you can mix different types of candies in one lei. However, consider the size and weight of the candies to ensure they are evenly distributed and the lei is comfortable to wear.
To finish the lei, overlap the two ends of the cellophane and tie them together with a ribbon. Make sure it’s secure so the lei can be easily worn without falling apart.
Selecting the right candy for your lei is crucial. Opt for individually-wrapped candies to maintain hygiene and ease of assembly. Avoid chocolates or candies that may melt easily if you're in a warm environment. Hard candies, like Jolly Ranchers or Werther's Originals, are excellent choices. Consider the event theme or the recipient's preferences when choosing candy types and colors.
Wrapping Up
Wrapping up, learning how to make a candy lei at home is both fun and rewarding. This DIY graduation lei idea is perfect for adding a personal touch to your celebrations. Following this simple guide ensures your candy lei will be a hit at any event. Get creative and enjoy crafting your own unique designs!


