Starting a DIY cribbage board project can be a simple and enjoyable task. I remember my first time; I had limited tools and woodworking experience, but I was excited to build something unique. I gathered all the materials, followed a step-by-step guide, and, to my surprise, the process was very straightforward. Within a few hours, I had a beautiful cribbage board ready for game nights.
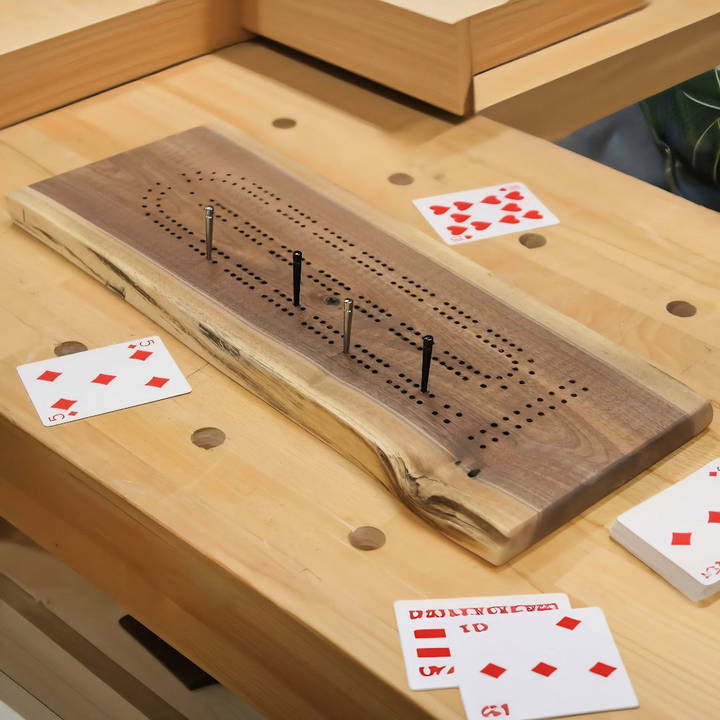
Making your own cribbage board allows for creativity and customization. You can choose the wood type, paint it, and even add personal touches. This project is perfect for anyone who loves hands-on activities. If you enjoy working with your hands and making something from scratch, this guide will be very valuable.
I'm sharing my experience to inspire you to start your DIY cribbage board project today.
Materials You'll Need
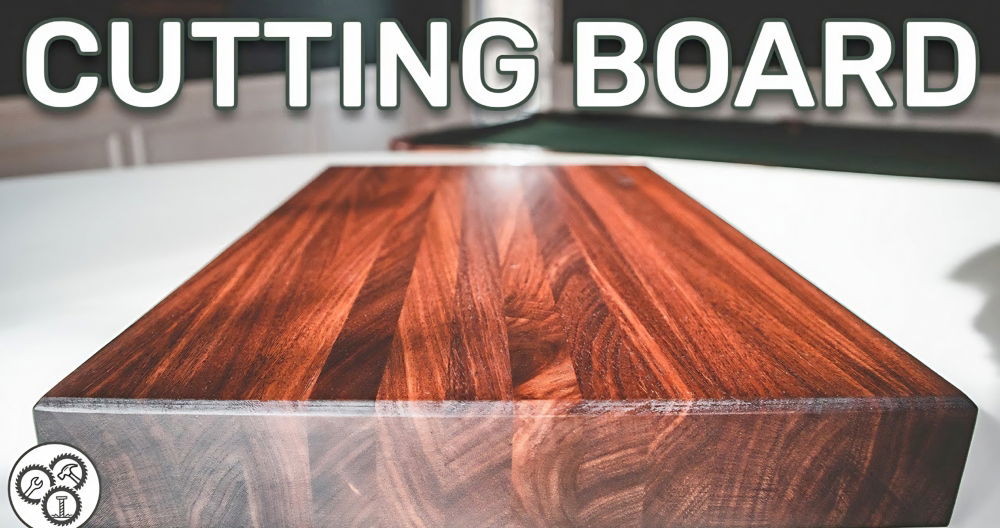
- Wood Piece: The beauty of a cribbage board lies in its simplicity. You can use any type of wood – maple, bamboo plywood, or even a small live-edge slab. Choose based on your aesthetics and availability.
- Paper Template: Helpful for marking the holes accurately.
- Awl: To mark the hole locations.
- Straight Edge: Ensures the holes are aligned properly.
- Drill Driver: To drill the peg holes.
- Eighth Inch Diameter Drill Bit: For precise hole sizes.
- Tape: To mark the drilling depth.
- Spray Adhesive: Optional, to adhere the paper template to the wood.
- Sandpaper: To smooth out any rough edges.
- Cribbage Template Kit: A more advanced tool that includes the template, a self-centering drill bit, and indexing pins.
Step by Step Instructions
Learn how to make a DIY cribbage board with our step-by-step instructions, from selecting wood to personalizing your board. Perfect for all skill levels.
Step 1: Selecting Your Wood
First, pick a piece of wood that appeals to you. I chose maple for its durability and smooth finish. But you can get creative and opt for something more exotic like bamboo or a live-edge slab for a rustic look. Ensure the wood is flat and free of major defects.
- Example: For one of my boards, I selected a piece of maple because it's durable and has a smooth finish.
Step 2: Preparing the Template
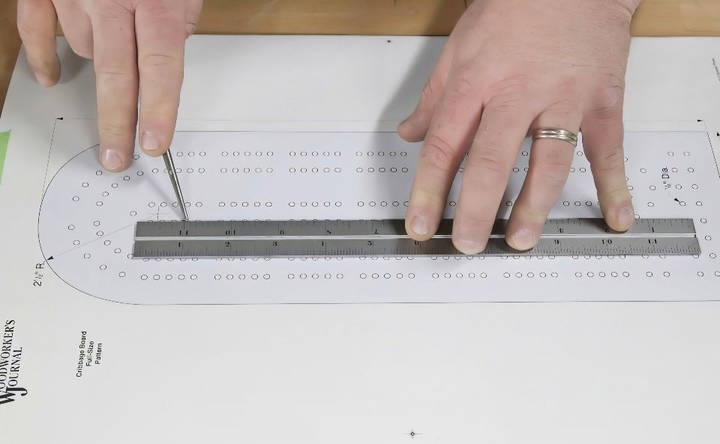
Laying out the holes accurately is crucial for a functional cribbage board. You can use a paper template to make this process easier.
- Print a paper template of the cribbage board hole layout.
- Lay the template on the wood piece.
- Use an awl to mark each hole's location.
- Use a straight edge to keep the marks aligned.
Step 3: Drilling the Holes
Learn the basic method with paper template & advanced method with cribbage template kit for drilling holes. Perfect guide for precision and ease!
Basic Method with Paper Template
- Set Up the Drill: Install an eighth-inch diameter drill bit in your drill driver. Use tape to mark a 3/8 inch drilling depth on the bit to ensure consistent depth.
- Drill the Holes: Begin drilling at the marked locations. Drill slowly to keep the holes clean and avoid splintering.
- Optional Adhesive Method: You can spray adhesive on the template to stick it to the wood and drill directly through the paper. Once done, sand off the paper.
- Note: While this method is straightforward, drilling that many holes can lead to slight misalignments.
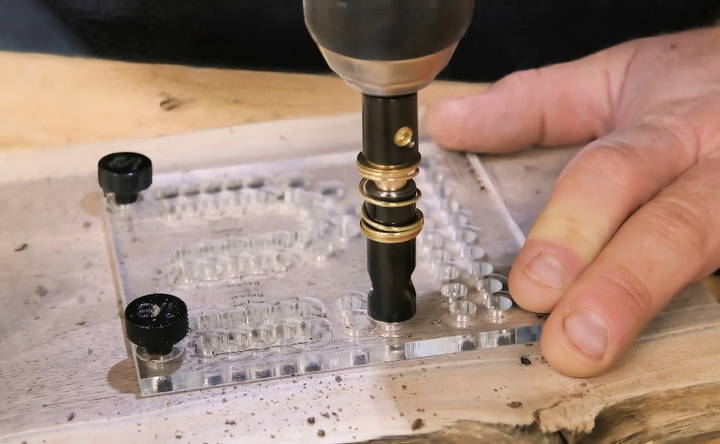
Advanced Method with Cribbage Template Kit
If you want perfectly aligned holes, I recommend using a cribbage template kit which provides precise guides and tools for accuracy.
- Position the Template: Follow the kit instructions to position the plastic track templates on your wood piece.
- Insert the Indexing Pins: These pins help to hold the template in place.
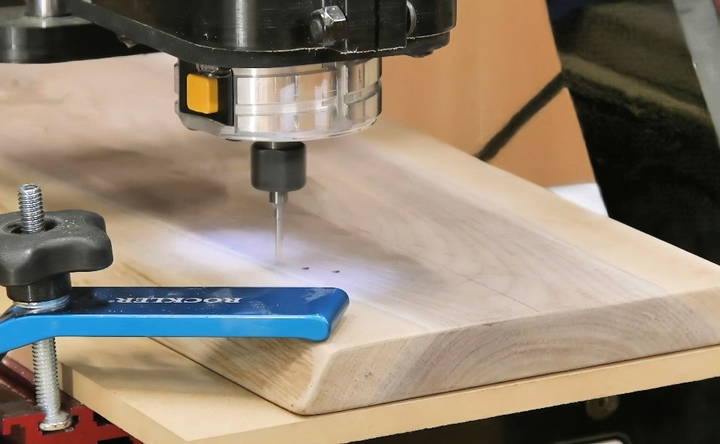
- Drill the Holes: The self-centering drill bit ensures each hole is drilled to the correct depth automatically.
- Relocate the Template: Move the template to the next section and repeat the process until all holes are drilled.
- Example: The cribbage template kit made the process much smoother and resulted in perfectly aligned holes, saving me a lot of sanding and adjustments later.
Step 4: Sanding and Finishing
After drilling all the holes, it's time to sand and finish the board.
- Sand the Board: Use sandpaper to smooth out any rough edges and the top surface of the board.
- Apply Finish: Depending on your choice, you can apply a clear coat, varnish, or wood oil to protect the wood and enhance its natural beauty.
Step 5: Building the Pegs (Optional)
If you want to go the extra mile, you can also build your own pegs.
- Use small dowel rods or metal rods.
- Cut them to a length of about 1-1/2 inches.
- Sand the ends to smoothen them and ensure they fit snugly in the holes.
Step 6: Giving Your Board a Personal Touch
Adding a personal touch can make your cribbage board even more special. You can engrave names, dates, or even a special message. This can be done using a woodburning tool or having the wood laser engraved.
Advanced Techniques for Crafting a Cribbage Board
When you're ready to take your DIY cribbage board to the next level, these advanced techniques can help you build a truly unique and professional-looking piece. Whether you're an experienced woodworker or a hobbyist looking to challenge yourself, these methods will enhance your craftsmanship.
Inlay Work
Inlaying is a method where you insert pieces of contrasting materials into depressions made in the base wood to form patterns or pictures. For a cribbage board, consider using metals like brass or copper for a luxurious touch. You can build intricate designs around the scoring track or in the center of the board.
Bent Wood
Bending wood can give your cribbage board a curved surface, adding an elegant twist to the traditional flat board. This technique involves steaming wood strips until they're pliable and then shaping them around a form. Once dried, they will hold their new shape, giving you a cribbage board that stands out.
Carving
Carving allows you to add three-dimensional designs to your cribbage board. From simple reliefs to complex sculptures, wood carving can turn your board into a work of art. You might carve scenes, symbols, or even a full landscape that tells a story as you play.
Marquetry
Marquetry is similar to inlay but involves making pictures or patterns from thin veneers of different woods. This can be used to add intricate imagery to your cribbage board, such as floral designs, geometric patterns, or even a depiction of the classic cribbage “street.”
Joinery
For those who want to combine multiple pieces of wood, advanced joinery techniques can be used to add both strength and beauty to your cribbage board. Dovetail joints or mortise-and-tenon joints not only secure the board together but also serve as a testament to your woodworking skills.
Pyrography
Pyrography, or wood burning, is a technique where you use a heated tool to burn designs into the wood. This can be used to add detailed artwork or to darken the scoring tracks for better visibility. It's a way to personalize your board with your signature style.
Epoxy Resin
Epoxy resin can be used to fill in carved or routed sections of your cribbage board, making a smooth, glass-like finish. You can add pigments or even small objects like coins or photos before the resin sets to build a unique and personal touch.
Practice these techniques patiently; they will enhance your cribbage board. Prioritize safety with tools and materials, and seek advice from experienced woodworkers as needed.
Troubleshooting Common Issues
Building a DIY cribbage board can be a rewarding project, but sometimes, you might encounter a few hiccups along the way. Here's a helpful guide to troubleshooting common issues you may face, ensuring your cribbage board turns out just right.
Misaligned Holes
If your peg holes aren't lining up properly, it could be due to a misaligned drill or an incorrect template. To fix this, double-check your template and use a drill press for consistent alignment. If you don't have a drill press, a simple drill guide can help keep your hand drill straight.
Wood Splitting
Splitting can occur if the wood is too dry or if you're drilling too close to the edge. To prevent this, ensure your wood has the proper moisture content and always drill holes at least one-quarter inch from the edge. If splitting happens, you can use wood glue and clamps to repair the split, then sand it down once it's dry.
Rough Edges
Rough edges around the holes or on the board's surface can be smoothed out with fine-grit sandpaper. Sand in the direction of the wood grain and progress to finer grits until the surface is smooth to the touch.
Stain or Paint Issues
If the stain or paint isn't applying evenly, it could be due to uneven sanding or residue on the wood. Make sure to sand the board thoroughly and wipe it down with a tack cloth before applying any finish. Test your stain or paint on a scrap piece of wood to ensure it looks as expected.
Pegs Not Fitting
Pegs that don't fit could be due to using the wrong drill bit size or wood swelling. Check that you're using the correct bit size for your pegs. If the wood has swelled, you can gently re-drill the holes with the same bit to clean them out.
Finish Not Drying
If your finish isn't drying, it could be due to high humidity or applying too thick of a layer. Apply thin layers of finish and allow ample drying time between coats. If possible, work in a controlled environment where you can manage the humidity.
With patience and care, you'll soon have a beautiful, functional cribbage board. Each problem has a solution; learn and improve as you go.
FAQs About DIY Cribbage Board
Get answers to common FAQs about DIY cribbage boards. Learn about materials, steps, and tips for making your own cribbage board.
The type of wood you select can vary based on preference and availability. Lighter woods are generally easier to work with, but you can also choose from exotic or domestic woods, or even end-grain designs for a unique look. Consider your budget, tools, and skill level when selecting the wood.
Yes, you can! While standard cribbage boards are around 6 x 17 inches, you have the freedom to build a large board or a custom shape. For beginners, it's recommended to start with a standard size to learn the process before trying more complex designs.
A regulation cribbage board has 120 holes for gameplay. If you’re using a template, it will guide you to drill the correct number of holes, which is typically 397 in total, including the game path and additional scoring sections.
First, cut your wood to match the size of your template. Next, attach the template to the wood using spray adhesive. Then, cut the wood block to the template’s shape and drill the holes as indicated. Finally, sand the board and apply a finish for protection and a polished look.
Accurate spacing of the holes is crucial for a functional cribbage board. To achieve this, use a cribbage board drilling template which you can find online. After cutting your wood to size, attach the template using spray adhesive. Ensure it's aligned properly before drilling. For precision, consider using a drill press and a pegging jig if available. The standard distance between holes is about 1cm, but always follow the specific measurements provided by your template. Remember to drill slowly to avoid splintering the wood and to achieve clean holes.
Conclusion
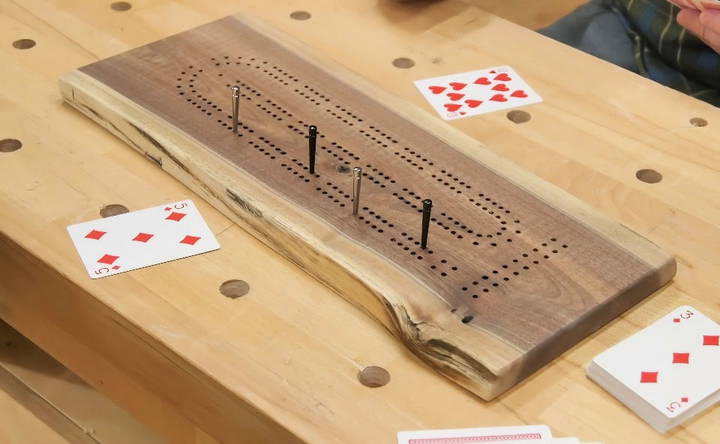
Building a DIY cribbage board is a rewarding project that combines creativity, skill, and a love for the game. Whether you're making it for yourself or as a gift, the personal touch and effort you put into it will make it a cherished item for years to come.
By following this step-by-step guide, you'll ensure each part of the process is manageable and enjoyable. Remember to take your time, measure accurately, and enjoy the woodworking journey.


