I stumbled upon an interesting project one weekend. My friend and I were eager to try making a crucible for melting metal. We had some scrap metal and thought it would be fun to melt it down. The process seemed daunting at first. We needed the right materials and a good plan to get started.
After a lot of reading, we found simple steps to make a crucible. We gathered materials like clay and sand, and followed clear instructions. It felt satisfying to make something useful with our own hands.
I'm sharing this guide to help you make your own crucible too. With these steps, you can get started on your metal melting project easily.
Materials Needed
Before diving in, let's gather the necessary materials. Each component is crucial for building a robust crucible:
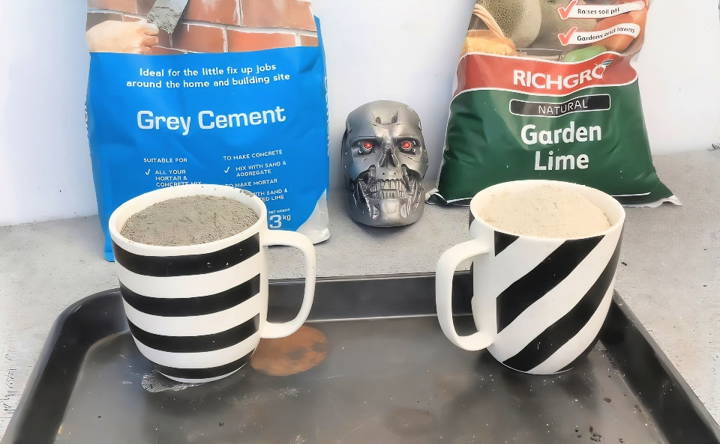
- Grey Cement: Essential for forming the base of your crucible. Cement provides the necessary strength.
- Garden Lime: Acts as an essential additive, enhancing the cement's heat resistance.
- Water: To mix with the cement and garden lime to form a paste.
- Plastic or Paper Cup: Serves as a mold for shaping the crucible.
- Plastic Ball: Used to make the cavity inside the crucible.
- Bucket: For mixing the cement, lime, and water.
- Borax: For glazing the inside of the crucible to make it non-stick.
- Torch: Necessary for glazing and preparing the crucible.
- Protective Gear: Always important for safety when handling cement and using a torch (e.g., gloves, goggles).
Step by Step Instructions
Learn how to make a homemade DIY crucible with our step-by-step DIY guide. Easy instructions from mixing ingredients to melting metal.
Step 1: Mixing the Ingredients
Firstly, ensure you have a clean, dry bucket. Measure out one cup of grey cement and one cup of garden lime.
- Combine Ingredients: Pour both into the bucket. The one-to-one ratio ensures the mixture has the right consistency and properties.
- Add Water: Gradually add water while stirring until you achieve a thick, smooth paste. This mixture should not be too runny.
Step 2: Preparing the Mold
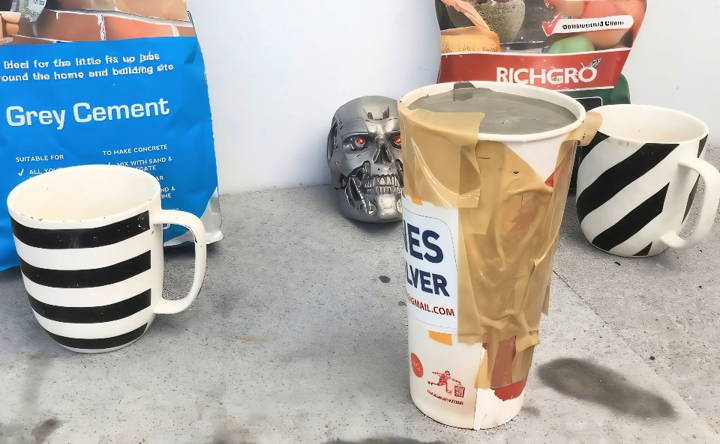
Next, take your plastic or paper cup and the plastic ball.
- Place the Ball: Drop the plastic ball inside the cup. It will form the interior cavity of your crucible.
- Pour the Mix: Quickly pour the cement mixture into the cup, covering the ball and filling up the cup. Work swiftly as the mixture sets fast.
- Settle the Mix: Tap and shake the cup gently to remove air bubbles. This ensures a uniform density and strength.
Step 3: Allow to Dry
Patience is key in this phase. Your crucible needs adequate time to set and dry properly.
- Initial Setting: After about four hours, you'll notice the cement starting to harden.
- Final Curing: Let the mold sit undisturbed for a full day or longer. The longer you let it cure, the stronger it will be.
Step 4: Removing the Mold
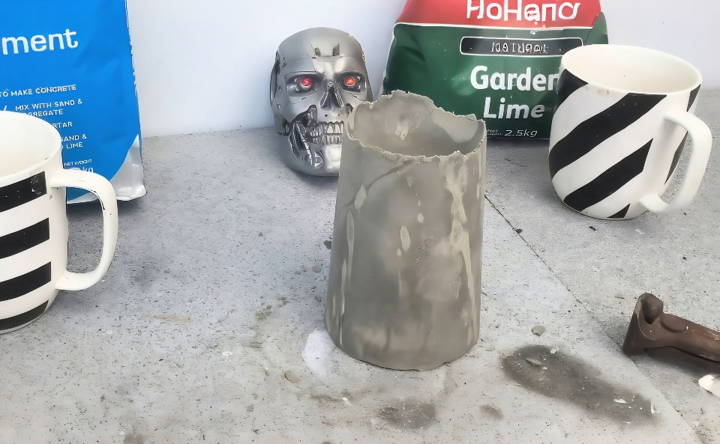
Once dried, carefully remove the plastic or paper cup.
- Extract the Ball: You might need to pop or cut the plastic ball to take it out smoothly.
- Finalize Drying: Let the now-formed crucible sit a bit longer to ensure full dryness.
Step 5: Preparing the Crucible with Borax
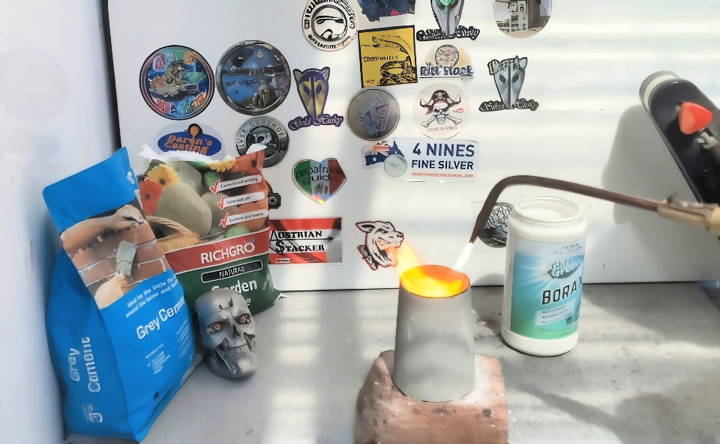
To prevent metals from sticking and improve the durability of your crucible, we need to glaze it with borax.
- Sprinkle Borax: Put a layer of borax inside the crucible.
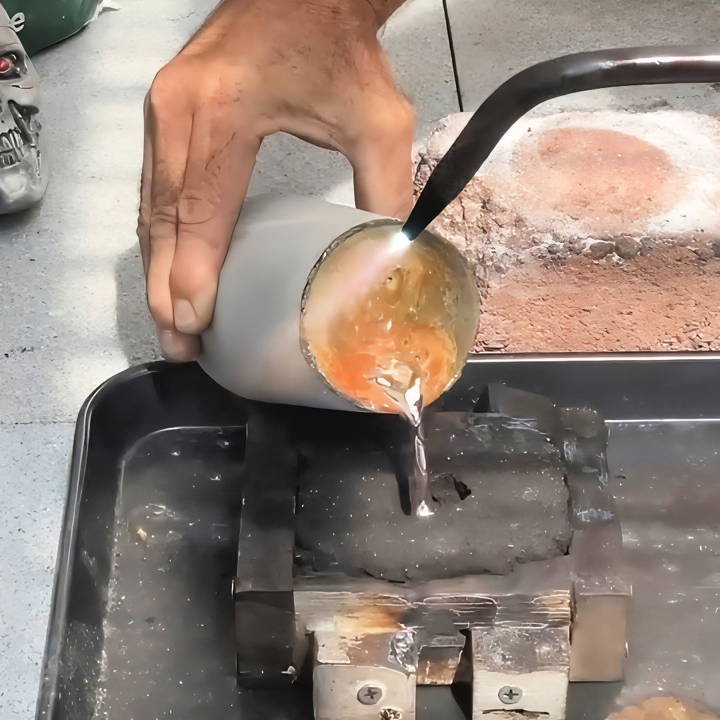
- Heat with Torch: Using the torch, melt the borax evenly across the inner surface. This will take about 7-8 minutes. Ensure you get a smooth, glassy glaze.
Step 6: Melting Metal in Your Homemade Crucible
Here's the moment of truth. We will test our crucible by melting metal in it.
- Setup: Place your crucible in a safe, heat-resistant area.
- Add Metal: Insert a piece of silver or any metal you wish to melt.
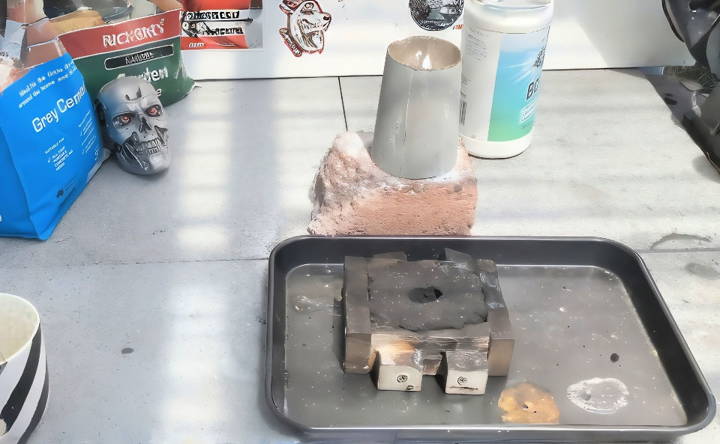
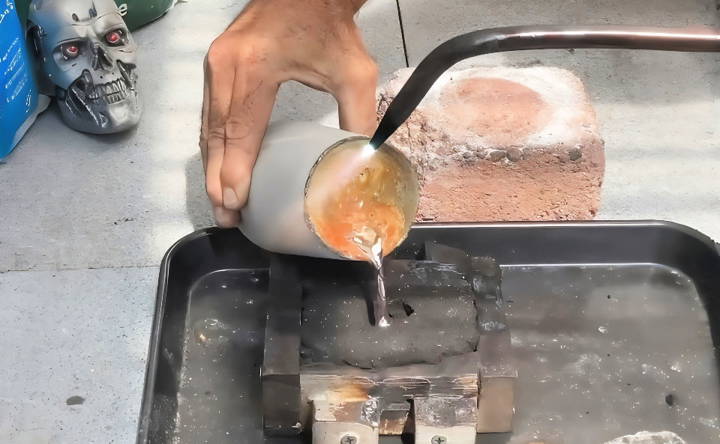
- Torch Again: Fire up the torch and direct it at the metal inside the crucible. Ensure that the torch rotates to distribute heat evenly.
Step 7: Testing and Finishing Touches
After successfully melting the metal, you can assess the crucible's performance.
- Check for Durability: Ensure the crucible withstands the high heat without any apparent damage.
- Safety Handling: Notice how I could handle the crucible with bare hands. Even though the top part heats up, the bottom remains cool, making it convenient and safe.
Advanced Techniques in Crucible Making
When it comes to crucible making, advancing beyond the basics can lead to improved durability and efficiency in your metalworking projects. Here, we'll explore some advanced techniques that can enhance the performance of your DIY crucibles.
Understanding Your Materials
The first step in advanced crucible-making is to understand the materials you're working with. A clay crucible recipe typically involves a mix of clay and grog—a finely crushed material that adds durability. The proper combination and firing of these materials in a kiln are crucial for building a crucible that can withstand high temperatures.
Crafting with Precision
Crafting a crucible requires precision. The thickness of the walls and the smoothness of the surface are important factors that affect the crucible's ability to hold molten metal. Ensure that the walls are even and the surface is as smooth as possible to prevent hot spots and ensure even heating.
Firing Techniques
Firing your crucible in a kiln is a delicate process. The temperature and duration of firing depend on the type of clay used. It's essential to fire the crucible at the right temperature to achieve optimal strength and heat resistance.
Experimenting with Mixtures
Experimenting with different clay mixtures can yield crucibles tailored for specific purposes. For instance, adding more grog to the mixture can increase the crucible's resistance to thermal shock, making it more suitable for rapid temperature changes.
Design Considerations
The design of your crucible should reflect its intended use. For high-temperature metals, consider a thicker base to withstand the increased heat. For metals with lower melting points, a thinner crucible may suffice, allowing for quicker heating and cooling cycles.
Advanced Shaping Tools
Using advanced shaping tools can help achieve more complex crucible designs. Tools like potter's wheels or custom molds can make uniform and precise shapes that are difficult to achieve by hand.
Reinforcement Techniques
For added durability, consider reinforcing your crucible with metal bands or mesh. This can help maintain the crucible's shape under the stress of repeated heating and cooling.
Testing and Refinement
After crafting your crucible, it's important to test it with non-critical melts. This allows you to refine your technique and make adjustments before using it for important projects.
Use these advanced techniques for better crucibles in metalworking. Patience and detail are crucial.
Troubleshooting Common Issues in DIY Crucible Making
Making your own crucible can be a rewarding DIY project, but it's not without its challenges. Here are some common issues you might encounter and how to resolve them:
Cracks and Breakage
- Problem: Your crucible may develop cracks or break due to thermal shock or improper drying.
- Solution: Ensure your crucible dries slowly and evenly before firing. Increase the grog content for better thermal shock resistance.
Uneven Heating
- Problem: If your crucible heats unevenly, it can lead to hot spots that weaken the structure.
- Solution: Use a kiln with uniform temperature distribution and turn the crucible occasionally during the firing process.
Difficulty in Shaping
- Problem: Shaping the crucible can be tough if the clay mixture isn't right.
- Solution: Achieve the right consistency by adjusting the clay-to-grog ratio. The mixture should be firm but workable.
Melting or Deformation
- Problem: The crucible melts or deforms at high temperatures.
- Solution: Use materials that can withstand the maximum temperature of your projects. For high-temperature metals, consider a clay body with a higher melting point.
Contamination of Metal
- Problem: Impurities in the crucible material can contaminate the metal.
- Solution: Use pure materials. Avoid grog made from crushed firebricks, which may contain impurities.
Short Lifespan
- Problem: Your crucible may not last as long as you'd like.
- Solution: Understand that DIY crucibles may have a shorter lifespan than commercial ones. Plan to make replacements as needed.
Anticipate problems and handle them well, and you'll have a successful DIY crucible.
Safety Guidelines for DIY Crucible Projects
Working with crucibles involves high temperatures and potentially hazardous materials, so safety must be your top priority. Here's a comprehensive guide to staying safe while crafting and using your DIY crucible:
Personal Protective Equipment (PPE)
- Wear the Right Gear: Always wear heat-resistant gloves, safety goggles, a face shield, and a fire-resistant apron. This PPE will protect you from burns, flying debris, and harmful fumes.
Workspace Setup
- Keep It Clean and Organized: Your workspace should be tidy, with a clear area around the furnace or heat source. Make sure all flammable materials are stored away from the heat.
Ventilation
- Breathe Easy: Ensure your workspace is well-ventilated. Fumes from melting metals can be toxic, so it's crucial to have a good airflow system or work in an open area.
Handling Materials
- Move Carefully: When moving the crucible, use proper lifting techniques and crucible tongs designed to handle the weight and heat. Never rush this process.
Heat Source Management
- Control the Flame: If you're using a gas furnace, check for leaks and ensure the flame is stable before starting. Electric furnaces should have all wiring inspected regularly.
Emergency Preparedness
- Be Ready for Anything: Keep a fire extinguisher rated for metal fires nearby. Know how to use it and have a first aid kit accessible.
Training and Knowledge
- Know Your Stuff: Before starting, understand the melting points of different metals and the maximum temperature your crucible can withstand. Misjudging these can lead to accidents.
Supervision
- Never Work Alone: Always have someone nearby when melting metals. If an accident occurs, immediate help can be crucial.
Following these safety tips ensures safe crucible-making and metalworking. Keep practicing safety for long-term enjoyment.
FAQs About DIY Crucibles
Discover the answers to FAQs about DIY crucibles, from materials and methods to safety tips and best practices for successful projects.
A DIY crucible is a container typically made from metal or clay that can withstand very high temperatures. It’s used for melting and casting metals like aluminum, gold, and silver. You can make one at home using simple materials like steel cans or firebricks.
Always preheat your crucible slowly to avoid thermal shock. After use, let it cool down gradually to prevent cracking. If you notice any cracks, it’s time to retire that crucible. Remember, safety first: wear protective gear and work in a well-ventilated area.
Safety is paramount when using a DIY crucible. Always wear heat-resistant gloves, eye protection, and a face shield. Work in a well-ventilated area, preferably outdoors. Secure the crucible in a stable position, and never leave it unattended while it’s hot. Use proper tongs or lifting tools to handle the crucible.
Heat the crucible slowly to prevent thermal shock, which can cause cracks. Use a consistent heat source like a propane torch or a furnace. When finished, allow the crucible to cool down naturally; rapid cooling can also lead to damage. If using a clay crucible, place it on hot coals after use to cool slowly.
Yes, a well-maintained crucible can be reused multiple times. Inspect it before each use for any signs of wear or damage. If you find cracks, warping, or holes, it's time to replace it. For steel crucibles, look for thinning walls which indicate it's nearing the end of its life cycle.
Conclusion
Wrapping up, learning how to make a crucible for melting metal opens up a world of DIY crucibles and limitless possibilities for your projects. By understanding the process and gathering the right materials, you can confidently make homemade crucibles that suit your specific needs.


