Making a DIY marble maze is a fun and engaging activity that suits both children and adults. Building your own marble maze can be an exciting way to enhance problem-solving skills and creativity. All you'll need are some basic materials like cardboard, glue, scissors, and a few marbles. You can make simple routes or more intricate paths, depending on your skill and creativity.
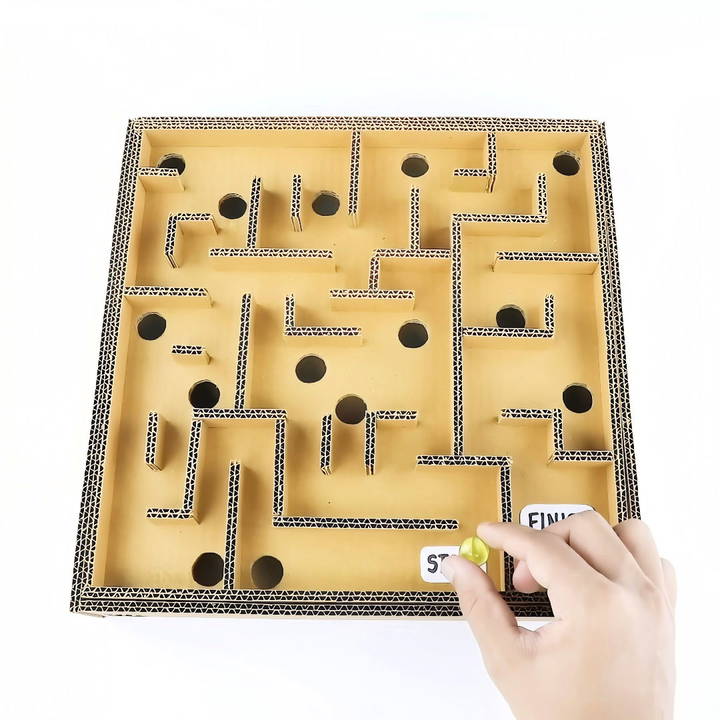
To start making a marble maze, outline your design on the cardboard. Use the glue to attach barriers and make paths for the marble to travel through. Once everything is in place and dry, you can test the maze by rolling a marble through it to see if it works as intended. Making a marble maze is an innovative and educational way to spend your time, and it makes for a great bonding activity with kids.
Ready to dive deeper? Explore the next section for step-by-step instructions and tips on making the perfect DIY marble maze.
Materials You Will Need
Before getting started, it's essential to gather all the necessary materials. Here's a list of what you'll need and why:
Materials List
- Cardboard: It's sturdy and easy to work with.
- Ruler and Pencil: For precise measurements and drawing.
- Scissors or Box Cutter: To cut the cardboard into desired shapes.
- Hot Glue Gun and Glue Sticks: For assembling the maze reliably.
- Marbles: The star of the game.
- Paint and Brushes (Optional): For decorating your maze.
Why These Materials?
- Cardboard: It serves as the primary material for the maze structure, providing the necessary rigidity and durability.
- Ruler and Pencil: Precision is key in designing the maze, and these tools ensure accuracy.
- Scissors or Box Cutter: These tools help you make clean cuts for a tidy maze setup.
- Hot Glue Gun: Ensures the pieces stay firmly in place, avoiding any frustration during gameplay.
- Marbles: Without these, you wouldn't have a marble maze!
- Paint and Brushes: This is purely for aesthetic purposes to make your maze more visually appealing.
Step by Step Instructions
Learn how to make a DIY marble maze with our easy step-by-step instructions. Perfect for all ages, this guide covers design, cutting, assembly, and more!
Step 1: Draw a Simple Maze Design
Once you have all your materials, the first step is to design your maze. Here's how:
Drawing Your Maze
- Find a Flat Workspace: A clean, flat area is essential for drawing and cutting.
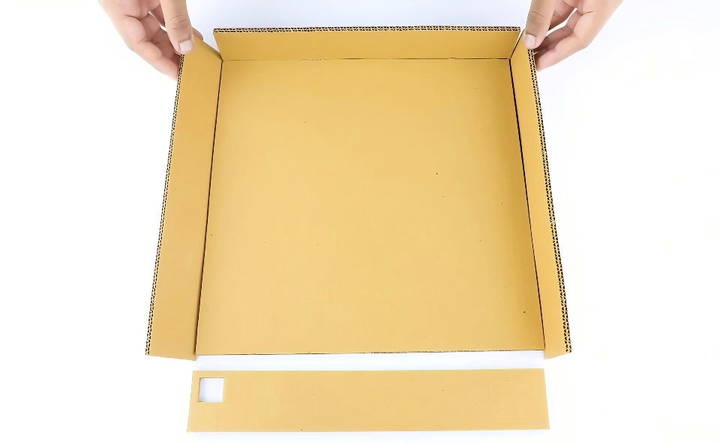
- Measure the Cardboard Base: Decide the size of your maze; let's say 30cm x 30cm.
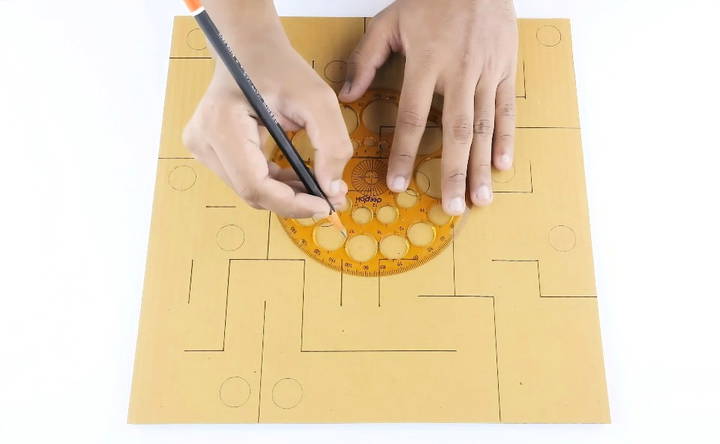
- Draw Your Maze: Using your ruler and pencil, sketch a simple maze design on the base. Keep it relatively easy if you're planning for kids to use it.
Step 2: Cut Out All the Pieces
Now that your design is ready, it's time to cut out the necessary pieces.
Cutting Process
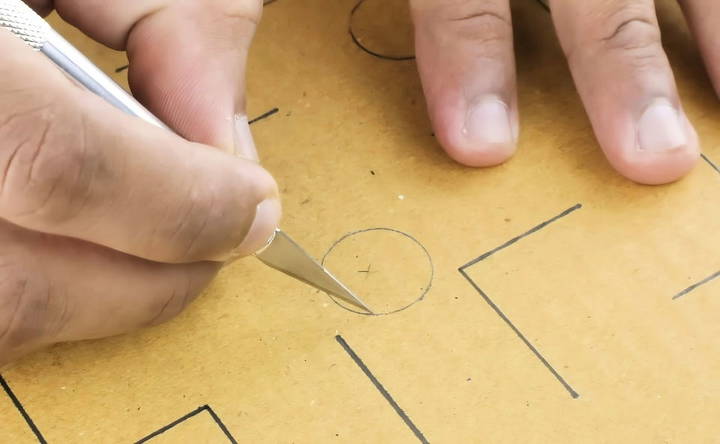
- Cut the Base: With scissors or a box cutter, cut the cardboard to your measured dimensions.
- Cut Maze Walls: Measure and cut strips of cardboard approximately 2cm high to serve as the walls of the maze.
Step 3: Assemble the Maze
With all the pieces prepared, it's time to bring your maze to life.
Assembling Steps
- Prepare Your Hot Glue Gun: Allow it to heat up.
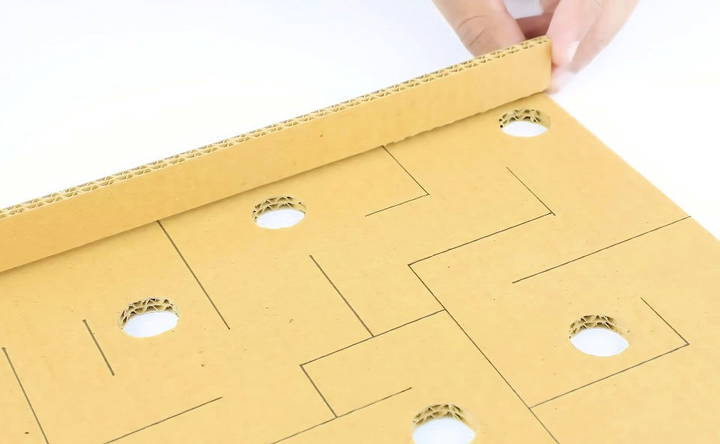
- Glue Maze Walls: Following your drawn lines, glue the strips of cardboard to the base to form the walls. Be precise and careful.
- Ensure Stability: Press down on each wall for a few seconds to make sure the glue sets properly.
Step 4: Add Decorative Elements (Optional)
If you want to make your maze look fantastic, now is the time to paint and decorate it.
Decorating Tips
- Base Painting: Paint the base in a color that contrasts well with the walls.
- Wall Painting: You can color-code the walls or add patterns to them.
Step 5: Add the Marble and Play
After the glue has dried and the paint (if you used any) has settled, you are ready to play.
How to Play
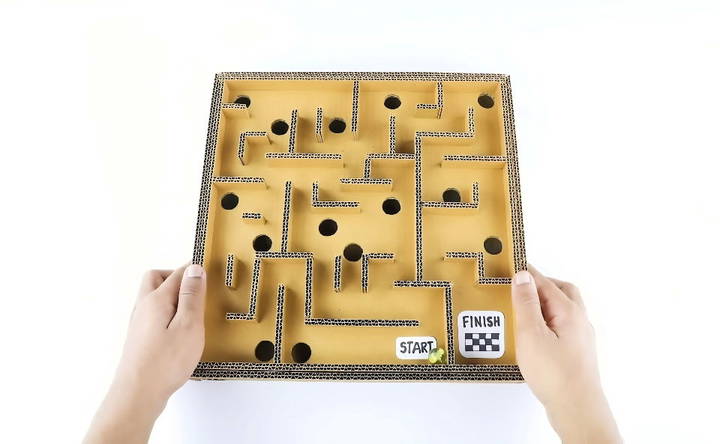
- Place the Marble: Put the marble at the start of your maze.
- Navigate the Maze: Tilt and turn the maze platform to maneuver the marble from the start to the finish.
- Challenge Friends: Time how long it takes each person to complete the maze or see who can do it fastest.
Tips for Crafting a Perfect Marble Maze
Here are some tips based on my personal experience:
- Start Simple: If it's your first time, a simple maze is a good start. You can always make more complex ones later.
- Secure the Walls: Make sure each piece is well glued to avoid any part coming off during the game.
- Test Frequently: As you build, periodically test the maze to ensure the paths are clear and the marble moves smoothly.
- Innovate: Experiment with different obstacles and path twists to make the game more interesting.
- Family Activity: Involve kids or family members in the creation process, turning it into a delightful family bonding activity.
Customization and Personalization Tips
Making a DIY marble maze is not just about following a set of instructions; it's an opportunity to express your creativity and make something unique. Here are some tips to help you customize and personalize your marble maze:
- Choose a Theme: Select a theme that resonates with you or the person you're making the maze for. It could be anything from a favorite color or pattern to a beloved movie or book. For example, if you're a fan of space exploration, you might design your maze to resemble a galaxy.
- Color Coordination: Use colors to make your maze more visually appealing. You can paint the walls in different shades or use colored marbles. If you're making the maze for a child, bright primary colors can be both attractive and educational.
- Add Obstacles and Features: Think beyond simple walls. Add interesting obstacles like bridges, tunnels, or ramps. You can use everyday items like straws, popsicle sticks, or cardboard pieces to make these features.
- Personalize with Decorations: Decorate your maze with stickers, drawings, or small figures. This is a great way to give your maze character. For example, if you're using the space theme, you might add star stickers or a small rocket ship.
- Adjust the Difficulty: If you're making the maze for different age groups, consider making adjustable difficulty levels. For younger children, wider paths and fewer obstacles might be best. For older kids or adults, you can add more complex turns and dead ends.
- Incorporate Learning Elements: If the maze is for educational purposes, incorporate elements that can aid learning. For instance, you could add numbers or letters along the path for children to follow, turning playtime into a fun learning experience.
- Make it Interactive: Consider adding elements that require interaction, like doors that need to be opened manually or sections where the marble needs to be lifted to the next level. This can make the maze more engaging and fun.
The goal is to make your marble maze a reflection of your personal style or the interests of the person you're making it for.
Advanced Techniques and Mechanisms
When you're ready to take your DIY marble maze to the next level, incorporating advanced techniques and mechanisms can transform a simple maze into an interactive masterpiece. Here's how you can enhance your maze with some innovative ideas:
- Incorporate Elevators and Lifts: Add a vertical dimension to your maze with elevators or lifts. You can make a simple lift using a platform and a pulley system that raises the marble to a new height, adding a fun and challenging element.
- Use Gates and Doors: Install gates or doors that the marble can trigger to open. This can be as simple as a swinging door made from cardboard that the marble pushes, or more complex, like a gate that opens with a lever system.
- Add Moving Obstacles: Make obstacles that move, such as rotating discs or swinging pendulums. These dynamic elements require precise timing and add an exciting challenge to the game.
- Experiment with Electronics: If you're comfortable with basic electronics, consider adding components like LED lights to indicate the start and end of the maze or sensors that detect the marble's passage and trigger changes in the maze layout.
- Programmable Parts: For those with coding skills, programmable microcontrollers like Arduino can be used to control motors, lights, and sensors, making your maze an interactive experience.
- Magnetic Mechanisms: Use magnets to make invisible forces that can guide or repel the marble. This can add an element of surprise and requires players to think about the unseen factors affecting the marble's path.
- Sound Effects: Incorporate sound effects that activate when the marble hits certain points. This could be as simple as a bell at the finish line or electronic sounds triggered by sensors.
Integrating advanced techniques makes your marble maze engaging and educational in physics, engineering, and electronics. Ensure safety, secure components to prevent choking hazards for kids.
FAQs About DIY Marble Maze
Discover answers to your FAQs about DIY marble maze. Learn tips, materials, and step-by-step guidance to make fun and engaging marble mazes at home.
A DIY marble maze is a homemade puzzle that involves guiding a marble through a path carved out within a box or a flat surface. The maze is typically maked using materials like cardboard, straws, or playdough. You start by placing the marble at a designated point, and by tilting the maze, you use gravity to move the marble through the twists and turns to reach the end point.
Yes, building a marble maze can be a fun and educational activity. It demonstrates scientific principles like Newton’s Laws of Motion and the transformation of potential energy into kinetic energy. It also encourages problem-solving, design skills, and understanding of spatial relationships.
To increase the difficulty of your marble maze, consider the following:
Add more complex turns and dead ends.
Vary the heights of the walls to require more precise control.
Introduce obstacles that the marble must bypass.
Time the runs to encourage speed and efficiency. These adjustments can make the maze more engaging and test your dexterity and planning skills.
When making and playing with a marble maze, keep these safety tips in mind:
Use a low-temperature glue gun if glue is necessary, to prevent burns.
Be cautious with sharp tools like scissors or box cutters when cutting materials.
Supervise young children to ensure they don't swallow small parts like marbles. By following these guidelines, you can enjoy a safe and fun crafting experience.
Personalizing your marble maze is a great way to make it uniquely yours. Here are some ideas:
Paint or color the base and walls to add a vibrant look.
Theme your maze after your favorite movie, book, or game by adding elements that represent it.
Label the start and end points with creative names or symbols.
Add levels to your maze by making a multi-layered structure.
Use different materials for the walls, like popsicle sticks or LEGO bricks, for a new texture and challenge. Remember, the key to personalization is creativity, so use your imagination and have fun with it!
Conclusion
Making a DIY marble maze game is not only fun but also an excellent way to engage your creativity. By following this guide, you'll make a sturdy, entertaining game in no time. Remember, the key is to have fun and enjoy the process of creation.


