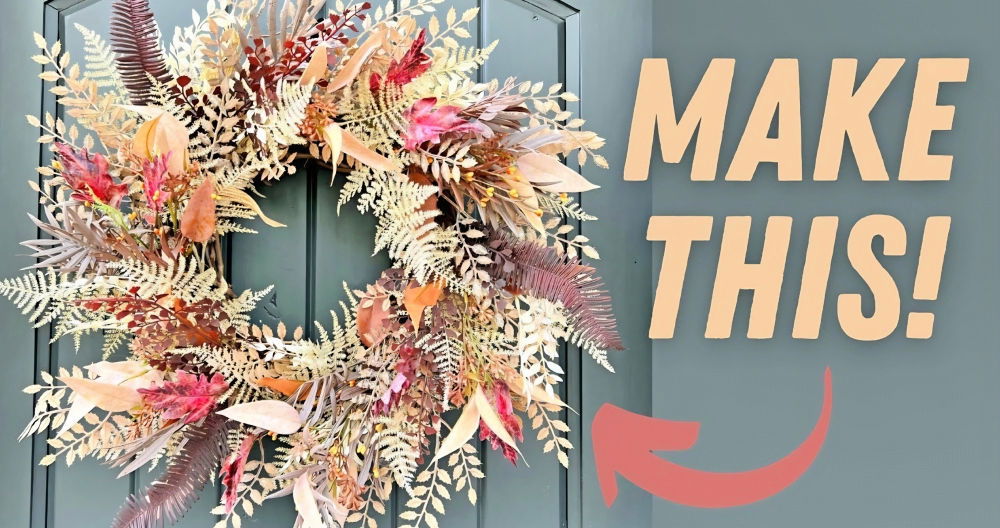
A wreath on your front door is a simple yet elegant way to express your personal style and welcome guests. While it might seem like a complicated craft reserved for professional decorators, making a beautiful wreath at home can be a fun, fulfilling project. Learn how to make a DIY door wreath with this guide—perfect for any time of year.
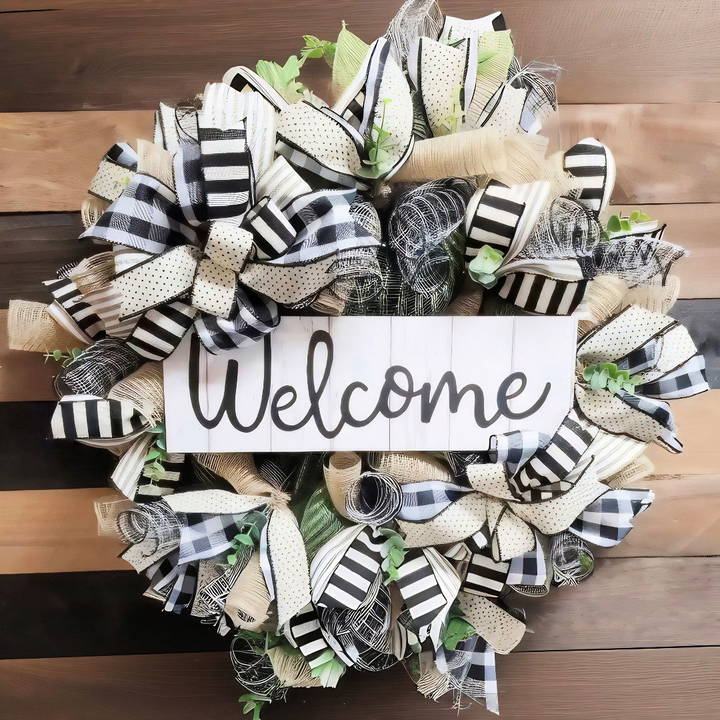
Materials You'll Need
Before diving into the wreath-making process, it's essential to gather all the materials needed. Here's a comprehensive list of everything required to make your wreath:
- 15" Work Wreath Form: This is the base for your wreath, a wireframe that provides structure.
- 10" Deco Mesh: Choose three different types of mesh—commonly burlap, moss green, and buffalo check. Deco mesh adds texture and volume to your wreath.
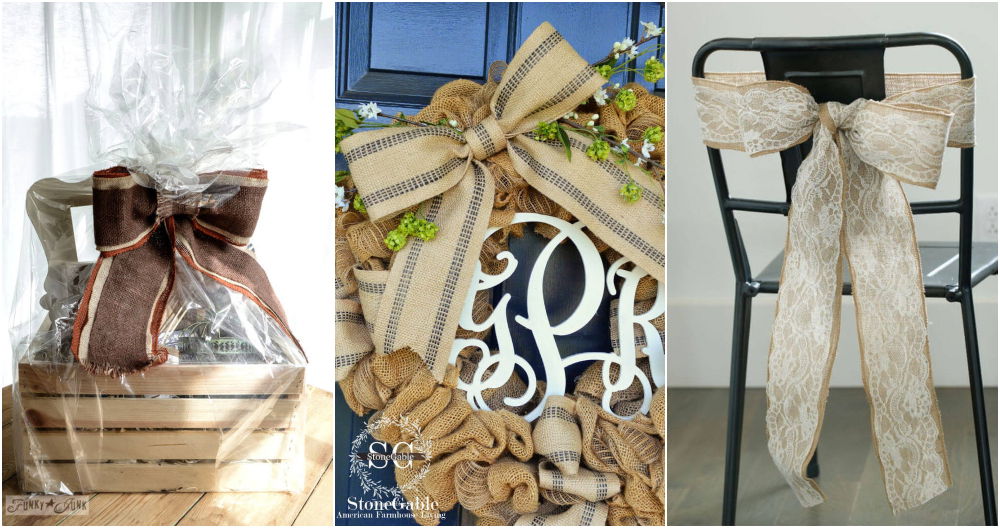
- Wired Ribbon: Select ribbons that complement the colors of your wreath. Wired ribbon holds its shape better than regular ribbon, allowing for a more polished finish.
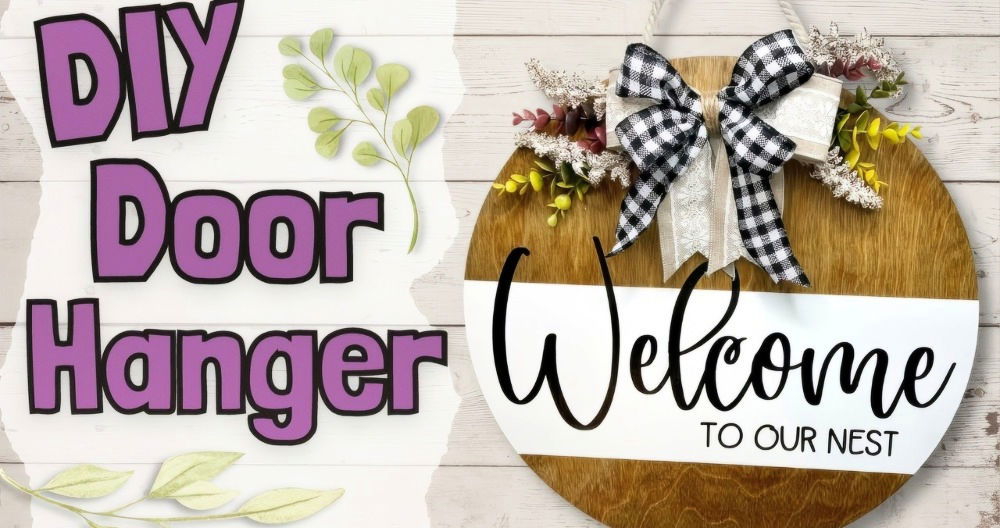
- Welcome Sign: You can personalize your wreath with a “Welcome” sign or any sign that matches the theme of your home or season.
- Greenery: Opt for artificial greenery that adds a natural element and works well with your color palette. Craft stores like Hobby Lobby offer various options.
- Pipe Cleaners or Floral Wire: Used to secure your materials onto the wreath form.
- Mounting Squares: These help attach signs and decorations securely to your wreath.
- Rotary Cutter or Scissors: A sharp rotary cutter ensures clean cuts for your mesh and ribbon.
- Glue Gun & Gorilla Glue Sticks: Used to secure mounting squares, signs, and other decorations to the wreath.
- Small Wire Snips: Useful for trimming floral wire and any excess materials.
Step by Step Instructions
Make a stunning DIY door wreath with our step-by-step guide. Follow these easy instructions for crafting and styling your own beautiful decoration.
Step 1: Prepping the Welcome Sign
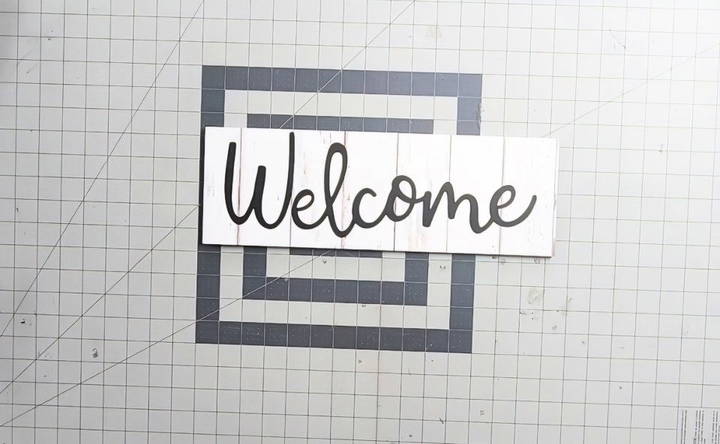
The first step is preparing the welcome sign that will become the centerpiece of your wreath. If you have a wooden or metal welcome sign, it's important to attach it securely to your wreath using mounting squares and floral wire.
- Mounting the Sign: Start by attaching two mounting squares to the back of the sign. These squares should have 3M sticky tape on one side. Remove the protective layer from the tape and press the squares firmly onto the back of the sign.
- Adding Hot Glue: For extra stability, place a small pea-sized amount of hot glue around the edges of the mounting squares. Press them down and hold for about 10 seconds to ensure a secure bond.
- Drying Time: Once the squares are attached, set the sign aside and allow it to dry while you prepare the rest of your wreath.
Step 2: Preparing the Work Wreath Form
Now that the sign is drying, it's time to start working on your wreath form. A 15-inch wire wreath frame will serve as the foundation for your project.
- Arranging the Ties: Your wireframe will have two layers, upper and lower, with ties already attached. These ties are similar to heavy-duty pipe cleaners. For the lower set of ties, point them outward, and for the upper layer, point them toward the center of the wreath. This arrangement will help ensure even coverage as you add deco mesh.
- Start with the Deco Mesh: Choose your first roll of deco mesh (for this guide, we'll use the mossy green mesh). Lay the mesh curl side down on your working surface, and cut a clean edge using your rotary cutter. To start, gather the mesh in your hands, making sure to tuck the edges inward to prevent fraying. Attach the mesh to one of the lower-level ties by placing the gathered end into the tie and twisting it tightly.
Step 3: Adding Poofs to the Wreath
Now that the mesh is anchored, it's time to add some volume to your wreath by making "poofs." The poof method is great because it requires minimal cuts, which reduces fraying and ensures a neater finish.
- Measuring the Poofs: Using a self-healing mat or a standard ruler, measure out 8 inches from the anchored point of the mesh. Gather the mesh at the 8-inch mark, scrunch it into your hands, and then move to the next tie. Open the tie into a wide V, place the scrunched mesh down, and twist the tie to secure it.
- Repeat Around the Lower Layer: Continue adding 8-inch poofs all the way around the lower layer of the wreath form. Once you've made a full circle, you'll reach the starting point.
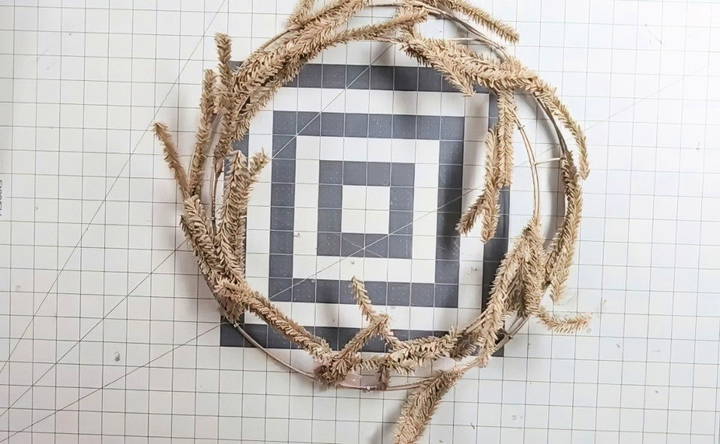
Step 4: Transitioning to the Upper Layer
Once the lower layer of poofs is complete, it's time to move up to the upper layer of the wreath frame.
- Jumping the Mesh to the Upper Layer: To transition the mesh to the upper layer, pull the mesh taut and bring it up to the nearest upper-level tie. Attach it just like you did with the lower layer, twisting it tightly into place.
- Repeating the Poofs: Again, measure out 8 inches for each poof, gathering the mesh and securing it into each tie around the upper layer. Once you complete the upper layer, cut away the remaining mesh, leaving about an inch and a half to tuck under the frame for a clean finish.
Step 5: Adding Deco Mesh Curls
To give your wreath more texture and fullness, add deco mesh curls. For this step, you'll need two types of mesh—burlap and buffalo check.
- Cutting the Mesh: Use your rotary cutter to cut 18 pieces of each type of mesh into 10-inch lengths. This will give you enough curls to fill every set of ties on the wreath.
- Making the Curls: Take one piece of burlap mesh and one piece of buffalo check mesh, and roll each into a cylindrical shape. Secure them with a clip or hold them together with your hand.
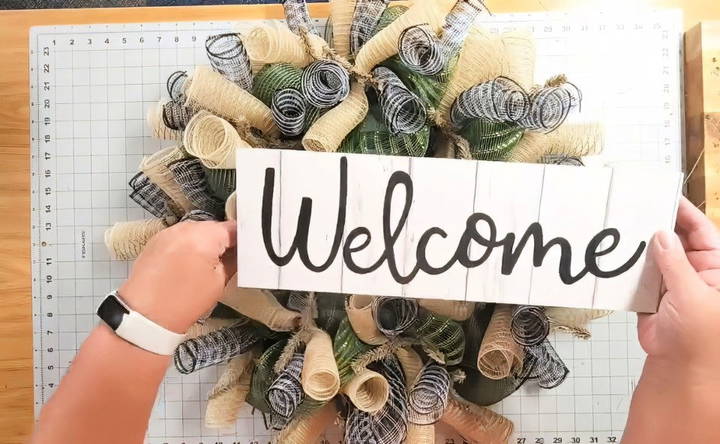
- Attaching the Curls: Open a set of ties and place the two curls (one burlap, one buffalo check) into the tie, crossing them in an X shape. Twist the tie tightly to secure the curls in place.
- Continue Around the Wreath: Repeat this process until you've added curls to every tie around the wreath. This will give your wreath a much fuller, textured appearance.
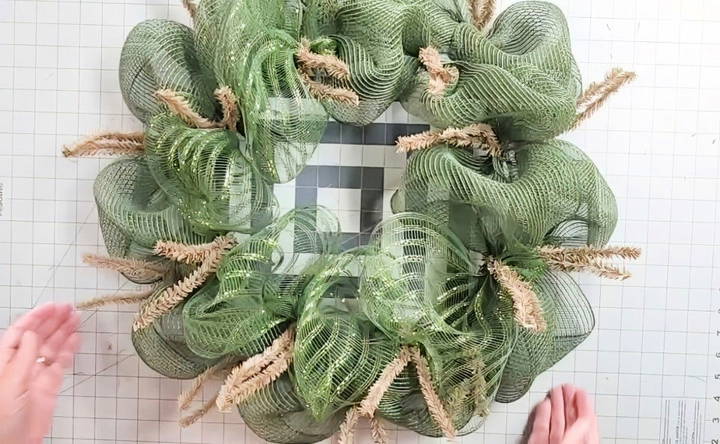
Step 6: Adding the Welcome Sign
Now that the deco mesh and curls are in place, it's time to add your welcome sign, which should be fully dried and ready to go.
- Attaching the Sign with Floral Wire: Use two floral wire stems (about 20 gauge) to attach the sign to the wreath. Fold each wire in half to form a loose V, then run the wire through the mounting squares on the back of the sign.
- Positioning the Sign: Flip your wreath over, poke the wires through the mesh, and twist them tightly around the wireframe to secure the sign. Ensure the sign is centered by positioning it between three sets of ties above and below.
- Securing the Wires: Once the sign is in place, twist the wires a few times around the innermost ring of the wreath form, trim any excess wire, and tuck the ends under with pliers.
Step 7: Making and Attaching Bows
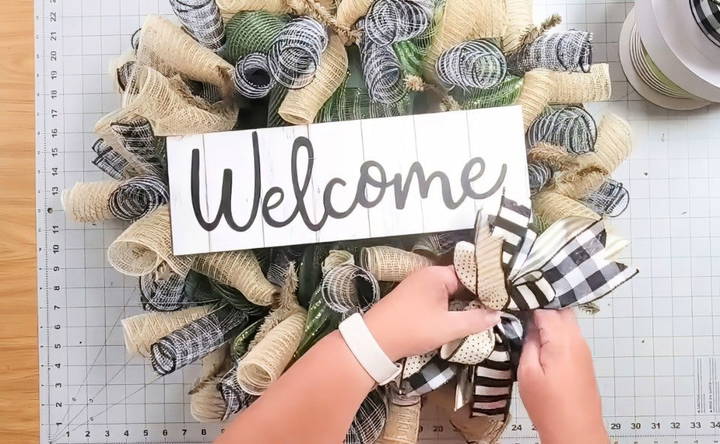
- Forming the Bows: To make the bow, first lay your 2.5-inch wide ribbon flat and measure out about 7 inches for the tail. Pinch it at this point and twist the ribbon to ensure that the "pretty" side faces out. Next, make your first loop by measuring 4 inches, pinching the ribbon again, and folding it back into your hand. Repeat this step to make the second loop on the other side. Be sure to twist the ribbon at each pinch point so that the design stays on the outside.
- Layering the Ribbons: Once you've maked the two loops from the 2.5-inch ribbon, repeat the same process with the 1.5-inch ribbon. This second layer will make smaller loops that add depth and contrast to your bow. Stack the ribbons directly on top of each other, alternating the patterns.
- Securing the Bow: After layering your loops, use a pipe cleaner or a piece of floral wire to tightly secure the middle of the bow. Twist it several times to ensure that the bow holds its shape. Trim any excess wire and tuck the ends neatly.
- Attaching the Bows to the Wreath: Position one bow in the upper left corner of your wreath (around 10 o'clock) and the other in the bottom right corner (around 4 o'clock). Open the ties at these positions, insert the bow, and twist the ties to secure them. Fluff out the loops of the bow by gently pulling them apart and arranging them in a full, rounded shape. You can also curl the tails of the ribbon by wrapping them around your fingers to make a soft, flowing look.
Step 8: Adding Ribbon Tails for Extra Flair
Ribbon tails are a simple yet impactful way to add dimension and elegance to your wreath. You'll need to cut strips of your wired ribbon and attach them to the remaining ties on the wreath.
- Cutting the Ribbon Tails: You'll need two ribbon tails for each tie on your wreath. Since we have already used two ties for the bows, you'll need 16 strips of each type of ribbon. Cut these strips to 10 inches in length. To ensure clean, professional-looking ends, dovetail the ribbon by folding each strip in half lengthwise and cutting a diagonal line from the folded edge toward the outer corners.
- Pairing the Ribbons: For each set of tails, pair a 2.5-inch ribbon with a 1.5-inch ribbon. Lay the smaller ribbon on top of the wider one, and fold them in half lengthwise to find the center.
- Attaching the Ribbon Tails: Pinch the ribbons at the center point and place them in one of the open ties on your wreath, twisting the tie around the center to secure them. Once attached, fluff the tails out into a loose V-shape, pulling them away from the center of the wreath.
- Alternating Ribbon Styles: Alternate between different ribbon patterns to make a dynamic, visually appealing design. Repeat this process until all the ties are filled with ribbon tails.
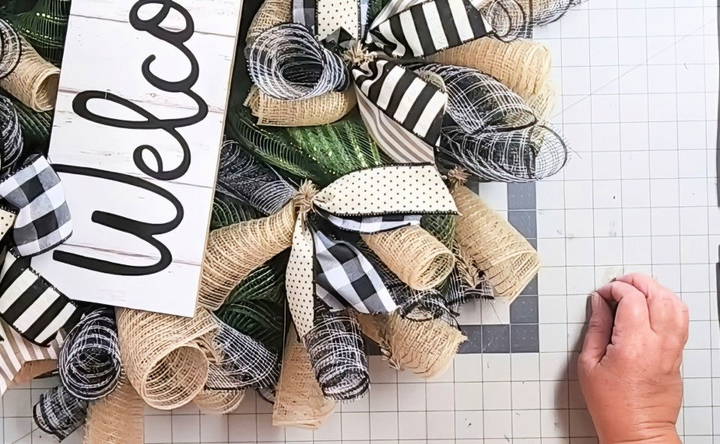
Step 9: Adding Greenery for a Natural Touch
Greenery adds a fresh, organic element to your wreath, softening the look and enhancing its overall aesthetic. The key is to use artificial greenery that complements your deco mesh and ribbon colors. Hobby Lobby, for example, offers a wide selection of greenery that is both durable and visually appealing.
- Choosing the Right Greenery: Select a long vine or bush with multiple stems that you can trim into smaller pieces. Ideally, each piece should be about 3 inches long. You will need one piece of greenery for each set of ties on your wreath, so trim a total of 16 pieces.
- Preparing the Greenery: Once you have your greenery trimmed, use a hot glue gun to apply a small bead of glue to the base of each stem. This will help the greenery adhere securely to the wreath.
- Attaching the Greenery: Insert the glued end of each greenery piece into the ties where your ribbon tails are secured. Press the greenery into the wreath base, holding it for about five seconds to ensure the glue sticks. The greenery should sit nestled between the ribbon tails, adding an extra layer of texture and fullness to your design.
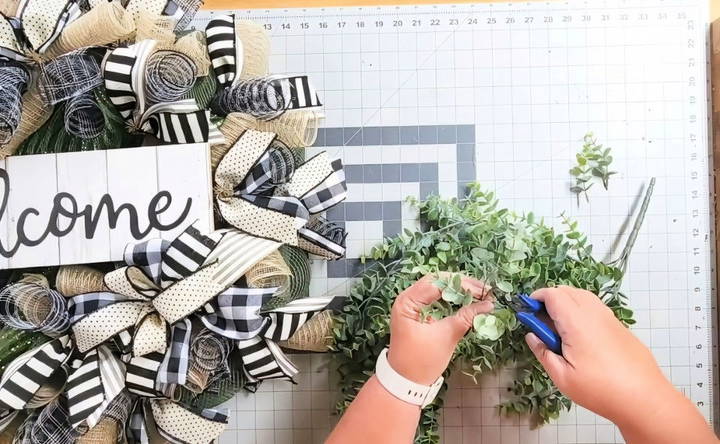
Step 10: Final Touches
Now that all the main components of your wreath are in place, it's time to step back and take a look at the overall design. This step is all about adjusting and fine-tuning the details to ensure your wreath looks its best.
- Fluffing and Adjusting: Start by fluffing out all the elements, including the deco mesh poofs, curls, ribbon tails, and greenery. Make sure the loops of your bows are even and full, and that the tails are arranged nicely. Adjust any ribbons or greenery that look out of place.
- Checking for Balance: Make sure the wreath looks balanced. The bows, ribbons, and greenery should be evenly distributed around the wreath, and the sign should be centered. If one area looks too full or sparse, adjust by moving the mesh or greenery around.
- Securing Loose Pieces: If any parts of your wreath feel loose or unstable, now is the time to secure them. Add extra glue to areas where the greenery or ribbons might need additional support, and check the ties to ensure they're twisted tightly.
Step 11: Hanging Your Wreath
With your wreath now complete, it's time to display it proudly on your front door. Here's how to hang it securely and ensure it stays in place.
- Choosing a Wreath Hanger: You can purchase a wreath hanger that fits over the top of your door or use a Command hook designed for outdoor use. If you choose a Command hook, make sure to apply it to a clean, dry surface and let it set for at least an hour before hanging the wreath.
- Attaching the Wreath: If you're using a wreath hanger, simply place the wreath over the hook or loop on the hanger. For a Command hook, loop a piece of floral wire through the top ring of your wreath form and make a small hanging loop. Attach this loop to the hook on your door.
- Adjusting for Placement: Once the wreath is hanging, adjust its position to ensure it's centered and straight. Step back to check that it's at the right height and that all the elements are displayed clearly.
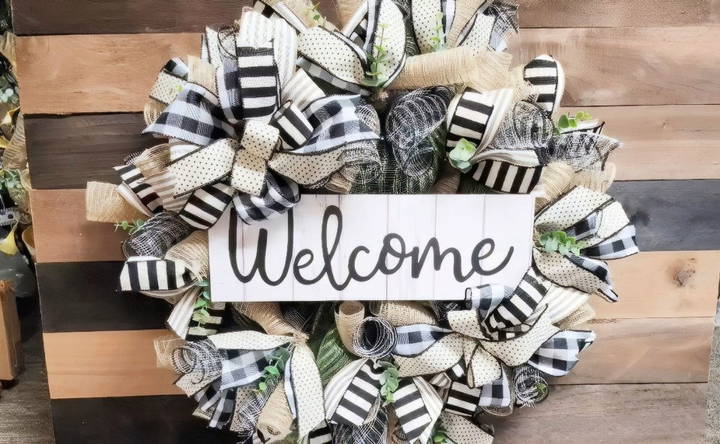
Step 12: Care and Maintenance
To ensure that your wreath lasts for a long time and remains in good condition, follow these simple care and maintenance tips:
- Weather Protection: If your wreath will be exposed to the elements, consider spraying it with a protective sealant to guard against rain and sun damage. You can find UV-protectant sprays at most craft or hardware stores.
- Cleaning: If your wreath collects dust or debris, use a soft brush or cloth to gently clean it. Avoid using water or harsh chemicals, as these can damage the deco mesh and ribbon.
- Storage: When the season or occasion has passed, store your wreath in a cool, dry place. A wreath storage box or a large plastic bag can help protect it from dust and damage during the off-season.
Conclusion
Making a DIY door wreath is a fun, creative way to enhance your home's curb appeal and give guests a warm welcome. With a little time and effort, you can craft a stunning everyday welcome wreath that reflects your style and personality. Whether you're new to wreath making or a seasoned crafter, following these step-by-step instructions ensures a professional-looking result that you can proudly display on your front door.
FAQs About DIY Door Wreath
Discover everything you need to know about DIY door wreaths in our comprehensive FAQ guide, including tips, materials, and step-by-step instructions.
If you run out of a specific color or type of deco mesh, feel free to get creative by using a similar shade or a mesh with complementary accents. As shown in the tutorial, mixing in a mesh with a slight variation, like a touch of gold, can still produce a beautiful and cohesive look.
Deco mesh is prone to fraying, especially at cut edges. To minimize fraying, use a rotary cutter for clean, smooth cuts. Additionally, techniques like the "poof and curl" method reduce the number of cuts needed, helping maintain the integrity of the mesh.
Choose durable, weather-resistant artificial greenery. High-quality plastic greenery from craft stores like Hobby Lobby is often a good choice, as it holds up well outdoors and blends naturally with deco mesh designs.
Use mounting squares with strong adhesive backing to secure your sign. Add a bead of hot glue around the edges of the mounting squares for extra security. Floral wire is recommended to attach the sign to the wreath frame by threading it through the mounting squares.
Yes, though a wire wreath form offers great structure, you can use foam or grapevine wreath bases as alternatives. For these bases, use floral pins or hot glue to secure your materials. However, wire frames are preferred for a lightweight, durable option.
Wired ribbon holds its shape better, making it ideal for making structured, voluminous bows. You can manipulate the ribbon to maintain its form even after adjusting the wreath, ensuring a polished, professional look.
Store your wreath in a cool, dry place, away from direct sunlight to prevent fading. Use a wreath storage box or a large plastic bag to protect it from dust and damage during the off-season.
Poly deco mesh is more durable and weather-resistant, making it ideal for outdoor wreaths, especially if your door lacks a protective overhang. Poly mesh is less prone to fraying and holds up well in various weather conditions.
To ensure balance, position your sign and bows in a way that divides the wreath into even sections. For example, place your sign between three upper and three lower ties. Regularly step back to assess the overall look, ensuring symmetry and even distribution of materials.
Absolutely! Feel free to add more curls, ribbons, or additional layers of greenery for a fuller, more luxurious wreath. Adding textures such as faux flowers or seasonal decorations can further enhance the wreath's appearance.


