Building a drawer that fits perfectly can be simple and rewarding. I remember deciding to make my own DIY drawer for my kitchen last summer. The thrill of making something from scratch was amazing. First, I gathered the necessary materials: wood, screws, a saw, and sandpaper. I took precise measurements of the space where the drawer would sit. It's important to measure accurately to ensure a perfect fit.
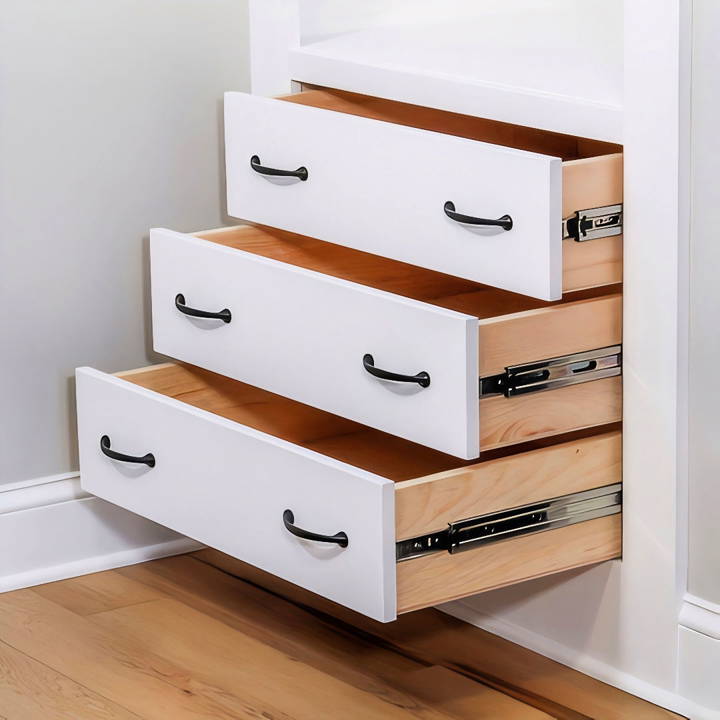
Once I had the materials and measurements in place, I cut the wood according to my specifications. Assembling the pieces was straightforward, with screws and a bit of patience. Sanding the edges made the drawer smooth to the touch. Finally, I installed the drawer, and it fit perfectly, gliding smoothly in and out. The sense of accomplishment was immense, and I hope these steps help you.
Building your own DIY drawer can be incredibly satisfying. Get started with these steps and experience the joy of a perfectly fitting drawer you made yourself!
Materials and Why They're Needed
- Baltic Birch Plywood: For the drawer sides, back, and bottom. It's strong, stable, and void-free, making it ideal for drawer construction.
- Undermount Drawer Slides: These require specific thicknesses, so I use either 1/2-inch or 5/8-inch plywood. The slides ensure smooth opening and closing.
- Wood Glue and Brad Nailer: Essential for quick assembly and securing parts together solidly.
- Table Saw and Miter Saw: For accurate cutting of plywood strips and parts to specific sizes.
- Dado Blade Set or Router: To cut a groove for the bottom panel of the drawer.
- Sanding Equipment: To smooth edges and surfaces before assembly and finishing.
- Finish (Paint, Varnish, etc.): Protects the wood and gives the drawer a polished look.
Step by Step Instructions
Learn how to build DIY drawers with step-by-step instructions, from cutting plywood to final assembly and finishing. Perfect for woodworking projects!
Step 1: Cutting the Plywood Strips
I start by cutting the Baltic Birch plywood into strips on the table saw. The width of these strips matches the height of the drawer box desired. For accuracy and safety, I adjust the fence and blade height accordingly.
Step 2: Cutting the Groove for the Bottom Panel
Next, I adjust the saw blade to cut a 1/4-inch wide groove, 1/2-inch from the bottom of each strip. This is to fit the bottom panel. I always test the groove's size with a scrap piece to ensure a snug fit.
Step 3: Cutting the Parts to Size
With my strips prepared, I move on to cutting the front, back, and sides of the drawer, using the dimensions optimized for undermount slides. I use a miter saw with a stop block for consistent, repeated cuts. This ensures all parts are precisely the same length needed.
Step 4: Assembly
Pre-sanding the inside faces of the parts before assembly makes it easier. I then use wood glue and a brad nailer to put the pieces together. The nails provide immediate hold, allowing the glue to cure without requiring clamps.
Step 5: Preparing the Bottom Panel
The bottom panel is cut to fit snugly into the grooves previously made. It's crucial this piece is accurate to avoid any play in the drawer's structure once assembled.
Step 6: Finishing
Before final assembly, I apply a finish to the inside of the drawer and the bottom panel. This is easier than trying to finish it once completely assembled. Once dry, I assemble the drawer, securing the bottom panel with screws for easy removal if needed.
Modifications for Solid Hardwood
When working with hardwood, the process is similar, but there are a few tweaks. Instead of brad nails, I use pocket hole screws to join the parts. It's also plausible to cut box joints or dovetails for a more traditional look with added strength.
Customization Ideas for DIY Drawers
When it comes to DIY drawers, customization is key to making a piece that not only fits your space perfectly but also reflects your personal style. Here are some ideas to inspire your own unique designs:
- Choose Your Style: Think about the overall look you're aiming for. Do you prefer a modern, sleek design or a rustic, vintage feel? Your choice will influence the materials and finishes you select.
- Paint and Finishes: A fresh coat of paint can transform your drawers. Consider chalk paint for a matte finish or high-gloss paint for a more contemporary look. Staining the wood is another option that can bring out its natural beauty.
- Drawer Pulls and Knobs: These small details can make a big impact. From vintage knobs to modern handles, the options are endless. You can even use unconventional items like leather straps or repurposed items for a unique touch.
- Lining the Drawers: Add a surprise element by lining the drawers with decorative paper or fabric. Not only does this protect the inside, but it also adds a pop of color or pattern when you open the drawer.
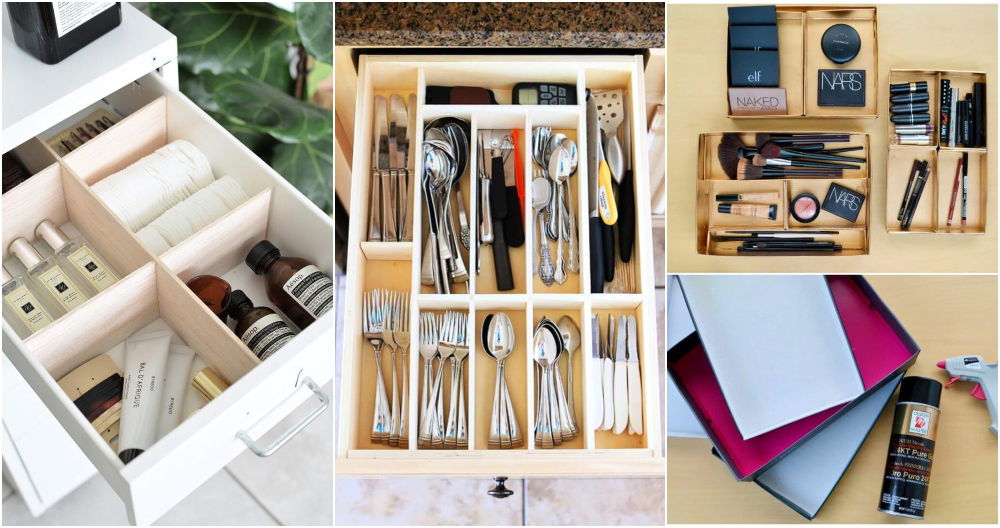
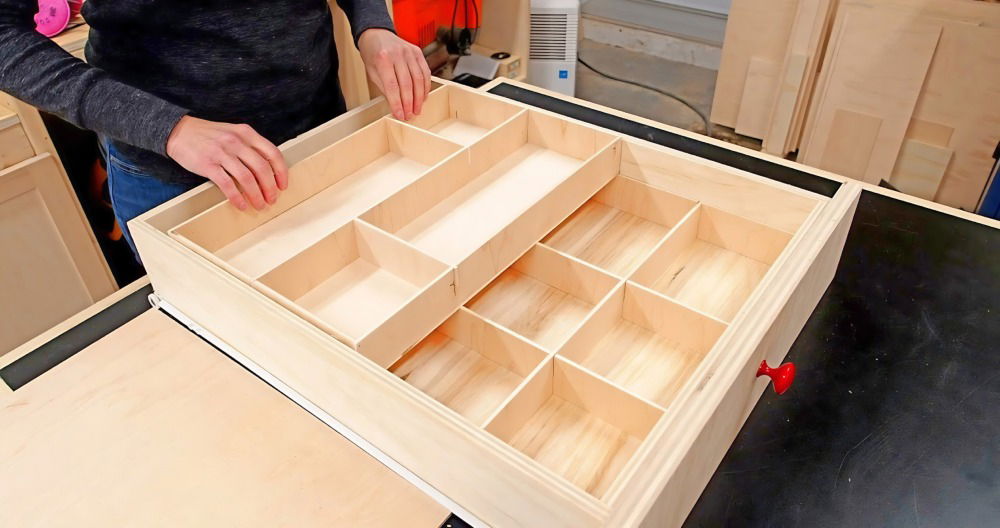
- Dividers and Organizers: Custom drawer dividers can help keep your items tidy. You can build these into your drawers or build adjustable versions for more flexibility.
- Lighting: Installing LED strips inside your drawers can provide functional lighting and add an unexpected design element.
- Mix and Match: Don't be afraid to mix materials and textures. Combining wood with metal, glass, or even acrylic can build interesting contrasts.
- Personal Touches: Incorporate elements that are meaningful to you, such as stenciled designs, hand-painted details, or hardware from a family heirloom.
The beauty of DIY Drawers is that there are no rules. Feel free to experiment and change things up until you build drawers that you love.
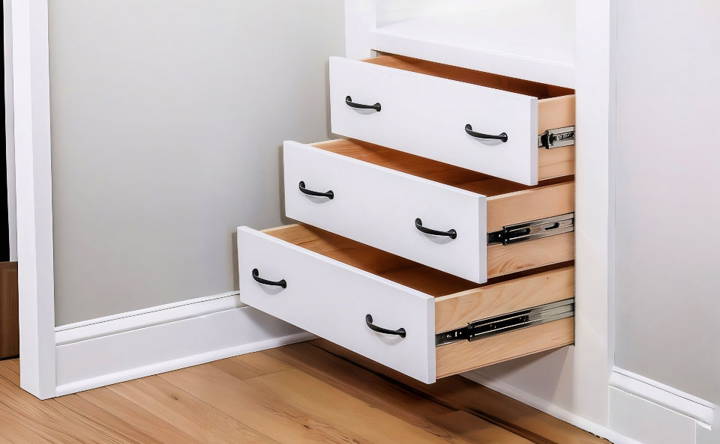
Advanced Techniques for Crafting DIY Drawers
For those who have mastered the basics of DIY and are looking to elevate their craftsmanship, advanced techniques can add both beauty and value to your drawer projects. Here's how you can incorporate some sophisticated methods into your work:
- Dovetail Joints: Known for their strength and durability, dovetail joints are a hallmark of quality in drawer construction. They involve interlocking wedge-shaped cuts that can be made using a special dovetail saw and chisel. For precision, a dovetail jig can be very helpful.
- Soft-Close Slides: Installing soft-close drawer slides can add a touch of luxury to your drawers. They prevent drawers from slamming shut, reducing noise and wear. Carefully measure and align the slides for smooth operation.
- Integrated Lighting: Adding built-in lighting to your drawers isn't just practical; it also adds an upscale feel. LED strip lights can be fitted inside or beneath the drawers to illuminate contents when opened.
- Secret Compartments: For a bit of intrigue, consider building a secret compartment into your drawer. This can be a hidden space at the back or bottom, accessible only by those who know it's there.
- Curved Drawers: If you're up for a challenge, try making drawers with curved fronts. This requires bending wood or using a bandsaw to cut the curve, then carefully sanding and finishing the surface.
- Inlay Work: Inlaying contrasting woods or materials can build stunning visual effects. Use a router to carve out a recess, then glue in your inlay material, which could be a different type of wood, metal, or even stone.
- Veneering: Applying a thin layer of fine wood veneer to your drawer fronts can give the appearance of expensive hardwood without the cost. Use a veneer press or clamps to apply evenly.
- Hand-Carved Details: If you have the skills, adding hand-carved details can make your drawers true works of art. From simple grooves to elaborate patterns, the possibilities are endless.
Incorporate these techniques to enhance your drawers' functionality and make them conversation pieces.
Troubleshooting Common Issues with DIY Drawers
When crafting DIY drawers, you might encounter a few hiccups along the way. Here's a guide to troubleshooting some common issues, ensuring your project stays on track:
- Sticking Drawers: If your drawer isn't sliding smoothly, check for any obstructions. Sand down any areas where the wood may be swollen or rough. Waxing the runners can also help the drawer glide more easily.
- Loose Joints: Over time, drawer joints can become loose. If you notice any wobbling, tighten the screws or add some wood glue to reinforce the joints.
- Drawer Fronts Misaligned: Ensure that all measurements are accurate before cutting. If the fronts are already attached, you may need to loosen the screws, adjust the position, and then retighten.
- Sagging Drawer Bottoms: This often occurs with heavy loads. Consider adding a support rail underneath or replacing the bottom with a thicker material.
- Squeaky Drawers: A squeak usually means there's friction somewhere. Apply a lubricant like silicone spray or graphite powder to the runners.
- Drawer Won't Stay Closed: Install magnetic catches or touch latches to keep drawers firmly shut when not in use.
- Scratches on Surface: Light scratches can be buffed out with fine sandpaper and resealed. For deeper scratches, wood filler may be necessary before refinishing.
- Uneven Finish: Apply stain or paint with even strokes, and always go with the grain of the wood. Multiple thin coats are better than one thick coat.
By addressing these common issues, you can ensure your DIY drawers function well and look great.
Maintenance Tips for Your DIY Drawers
Keeping your DIY drawers in top condition doesn't have to be complicated. Here are some straightforward maintenance tips to ensure they remain sturdy and functional for years to come:
- Regular Cleaning: Dust and debris can accumulate over time. Wipe down your drawers with a damp cloth regularly to keep them clean. For wooden drawers, use a wood-friendly cleaner.
- Tighten Hardware: Drawer pulls and knobs can become loose with use. Periodically check and tighten these fixtures to ensure they remain secure.
- Lubricate Slides: If you have metal slides, a little lubricant can go a long way in keeping your drawers opening and closing smoothly. Use a silicone-based product for best results.
- Check for Wear and Tear: Inspect your drawers for any signs of damage, such as cracks or splinters. Small issues can be fixed with wood glue or filler before they become bigger problems.
- Protect from Moisture: If your drawers are in a damp area, consider using a dehumidifier or silica gel packs to protect against moisture, which can cause warping or swelling.
- Avoid Overloading: Distribute weight evenly, and don't overload your drawers. Too much weight can strain the joints and slides, leading to damage.
- Update Liners: Shelf or drawer liners can protect the interior from scratches and stains. Replace them when they start to wear out or if you want to refresh the look of your drawers.
- Seasonal Adjustments: Wood can expand or contract with changes in humidity. If your drawers become tight or loose with the seasons, adjust the fit as needed.
Follow these tips to keep your DIY drawers looking great and working well. Regular care will make them last longer and stay as beautiful as when you made them.
FAQs About DIY Drawers
Discover everything you need to know about DIY drawers with our comprehensive faqs. Find answers to common questions and get started on your project!
There are three main types of drawer construction: nailed-bottom, recessed-bottom, and captured-bottom. Nailed-bottom is the simplest and least durable, while captured-bottom is more complex but offers a sturdier build. Your choice depends on your skill level and the intended use of the drawer.
Yes, often a drawer that falls out can be fixed without replacing the slides or tracks. You may need to adjust the existing hardware, ensure everything is properly aligned, or secure loose components. Regular maintenance can prevent drawers from falling out.
It's a good idea to inspect your drawer slides and tracks at least once a year. Look for signs of wear, misalignment, or damage. Keeping them clean and well-maintained can extend their life and ensure smooth operation.
To clean drawer slides and tracks, remove any debris or dust with a soft brush or cloth. You can also use a mild cleaner if needed. Avoid harsh chemicals or abrasive materials that could damage the slides or tracks.
When determining the dimensions for your DIY drawer, you need to consider the size of the drawer opening and the thickness of the drawer slides. Measure the width of the opening from side to side, then subtract the thickness of your two drawer slides to get the full width of your drawer. For the height and depth, measure the available space and subtract a small margin to ensure a smooth fit.
Conclusion
Wrapping up, making a drawer that fits perfectly doesn't have to be challenging. With the right tools, measurements, and techniques, you can build beautiful, functional DIY drawers for any space. Remember, accurate measurements and quality materials are the keys to success. Happy crafting!


