Making a musical instrument can be a truly satisfying experience, especially when it's a DIY PVC flute that you've made yourself. In this step-by-step guide, you'll learn how to make a flute in A Major, using low-cost, accessible materials. Before long, you'll have a finely tuned instrument that you can make and enjoy right at home.

Materials Needed
The following materials are essential to crafting your PVC transverse flute. All of these items can be found at most hardware or craft stores:
- PVC Pipe (20mm diameter): The main body of the flute will be a 20mm electric sheath pipe.
- Wood Dowel (20mm diameter): Used as a block for the mouthpiece. The diameter can vary slightly, so choose one that fits snugly into the pipe.
- Tools:
- Measuring tape or ruler
- Hacksaw or PVC pipe cutter
- Round and half-round files
- Drill with a 9.5mm drill bit
- Sandpaper (medium to fine grit)
- PVC glue (optional)
Step by Step Instructions
Learn DIY flute making with step-by-step instructions. From cutting pvc to tuning and finishing, make your own flute in a major.
1. Cutting and Preparing the PVC Pipe
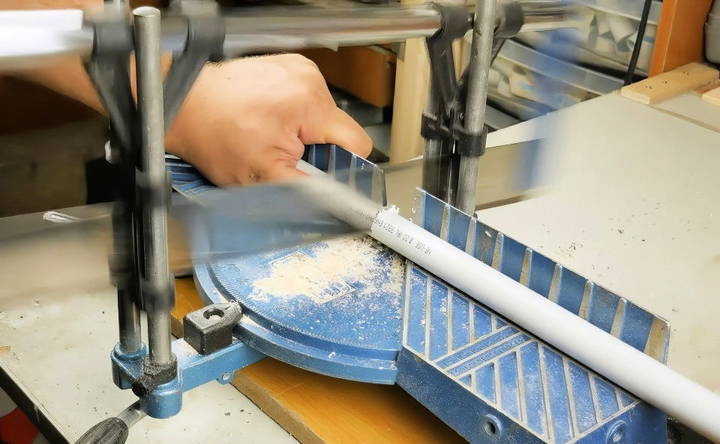
The first step is to cut the PVC pipe to the correct length, which is essential for achieving the right pitch.
- Cutting the Pipe: Measure and cut a 410mm piece from the PVC pipe. This length will serve as the main body of the flute, which is essential for tuning it to the A Major key.
- Preparing the Mouthplate: Cut an additional 30mm piece from the PVC pipe, which will act as the mouthplate. Once cut, split this piece in half so you have two semicircular pieces. This will later be attached to the main body of the flute to make the embouchure hole (where you blow to produce sound).
- Rounding the Edges: Round the edges of the 30mm mouthplate piece with a file. This step helps make a smooth finish and ensures a comfortable mouthpiece for playing.
- Marking the Middle: Locate and mark the middle of the mouthpiece on the pipe. This midpoint is critical as it will help you center the mouthpiece on the main body of the flute.
2. Making the Mouth plate and Embouchure Hole
The mouthplate and embouchure hole are vital components for sound production. Let's break down the steps:
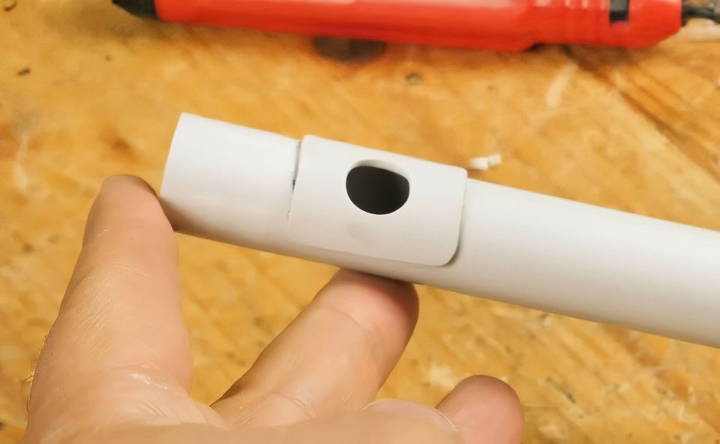
- Attach the Mouthplate: Position the mouthplate 22mm from one end of the main body pipe. Secure it with PVC glue or by simply pressing it into place if it fits snugly.
- Drilling the Embouchure Hole: Using a 9.5mm drill bit, drill a hole in the mouthplate at the marked midpoint. This hole is where you'll blow into the flute to make sound.
- Shaping the Embouchure Hole: Use a half-round file to gently shape the inside of the hole. This shaping allows airflow to travel smoothly and enhances the flute's sound quality. Work carefully here, as the embouchure's shape directly affects the flute's playability.
3. Tuning the Flute to A Major
Getting the right pitch requires precise measurements and adjustments.
- Starting with the Base Note: Before adding finger holes, check the flute's base note. Gradually shorten the flute from the open end until it reaches the note G, which will later translate into an A when played in a specific fingering.
- Marking the Centerline: Draw a line along the length of the flute, which will serve as a reference for drilling the finger holes. Mark this line in alignment with the mouthpiece to ensure the holes are positioned correctly for playing comfort.
4. Drilling and Adjusting Finger Holes
The positioning and size of each finger hole are crucial to achieving accurate notes in A Major.
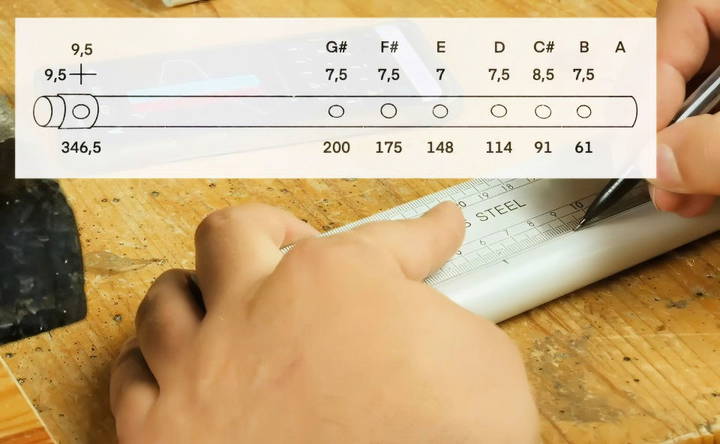
- Referencing the Blueprint: Use a blueprint or flute chart to mark the locations of each finger hole along the centerline. Measure each position from the open end of the flute (the farthest point from the mouthpiece).
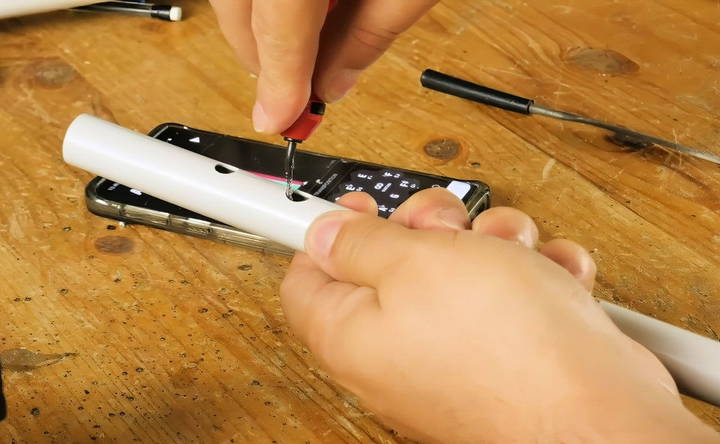
- Drilling the Holes: Start by drilling the holes 1mm smaller than specified in the blueprint. This will allow for adjustments and fine-tuning.
- Fine-Tuning the Holes: Gradually expand each hole with a file or deburring tool, starting from the hole farthest from the mouthpiece and working toward the closest one. Continue adjusting each hole until the flute produces accurate notes when played.
- Sanding the Edges: Sand the edges of each hole to remove any roughness, which improves sound quality and makes the flute more comfortable to handle.
5. Finishing Touches
Now that the finger holes are in place, it's time to complete the flute with some final steps to ensure it looks and sounds polished.
- Smoothing the Inside and Outside: Use sandpaper to smooth the inside of the flute, as any rough spots can affect airflow and sound clarity. Additionally, sand the outer surface of the flute for a professional look.
- Optional: Adding a Sealant: Applying a light coat of PVC-safe sealant can protect the surface and give the flute a glossy finish. Just be sure any chemicals used are non-toxic and safe for handling near the mouth.
- Final Sound Check: Test each note, making any minor adjustments to hole size as needed. This step ensures the flute is fully in tune and ready to play.
Experimenting with Different Flute Designs
Once you've mastered this basic flute design, there's a world of possibilities for making different sounds and pitches. Here are a few ways you can modify your flute:
- Changing the Length: By lengthening or shortening the main pipe, you can adjust the overall pitch of the flute. Longer flutes produce deeper sounds, while shorter ones yield higher pitches.
- Adjusting the Diameter: Flutes with larger diameters tend to have richer, fuller tones, whereas narrower pipes produce a brighter sound. Try using a 25mm pipe for a bass flute or a smaller diameter for a soprano flute.
- Experimenting with Tuning: This tutorial focuses on A Major, but you can make a flute in any scale by adjusting the hole placements. There are resources and apps available that help calculate hole distances for various tunings.
- Adding Decorative Elements: If you'd like to personalize your flute, try painting or wrapping it with decorative tape. Just ensure any materials used are safe for handling.
Tips for Playing Your PVC Flute
Once your flute is ready, it's time to enjoy the fruits of your labor. Here are some tips for getting the best sound out of your DIY instrument:
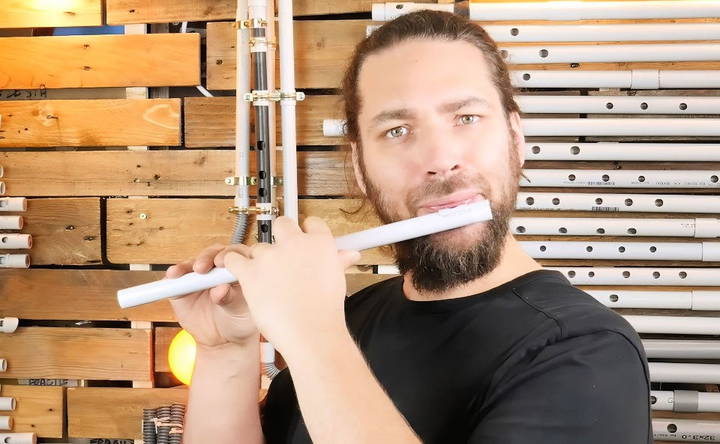
- Finding the Right Angle: Transverse flutes require you to blow across the embouchure hole rather than into it. Experiment with the angle and positioning until you find the sweet spot where sound production is clearest.
- Finger Placement: Proper finger placement is key to achieving clear notes. Practice covering each hole completely with your fingertips to prevent any air leaks.
- Breath Control: Unlike woodwinds with reeds, a transverse flute relies on a steady, controlled airflow. Start with gentle breaths and gradually increase the airflow for louder, richer tones.
- Learning the Scale: Familiarize yourself with the notes and scales of your A Major flute. Simple songs or scales are a great place to start for beginners.
- Experimenting with Dynamics: PVC flutes are versatile and can produce a range of tones based on your breath pressure and embouchure positioning. Try playing louder for a more resonant sound or softer for a mellow, whispery tone.
Final Thoughts
Making a PVC flute is not only an engaging DIY project but also a fulfilling way to make your own music. This guide has provided you with the foundational steps for building a transverse flute in A Major, but feel free to experiment with the dimensions, materials, and tunings to make your own unique instruments.
FAQs About DIY PVC Flute
Discover everything you need to know about making a DIY pvc flute with our comprehensive FAQs guide. Get tips, tricks, and expert advice.
For an A Major flute, use a 20mm diameter PVC pipe with a length of 410mm. The embouchure hole should be drilled 22mm from one end of the pipe, with a diameter of 9.5mm. Proper measurements are essential for accurate tuning.
Ensure the distance between the cork and the embouchure hole matches the pipe’s internal diameter; otherwise, higher notes may sound flat. Larger holes can improve tuning for upper registers if high notes still sound off.
Yes, but you’ll need different dimensions for the pipe and hole placements. For C Major, a longer pipe and precise adjustments to hole spacing and sizes are necessary. Tuning apps can help when experimenting with new keys.
The added mouthpiece piece provides necessary thickness for stable sound production. Without it, the flute sounds “windy” and less precise, especially in the second octave. It also improves control over the tone quality.
Make sure your blowing technique is correct; transverse flutes require air directed across the embouchure hole. Also, check for air leaks around the mouthpiece or embouchure hole, as these will disrupt airflow and sound production.
Adding extra holes or experimenting with hole placements may provide access to semi-tones for chromatic scales. However, keep in mind that not all fingerings will work perfectly without altering the flute's tone or tuning.
Flat notes in higher registers can result from incorrect cork positioning, inadequate hole sizes, or mouthpiece issues. Experiment with slightly enlarging the holes or adjusting breath control to improve higher notes.
Yes! Bamboo is a popular alternative that offers a more traditional sound. For metal, ensure safe handling, as it requires different tools and techniques than PVC to shape and tune effectively.
"Tunable" is a highly recommended app for wind instruments. It helps measure pitch accurately and fine-tune holes, making it easy to get each note in tune.


