Building your own gas mask might sound intimidating, but with a few simple tools and materials, you can make a functional DIY gas mask at home for less than $30. From gathering materials to putting your mask together, this guide covers each step to help you make a protective option when needed. Keep in mind, that while this homemade gas mask offers basic protection, it's not a substitute for a professional military-grade mask. However, it is better than nothing in a pinch and works well against smoke, aerosols, and similar hazards.
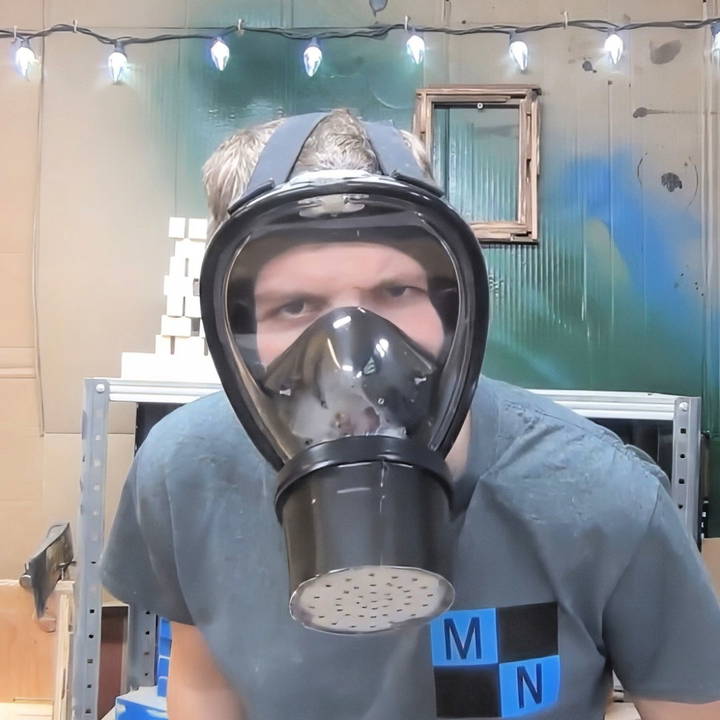
Materials You'll Need
The first step to building your DIY gas mask is gathering the necessary materials. Most of these items are inexpensive and can be found at your local dollar store or hardware store.
- Snorkel mask (The foundation of your mask. It's waterproof, making it airtight when necessary.)
- Plastic cup with screw-on lid (This will serve as your filter canister.)
- Activated charcoal (Available at pet stores. Essential for filtering airborne particles.)
- Thin cotton discs and cotton balls (These will act as additional layers of filtration.)
- Lexan or similar plastic sheet (This will be used to make the breathable plate for air intake.)
- Silicone or hot glue (To seal off holes and ensure the mask is airtight.)
- O-ring (To make a secure, airtight seal between the mask and the filter canister.)
- Duct tape (For reinforcing certain parts of the mask.)
- Hacksaw or small saw (For cutting parts of the snorkel mask and cup.)
- Drill and small drill bit (9/64 size suggested) (For making air holes in the filter plate.)
Why These Materials?
- Snorkel Mask: The snorkel mask is an ideal foundation because it's designed to be watertight, meaning it can also keep air out. Plus, it covers the eyes, nose, and mouth, providing full facial protection.
- Activated Charcoal: This substance is excellent for absorbing harmful chemicals and gases, making it the key to filtering the air you breathe through the mask.
- O-ring: Ensuring your mask has a proper seal is crucial. The O-ring helps to make a tight fit where the filter canister attaches to the mask, preventing any unfiltered air from leaking in.
Step by Step Instructions
Learn how to make a DIY gas mask with detailed step-by-step instructions. Ensure safety with airtight seals and thorough testing.
Step 1: Preparing the Snorkel Mask
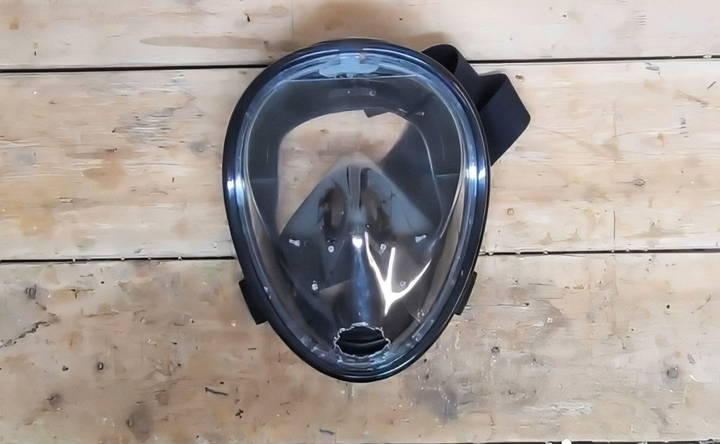
Start by modifying the snorkel mask to serve as the base of your gas mask. If your mask comes with a float valve (which blocks water when snorkeling), you'll need to remove it.
- Remove the float: Most snorkel masks have a built-in float that prevents water from entering. This isn't necessary for our gas mask, so remove it.
- Seal any remaining holes: Once the float is removed, you'll likely have a hole at the top of the mask. Use silicone or hot glue to fill these gaps. It doesn't need to look perfect but make sure the seal is airtight.
- Remove excess parts: If there's an intake valve for the float, sew off this part with a hacksaw to smooth out the mask's surface. This will give the mask a uniform look and prevent airflow issues.
- Make a new airway: Near the mouth area, you'll find a small plastic piece that can be removed, revealing a rubber piece underneath. This area will serve as the new air intake for the gas mask. Widen the hole slightly using your saw, ensuring it's large enough to allow for proper airflow.
Step 2: Building the Filter Canister
The filter canister is a crucial part of the gas mask as it's what filters the air before you breathe it in. Here's how to construct it:
- Prepare the lid of the plastic cup: The plastic cup with a screw-on lid will serve as the filter canister. First, take the lid and cut a circular hole about 3 inches in diameter from the center. This hole will allow you to attach the canister to the mask.
- Attach the canister to the mask: Before attaching the lid to the mask, spray-paint the lid black to match the mask (optional). Once dry, bolt the lid down onto the mask so it's centered with the newly maked hole from Step 1. Use silicone or hot glue around the edges to seal the connection, ensuring it's airtight.
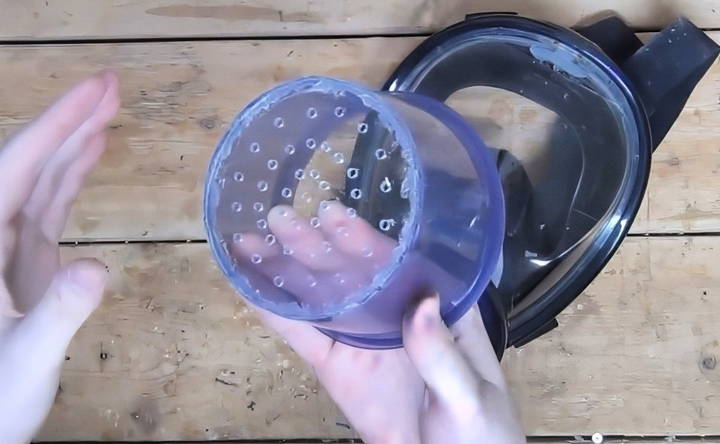
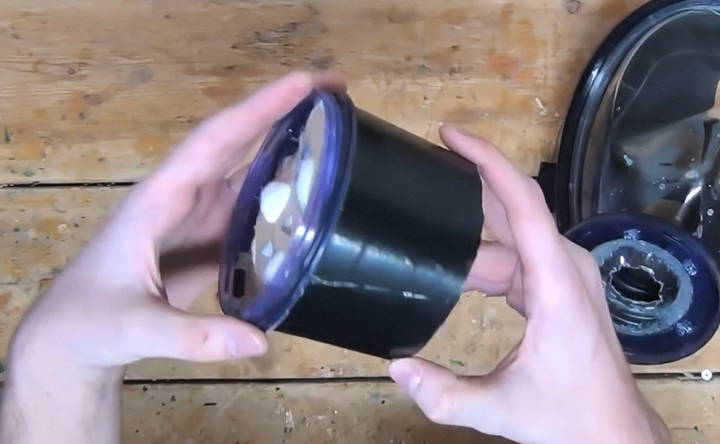
- Cut the cup: Take the plastic cup and cut off the top 3 inches (where the threads are). This will be the body of your filter canister, which screws onto the lid that's now attached to your mask.
- Make the filter plate: Cut a circular piece of Lexan or a similar plastic material that fits snugly into the bottom of the cup. Using a small drill bit (such as 9/64), drill multiple air holes into the plate. These holes will allow filtered air to pass through.
Step 3: Assembling the Filter
Now it's time to assemble the filter layers inside the canister.
- First filter layer – Cotton discs: Place a thin layer of cotton discs at the bottom of the canister. These will serve as the first layer of filtration, trapping larger particles.
- Activated charcoal layer: Pour a generous amount of activated charcoal into the canister, leaving about half an inch of space at the top. This will be the main filtration medium, absorbing harmful gases and chemicals.
- Second filter layer – Cotton balls: Add another layer of cotton discs and cotton balls on top of the charcoal. This helps hold the charcoal in place and adds another layer of protection.
- Secure the filter: Cut a piece of cardboard to fit snugly over the top of the canister's contents. Hot glue it in place to ensure nothing falls out of the canister when it's in use.
Step 4: Ensuring an Airtight Seal
Ensuring the mask is airtight is crucial for its effectiveness.
- Add the O-ring: Place a large O-ring around the bottom of the canister's threads. This will help make a tight, airtight seal when you screw the canister onto the mask.
- Test the seal: Screw the canister onto the mask and ensure everything is secure. Check for any gaps or loose spots where unfiltered air might leak in. Apply additional silicone or hot glue as needed to seal any remaining gaps.
Step 5: Testing the Gas Mask
Before relying on your mask, it's important to test its effectiveness. One of the simplest ways to test your gas mask is by using a strong-smelling substance, like an aerosol cleaner.
- Make a controlled test environment: Spray a generous amount of a strong-smelling aerosol into a trash can or similar container.
- Test with and without the mask: First, breathe in the fumes without the mask (be careful, and don't expose yourself too much). You should notice the smell is strong and possibly irritating.
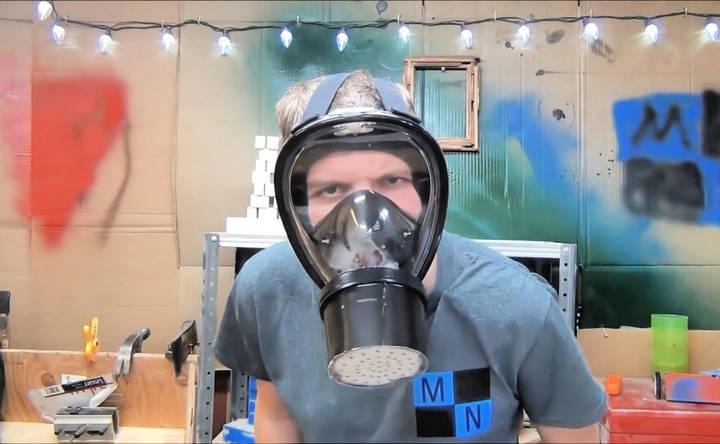
- Wear the mask and repeat: Put on the gas mask and attempt to breathe in the same fumes. Ideally, you should barely smell anything, indicating that the filter is working. If you can still smell the fumes strongly, there might be gaps in the seal or the filter may need adjustments.
Final Thoughts and Safety Tips
While this homemade gas mask is effective against some airborne threats, it's not designed to protect against all hazardous gases or conditions. It's suitable for smoke, dust, pepper spray, and certain aerosols, but it's not a replacement for military-grade or industrial gas masks. Use this as a last resort in emergencies where professional equipment isn't available.
Additionally, it's worth noting that the filter canister is reusable. You can unscrew it, replace the activated charcoal, and swap out the cotton discs after heavy use or when necessary. For added preparedness, you might want to build multiple canisters ahead of time so they can be swapped out quickly in an emergency.
In Conclusion
This DIY gas mask is an affordable and effective option for basic protection in emergency situations. With just a snorkel mask, some basic filtration materials, and a little bit of time, you can make a mask that offers decent protection from harmful airborne particles. Remember, this isn't a replacement for professional equipment, but it can certainly help when there are no other options available.
FAQs About DIY Gas Mask
Discover answers to common questions about DIY gas masks, with tips on materials, construction, and safety for peace of mind.
If you smell something while using the gas mask, it indicates the mask isn't airtight. You may need to check the seal between the filter and the mask. Ensure that all seals are properly caulked or glued, and that the O-ring is tightly fitted to make an airtight connection.
Regular charcoal is not effective for gas masks. Activated charcoal has a larger surface area, which makes it much better for trapping harmful gases and chemicals. Crushed, smaller pieces of activated charcoal work best for this purpose.
It’s important to have both an inlet and an exhale valve to avoid carbon dioxide buildup. If both air is entering and exiting through the filter, carbon dioxide can accumulate inside the mask, which can lead to suffocation. Consider keeping the mask’s original exhalation valve or adding a new one to avoid this issue.
For better protection against finer particles or viruses, you could incorporate HEPA filters or N95 mask material into the canister. However, keep in mind that even with these improvements, this mask won’t offer complete protection against viruses like COVID-19 or chemical warfare agents.
The exhalation valve allows the expelled air to exit the mask without coming back through the filter, preventing fogging of the lens and the buildup of carbon dioxide. Without this valve, the mask will force you to exhale through the same filter you’re inhaling from, reducing the effectiveness of the mask and making it harder to breathe.
You can reuse the filter by unscrewing it, replacing the activated charcoal, and swapping out the cotton layers. Be sure to replace these materials regularly, especially after heavy use or exposure to harmful substances.
The filter should be replaced after every use or if it becomes clogged. Continuous exposure to hazardous materials will shorten the filter’s lifespan, so it’s essential to have spare filters on hand if the mask is used in a prolonged or severe environment.
This mask can provide basic protection against tear gas and certain aerosols, but it’s not designed for smoke inhalation in situations like fires. Smoke reduces oxygen levels, which this mask cannot address. Always prioritize evacuation from hazardous smoke-filled areas.
The float valve is designed to prevent water from entering the mask when snorkeling, but it's unnecessary for a gas mask. The float was removed to repurpose the snorkel mask for filtering air instead of water, making a new inlet for the filter system.
No, this DIY mask is not recommended for protection against airborne viruses like COVID-19. For virus protection, certified medical respirators like N95 or P100 masks are recommended. This mask provides basic protection against particulates and gases but lacks the filtration needed for viral protection.


