Making a DIY kaleidoscope at home can be a fun and educational project for individuals of all ages. You'll need simple materials like a cardboard tube, reflective paper, and colorful beads. This step-by-step guide will detail the process of assembling your own kaleidoscope. Following the instructions carefully ensures you get a functional and beautiful kaleidoscope to admire and enjoy.
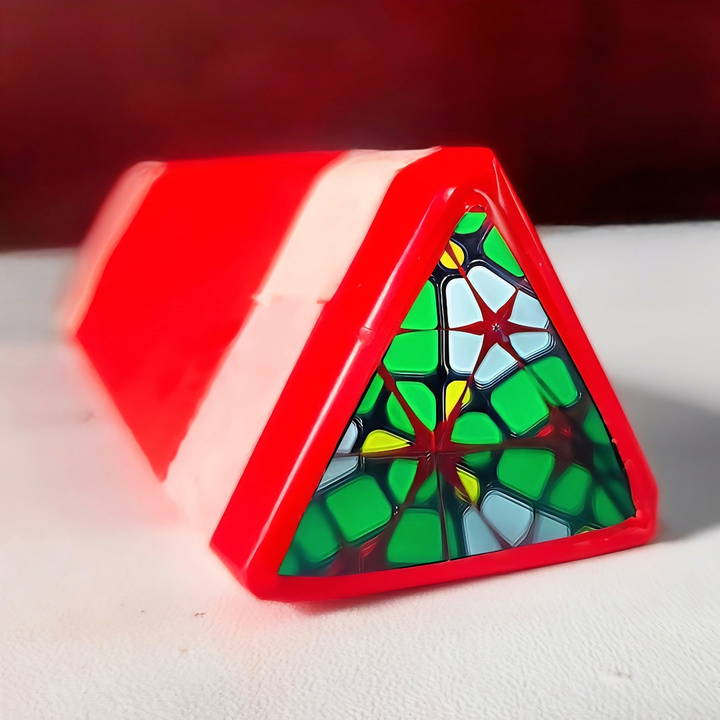
By the end of this project, you will understand how to make a kaleidoscope from scratch with everyday items. Building a kaleidoscope helps in learning basic concepts of light reflection and symmetry. The easy-to-follow steps make it an enjoyable experience for everyone.
Ready to see the magic of colors and patterns? Let's discover how to build your DIY kaleidoscope in the next section!
What is a Kaleidoscope?
A kaleidoscope is an optical instrument consisting of two or more reflecting surfaces tilted towards each other in an angle, so that one or more (parts of) objects on one end of the mirrors are seen as a regular symmetrical pattern when viewed from the other end, due to repeated reflection. The reflectors (or mirrors) are usually enclosed in a tube, often containing on one end a cell with loose, colored pieces of glass or other transparent (and sometimes opaque) materials to be reflected into the viewed pattern. Light enters the kaleidoscope through the other end and reflects off these objects to present the viewer with a circle of colorful patterns.
The Magic of Reflection
The key to a kaleidoscope's magic lies in its mirrors. When light enters the kaleidoscope, it bounces back and forth between the mirrors. This repeated reflection makes multiple images of the objects inside the kaleidoscope, forming the intricate patterns we see. The angle between the mirrors determines the number of times the pattern is repeated.
A Brief History
The kaleidoscope was invented in 1816 by Scottish scientist Sir David Brewster. He named it after the Greek words ‘kalos' (beautiful), ‘eidos' (form), and ‘scopos' (watcher), which means ‘the beautiful form watcher'. Brewster's invention quickly became a popular toy, and its patent brought about a kaleidoscope craze in the 19th century.
Why Make a Kaleidoscope?
Creating your own kaleidoscope is not just a fun craft activity; it's also a wonderful way to explore the principles of light and symmetry. It encourages creativity and can be a relaxing way to de-stress. Plus, homemade kaleidoscopes can be personalized gifts that spark joy and wonder in others.
For Everyone
Kaleidoscopes are for everyone. Whether you're a child fascinated by colors, a teacher looking for an engaging educational tool, or an adult seeking a nostalgic escape, making and using a kaleidoscope offers a universal appeal.
The beauty of a kaleidoscope is in its simplicity and endless possibilities. Every turn reveals a new pattern and perspective, just like life. Let's explore kaleidoscopes and make our own magical designs.
Materials You'll Need:
- Three Mirrors of Equal Size: These will form the reflective surface inside the kaleidoscope. I used three rectangular mirrors, each measuring 4"x8". The size can vary, but it's crucial they're all the same.
- Tape: This will hold the mirrors together. I recommend using a durable tape like duct tape or strong clear adhesive tape.
- Colored Paper: These will make the colorful patterns in your kaleidoscope. Sample a variety of colors!
- Additional Materials: You'll also need a cardboard tube (like a paper towel roll), scissors, clear plastic (from packaging or an old photograph cover), colored markers, and glue.
Step by Step Instructions
Learn how to make a kaleidoscope with our step-by-step guide. From mirrors to color chambers, make and personalize your own unique kaleidoscope.
Step 1: Preparing the Mirrors
First, take your three mirrors. Lay them flat on a surface, long sides touching, and form a triangle with the reflective sides facing inward. Secure the edges where the mirrors meet with tape. It's vital to ensure no gaps between the mirrors, as this can disrupt the kaleidoscope's visuals.
Step 2: Creating the Color Chamber
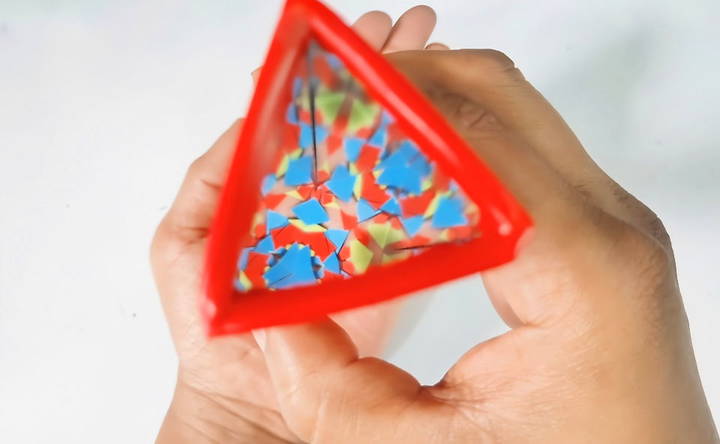
Cut a small circle from the clear plastic, fitting the end of the cardboard tube you're using. Then, take the colored paper and cut tiny pieces. You can also use beads or sequins for a varied effect. Place these tiny pieces on the plastic circle, and cover with another plastic circle of the same size. Use tape or glue around the edges to seal your "color chamber."
Step 3: Assembling the Kaleidoscope
Slide the mirror triangle into the cardboard tube. If the fit isn't snug, wrap some paper around the mirrors before inserting them. This ensures stability. Next, attach the color chamber to one end of the tube, ensuring it's secure but can still be rotated or shaken for varying patterns.
Step 4: Personalizing Your Kaleidoscope
Now, the construction part is done, but let's add a personal touch. Use colored markers to decorate the cardboard tube. Maybe wrap it in decorative paper or stickers for a more vibrant look. This is where your creativity can shine.
Customization Ideas
Creating a kaleidoscope offers endless personalization possibilities, making it unique and reflecting your or a gift recipient's personality.
Choose Your Materials
Start by selecting the materials for your kaleidoscope. You can use anything from recycled paper tubes to clear plastic bottles for the body. For the reflective surfaces, mirrors are traditional, but you can also use shiny aluminum foil or reflective cardstock.
Decorate the Exterior
The outside of your kaleidoscope is like a blank canvas. Wrap it in colorful paper, paint it with acrylics, or adorn it with stickers and glitter. If you're gifting it, consider the recipient's favorite colors or themes.
Fill It with Fun
The objects inside the kaleidoscope's viewing chamber are what make the colorful patterns. Use beads, sequins, small stones, or even dried flowers. Think about the colors and shapes that will make the most appealing patterns.
Make It Educational
For a more educational twist, include items that can teach about color theory, like primary colored beads that can mix to show secondary colors when overlapped in the reflections.
Interactive Elements
Add elements that move or change to make your kaleidoscope interactive. This could be as simple as a rotating end cap filled with loose beads or as complex as a magnetic chamber that allows you to change the items inside without opening the kaleidoscope.
Light It Up
Consider adding a light source like a small LED light at one end of the kaleidoscope. This can illuminate the objects inside, making the colors more vibrant, especially in dimmer environments.
Themes and Occasions
Tailor your kaleidoscope to specific themes or occasions. For a holiday theme, use red and green beads for Christmas or orange and black for Halloween. For a birthday gift, include items that are meaningful to the person celebrating.
Sustainability Focus
If you're environmentally conscious, focus on sustainability. Use biodegradable materials or upcycled items. This not only reduces waste but also teaches the importance of environmental stewardship.
Incorporate these ideas to make a kaleidoscope that's visually pleasing and reflects your creativity.
Educational Section
Kaleidoscopes aren't just toys; they're also educational tools that can help explain several scientific concepts in a fun and engaging way. Here's how you can use a kaleidoscope to learn about or teach some fundamental principles of science and art.
- Understanding Light and Reflection A kaleidoscope uses mirrors to reflect light. When you look through one, you're seeing the effects of light bouncing between reflective surfaces. This is a great way to introduce the concept of reflection, which is a key principle in physics. You can experiment with different angles and see how they change the patterns.
- Symmetry in Nature The patterns in a kaleidoscope are symmetrical, meaning they are the same on both sides of an axis. This reflects the symmetry we often see in nature, like in leaves, butterflies, and even human faces. By turning the kaleidoscope and observing the changing patterns, learners can get a hands-on understanding of symmetry.
- Colors and Light Inside the kaleidoscope, you'll often find colorful beads and glass. These can teach us about how light can split into different colors, known as the spectrum, and how those colors can mix to make new ones. It's a practical demonstration of color theory.
- Mathematics of Patterns The patterns maked by a kaleidoscope can be quite complex, and they can help illustrate mathematical concepts like tessellations and fractals. These are patterns that repeat at different scales and can be used to explain complex mathematical ideas in a visual and accessible way.
- Craft and Design Building a kaleidoscope also involves elements of craft and design. It requires planning, measuring, cutting, and assembling—skills that are fundamental to engineering and architecture. This can be a stepping stone to more advanced design projects.
- Cultural Significance Kaleidoscopes have been used in various cultures for both entertainment and spiritual purposes. They can be a gateway to discussions about how different societies use art and science in their traditions.
Incorporate educational aspects into your kaleidoscope project for a hands-on learning experience suitable for all ages.
Advanced Techniques
For those who have mastered the basics of kaleidoscope-making and are ready to take their craft to the next level, advanced techniques can offer a new challenge and add complexity to your designs. Here are some ideas to enhance your kaleidoscope-making skills:
- Motorized Kaleidoscopes Adding a motor can automate the rotation of the imaging chamber, making a dynamic visual experience without manual intervention. You can use a small battery-operated motor connected to the end cap, allowing the contents to spin continuously.
- Incorporating Prisms Instead of traditional mirrors, try using prisms to refract light into your kaleidoscope. Prisms can split light into its constituent spectral colors, adding another dimension to the patterns you see.
- Digital Kaleidoscopes: Embrace technology by making a digital kaleidoscope. Use a small screen inside the tube that displays changing digital images, which are then reflected by the mirrors to make patterns. You can program the screen to change images according to different themes or even respond to music.
- Complex Mirror Arrangements: Experiment with the number and angle of mirrors. More mirrors or non-traditional angles can make more complex patterns. Try using four or five mirrors instead of the usual three or adjustable mirrors to change the pattern dynamically.
- Dual-Viewing Kaleidoscopes Make a kaleidoscope with two viewing points, allowing two people to experience different patterns at the same time. This requires a careful arrangement of mirrors and a divided chamber of objects.
- Interchangeable Chambers Design your kaleidoscope with an interchangeable chamber system. This allows you to switch out the contents easily, offering endless variety. You can have themed chambers for different occasions or moods.
- Enhanced Optical Quality For a clearer and more vibrant display, invest in high-quality mirrors and optical-grade glass for the viewing chamber. This will reduce distortions and make sharper images.
- Kaleidoscope Kits Develop a kaleidoscope kit with various components that users can assemble in different ways. This not only teaches about the construction of kaleidoscopes but also encourages creativity and experimentation.
Explore advanced techniques to make visually stunning kaleidoscopes that highlight innovation and craftsmanship.
Troubleshooting
Creating a kaleidoscope can be a rewarding experience, but sometimes you might encounter issues that need fixing. Here's a troubleshooting guide to help you solve common problems and ensure your kaleidoscope works perfectly.
Blurry Images
- Cause: This often happens if the mirrors are smudged or the viewing chamber is not clean.
- Solution: Gently wipe the mirrors with a soft, lint-free cloth. Make sure the viewing chamber is free of dust and fingerprints.
Patterns Not Forming Properly
- Cause: Incorrect mirror angles or insufficient reflective material can cause this issue.
- Solution: Check that the mirrors are positioned at the correct angle, usually 60 degrees for a three-mirror setup. Ensure there's enough reflective surface for the light to bounce off.
Loose Components Inside
- Cause: If the items inside the viewing chamber move around too much, they won't make stable patterns.
- Solution: Secure the objects with a clear adhesive or place them in a fixed chamber.
Kaleidoscope Not Rotating Smoothly
- Cause: The end cap or rotating mechanism may be too tight or lack lubrication.
- Solution: Loosen the end cap slightly. If there's a rotating mechanism, apply a small amount of lubricant to ensure smooth movement.
Light Not Passing Through
- Cause: If the kaleidoscope is too dark, it might be because the light entry point is blocked or too small.
- Solution: Make sure the end where the light enters is clear and unobstructed. Consider enlarging the hole if it's too small.
Materials Inside Fading
- Cause: Exposure to sunlight or bright lights can cause some materials to lose their color.
- Solution: Use UV-resistant beads or glass, and store your kaleidoscope in a cool, dark place when not in use.
Reflective Surfaces Tarnishing
- Cause: Over time, mirrors can tarnish, especially in humid conditions.
- Solution: Use high-quality mirrors and seal the edges to prevent air and moisture from getting in.
Difficulty in Assembly
- Cause: Sometimes, the pieces don't fit together as they should, making assembly challenging.
- Solution: Double-check all measurements and cuttings. If you're using a kit, contact the manufacturer for guidance or replacement parts.
Patience and detail are crucial for troubleshooting your kaleidoscope. If issues persist, review the basics.
FAQs About How to Make a Kaleidoscope
Discover answers to frequently asked questions about making a kaleidoscope, including step-by-step instructions, materials needed, and creative tips for crafting.
Cut the mirrors to fit the length of your cardboard tube. Tape them together lengthwise to form a triangular prism with the reflective sides facing inward. This prism will fit inside your tube and create the reflective effect.
At one end of the tube, cut a circle from the cardboard to fit over the end. In the center of this circle, cut a small hole to look through. Secure this to the tube with tape or glue.
Cut a circle of transparent plastic to fit over the other end of the tube. Before sealing it with tape or glue, create a chamber between the plastic and the end of the tube by adding another circle of cardboard inside. Fill this chamber with colorful beads, sequins, or pieces of transparent colored paper. These items will create the colorful patterns when you look through the kaleidoscope.
Look through the hole you maked at the viewing end, point the other end toward a light source, and rotate the tube. The mirrors inside will reflect the light and the colorful items you've added, making beautiful, ever-changing patterns.
Personalizing your kaleidoscope can make it a unique piece of art. Here are some ideas:
Decorate the tube: Use colorful paper, stickers, or paint to make the outside of your kaleidoscope vibrant.
Adjust the view: Try different shapes and sizes of beads and sequins to change the patterns.
Make it rotate: Attach a rotating end cap to the viewing end to easily switch between patterns.
Experiment with light: Different light sources can change how the colors appear inside your kaleidoscope.
Share the fun: Make multiple kaleidoscopes with different themes and swap with friends to see a variety of patterns.
Final Thoughts on Making a Kaleidoscope
Wrapping up, learning how to make a kaleidoscope at home is a rewarding and enjoyable project. With a few simple materials, you can make your very own DIY kaleidoscope and explore mesmerizing patterns. This hands-on activity is perfect for anyone interested in crafts and science. Get creative and have fun with your kaleidoscope project!


