Making a mesh wreath is a fun and rewarding craft perfect for any occasion. Learning how to make a mesh wreath simplifies the process, making it manageable and enjoyable. With straightforward instructions and clear visuals, you can easily craft a stunning wreath. This guide walks you through every step of the way, ensuring your project is both beautiful and well-made.
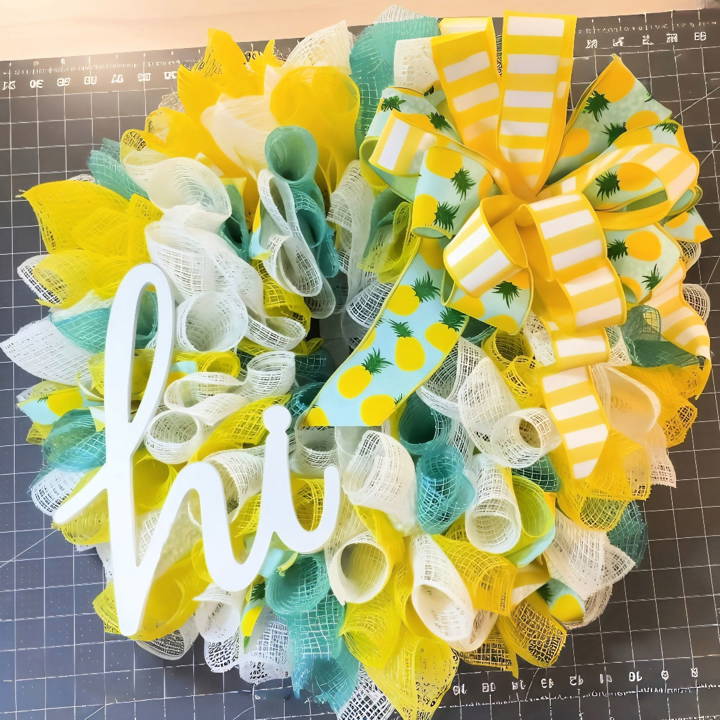
By understanding how to make a wreath with mesh, you can personalize your home decor with unique handmade touches. The detailed images and step-by-step guidance provided will help ensure that each loop and twist is just right.
Interested in getting creative with your decor? Let's dive into the next section and explore each step in detail to start your DIY mesh wreath project.
Materials Needed:
- Mesh in Daffodil Yellow, White, and Aqua: The base of our wreath relies on these colors to bring out the pineapple theme.
- Pineapple Ribbon and a Coordinating Ribbon: These ribbons add that special touch to the wreath, tying in with the theme beautifully.
- Dollar Tree Wreath Form: A cost-effective option that works perfectly for this project.
- Zip Ties: Used for securing the mesh and ribbons to the wreath form.
- Rotary Cutter and Cutting Mat: For precise cuts on the mesh and ribbon.
- Stapler or Hot Glue (optional): For attaching your sign to the wreath.
Step by Step Instructions
Learn how to make a mesh wreath with our step-by-step instructions. This is the perfect guide for making a beautiful mesh wreath from start to finish.
Step 1: Preparing the Mesh
I started by cutting the white mesh into 20-inch lengths to form the base of the wreath. This would make a lush backdrop for the colors to pop. The daffodil yellow and aqua meshes were cut into 14-inch lengths, providing a beautiful contrast and adding depth to the overall design.
Step 2: Crafting the Cruffle
The "cruffle" method caught my eye for its texture and simplicity. It's essentially a curl and ruffle combined. Take a mesh piece, roll the ends inward twice, and scrunch up the center. Secure this cruffle with a chip clip to maintain its shape before attaching it to the wreath form with zip ties.
Step 3: Making Ribbon Accents
To make ribbon accents, I cut the pineapple ribbon into 12-inch lengths and the coordinating ribbon slightly shorter, at 10 inches, for contrast. Folding them in an "X" shape and securing them with a small zip tie prepared them for placement on the wreath.
Step 4: Assembling the Wreath
I attached the cruffles to the middle two wires of the wreath form, alternating between the white base and the colored meshes. The ribbon accents were then added to every third cruffle to distribute them evenly and add pops of thematically appropriate color.
Step 5: Adding the Bow and Sign
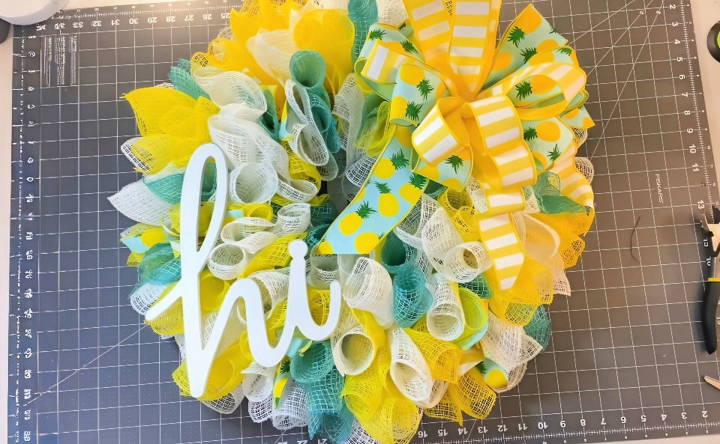
For a focal point, I crafted a bow from the remaining ribbon and attached it to the upper part of the wreath. I chose a "Hi" sign to welcome visitors, which I attached using wire and a dab of hot glue for extra security.
Step 6: Final Touches
After attaching the sign and adjusting the bow, I stepped back to assess. It needed a bit more flair, so I weaved some additional ribbon through the mesh, letting the ends cascade for a whimsical touch. Finally, I trimmed any excess mesh or ribbon to ensure a clean look.
Customization Ideas for Mesh Wreaths
Making a mesh wreath is not just about crafting a decorative item; it's about expressing your personality and creativity. Here are some customization ideas to make your mesh wreath uniquely yours:
Choose a Theme
Start by selecting a theme that resonates with you. It could be seasonal, like spring flowers or autumn leaves, or occasion-based, such as Halloween or Christmas. Themes can also be inspired by hobbies, favorite colors, or even sports teams.
Play with Colors
Colors can set the mood for your wreath. Use bright, vibrant colors for a cheerful look, or opt for pastels for a softer touch. Consider the color wheel and use complementary colors for a striking contrast, or analogous colors for harmony.
Add Textures
Incorporate various textures to add depth to your wreath. Mix different types of mesh, such as deco mesh with fabric mesh, or add elements like burlap ribbons or felt shapes. Textures can make a tactile experience that enhances the visual appeal.
Personalize with Accents
Personal touches make your wreath stand out. Attach wooden letters to spell out a message, use family initials, or include figurines that reflect your interests. These accents make the wreath feel more connected to you.
Incorporate Lighting
String lights can transform your wreath, especially in the evening. Wrap LED lights around the wreath for a warm glow, or use battery-operated fairy lights for a magical effect.
Experiment with Patterns
Don't be afraid to mix patterns. Stripes, polka dots, and chevrons can coexist beautifully when balanced correctly. Stick to a consistent color scheme to unify the patterns.
Focus on the Centerpiece
The centerpiece of your wreath can be a focal point. Use a large bow, a sign, or a special ornament that draws attention. The centerpiece should tie in with the overall theme of the wreath.
Think Outside the Circle
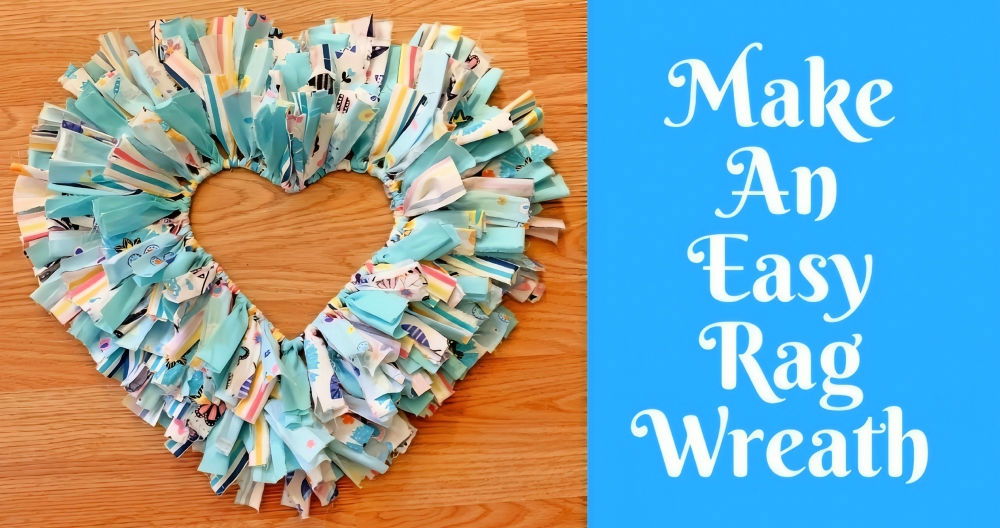
Who says wreaths have to be circular? Try different shapes like a heart, star, or even a square. Changing the shape can instantly give your wreath a fresh perspective.
Update Seasonally
Keep your wreath up-to-date by changing elements according to the season or upcoming holidays. This way, you can keep the base of your wreath and refresh its look throughout the year.
Engage the Senses
Consider adding elements that engage other senses, like scented pine cones for smell or bells for sound. These sensory details can enhance the experience of your wreath.
With these ideas, make a mesh wreath that decorates your space and tells your story. Customization should reflect your style and bring you joy.
Advanced Techniques for Mesh Wreath Making
For those who have mastered the basics of mesh wreath making and are looking to elevate their craft, advanced techniques can add complexity and uniqueness to your creations. Here are some sophisticated methods to try:
Layering and Texturing
Beyond the single layer of mesh, try adding multiple layers with different textures. Combine fine and coarse meshes, or introduce new materials like tulle or lace. This adds depth and interest to your wreath.
Intricate Weaving Patterns
Move past the simple loop or pouf methods and experiment with intricate weaving patterns. Basketweave, herringbone, or braiding techniques can make stunning visual effects that are sure to impress.
Incorporating Natural Elements
Integrate natural elements like branches, dried flowers, or pinecones into your design. These can be woven into the mesh or attached as accents, bringing an organic touch to your wreath.
Sculpting with Mesh
Mesh is a flexible material that can be sculpted into shapes and figures. Try making three-dimensional flowers, animals, or even letters by molding and securing the mesh with wire.
Adding Movement
Incorporate elements that move, such as hanging charms or wind spinners. These can catch the breeze and add a dynamic aspect to your wreath when displayed outdoors.
Lighting Techniques
Advanced lighting techniques can transform your wreath in the evenings. Embed lights within the layers of mesh for a diffused glow, or spotlight certain areas for dramatic effect.
Seasonal Transitions
Design your wreath so that elements can be easily swapped out to transition between seasons or holidays. This approach allows for the versatility and longevity of your wreath.
Explore advanced techniques to make mesh wreaths that showcase your skill and creativity. Advanced crafting thrives on experimentation and trying new things.
Troubleshooting Common Issues with Mesh Wreaths
When crafting a mesh wreath, you might encounter a few hiccups along the way. Here's a helpful guide to troubleshooting common issues, ensuring your wreath-making experience is as smooth as possible.
Mesh Fraying
- Solution: To prevent fraying, use a rotary cutter and a self-healing cutting mat when trimming your mesh. Seal the edges by applying a light heat source, like a hairdryer, or use clear glue on the tips.
Wreath Looks Sparse
- Solution: If your wreath looks too thin, add more layers of mesh or incorporate additional materials like ribbons or floral picks to fill in the gaps. Ensure you're fluffing each loop to maximize fullness.
Shape Isn't Holding
- Solution: A common issue is the wreath losing its shape. Use a sturdy wire wreath frame as your base, and secure your mesh tightly with floral wire or zip ties. This will help maintain the wreath's form.
Color Fading
- Solution: Mesh can fade if exposed to direct sunlight over time. To protect your wreath, spray it with a UV-resistant clear coat. Alternatively, hang your wreath in a shaded area to preserve its vibrant colors.
Decorations Falling Off
- Solution: Ensure all decorations are securely attached. Use hot glue or wire to fix ornaments and accents in place. For heavier items, reinforce them with additional support from the back.
Storage Damage
- Solution: Store your wreath in a cool, dry place to prevent mold and dust accumulation. Cover it with a plastic bag or a wreath storage container, and hang it to avoid crushing the decorations.
Tackling these common issues ensures your mesh wreath stays beautiful and intact. Patience and creativity are vital for any crafting challenge.
FAQs About How to Make a Mesh Wreath
Get answers to faqs about how to make a mesh wreath, including tips, materials needed, and step-by-step instructions. Perfect for DIY enthusiasts!
First, cut your mesh ribbon into 30-inch pieces. Attach pipe cleaners to the wire frame at regular intervals. Then, make ruffles or loops with your mesh and secure them to the frame using the pipe cleaners. Start from the outer ring and work your way inwards, ensuring the mesh is fluffy and full.
Absolutely! You can personalize your wreath by adding various decorations such as signs, seasonal accents, or additional ribbons. Use a hot glue gun to attach felt pieces to the back of your decorations and then secure them to the wreath with pipe cleaners.
The key to a full and fluffy wreath is to not skimp on mesh. Use ample amounts of mesh and don't flatten it as you attach it to the frame. Fluff out each section as you go, and once completed, go around the wreath to adjust and puff out any areas that seem sparse.
Yes, there are several techniques, including the ruffle, bubble, and poof methods. Each technique involves folding or rolling the mesh in different ways to achieve various textures and looks. Experiment with different styles to find the one you like best.
To maintain the shape of your mesh wreath, always store it in a cool, dry place. If storing it away, use a wreath storage box or hang it in a closet to prevent the mesh from getting squashed. If your wreath does get misshapen, simply fluff out the mesh and adjust the decorations as needed to restore its original fullness. Remember, the more you handle the wreath, the more likely it is to lose its shape, so handle it gently and as little as possible.
Conclusion
Wrapping up, this guide on how to make a mesh wreath covers everything you need to make your own beautiful decoration. By following these steps, you can craft a stunning mesh wreath that will add charm to any space. Remember, practice makes perfect, and the more you make, the better you'll get.


