Making a money cake is a fun and creative way to gift money, especially for celebrations like graduations, birthdays, and weddings. It combines the charm of a decorative cake with the excitement of receiving cash, making it a unique and personalized gift. With this complete guide, you'll learn how to make a money cake that's both visually stunning and certain to wow anyone who receives it.
What is a Money Cake?
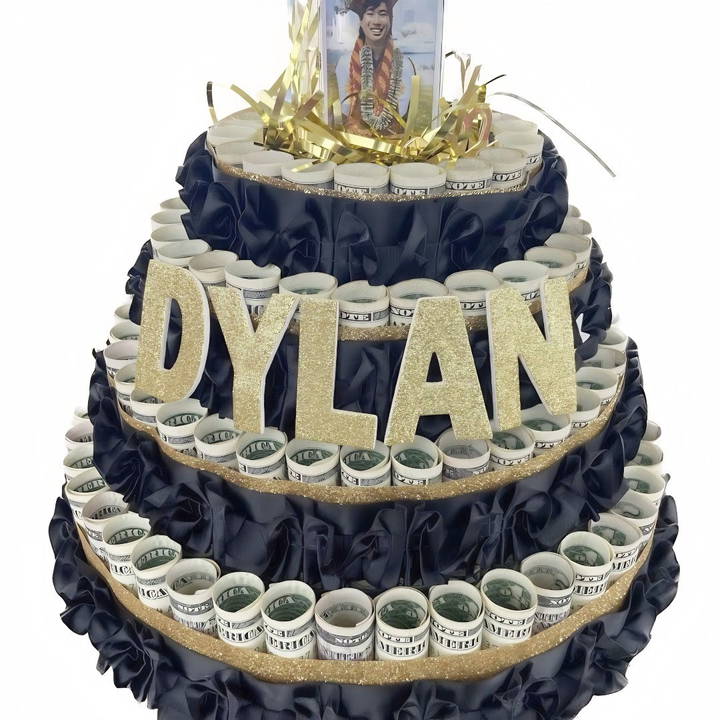
A money cake is a cake-shaped structure, often made from foam or cardboard, where bills are rolled and attached around the cake in layers. While it looks like a traditional cake, it's actually a cleverly designed display that holds money, which the recipient can disassemble and enjoy.
In this guide, you'll learn:
- The materials you'll need
- How to construct the base of the money cake
- Techniques for rolling and attaching the money
- Tips for decorating the money cake for a stunning finish
By the end of this tutorial, you'll be able to make a beautiful and functional money cake for any special occasion.
Materials Needed for a Money Cake
Before starting, gather all the required materials. You can find most of these items at your local craft store or order them online.
Materials:
- Foam or Cardboard Cake Rounds: These form the layers of your cake. You'll need at least two or more rounds depending on how tall you want the cake to be. For this tutorial, four layers were used.
- Washi Tape: This is a low-tack tape that will hold the money in place without damaging it. It's important to use low-tack tape so the recipient can easily remove the bills without tearing them.
- Hot Glue Gun & Glue Sticks: Essential for assembling the cake structure and securing decorations. Be careful not to glue directly onto the money.
- Dowels or Similar Tools: To roll the bills neatly and uniformly, dowels work best, but you can also use any smooth, cylindrical object.
- Paper Circles (Optional): To separate layers and make the structure reusable, paper circles are handy.
- Ribbon: Decorative ribbons are used to secure the money onto the cake layers. Make sure you choose a ribbon wide enough to hold the bills in place.
- Floral Foam Discs: These are typically used in floral arrangements, but they work great for constructing the base and layers of the money cake.
- Decorative Items: This includes cake toppers, artificial flowers, stickers, or any other decorative elements that fit the occasion.
Step by Step Instructions
Make your own DIY money cake with step-by-step instructions. Impress with a cash gift that's creative and easy to make.
Step 1: Prepare the Cake Base
- Choose Your Cake Rounds: For this cake, we're using four foam rounds in different sizes to make a tiered cake look. These foam rounds can be found in the floral section of craft stores like Michael's or Joann's.
- Glue the Layers Together: Use a hot glue gun to adhere the foam rounds. Start with the largest round as the base and layer up to the smallest. Apply hot glue to the center of each layer, stack them, and adjust while the glue is still hot to ensure each layer is centered properly.
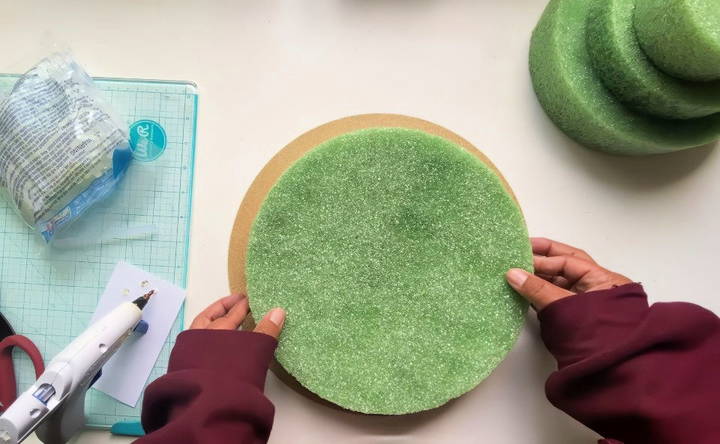
Tip: If you plan to reuse the cake structure, consider placing paper circles between the layers before gluing them. This will allow you to disassemble the cake later without damaging the foam.
Step 2: Roll the Money
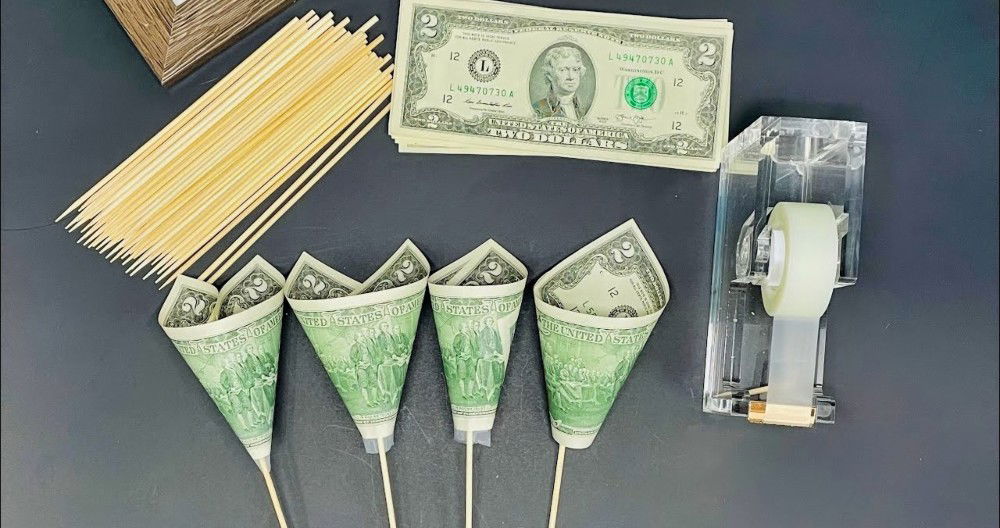
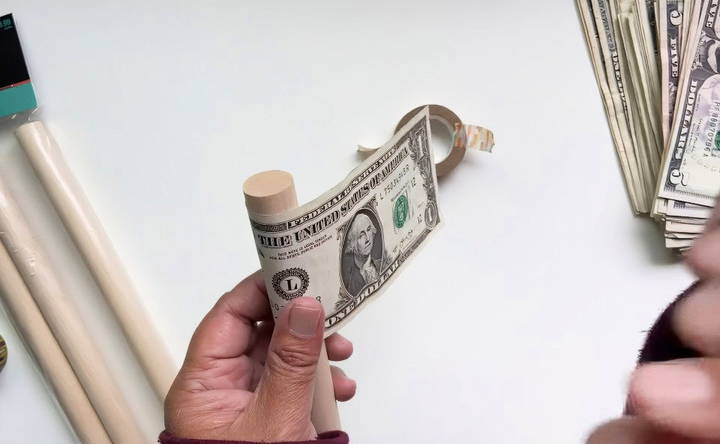
- Roll the Bills Uniformly: To get neat, uniform rolls, use a dowel or the handle of a kitchen utensil. Roll each bill tightly around the dowel and secure it with a small piece of washi tape.
- Prepare Your Tape in Advance: Tearing multiple small pieces of washi tape ahead of time will make the rolling process faster and smoother.
Tip: You don't need a large piece of tape to secure the bill. A small piece across the edge is enough to hold the roll in place while ensuring it's easy to remove later.
Step 3: Attach the Money to the Cake
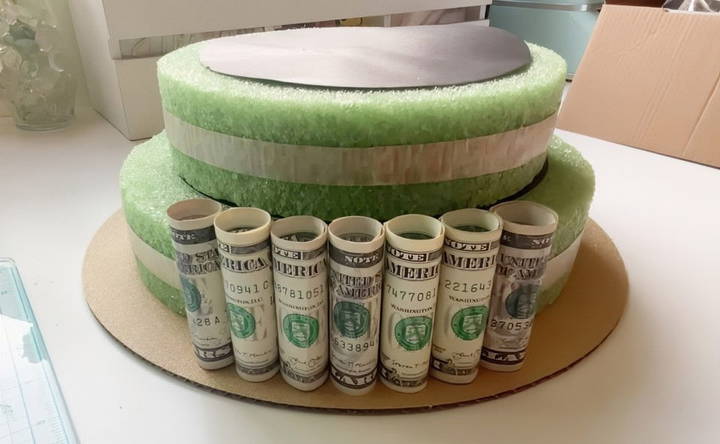
- Wrap the Cake in Washi Tape: For each tier of the cake, wrap a strip of washi tape around the perimeter, sticky side out. This tape will temporarily hold the rolled bills in place while you work. Make sure the tape forms a loop around the cake with the sticky side facing outwards.
- Arrange the Money Rolls: Once the washi tape is in place, start placing the rolled bills along each tier of the cake. Make sure they are evenly spaced and aligned neatly. For added flair, you can alternate the direction of the money or use different denominations, such as ones and fives, to make a pattern.
Step 4: Secure the Money with Ribbon
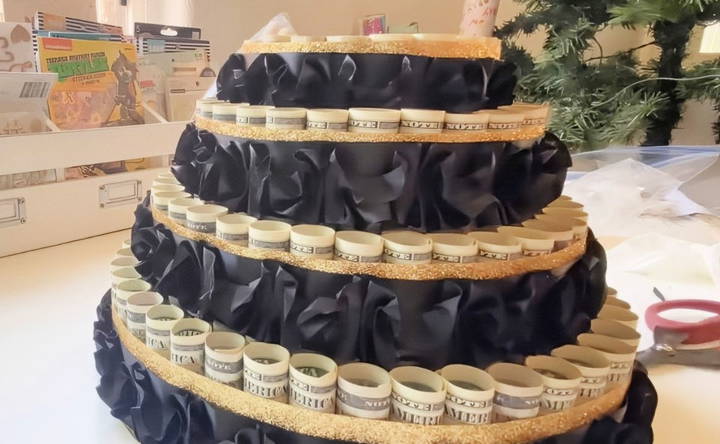
- Wrap the Ribbon Around Each Layer: After all the bills are arranged, secure them by wrapping a decorative ribbon around each tier. The ribbon should be tight enough to hold the bills in place, but not so tight that it crumples or damages the money.
- Hot Glue the Ribbon Ends: Use a small dab of hot glue to seal the ribbon ends together. Be careful not to get any glue on the bills, as it could damage them or make it difficult for the recipient to remove the money later.
Step 5: Decorate the Money Cake
- Add a Topper: You can customize the money cake to fit the occasion by adding a decorative topper. For a graduation-themed cake, you might choose a cap or the graduate's name. For a birthday, you could use numbers or a celebratory message.
- Personalize with Decorations: Add finishing touches like artificial flowers, stickers, or even small trinkets that match the occasion. Keep in mind the recipient's preferences—simple designs might work best for someone who doesn't like too much decoration, while others might appreciate a more elaborate look.
Final Thoughts
Making a money cake is a fun, creative, and thoughtful way to give a gift. Not only does it offer a visually impressive presentation, but it also provides the recipient with a practical and useful gift—cash! With a little bit of planning, patience, and creativity, you can make a money cake that will be remembered and appreciated.
Whether it's a simple two-tier cake or a grand four-tier structure, the steps outlined in this tutorial will guide you through the process from start to finish. Now you have all the tools you need to craft your own DIY money cake—so get started and surprise someone with this memorable and valuable gift!
FAQs About DIY Money Cake
Discover answers to common questions about DIY money cake. Learn how to make and personalize this unique gift for any occasion.
The amount of money you use for your cake depends on the size and number of layers you're making. For a four-layer cake, you might need around 120 bills, but this can vary based on the size of the layers and how tightly you roll the bills. You can use bills in any denomination to adjust the total amount of money given.
Washi tape is ideal for this project because it’s low tack, meaning it won’t damage the money when it’s removed. Avoid using stronger adhesive tapes like clear Scotch tape, as these can tear the bills when they’re removed.
Yes, you can reuse the foam structure if you use paper circles between the layers and avoid gluing the foam directly together. This allows you to disassemble the layers and use them again for another occasion.
Absolutely! The beauty of a money cake is that it can be customized to fit any occasion or recipient. Whether you’re making it for a wedding, birthday, or graduation, you can change up the decorations, ribbon colors, and topper to make it unique.
The number of bills depends on the size and number of layers of your cake. For a four-layer cake, 120 bills were used, but this can vary depending on how large the layers are and how tightly you roll the bills.
You can use floral foam rounds of various sizes depending on the design of your cake. For this project, the foam sizes ranged from small to large to create a tiered effect. Foam pieces are commonly found in the floral section at craft stores.
It's better not to use rubber bands because they can crush or damage the rolled bills. Instead, washi tape is recommended because it holds the bills securely without causing any damage when removed.
Decorative ribbon can be found at most craft stores. Popular choices include Hobby Lobby, Joann's, or Michael’s, where you can find a variety of styles and colors to match your theme.
Ensure you use washi tape wrapped sticky side out around each layer. This makes a surface for the bills to stick to before securing them with a ribbon. Without the tape, the bills may fall off.
Yes, you can. If you use paper circles between the foam layers and avoid directly gluing the foam rounds together, the structure can be disassembled and reused for future projects.


