Helping you learn how to make a DIY paper lantern seems like a fun and rewarding project. I remember when I made my first paper lantern. It was a rainy afternoon, and I just wanted to make something beautiful. I gathered some simple materials like colored paper, scissors, and glue. I felt a sense of joy as I watched my lantern come together.
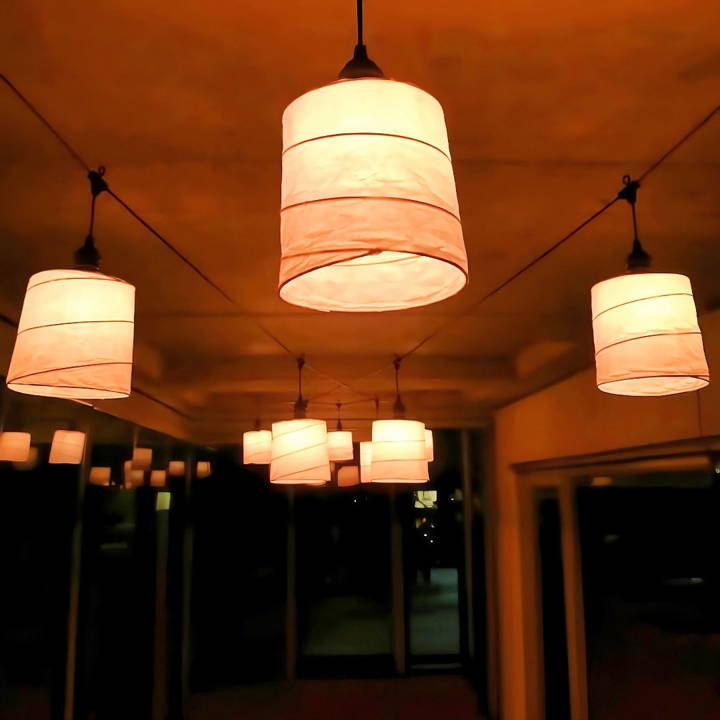
Making these DIY lanterns is not only fun but also a great way to spend time with family or friends. You can hang them in your room or garden to add a special touch. Making lanterns helped me learn patience and creativity.
I hope this guide motivates you to start your lantern-making journey. I am truly excited to help you make your own beautiful lanterns.
Materials You'll Need
- A Mold: I used the inner container of a bathroom bin. It needs to be durable and smooth.
- Rattan or Thin, Flexible Wood: This forms the structure. You want it thin enough to bend, but sturdy enough to hold shape.
- Clips: These help keep the wood in place while you work.
- Masking Tape: It secures the wood until you apply the glue.
- Linen Thread (or Any Strong Thread): For binding the ends of your structure.
- Wood Glue & Water: Mixed together, this will adhere the paper to the wood frame.
- Paper: Japanese washi paper is ideal for its strength and texture, but many types will work.
- Scissors, Brush for Glue, Measuring Tape: Basic tools for cutting and applying materials.
Why These Materials?
Each material is chosen for its specific role in the lantern-making process. The mold gives shape, while the flexible wood forms the main structure. The rest of the materials serve to bind, adhere, and cover this structure to transform it into a lantern.
Step by Step Instructions
Learn step-by-step instructions on how to make a paper lantern. Perfect DIY project for all ages. Easy and fun guide to making beautiful lanterns!
Step 1: Preparing Your Mold and Frame
I began by wrapping the thin wood around my chosen mold (remember, my bathroom bin came in handy!). Secure the ends with clips and tightly wrap it so the structure is snug against the mold. I used masking tape to keep everything in place but remember this tape is just temporary.
Step 2: Binding the Structure
After cutting the ends of the wood diagonally for a smoother bind, I wrapped linen thread around them to secure firmly. This ensures your lantern maintains its shape. Remember, any strong thread should work here.
Step 3: Applying the Paper
With my structure ready, I diluted wood glue with water and brushed it onto the frame. The paper—cut slightly larger than the frame—was then laid over the structure. It's crucial to press it against the wood, ensuring it takes the right shape. The overlap of paper helps reinforce the lantern's edges.
Step 4: Drying and Releasing
Letting the lantern dry completely was possibly the most testing part—patience is crucial. Too early, and the wet paper could tear. Once dry, gently easing the lantern off the mold while carefully peeling away the tape was a delicate operation.
Step 5: Trimming and Sealing Edges
I trimmed the excess paper, leaving about a millimeter for a clean edge. Applying the same glue mix, I folded these edges back over the structure for a neat finish.
Step 6: Adding a Hanging Mechanism
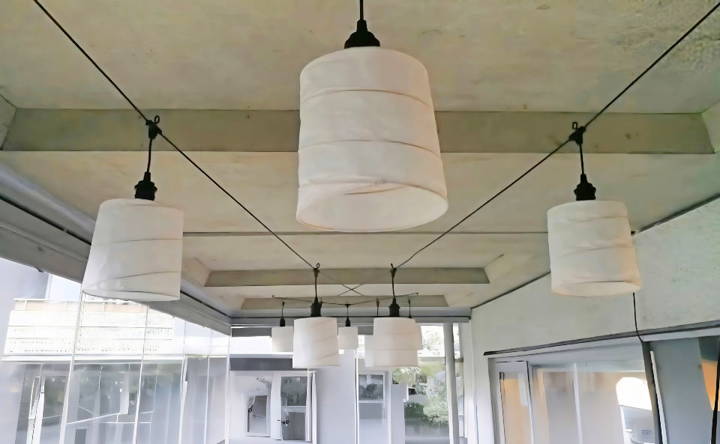
Depending on your light fixture, you might need to make a customized ceiling. I reinforced a hole in the lantern with additional paper, which I later used to attach the lantern to my light bulb.
Step 7: Camouflaging Flaws
Any wrinkles or imperfections could be masked with a bit more glue and paper, giving the lantern a distressed look that's quite forgiving for beginners.
Customization Ideas for Paper Lanterns
Customizing paper lanterns is a wonderful way to express your creativity and add a personal touch to your decor. Here are some ideas to inspire you:
- Choose Your Paper Wisely: Start by selecting the right type of paper. Rice paper is traditional, but you can also use parchment, vellum, or even recycled paper for an eco-friendly option. Consider the weight and transparency of the paper based on how much light you want to filter through.
- Paint and Color: Unleash your inner artist by painting your lantern. Watercolors work well on rice paper, making a soft, glowing effect. For a bolder look, acrylics can provide vibrant, opaque colors. You can also use stencils to apply patterns or designs.
- Cut-Out Patterns: Make intricate designs with cut-outs. Use a craft knife to carve patterns like stars, moons, or geometric shapes. When the lantern is lit, these cut-outs will cast beautiful shadows around the room.
- Add Textures: Incorporate materials like tissue paper, fabric, or lace to add texture to your lanterns. Layering different materials can make depth and interest.
- Incorporate Nature: Pressed flowers or leaves can be glued onto the lantern's surface for a natural, organic feel. This is especially beautiful when using translucent paper, as the details of the botanicals are highlighted when backlit.
- Cultural Motifs: Draw inspiration from different cultures. For example, use Chinese characters, Japanese kanji, or Indian mandalas to decorate your lanterns and pay homage to the rich history of paper lanterns.
- Personal Messages: Write meaningful quotes, wishes, or messages on your lanterns. These can be personal affirmations or notes to loved ones, making the lanterns not just decorative but also sentimental.
- Accessorize: Ribbons, beads, tassels, and pom-poms can be attached to the base or the handle of the lantern, adding movement and flair.
- Lighting Choices: While traditional candles can be used, consider safer alternatives like LED tea lights or string lights. These come in various colors and can even be remote-controlled.
- Seasonal Themes: Tailor your lanterns to the season. Bright colors and floral patterns for spring, warm tones and leaves for autumn, or snowflakes and cool blues for winter.
Use these customization ideas to make each lantern unique and reflect your style. Have fun, and let your creativity shine through. Enjoy making something that's truly yours.
Troubleshooting Common Issues with Paper Lanterns
When crafting paper lanterns, you might encounter a few hiccups along the way. Here's a guide to help you troubleshoot some common issues:
- Tearing Paper: If your paper tears while folding or cutting, it's often due to the paper being too thin or the tools being too harsh. Use thicker paper or gentler tools like a blunt knife for scoring.
- Wrinkles and Creases: To avoid unwanted wrinkles, use a bone folder or the back of a spoon to make smooth folds. Work on a flat, clean surface and handle the paper with care.
- Collapsing Lanterns: Lanterns may collapse if the paper isn't sturdy enough or if the structure lacks support. Reinforce the lantern by using thicker paper or adding additional ribs made from thin wire or bamboo sticks.
- Uneven Shapes: When your lanterns don't hold the desired shape, it's usually due to uneven cutting or folding. Measure and mark your folds carefully, and use a template for cutting to ensure uniformity.
- Difficulty in Hanging: If you're struggling to hang your lanterns, make sure you've attached a strong handle. You can use a ribbon or a piece of twine secured with tape or glue.
- Fire Hazard with Candles: Always prioritize safety. Instead of traditional candles, opt for battery-operated LED lights that provide the same effect without the risk.
- Fading Colors: If your lanterns are losing color, especially when used outdoors, it's likely due to sun exposure. Use UV-resistant paints or keep your lanterns out of direct sunlight to prevent fading.
- Environmental Concerns: Be mindful of the environment. Use biodegradable or recycled paper and avoid using materials that are not eco-friendly.
By addressing these common issues, you'll ensure that your paper lanterns are not only beautiful but also durable and safe. Remember, patience and practice are key to perfecting your craft.
Safety Tips for Making Paper Lanterns
Making paper lanterns is a fun and artistic activity, but it's important to prioritize safety, especially when they involve lighting elements. Here are some safety tips to ensure that your lantern-making experience is both enjoyable and secure:
- Choose the Right Materials: Use fire-retardant paper or treat your paper with a fire-retardant spray. This will reduce the risk of fire if you're using candles.
- Opt for LED Lights: Instead of candles, consider using LED lights. They are much safer as they don't generate heat and reduce the risk of fire.
- Secure Attachments: If you're hanging your lanterns, make sure all attachments are secure. Use sturdy strings or wires and check that they are well fastened to avoid falls.
- Keep Away from Flammable Objects: When displaying your lanterns, keep them away from anything that can catch fire easily, such as curtains, furniture, or decorations.
- Supervision is Key: Always supervise children when making or displaying paper lanterns. It's a great opportunity for them to learn about safety first-hand.
- Proper Ventilation: If you're using candles, ensure the room is well-ventilated. This will help prevent the build-up of heat and allow smoke to dissipate.
- Emergency Preparedness: Have a fire extinguisher or a bucket of water nearby just in case. It's better to be prepared, even if you never need to use it.
- Test Your Lanterns: Before the actual event, test your lanterns to see how they hold up. This will give you time to make any necessary adjustments.
- Be Mindful of Weather: If you're using lanterns outdoors, be aware of weather conditions. Wind can knock over lanterns or spread flames.
By following these safety tips, you can ensure that your paper lanterns are not only beautiful but also safe for everyone to enjoy. Remember, safety should always come first in any craft project.
FAQs About How to Make a Paper Lantern
Discover the faqs about how to make a paper lantern. Learn essential tips, materials needed, and step-by-step instructions for making beautiful lanterns.
After cutting, unfold the paper and:
Roll the paper into a tube shape so the cut lines run vertically.
Tape or glue the edges together to secure the tube.
Attach the handle by taping or gluing the strip you set aside to the top edges of the lantern.
Absolutely! Before assembling, you can:
Color the paper with markers or paint.
Apply stickers or glitter.
Cut out shapes or patterns to create a unique design. Remember to decorate before cutting and folding for easier handling.
To display your lantern, you can:
Tie a string through the top and hang it.
Place a battery-operated tea light inside for a glowing effect (never use real candles for safety reasons).
Use them as centerpieces or string several together for a festive garland.
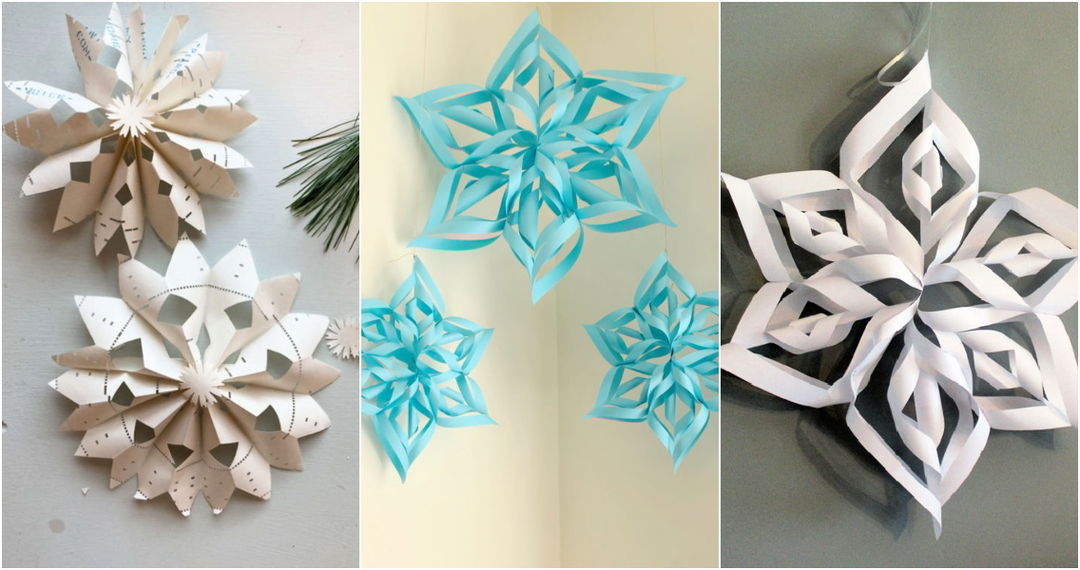
For a round lantern that resembles a snowflake, follow these steps:
Make two paper circles using any round object as a guide.
Fold one circle in half, then in half two more times, until it looks like a slice of pizza.
Draw alternating curved lines along the folded edge, stopping short of the opposite side.
Cut a small hole at the point of the triangle for hanging.
Cut along the curved lines, then unfold the paper to reveal the design.
Repeat with the second circle and glue the two circles together at the outermost ring.
Yes, paper lanterns are versatile and can be tailored for different occasions:
For the Chinese Lantern Festival, use red and yellow paper to make traditional lanterns.
During Diwali, incorporate bright colors and add lights inside the lanterns for a festive glow.
For Christmas, choose green, red, and white paper and add ribbons or sparkles. Remember to consider the theme and colors of the festival when designing your lantern.
Final Thoughts
By following this guide, you'll find it's easy to make beautiful DIY paper lanterns. These steps will definitely help you make lovely decorations.


